HTML Course : Building Header of the Website
Last Updated :
10 Jul, 2023
Course Navigation

So far, we have created the navigation bar for the header of our website. The next thing to complete the header is to include the image and text above the image as shown in below screenshot:
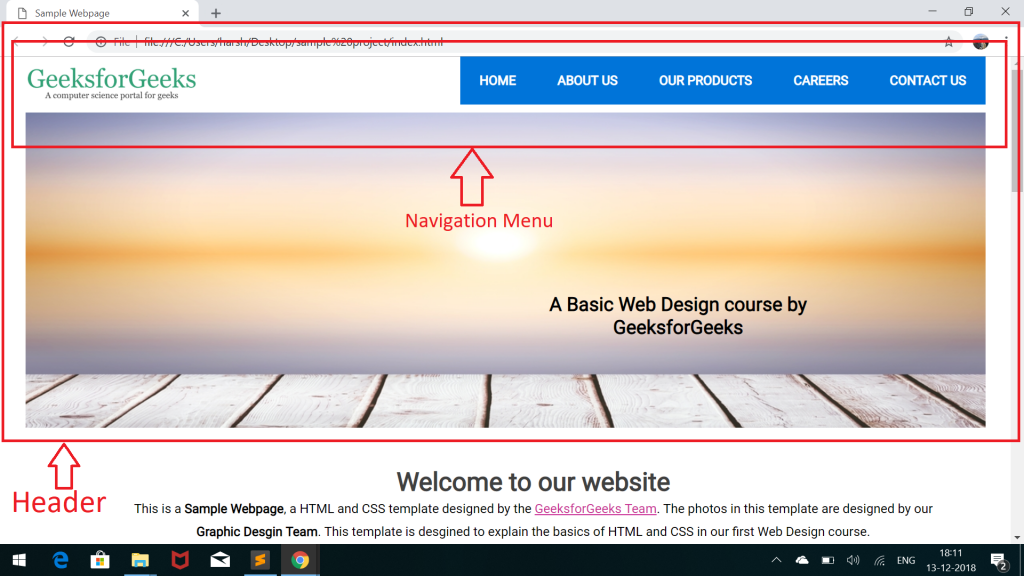
Let’s again look at the part of the code for the header in our index.html file. The highlighted part of the code shows the image menu of the header:
HTML
<!DOCTYPE html>
<header>
<div id="top-header">
<div id="logo">
<img src="images/logo.png" />
</div>
<nav>
<ul>
<li class="active">
<a href="#">Home</a>
</li>
<li>
<a href="#">About Us</a>
</li>
<li>
<a href="#">Our Products</a>
</li>
<li>
<a href="#">Careers</a>
</li>
<li>
<a href="#">Contact Us</a>
</li>
</ul>
</nav>
</div>
<div id="header-image-menu">
</div>
</header>
|
To complete the image menu, we first need to add the image and text inside the div tag with id “header-image-menu” as shown in the above code.
Adding Image:
- Click Here to download the given image.
- Add it to the images folder of your project.
- Include it inside the div with id = “header-image-menu”.
Adding Text: Add the text inside an <h2> tag and give the tag an id = “image-text” which will be used for adding styles.
Below is the final HTML code for the header menu after adding the images and text:
HTML
<!DOCTYPE html>
<header>
<div id="top-header">
<div id="logo">
<img src="images/logo.png" />
</div>
<nav>
<ul>
<li class="active">
<a href="#">Home</a>
</li>
<li>
<a href="#">About Us</a>
</li>
<li>
<a href="#">Our Products</a>
</li>
<li>
<a href="#">Careers</a>
</li>
<li>
<a href="#">Contact Us</a>
</li>
</ul>
</nav>
</div>
<div id="header-image-menu">
<img src="images/slider.jpg">
<h2 id="image-text">
A Basic Web Design course by GeeksforGeeks
</h2>
</div>
</header>
|
Our webpage will now look like as in the below screenshot:

Can you point out what is wrong with the above image? The answer is that the text is below the image and not at its correct position as shown in the template.
We will have to use CSS to add styles to the text and image in order to place the text over the image. Let’s begin with adding CSS.
- Styling the main image menu(#header-image-menu): Give the image menu parent a margin of top as 10px and set its position to relative.
Add the below code to style.css:
CSS
#header-image-menu{
top: 10px;
position: relative;
}
|
- Styling the image inside the image menu: Set the width of the image to 100% of the parent and remove the margins and padding.
Add the below code to style.css:
CSS
#header-image-menu img{
width: 100%;
margin: none;
padding: none;
}
|
- Positioning the text(#image-text): Set the position of the text to absolute first and give appropriate margins from left and top. Set the color and translate the text by 30% using the translate() function.
Add the below code to style.css:
CSS
#image-text{
position: absolute;
top: 60%;
left: 60%;
font-family: 'Roboto';
color: #000;
transform: translate(-30%, -30%);
text-align: center;
}
|
The complete CSS code for the image menu will look something as below:
CSS
#header-image-menu{
top: 10px;
position: relative;
}
#header-image-menu img{
width: 100%;
margin: none;
padding: none;
}
#image-text{
position: absolute;
top: 60%;
left: 60%;
font-family: 'Roboto';
color: #000;
transform: translate(-30%, -30%);
text-align: center;
}
|
On opening the index.html in the browser now, you will see the exact same header as shown in the sample video at the start of the course.

We have completed building the header of our website.
Supported Browser:
- Google Chrome
- Microsoft Edge
- Firefox
- Opera
- Safari
Share your thoughts in the comments
Please Login to comment...