How to Resolve Windows Error 0x8007042E?
Last Updated :
27 Aug, 2023
Windows 10 is the most popular operating system from Microsoft that is operated in more than 192 countries. According to one survey, nearly 90k+ desktop or laptop is upgraded to Windows 10 operating system. But oftentimes with such a great power, some great bugs also arrive.
Such a great & ridiculous bug is the Windows error 0x8007042E issue. You will receive the error code 0x8007042E occasionally while working on some applications. For Windows 10, the error was termed a Windows update error because it appears during updating. But in Windows 11, the same error is now coming for mail applications also.
What is Windows Error 0x8007042E?
In the case of Windows 10, the error was associated with the Update of the operating system. While updating the system, it got stuck at a point & released the statement that it had encountered the error. The issue occurs due to faulty installation of any updating component of the operating system.
Now, the issue is extended to the latest Windows 11 version. The error is now occurring due to the bugs present in the mail application. Such issues are occurring due to the presence of a corrupted file in the user’s account in the mail application. It prevents opening the mail application on the device.
How to Solve Error 0x8007042E?
Here, we will first discuss the steps required for resolving Windows 10 0x8007042E in the case of the mail application. Later, we will discuss it for an update issue.
Resolve Error in Mail Application
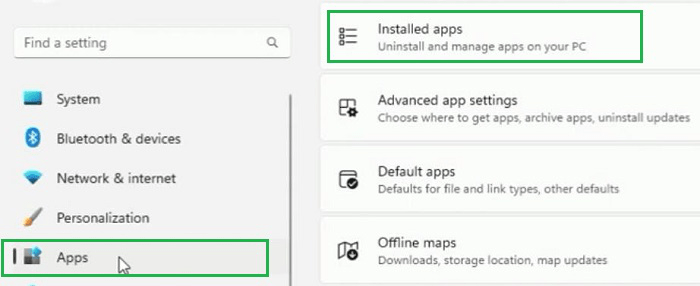
Step 1: At first, open the Settings of the device & click on Apps in the left-side panel. You will receive some options on the right-hand side. Click on Installed Apps.
Step 2: You will find a list of applications there. Scroll down & look out for the Mail & Calendar option. Click on the three dots & move to Advanced Options.

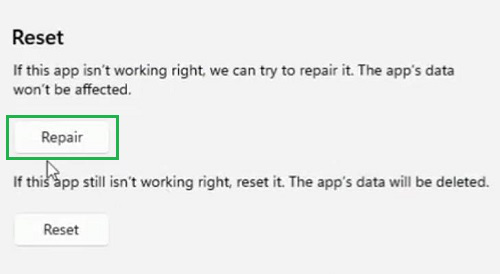
Step 3: Scroll down & under the Reset category, you will find two options. Click on the Repair option & let the changes happen.
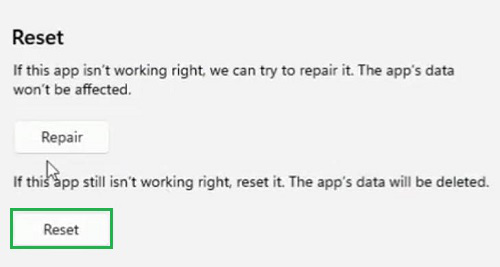
Step 4: If still the problem exists, click on the Reset option present there. Remember, it will remove all the data of the application.
Hence, we have successfully resolved the error 0x8007042E for Windows 11 mail application.
Resolve Error While Updating
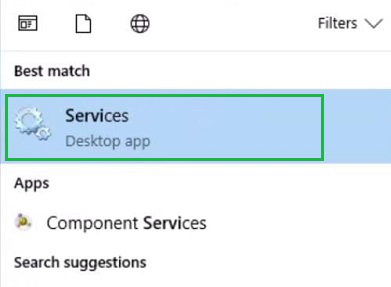
Step 1: In the search bar, search for the Services App & move for it.
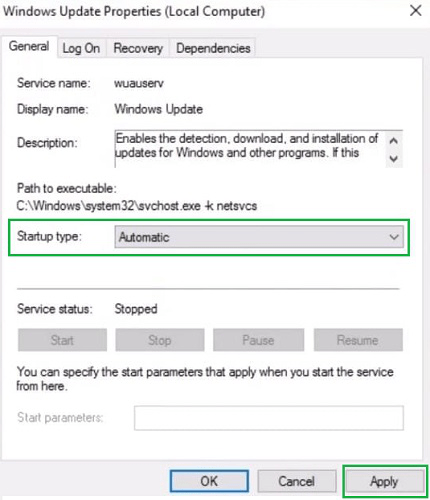
Step 2: From the list of options search for the Windows Update & click on it. A popup window will arrive & select the Automatic type from the dropdown menu. Now click on Apply button.
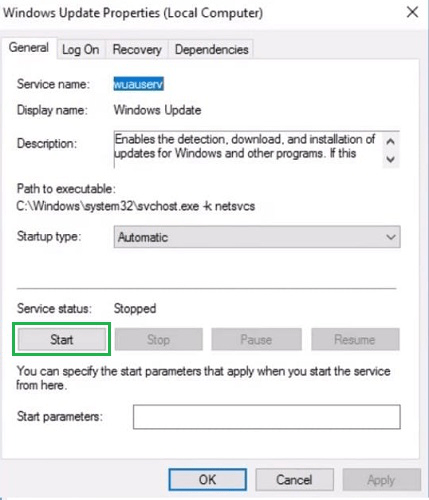
Step 3: A Start button will be now visible. Click on it to start the operation.
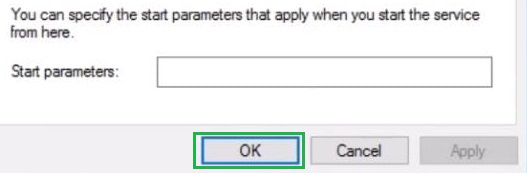
Step 4: Now, click on Ok & close the window.
Hence, we have successfully resolved the error 0x8007042E for Windows 10 system update.
These are the simple steps that should be executed to resolve Windows error 0x8007042E. The error 0x8007042E might arrive with a different code number. But you will find similarities between them because a letter or two will be removed from the discussed one.
FAQs: Fix Windows Error 0x8007042E
1. How can I remove error 0x8007042E for the mail application?
To remove the error code 0x8007042E from the mail application follow the below steps:
- Open Settings & click on Apps.
- Click on Installed Apps & search for Mail and Calendar applications.
- Click on the three dots to receive the option Advanced Options.
- Scroll, and click on the Repair button.
- If the problem still exists, click on the Reset button.
2. What are the steps to make the Windows update error-free?
The guideline required to remove the error from Windows update is the following:
- Search for Services on the Search Bar.
- Click on the Windows Update option & select Automatic Start type.
- Click on Apply.
- Click on Start & later click on Ok.
Share your thoughts in the comments
Please Login to comment...