Google Docs stands as a versatile tool accessible to professionals from all walks of life. Its user-friendly interface and cloud-based convenience have made it an indispensable resource for countless individuals in various industries. However, to truly harness the power of Google Docs and streamline your workflow, understanding how to incorporate headings can be a game-changer. In this article, we delve into the concept of headings and provide step-by-step guidance on how to seamlessly integrate them into your Google Docs documents. Whether you’re a seasoned Google Docs user or just beginning to explore its potential, join us as we explore the art of efficient document organization and formatting, unlocking the full potential of this remarkable application.
What is a heading in Google Docs?
In Google Docs, a heading is a distinct type of text that appears larger than the regular document text. These headings serve as a crucial organizational tool, dividing the document into sections, and enhancing readability and structure. Google Docs offers several types of headings, each with its unique characteristics and purposes, allowing users to efficiently categorize and present content.
Types of Heading in Google Docs
Heading 1 (H1)
Font Size: Large
Heading 1 is the primary heading type in a document, easily distinguishable by its substantial font size. It serves as the title for the main sections within your document. For instance, if you’re creating a report on a year’s company performance, you can employ Heading 1 to label overarching sections such as “first quarter” and “second quarter.”
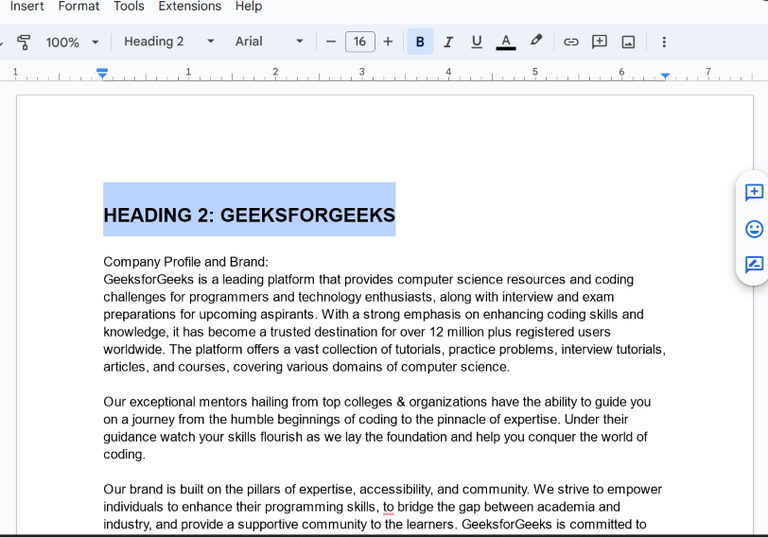
Heading 2 (H2)
Font Size: Slightly smaller than Heading 1
Heading 2 is employed for subheadings within sections marked with Heading 1. In the context of the company performance report, where Heading 1 represents quarters, Heading 2 can be utilized to further categorize information, possibly detailing various departments.
Heading 3 (H3)
Font Size: Smaller than Heading 2 but larger than regular text
Heading 3 is utilized when you need to provide additional subordination under a Heading 2 title. Though less commonly used than the previous two, Heading 3 assists in elaborating on specific topics under the Heading 2 subheading. Its purpose is to offer even finer granularity, making document navigation more straightforward.
How to add Headings in Google Docs for Desktop
For adding the Headings in Google Docs, we have different types of ways and approaches, which can help us to add headings titles, and subtitles in our document. Below we have listed the methods through which we can add the Headings in Google Docs.
- Add Headings in Google Docs using Menu Bar
- Add Headings in Google Docs using Format Tab
- Add Headings in Google Docs using Keyboard Shortcuts
How to add Headings in Google Docs using Menu Bar
Step 1: Go to Google Docs and Open a Document
In the very first step, we need to visit the Google Docs official website, from which we are allowed to create and edit the documents. Navigate to the Google Docs website. Use the following link to visit the official Google Docs website and open the document in which we need to add Headings.

Opening Document
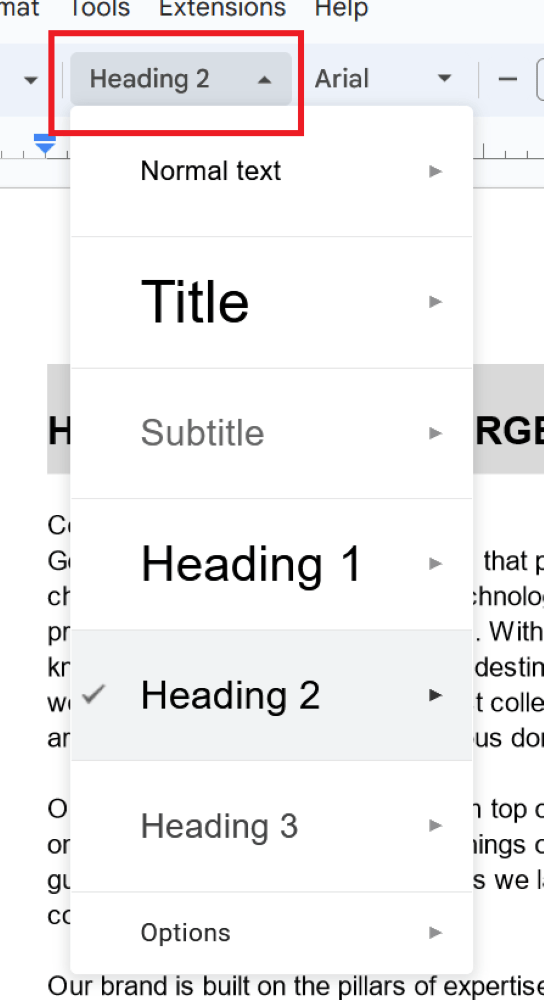
Step 2: Click on the Style Drop-down Box
After opening the document, navigate to the Menu Bar, in the menu bar you will see various options, so from these options, we need to look for the Style drop-down which has the sub-options as “Normal text, Title, Headings” etc. So we need to click on this drop-down to select the appropriate option.
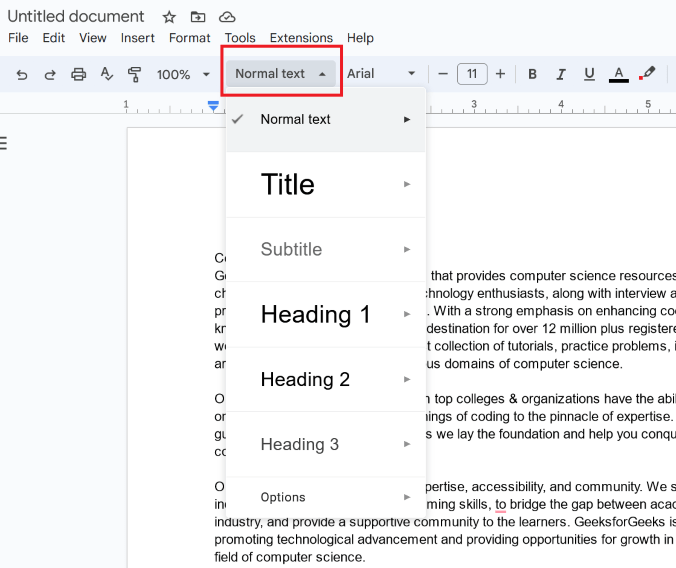
Clicking on Style Drop-Down
Step 3: Select Heading Form
From the sub-options, we need to select the option of the Heading. We need to choose any of the Heading Forms as Heading 1, Heading 2, etc. as per our requirement.
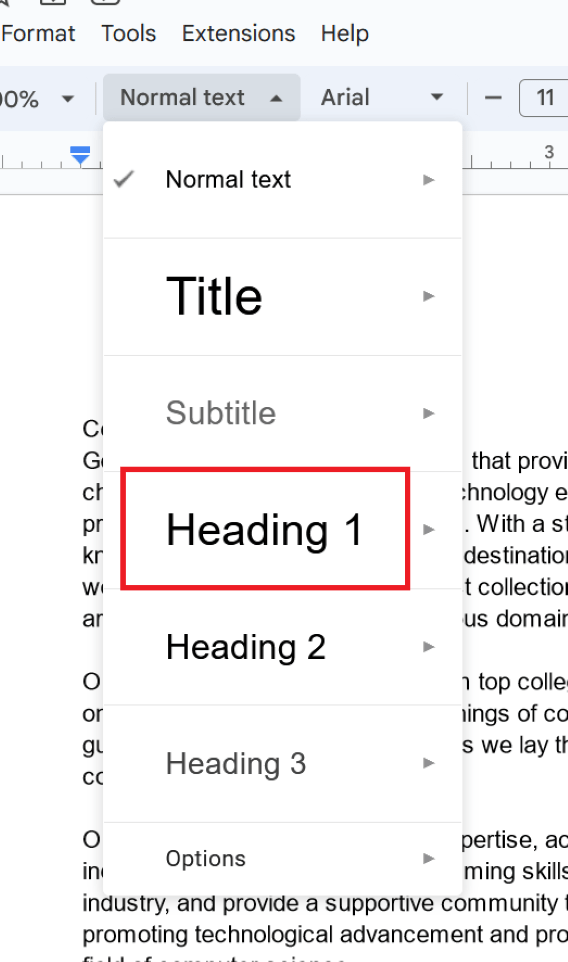
Selecting Heading Form
Step 4: Click on Apply
After selecting the required Heading, click on the Apply option, so that it will get added to our text.
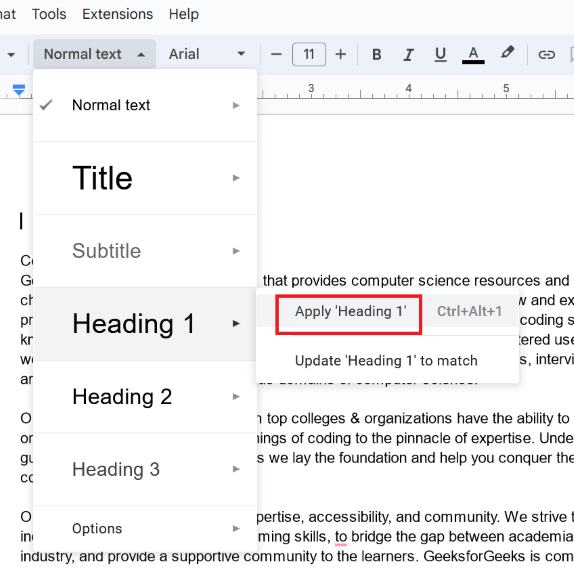
Clicking on Apply Heading
Step 5: Preview Heading in the Document
The heading that we have selected will be added to our document successfully.

Heading Added Successfully
How to add Headings in Google Docs using Format Tab
Step 1: Click on the Format Tab
After opening the document in which we need to add the Headings, we need to find the Format Tab which is placed on the top ope the editing space of Google Docs. You can also refer to the below screenshot for navigation.
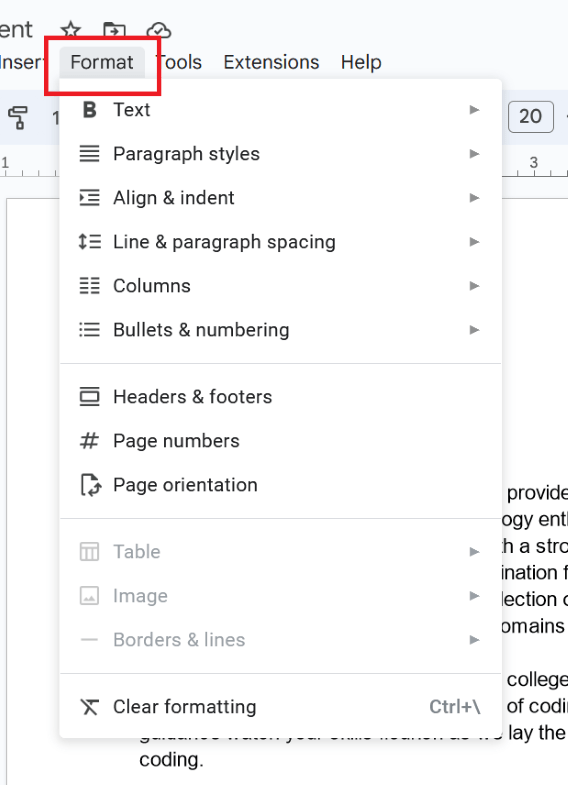
Clicking on the Format Tab
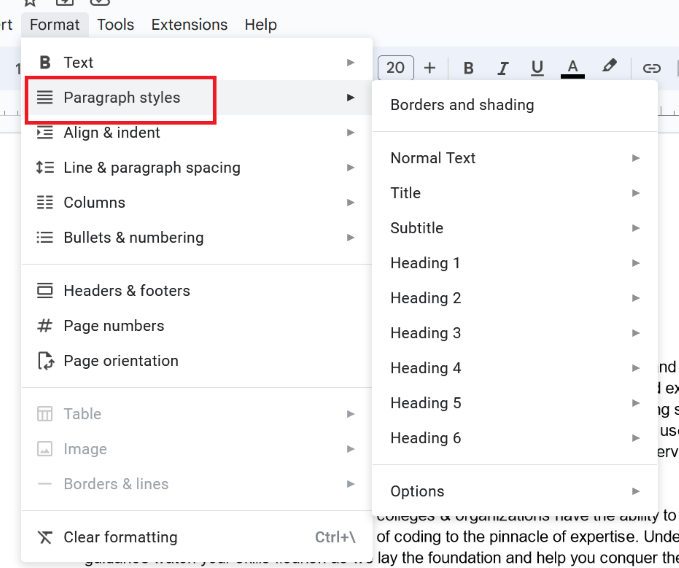
Step 2: Select Paragraph Styles
After clicking on the Format Tab, you will see the list of sub-options, so from these sub-options, we need to select the option of “Paragraph Styles“.
Selecting Paragraph Styles Option
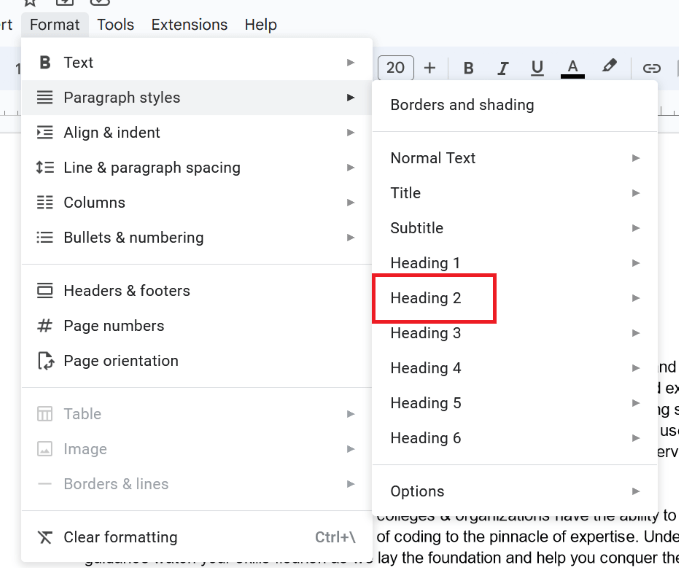
Step 3: Choose a Heading Form
Now, after clicking on the “Paragraph Styles” options, there will be a list of different Headings Forms. So from this list, we need to select the required form.
Choosing Heading Form
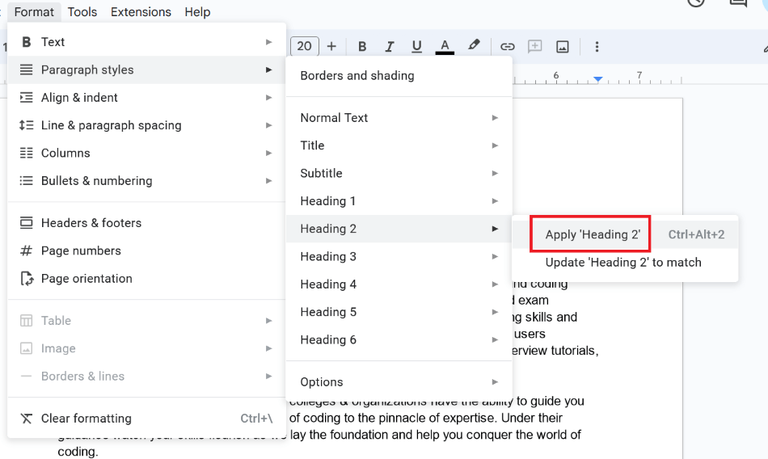
Step 4: Click on Apply Selected Heading
After selecting the Heading Form, we need to click on the option of “Apply Heading 2”. This will apply to the selected Heading in our document. In the below screenshot, you can see that our selected Heading is been added to the document.
Clicking on Apply Heading
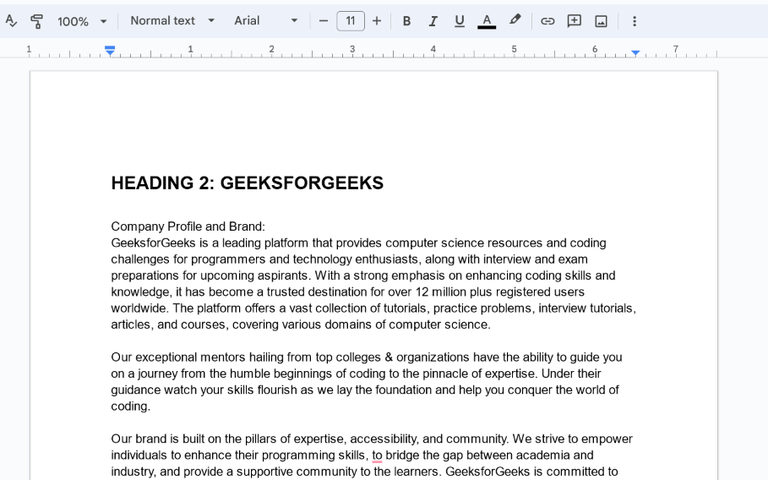
Step 5: Preview Heading in the Document
The heading that we have selected will be added to our document successfully.
Heading Added Successfully
Keyboard shortcuts for Google Docs to Add Heading
In this section, we will see some of the shortcuts through which we can add the Headings to our documents rather than following lengthy steps. Below we have added the shortcuts that will help us to add the Headings using Keyboard keys.
- Heading 1: Ctrl + Alt + 1
- Heading 2: Ctrl + Alt + 2
- Heading 3: Ctrl + Alt + 3
- Heading 4: Ctrl + Alt + 4
- Heading 5: Ctrl + Alt + 5
- Heading 6: Ctrl + Alt + 6
How to Remove Headings in Google Docs
In some of the cases, we don’t require Headings in our document, so we can either remove them by deleting the text or else we can also convert them to regular text. So follow the below steps to remove headings in Google Docs.
Step 1: Select the Heading
To remove the Heading from our document, we need to select Heading with the mouse or by using the Keyboard keys. In the below screenshot, you can see that we have selected the Heading, which we will convert to normal text.
Selecting Existing Heading
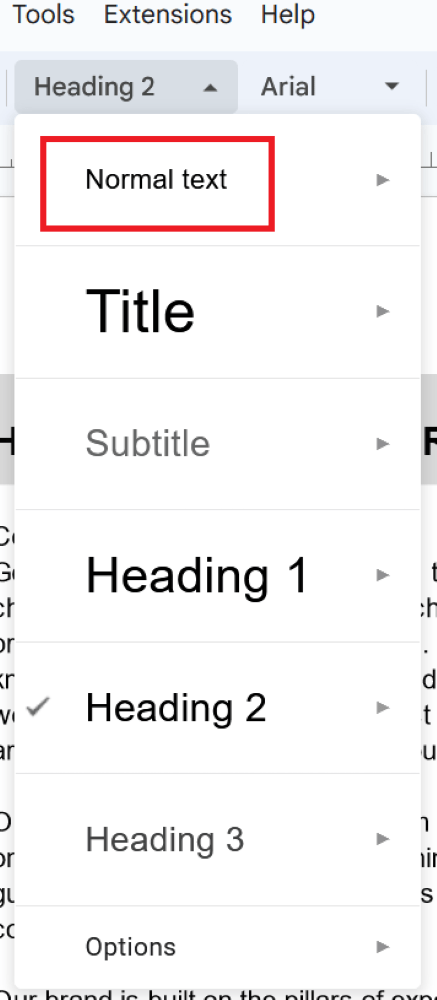
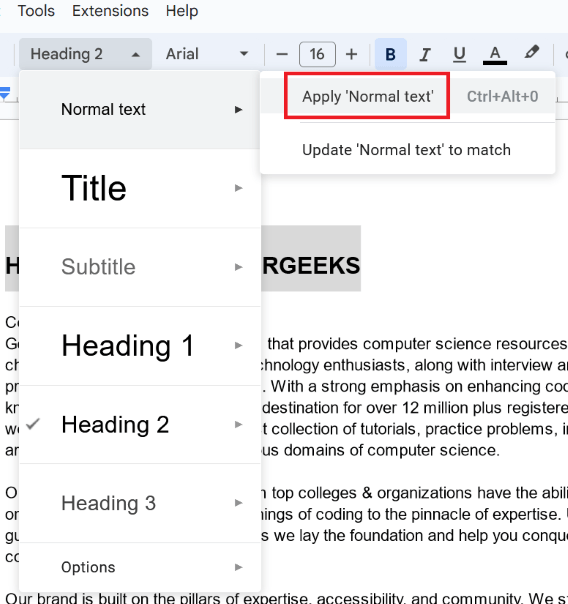
Step 2: Click on the Style Drop-down Box
After selecting the Heading, click on the Style Drop-Down Box which is shown in the below screenshot.
Clicking on Style Drop-Down Box
Step 3: Select the Option Normal text
From the list of items in the drop-down box, we need to select the option of Normal Text. This will convert our Heading into Normal Text. Click on the Apply Normal Text option to apply the changes.
Selecting Normal Text Option
Step 4: Heading Removed
After clicking on the Apply option, the Heading will get removed or it will get converted into the normal text same as the other text in the document.
Clicking on Apply Normal text Option
The heading that we have selected will be removed from our document successfully.

Heading Removed from Document
How to Add Headings in Google Docs on Mobile Devices
The feature of adding Headings is not limited to the PC or Laptop devices, but we can also add the Headings on Mobile Devices. To add the Headimgs in Google Docs on Mobile Devices, follow the below speicifed steps and perform it proper manner.
Step 1: Installing and Opening Google Docs
Firstly, we have to open the Google Docs application, as the Google Docs features can be accessed usin the mobile application. If you do not have it, you can install it using the Play Store application.

Installing Application
Step 2: Open the Document
After installing or Opening the application, we need to open the document in which we need to add the Headings. In the below screenshot, you can see that, we have opened the Document in which we will be adding Heading.

Opening the Document
Step 3: Click on Format Icon
After opening the document in which we will be adding the Headings, we need to click on the Format Icon which is placed at the top-notch of the application window.

Clicking on the Format Icon
Step 4: Click on Style Option
After clicking on the Format Icon, we need to click on the Style option. In the below screenshot, you can see the navigation for a better understanding.
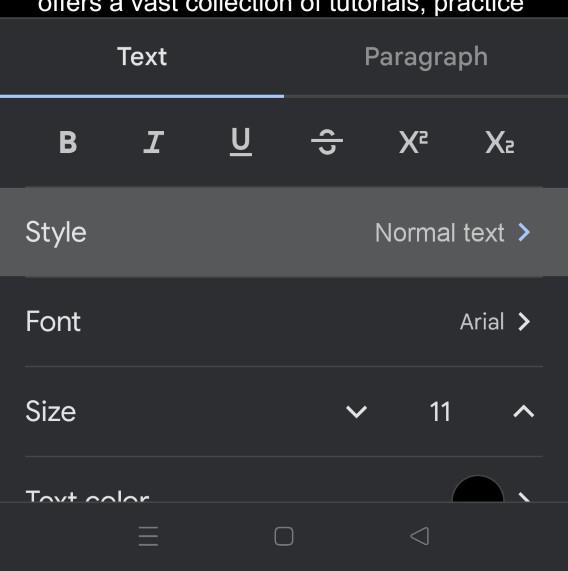
Clicking on Style Option
Step 5: Select the Heading Form
In the Style list, we can select the required Heading and add it to our document.

Selecting Heading Form
Step 6: Preview Added Heading
After selecting the required Heading Form, it gets reflected or added to our document. In the below screenshot, you can see that we have successfully added the Headings from the Mobile device.

Heading Added Successfully
Conclusion
In conclusion, headings in Google Docs webiste is an useful feature that enables users to have better structure and flow of the document contents. Headings can make the look and feel more professional of the document. We can also use this heading to add a Table of Contents in Outline. The steps for adding the Headings are easy and simple in Google Docs aswe have discussed in above sctions, using different ways we can add the Headings in our document. Also, we can use the heading in the Mobile application of Google Docs, which makes broad use of the Heading feature in Google Docs.
FAQs
What is the need for using heading in Google Docs?
The use of headings in Google Docs helps the readers to represent the document contents in proper strucutred manner. Headimgs in document can help readers to identifuy the main topics in the document easily.
Can we use the same heading styles multiple times in the same Google Docs document?
Yes, we can use the same heading style multiple times in a single document as per the requirement.
Is it possible to customize the heading according to the user in Google Docs?
Yes, it is possible to customize the headings according to the needs of the user. We can do this by using diifferent options like colour, font, size etc in the Google Docs.
Share your thoughts in the comments
Please Login to comment...