Google Docs is a platform for creating, editing, and storing documents online. It allows multiple users to collaborate on the same document in real time. Google Docs offers different types of indentation including Right, Left, and Hanging. Hanging indentation means indenting the subsequent lines of the same paragraph while leaving the first line unindented.
In this article, we will go through the simple steps for making the hanging indent in our Google document. Also, we will see some of the benefits of using hanging indent in our cool document. And lastly, we will conclude our article with the summary and the frequently asked questions.

What is Hanging Indent in Google Docs?
Hanging intent in Google Docs is nothing but a special type of indentation in which the first line of the main text paragraph is not intended but the rest are subsequent lines of the same paragraph that have been intended. This type of pendant is used in bibliographics, and reference pages and we can use it for citing a list of sources of materials.
Different Methods to Create a Hanging Indent in Google Docs
Making our text or documents into hanging indent gives a professional and attractive flavor to our document. So there are different types of methods through which we can make our document into a hanging indent format. So below we have discussed all the methods along with their detailed steps to make the text into a hanging indent. We will discuss below ways to do a Hanging Indent in Google Docs.
How to Create a Hanging Indent using Ruler in Google Docs
Step 1: Launch Google Docs
Open Google Docs in your Web Browser.
Opening Google Docs
Step 2: Open the Document
Now, Open the document in which we want ot perform the Indentation using Ruler.

Opening Document
Step 3: Select the Text or Paragraph
After opening the document for applying hanging indent into it, we need to select the text or paragraph.

Selecting Paragraph
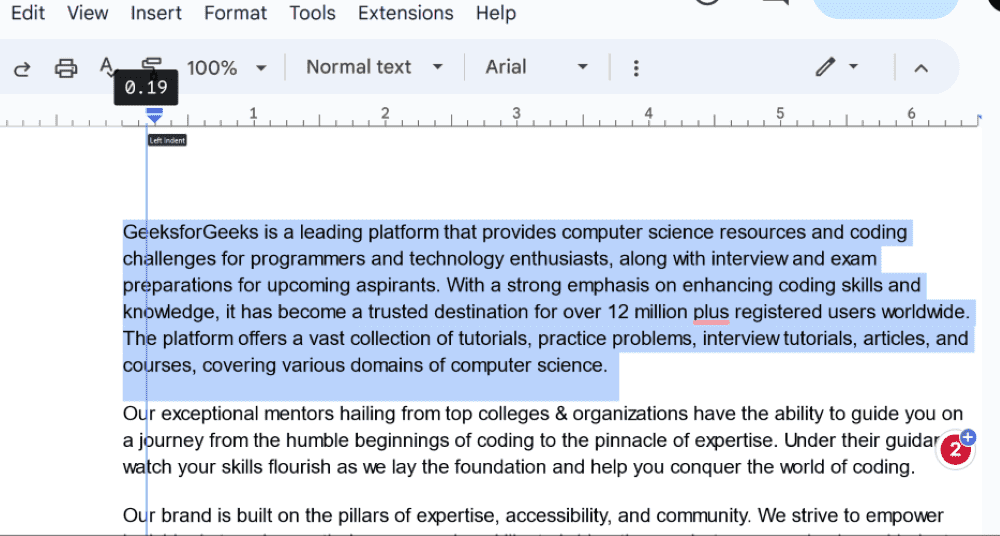
Step 4: Adjust the Left Indent in the Ruler
Once you’ve highlighted the text for a specific paragraph, the next step is to apply hanging indentation. To do this, locate the ruler positioned just below the customization panel. Within the ruler, you’ll make the necessary adjustments to the indentation measurement, which can be observed as you modify it.
Adjusting Left Indent
Note: As in the hanging intent, the first line is kept unchanged. So we have to move the 1st line back to its original margin.
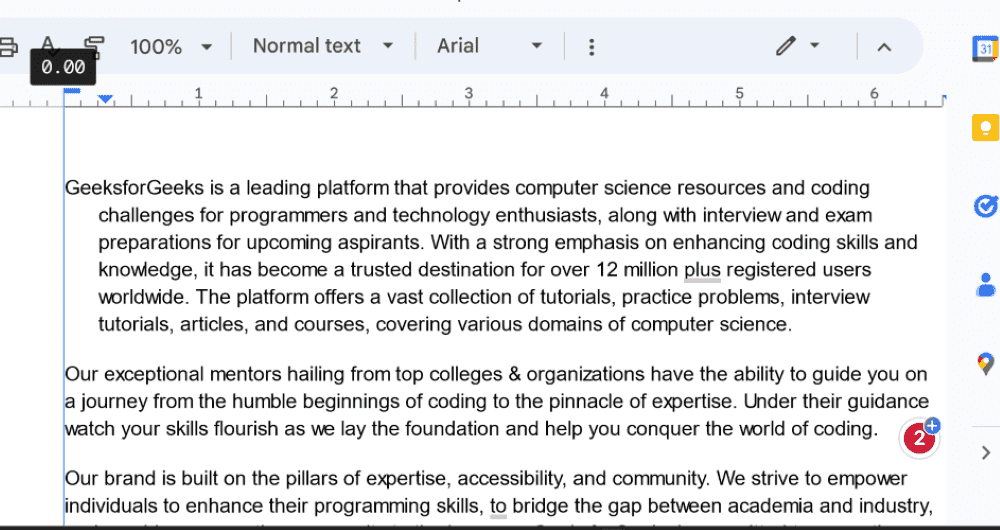
Making First Line Unchanged
How to Create a Hanging Indent in Google Docs using the Indentation Options
Step 1: Launch Google Docs
Open Google Docs in your web browser.
Step 2: Open the Google Document
Open the document in which you need to perform the indentation.

Opening the Document
Step 2: Select the Text
Now select the text or the content of the paragraph in which you need to perform the hanging indent.

Selecting the Text
Step 3: Select Format from the Menu bar
Select the “Format” option located at the top panel or the upper section of our main screen.

Clicking on the Format Tab
Step 4: Select Align & Indent from the Drop down Menu
Upon clicking the “Format” tab, a range of options will be presented. Seek out “Alignment and Indent” within these choices. When selected, additional options will appear, allowing you to choose the desired indentation settings.

Selecting Indentation Options
Step 5: Select Hanging Special Indent and Click Apply
Subsequently, a compact window will emerge. Inside this window, you will encounter an option named “Special Indent.” Opt for this option, which will trigger a dropdown menu to appear, and within it, select “Hanging.” Upon completing this step, just click on the “Apply” button, and your hanging indent will be implemented.

Selecting Hanging Indent
Step 6: Preview Hanging Indent
Your hanging indent in being successfully applied to the selected paragraph, in which the first line of the paragraph is the same as the initial state, and the rest of the paragraph lines are indented in the hanging format.

Indent Applied Successfully
How to do a Hanging Indent on Google Docs using a Keyboard Shortcut
Using a keyboard shortcut, we can create a hanging indent in Google Docs:
- Step 1: Place the cursor at the end of the first line, where you want the hanging indent to appear.
- Step 2: Hit Shift + Enter or Shift + Return, followed by the Tab key on the keyboard.
- Step 3: A line break or soft return is applied as a result.
Note: There is no builtin-support to make Hanging indent on Mobile Devices using Google Docs Application.
How to Create a Hanging Indent in Google Docs on iPad
Follow th below steps to create an hanging indent in Google Docs on iPad:
Step 1: Launch Google Docs App
Step 2: Now Include your citation
Step 3: Touch the “A” icon located in the upper right corner of the app
Step 4: Tap on “Paragrapgh“
Step 5: In the “Line Spacing” section, tap the upward arrow once to change it from 1.5 to 2, making it double-spaced.
Step 6: Tap anywhere on your screen to exit this menu.
Step 7: Place your cursor after the first line of your citation, then press the “Return” key on your iPad keyboard. This will move your cursor to the beginning of the second line in your citation.
Step 8: Again, tap the “A“ icon in the top right corner of the app.
Step 9: Select the “Right Indent” option.
Step 10: Now, your citation will be double-spaced with a hanging indent. To close the paragraph options, tap the center of your screen.
Conclusion
In conclusion, the proper utilization of hanging intents in Google Docs is advantageous and significantly enhances the quality, readability, and overall representation of our document data. This technique characterizes our distinct formatting of paragraphs and also helps us improve the organization and maintain professionalism in the document.
How to create a Hanging Indent in Google Docs – FAQs
Why use Hanging Indent in our documents?
By using the hanging indents in our Google document, it can offer a clear visual separation between different entries or paragraphs. These help the readers to scan and navigate different types of references and citations easily.
What is the shortcut for indent in Google Docs?
Press Tab to indent, press Shift + Tab to decrease indent.
Can we customize the spacing of the Hanging Indent?
Yes, Google Docs allows us to customize the spacing of hanging intent as we can choose the measurement or distance by which the subsequent lines need to be indented properly.
How to create a hanging indent on Google Docs
To create a hanging indent on Google Docs:
- Open Google Docs
- Highlight the chosen text
- Click the Format option in the top menu
- Open the “Special indent” drop-down menu > Select Hanging
- Click Apply
Can we remove Hanging Indents from applied paragraphs?
Yes, we can remove hanging intents from specific paragraphs as per our needs. So for removing, we just need to select the text edges, and the paragraph formatting settings, and click on the option of normal or none under the special drop-down to revert the changes which we have done using the hanging indent.
Share your thoughts in the comments
Please Login to comment...