Creating your first application using Kivy
Last Updated :
10 Dec, 2021
Prerequisites: Introduction to Kivy, Hello World in Kivy
Kivymd is graphical user interface library in python based on kivy that allows you to develop multi-platform applications on Windows, MacOS, Android, iOS, Linux, and Raspberry Pi. The best thing about kivy is, it performs better than HTML5 cross-platform alternatives. Kivymd requires fewer lines of code compare to kivy. Kivymd is written in python using the kivy library.
In order to start KivyMD, you must first install the Kivy framework on your computer. Once you have installed Kivy, you can install KivyMD.
Installation
pip install kivymd
If you want to install the development version from the master branch, you should specify a link to zip archive:
pip install https://github.com/kivymd/KivyMD/archive/master.zip
Buttons
To change MDFloatingActionButton background, use the md_bg_color parameter:
MDFloatingActionButton:
   icon: "android"
   md_bg_color: app.theme_cls.primary_color
The length of the shadow is controlled by the elevation_normal parameter:
MDFloatingActionButton:
    icon: "android"
    elevation_normal: 12
To change the text colour of class MDFlatButton use the text_color parameter:
MDFlatButton:
   text: "MDFLATBUTTON"
   text_color: 0, 0, 1, 1
Step-by-step Approach:
There are three steps of creating an application with kivymd-
- Inherit Kivymd’s App class which represents the window for our widgets
- Create build() method, which will show the content of the widgets.
- And at last calling of run() method.
Code blocks:
- text: the text you want to show on screen.
- halign: alignment of that text.
- pos_hint: position from the text from the left and top (center_x =0.5 and center_y=0.5 represents the centre. of the screen).
- icon: The type of icon you have to give for your button.
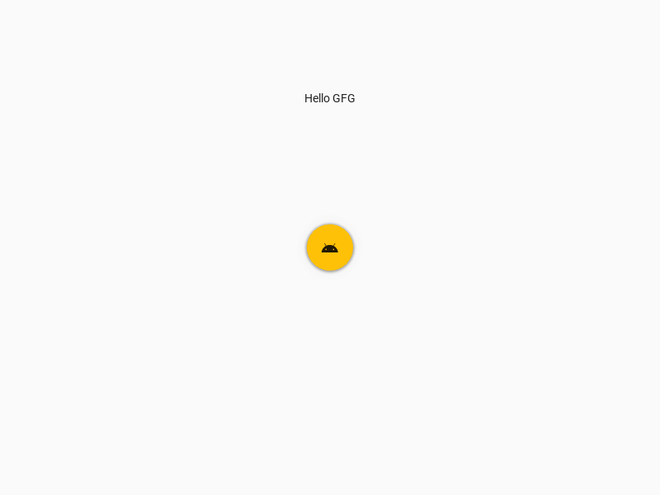
Below is the example of how we can create a simple application using kivy:
Python3
from kivymd.app import MDApp
from kivymd.uix.button import MDFloatingActionButton, MDFlatButton
from kivymd.uix.screen import Screen
from kivymd.icon_definitions import md_icons
class DemoApp(MDApp):
def build(self):
screen = Screen()
btn1 = MDFlatButton(text='Hello GFG', pos_hint={'center_x': 0.5,
'center_y': 0.8})
btn = MDFloatingActionButton(icon="android",
pos_hint={'center_x': 0.5,
'center_y': 0.5},
)
screen.add_widget(btn1)
screen.add_widget(btn)
return screen
DemoApp().run()
|
Output:
Share your thoughts in the comments
Please Login to comment...