Python | Working with buttons in Kivy
Last Updated :
06 May, 2021
Kivy is a platform independent GUI tool in Python. As it can be run on Android, IOS, linux and Windows etc. Kivy provides you the functionality to write the code for once and run it on different platforms. It is basically used to develop the Android application, but it does not mean that it can not be used on Desktops applications.
Kivy Tutorial – Learn Kivy with Examples.
Now in this article, we will learn how to build a button in kivy, just like the button we use in calculators and many more places, adding functionality to the button, styling of the button.
The Button is a Label with associated actions that are triggered when the button is pressed (or released after a click/touch). We can add functions behind the button and style the button.
Basic Approach to follow while creating button :
-> import kivy
-> import kivy App
-> import button
-> set minimum version(optional)
-> Extend the class
-> Add and return a button
-> Run an instance of the class
Code #1: How to create button in kivy.
Python3
import kivy
kivy.require("1.9.1")
from kivy.app import App
from kivy.uix.button import Button
class ButtonApp(App):
def build(self):
btn = Button(text ="Push Me !")
return btn
root = ButtonApp()
root.run()
|
Output:
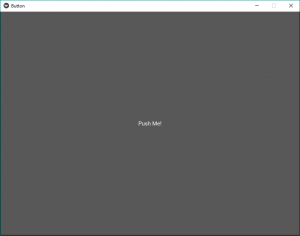
In the above output, the button will cover the whole window as we have not given any specific size or done any styling in the button so by default it shows button size equal to window size.
Code #2: Styling The Button
Python3
def build(self):
btn = Button(text ="Push Me !",
font_size ="20sp",
background_color =(1, 1, 1, 1),
color =(1, 1, 1, 1),
size =(32, 32),
size_hint =(.2, .2),
pos =(300, 250))
return btn
|
Output:
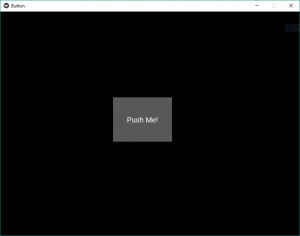
These are just similar to the HTML, CSS effects. By this, we fix the position of a button at the center of the window, text size, colour and anything you want.
Code #3 Adding Functionality behind the button.
One of the common problems is how to add functionality to the button. So to add functionality we use
bind() function it binds the function to the button. bind() creates an event that is send to callback().
One of the most common problems for new Kivy users is misunderstanding how the bind method works, especially amongst newer Python users who haven’t fully formed their intuition about function calls.
The thing is that the bind method doesn’t know about the existence of a function or its arguments, it only receives the result of this function call. As in the given code when the button is pressed it prints that “button pressed” def in the function callback.
In the given code inside bind() we use on_press because when button press it tells the function that button is pressed then the bind uses its functionality.
Python3
import kivy
kivy.require("1.9.1")
from kivy.app import App
from kivy.uix.button import Button
class ButtonApp(App):
def build(self):
btn = Button(text ="Push Me !",
font_size ="20sp",
background_color =(1, 1, 1, 1),
color =(1, 1, 1, 1),
size =(32, 32),
size_hint =(.2, .2),
pos =(300, 250))
btn.bind(on_press = self.callback)
return btn
def callback(self, event):
print("button pressed")
print('Yoooo !!!!!!!!!!!')
root = ButtonApp()
root.run()
|
Output:
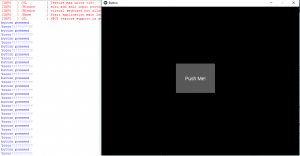
Video output:
Button using KivyMD:
KivyMD is an extension of the Kivy framework. KivyMD is a collection of Material Design widgets for use with Kivy, a GUI framework for making mobile applications.
Below is an example of MDRectangularFlatButton
MDRectangleFlatButton has the following parameters:
- text- the text we want to put on the button
- pos_hint- a dictionary having the position with respect to x-axis and y-axis
- on_release- it is a function that has the properties that we want to call on clicking the button
Python3
from kivymd.app import MDApp
from kivymd.uix.screen import Screen
from kivymd.uix.button import MDRectangleFlatButton
class Demo(MDApp):
def build(self):
screen = Screen()
btn= MDRectangleFlatButton(text="Submit",pos_hint={'center_x':0.5,'center_y':0.3},on_release=self.btnfunc)
screen.add_widget(btn)
return screen
def btnfunc(self,obj):
print("button is pressed!!")
if __name__=="__main__":
Demo().run()
|
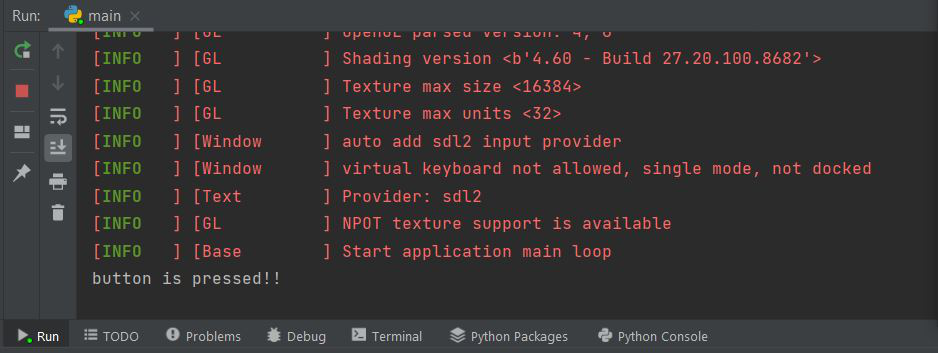
Output:

When the button is pressed it displays the following output
Share your thoughts in the comments
Please Login to comment...