Python OpenCV | cv2.line() method
Last Updated :
04 Jan, 2023
OpenCV-Python is a library of Python bindings designed to solve computer vision problems.cv2.line() method is used to draw a line on any image.
Syntax:
cv2.line(image, start_point, end_point, color, thickness)
Parameters: image: It is the image on which line is to be drawn.
- start_point: It is the starting coordinates of the line. The coordinates are represented as tuples of two values i.e. (X coordinate value, Y coordinate value).
- end_point: It is the ending coordinates of the line. The coordinates are represented as tuples of two values i.e. (X coordinate value, Y coordinate value).
- color: It is the color of the line to be drawn. For RGB, we pass a tuple. eg: (255, 0, 0) for blue color.
- thickness: It is the thickness of the line in px.
Return Value: It returns an image.
Implementation:
The image used for examples n1 and 2 is as follows:

Example #1:
Python3
import cv2
path = r'C:\Users\Rajnish\Desktop\geeksforgeeks\geeks.png'
image = cv2.imread(path)
window_name = 'Image'
start_point = (0, 0)
end_point = (250, 250)
color = (0, 255, 0)
thickness = 9
image = cv2.line(image, start_point, end_point, color, thickness)
cv2.imshow(window_name, image)
|
Output:

Example #2:
Python3
import cv2
path = r'C:\Users\Rajnish\Desktop\geeksforgeeks\geeks.png'
image = cv2.imread(path, 0)
window_name = 'Image'
start_point = (225, 0)
end_point = (0, 225)
color = (0, 0, 0)
thickness = 5
image = cv2.line(image, start_point, end_point, color, thickness)
cv2.imshow(window_name, image)
|
Output:

Example 3: Drawing a line on black screen using numpy library:
Python3
import numpy as np
import cv2
Img = np.zeros((512, 512, 3), dtype='uint8')
start_point = (100, 100)
end_point = (450, 450)
color = (255, 250, 255)
thickness = 9
image = cv2.line(Img, start_point, end_point, color, thickness)
cv2.imshow('Drawing_Line', image)
cv2.waitKey(0)
cv2.destroyAllWindows()
|
Output:
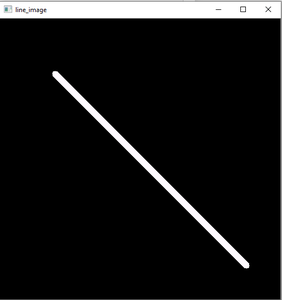
Black Screen created using numpy and drawing line using cv2.line() function
Share your thoughts in the comments
Please Login to comment...