How to Add Labels to Google Business
Last Updated :
18 Oct, 2023
In the dynamic world of digital marketing and online presence, managing your business’s identity is not just an art; it’s a science. That’s where Google My Business comes into play, offering you a platform to showcase your brand to the world. But here’s the secret sauce for turbocharging your Google My Business profile – labels. These little tags are the superheroes of organization, helping you sort, categorize, and enhance your online presence effortlessly. In this guide, we’ll unveil the art of adding labels in Google My Business, equipping you with the power to fine-tune your online identity and reach the right audience. So, grab your virtual label maker, and let’s dive into the world of label magic on Google My Business!

In this article, we will learn how to add these labels to Google My Business.
What Are Labels In Google My Business
Google My Business effectively manages a company’s internet presence and connects with local customers. Labels are an important feature that can help you easily organize and categorize your business listings. They enable you to add custom tags to your listings, which makes it easier to track and manage different parts of your organization. In this post, we’ll walk you through the basics of adding labels to Google My Business and demonstrate how this easy feature may help you manage your online presence.
How To Add Labels In Google My Business Listing
Follow the below steps to add labels to your google business:
Step 1: Log in to Gmail Account and Go to Business Profile Manager
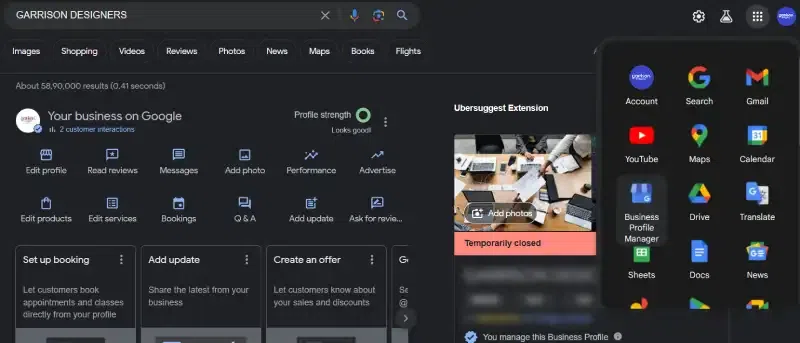
Log in and Go to Google Business Profile Manager
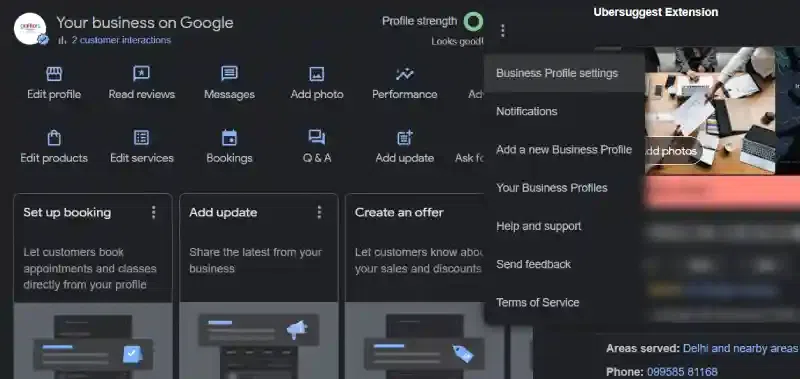
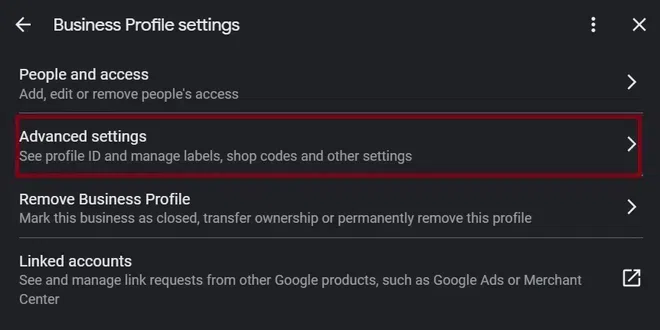
Step 2: Go to Settings (three-dot) Icon and Click on Your Business Profile Settings
Go to Google My Business Profile and sign up with your Business account. Click on Business Profile Settings under more options.
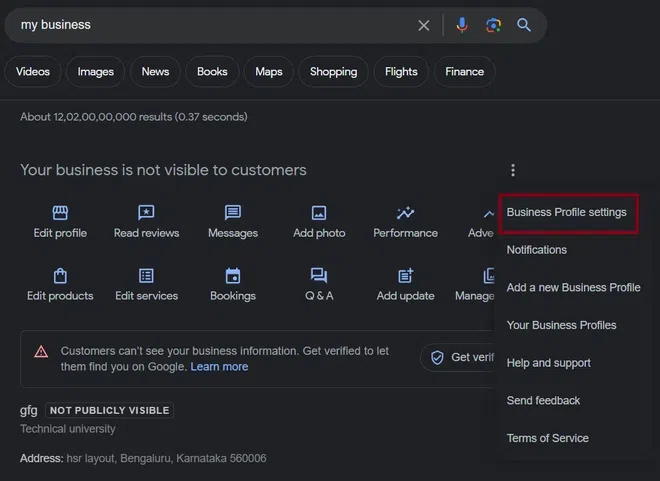
Go to Business Profile Settings
Step 3: Select Advanced Settings
In the Business Profile Settings, Go to Advanced Settings and after clicking on it Select labels in the menu.
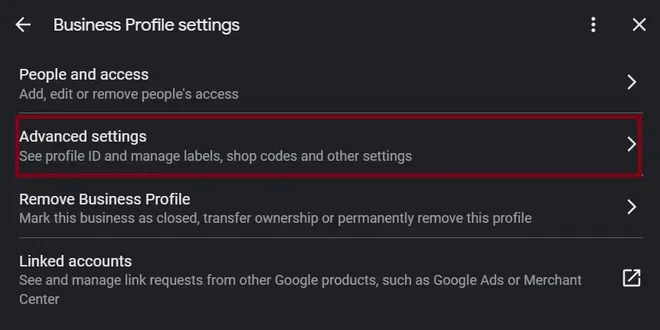
Select Advanced Settings and go to Labels Option
Step 3: Select Add within the Labels Section
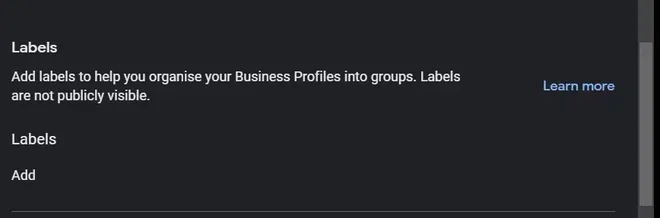
Click on Labels
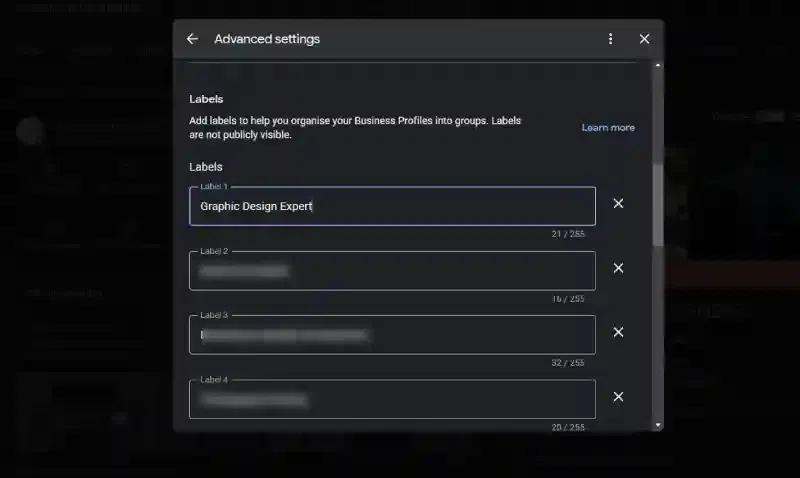
Step 4: Add a Label and Click on Save
Click on the Add option to add the required label. You can add as much as you need to add. Click on Save after you finish adding all the required labels.
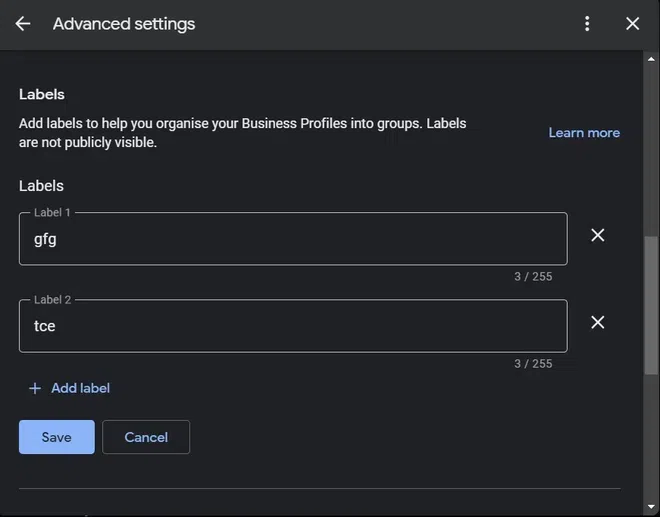
Add a Label and Click on Save
Step 4: Preview your Label
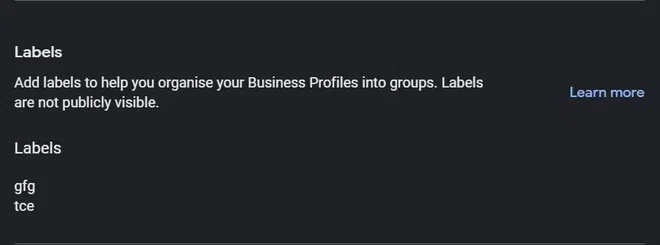
Label Added
How to Edit Label in Google Business
You can easily edit the label of your Google Business by following the below steps:
Step 1: Go to Business Profile Settings
After Logging in to your Gmail account click on the settings(Icon) and Select Business Profile Settings.
Go to Business Profile Settings
Step 2: Click on Advanced Settings

Click on Advanced Settings
Step 3: Click on Labels and Select the Text you want to Edit
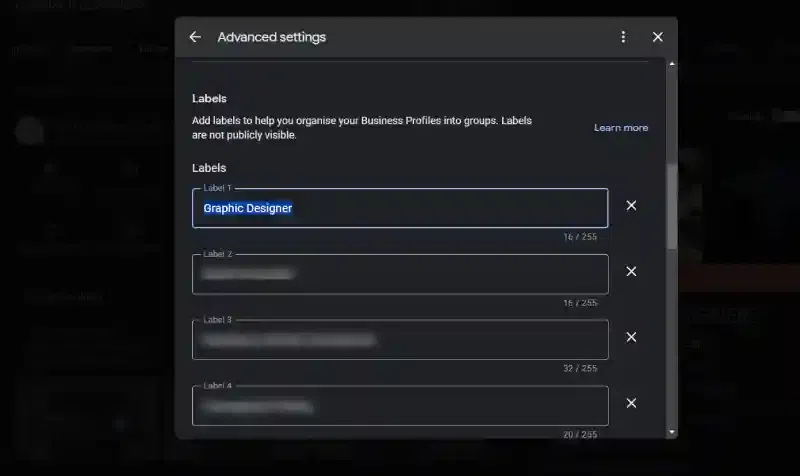
Select the Text you want to edit
Step 4: Replace the Text and Click on Save
Replace the Text
How to Remove a Label in Google Business
To delete labels follow the below steps:
Step 1: Log in to your Google Business Account
Step 2: Go to Settings (three-dot) Icon and Click on Your Business Profile Settings
.webp)
Go to Business Profile Settings
Step 3: Select Advanced Settings
Select Advanced Settings
Step 4: Click on Labels
Step 5: Click on Edit(Pencil) Icon Next to Label
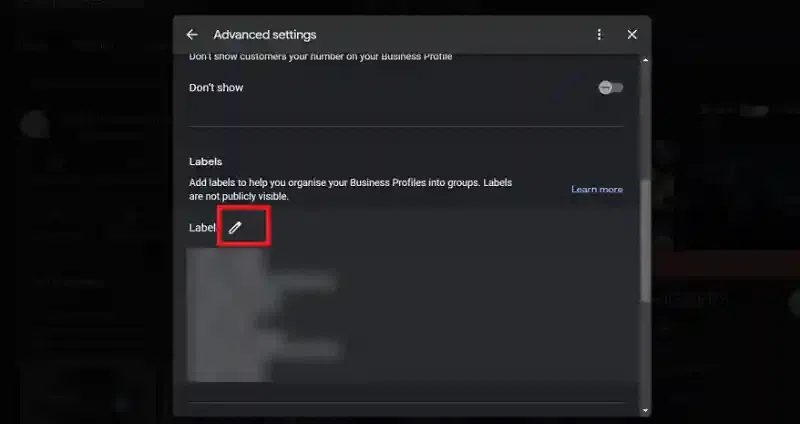
Click on the Edit Button
Step 6: Press the Remove(x) Icon and Click on Save
.webp)
Click on Remove Icon and Press Save
Note: To see the labels applied to a listing go to the Info section of your Google My Business dashboard. They will be listed under the “Label” section.
Conclusion
Adding labels to your Google My Business listings is a simple operation that may considerably improve your online presence management. You may conveniently manage and monitor different elements of your business by organising your listings with relevant labels, ensuring you stay connected with your target audience effectively.
FAQs
What is the use of labels in Google Business?
Labels in Google Business serve as a categorization and organization tool for business listings. They help businesses track performance, manage locations by criteria like region or service area, and identify high-priority listings. Labels also enable customized reporting and communication within a team.
What is the difference between labels and tags in Google?
In Google, labels are used in Google My Business to categorize and organize business listings. They help track performance and manage locations based on specific criteria. Tags, on the other hand, are used in services like Gmail to quickly identify and filter emails. While both serve to categorize, labels are specific to Google My Business listings, whereas tags are used more broadly across various Google services for organization and search purposes.
How do I manage Google labels?
To manage Google labels:
1. Log in to your Google My Business account.
2. Go to the “Info” section of the specific listing you want to label.
3. Scroll down to the “Label” section and click on the pencil icon.
4. Create a new label or select an existing one.
5. Apply the label to the listing.
6. Click “Apply” to save the changes.
You can edit or delete labels at any time in the same “Label” section. Labels offer an efficient way to organize and categorize your business listings for effective management.
Share your thoughts in the comments
Please Login to comment...