How to add a border color to a button in Tkinter?
Last Updated :
05 Apr, 2021
In this article, we will learn how to add border color to a button in Tkinter. In the first example, we are using the frame widget to add border color to a button in frame by highlighting the border with black color and a thickness of 2.
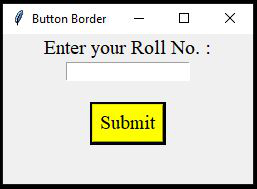
Example 1: Using Frame widget to add border color to a button.
Steps:
- A frame is a container for widgets. In this article, we are using frame widget parameters as highlightbackground and highlightthickness for adding border color to the button.
- Using Label widget to add text in GUI(graphical User Interface) with text font as a parameter.
- The Entry widget is used to take single-line input from the user.
- A frame with a thickness of 2 and a highlight background color as black is used for the button.
- Button widget with text as “Submit”, button background color as yellow with foreground color for text on the button is used as black in this GUI.
- Finally, a button with black border color with text as Submit is created successfully.
Below is the implementation:
Python3
import tkinter as tk
root = tk.Tk()
root.geometry('250x150')
root.title("Button Border")
l = tk.Label(root, text = "Enter your Roll No. :",
font = (("Times New Roman"), 15))
l.pack()
tk.Entry(root).pack()
tk.Label(root, text=" ").pack()
button_border = tk.Frame(root, highlightbackground = "black",
highlightthickness = 2, bd=0)
bttn = tk.Button(button_border, text = 'Submit', fg = 'black',
bg = 'yellow',font = (("Times New Roman"),15))
bttn.pack()
button_border.pack()
root.mainloop()
|
Output:
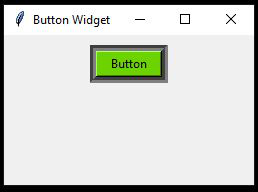
Example 2: Using LabelFrame to add border color to a button.
Steps:
- A LabelFrame widget in tkinter contains the functionality of both label and a frame.
- The parameters of LabelFrame i.e., bd (border width) are taken as 6 with bg (background) color as black.
- The button widget is used for creating a button, the text parameter is used for adding text on button, and the button background color is taken as green with black color text on it.
- Finally, a button with black border color using LabelFrame widget with text as ‘Button’ on it is created successfully.
Below is the implementation:
Python3
from tkinter import *
window = Tk()
window.geometry('250x150')
window.title('Button Widget')
border = LabelFrame(window, bd = 6, bg = "black")
border.pack(pady = 10)
btn = Button(border, text="Button", width = 8,
bg = "#6CD300", fg = "black")
btn.pack()
window.mainloop()
|
Output:
Share your thoughts in the comments
Please Login to comment...