How to Reset/Repair an App on Windows 11?
Last Updated :
29 Dec, 2023
Windows 11 introduces a modern interface. Just, like any operating system, it’s not completely immune to occasional glitches that can affect individual applications. When faced with issues related to apps it can be helpful for users to know how to reset or repair them.
In this article, We will explain to you three ways how to repair an app on Windows 11.
Quick Steps: Reset an App on Windows 10
Here is a short preview of our active and speedy learner. Follow these steps to reset/repair an app on Windows.
- Open Settings.
- Go to “Apps.”
- Select the app to reset.
- Click “Advanced options.”
- Choose “Repair” to fix issues or “Reset” to restore the app to its default state.
Method 1: Reset/Repair an App on Windows 11 Using Settings App
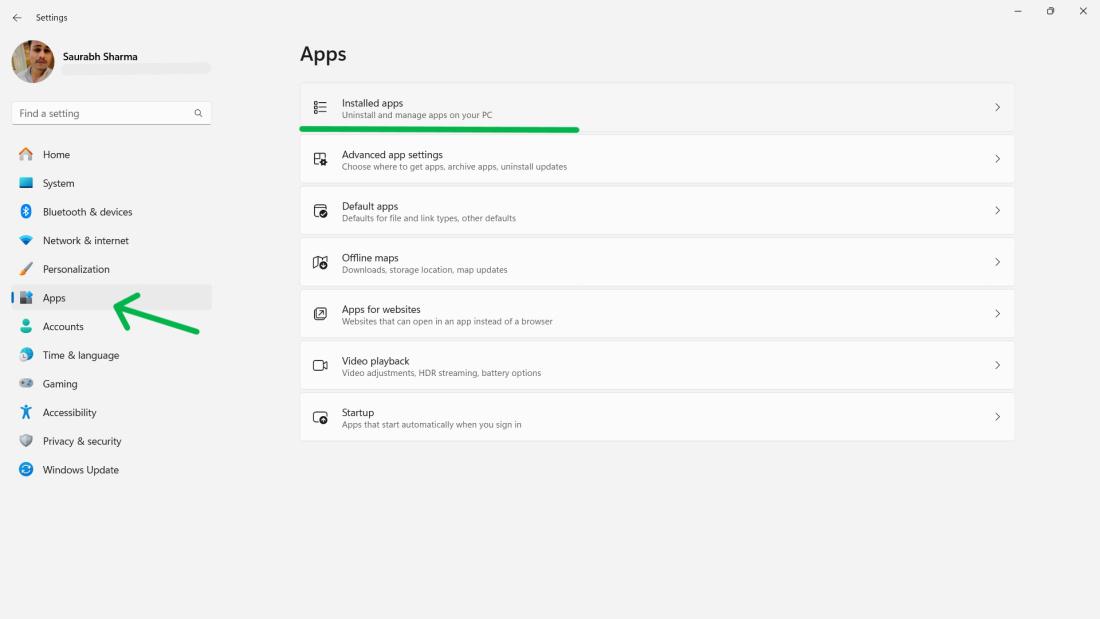
Step 1: Press Win + I to open Settings
Step 2: In the Settings app, click on Apps on the left sidebar, and then click on Installed Apps on the right pane.
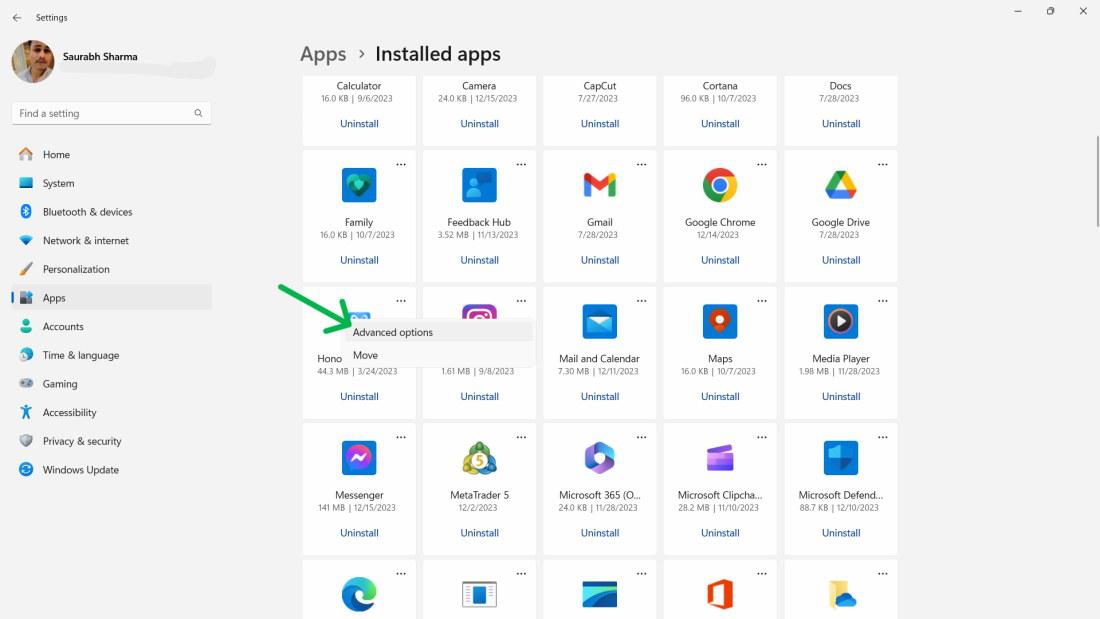
Step 3: On the right panel of your screen you will find a list of installed apps or programs, on your computer. Locate the desired app that needs resetting and/or repairing and click on the three-dot icon located in its app list. Then select “Advanced Options.”
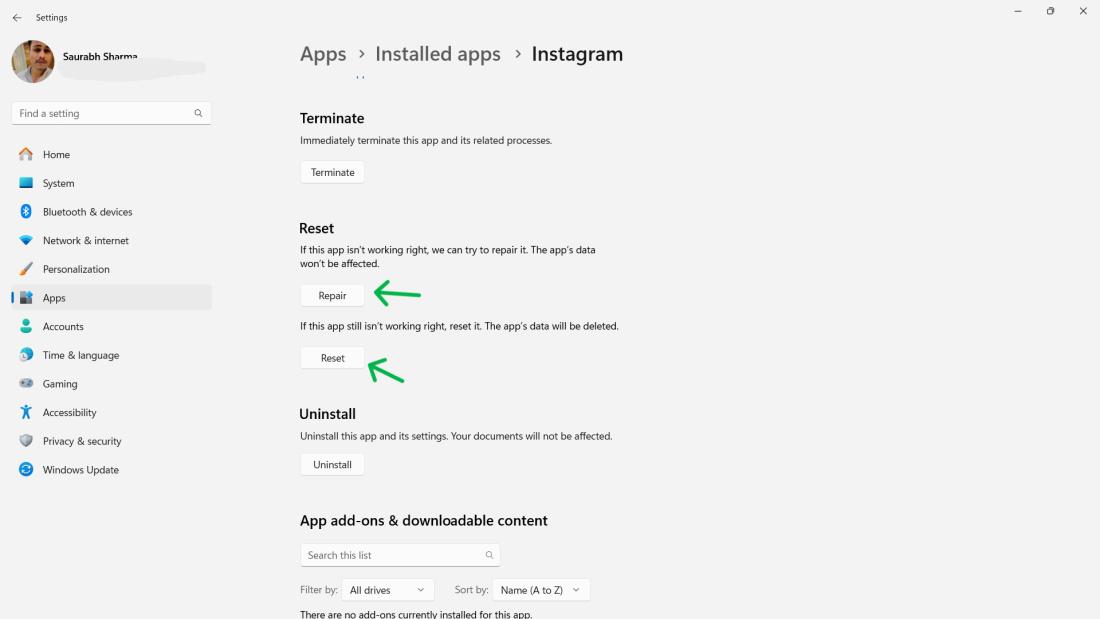
Step 4: Scroll down to the Reset section of the Advanced options page. You will see two buttons: Repair and Reset.
- If you want the repair the app, click Repair.
- If you want to get rid of the app’s data and change it back to its original settings, click on Reset.
Method 2: Resetting and Relaunching Apps on Windows 11
Step 1: Locate the app icon on the taskbar.
Step 2: Right-click on the app icon.
Step 3: Choose “Close window” to shut down the app completely.
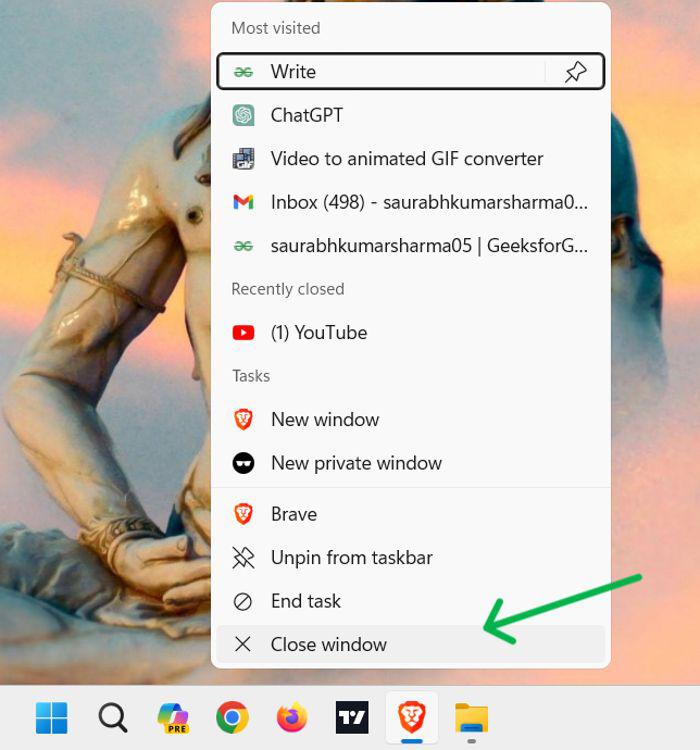
Step 4: Open the Start menu and relaunch the app.
Step 5: This straightforward process can often resolve temporary issues without the need for extensive troubleshooting.
Method 3: How to Reset/Repair an App on Windows 11 Using Task Manager
Step 1: Right-click on the taskbar and select “Task Manager” or use the shortcut (Ctrl + Shift + Esc).

Step 2: In Task Manager, Click on Processes tab. Right-click your preferred app for reset or repair, locate it. Then, click on End task.

Step 3: Relaunch the app from the Start menu or desktop.
Conclusion
In Conclusion, we have explored three methods, for resetting or repairing an app on Windows 11; through the settings app and task manager. If you encounter any issues with the app, such, as crashing or freezing these methods can help you reset or fix it effectively.
Also Read
FAQ’s To Reset/Repair an App on Windows 11
1. Why should you reset an app on Windows 11?
Resetting an app can resolve problems like crashes or errors bringing the app back to its functioning state.
2. Does resetting an app delete data?
No. However personalized settings might revert back to their defaults. The data associated with the app usually remains unaffected.
3. Can you reset any app on Windows 11?
For the majority of apps yes. However built in or critical apps may have options for resetting. It’s advisable to refer to the app documentation for details.
Share your thoughts in the comments
Please Login to comment...