How to Change the Time in Windows 11?
Last Updated :
03 Apr, 2024
Are you struggling to adjust the time on your Windows 11 computer? Don’t worry, you’re not alone. Knowing how to change the time on your device is crucial for keeping it synchronized and accurate. Whether you need to adjust for time zones, daylight saving time, or simply correct an incorrect time display, understanding the process is essential. In this article, we’ll guide you through the simple and easy-to-follow steps to change the time in Windows 11. By the end, you’ll know to ensure your computer’s time is always correct, keeping you on schedule and organized.
How to Change the Clock Time in Windows 11
Method 1: How to Change the Clock Time in Windows 11
Changing the clock time in Windows 11 is a simple process that involves adjusting the date and time settings. By following these easy steps, you can ensure that your computer’s clock displays the correct time:
Step 1: Right-click date/time on the right side of the taskbar, then select “Adjust date and time“.

Step 2: Scroll down and click on “Additional Clocks”
Step 3: Then, a window will be pop on that window click on “Change date and time.”
Step 4: On UAC click “YES“
Step 5: In the Date and Time window, you can adjust the time and date manually.
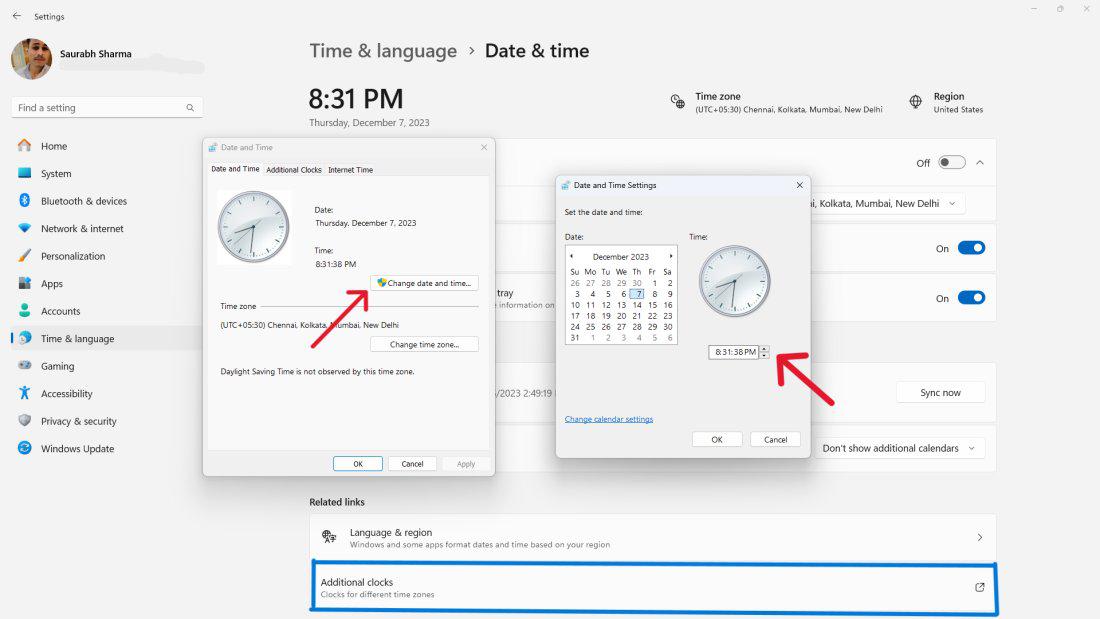
Step 6: Click “OK” to modify the settings.
Method 2: Change the Time Format in Windows From Control Panel
You can easily adjust the time format in Windows 11 by accessing the Control Panel and navigating to the date and time settings. This method allows you to customize how the time is displayed on your computer, including options like 12-hour or 24-hour format. Follow these simple steps to change the time format to suit your preferences.
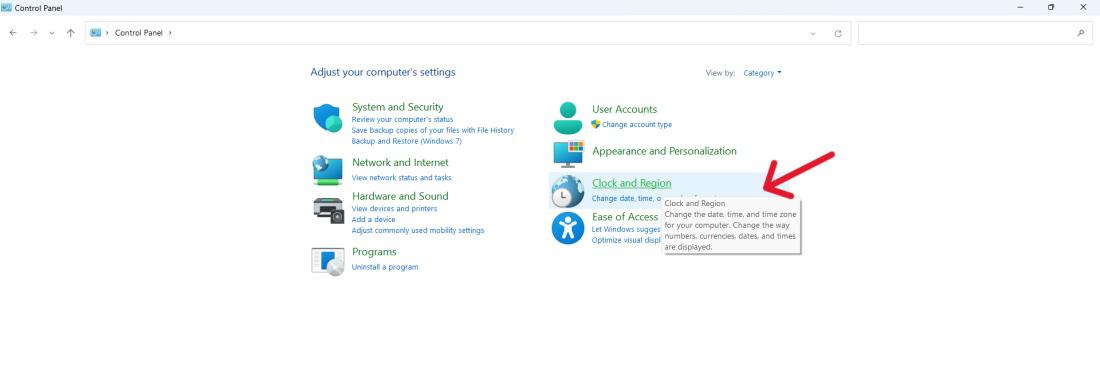
Step 1: To control panel use shortcut Win + R then on input type “Control Panel“
Step 2: Click on “Clock and Region.“
Step 3: Under the “Date and Time” section, click “Set the time and date.”
Step 4: Then, a window will be pop on that window click on “Change date and time.”
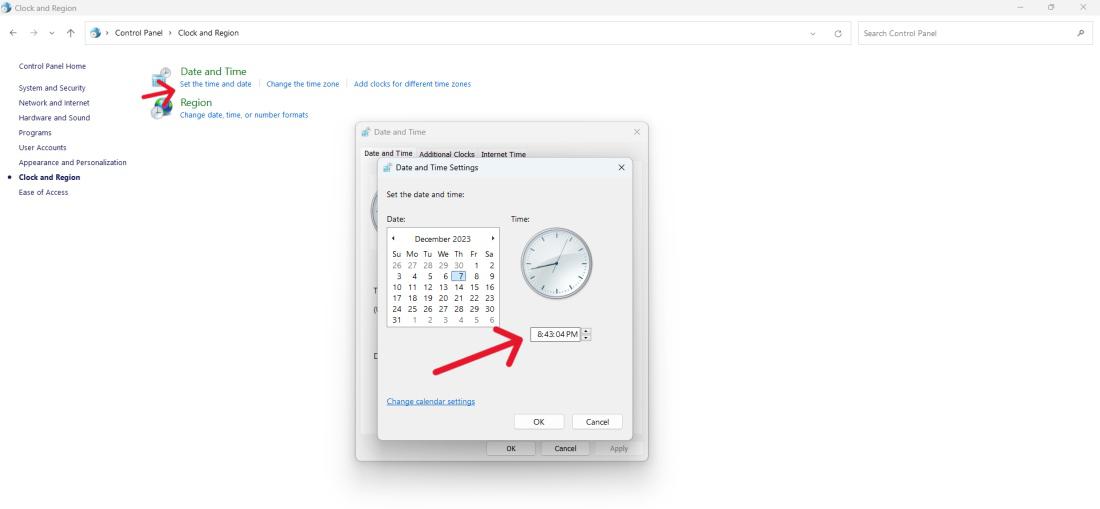
Step 5: Click “OK” to modify the settings.
Method 3: Automatically Set Your Date and Time Zone
To ensure your computer’s time is always accurate without manual intervention, you can enable the automatic setting for date and time zone. This method allows Windows 11 to change date and time settings automatically based on your location. By following these simple steps, you can ensure that your device stays synchronized with the correct time and time zone, eliminating the need for manual adjustments.
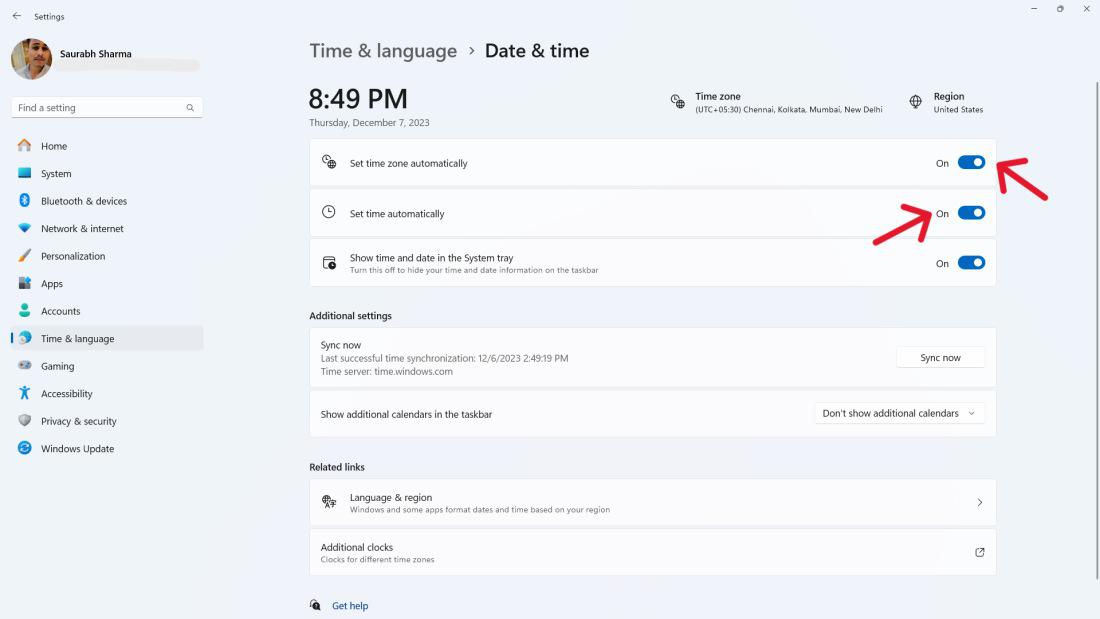
Step 1: Open Settings by pressing Win + I.
Step 2: Go to “Time & language” and select “Date & time.“
Step 3: Toggle on the “Set time automatically” and “Set time zone automatically” options.
Method 4: Change Time format and Date from Command Prompt on Windows 11
If you prefer using the command prompt to make changes to your computer’s date and time settings, you can do so easily in Windows 11. This method allows you to customize the time format and adjust the date directly from the command line interface. By following these straightforward steps, you can quickly modify the time format and date to suit your preferences on Windows 11.
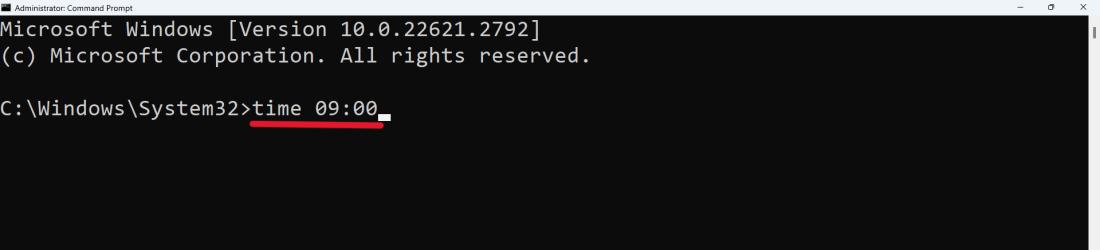
Step 1: Press Win + S and type “Command Prompt” then on right click “Run as administrator”
Step 2: On UAC click on “YES” button
Step 3: Use the following command to change the time: time time HH:MM.
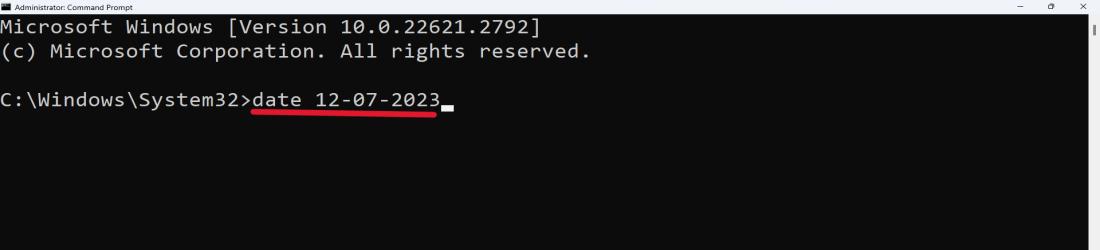
Step 4: To change the date: date mm-dd-yy.
To adjust the time format and date on Windows 11, you can easily modify the date and time settings. This method allows you to customize how the time and date are displayed on your computer. By following these straightforward steps, you can tailor the format to your preference, ensuring that the time and date are presented exactly how you want them.
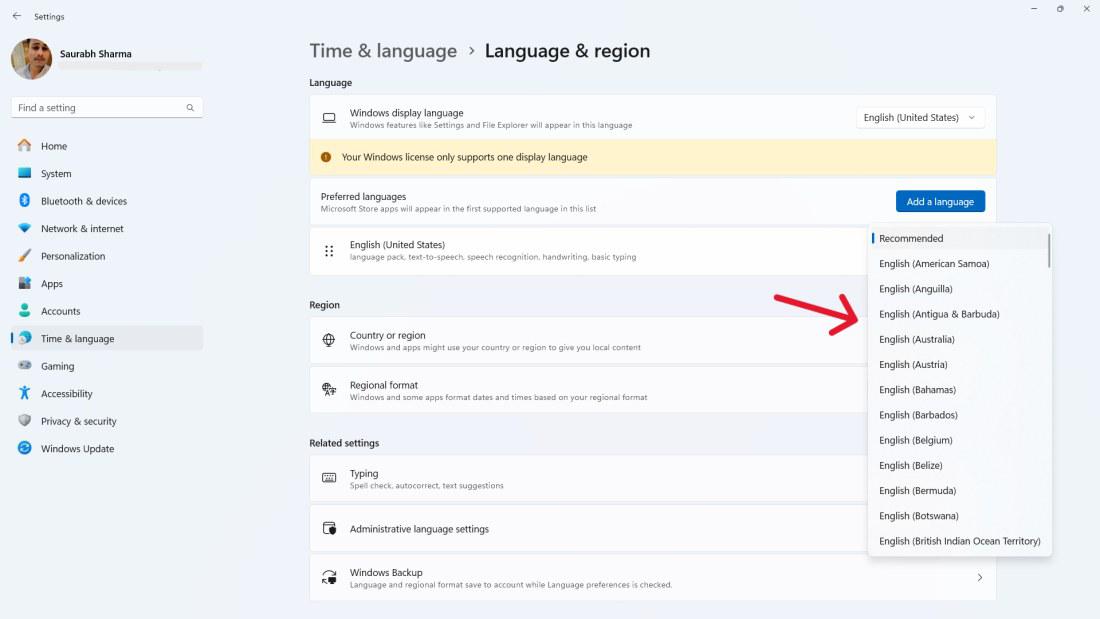
Step 1: Open Settings and go to “Time & language.”
Step 2: Click on “Language & region.”
Step 3: Under the “Regional format” section, choose your preferred format.
Conclusion
In conclusion, knowing how to change the time in Windows 11 is essential for keeping your computer’s clock accurate and synchronized. With various methods available such as adjusting time settings, changing time zones, and modifying time format and date, you have the flexibility to change your computer’s time display to your preferences. By following the simple and easy-to-follow steps outlined in this guide, you can ensure that your Windows 11 device always reflects the correct time, keeping you on schedule and organized. So, the next time you need to change Windows time, refer back to this article for guidance on how to do it efficiently.
How to Change Time in Windows 11? – FAQs
Can I change the time format to a custom format in Windows 11?
Yes, it is possible to customise the time and date settings in windows 11. To change, you can click on “Settings” under “time & language” then click into “language & region”, select the preferred format in the “Regional format” section.
Does Windows 11 have some shortcut keys that allows us to easily navigate through Date/Time options?
Yes, you can have easily accessed date set through keyboard short cuts. For this, press the Win + I keys to open the Settings which will redirect you to “Time & Language” > “Date & Time”. There is an available option of directly accessing the time settings by right-clicking at the position where the clock appears in the taskbar.
How do I change my Windows 11 from 24hr to 12hr?
- Go to Settings (cogwheel icon in Start menu).
- Click Time & language > Date & time.
- Expand Regional format and choose “Change formats.”
- Pick a time format with “AM” or “PM” under Short time or Long time.
How do I change the date and time format in Windows 11?
- Go to Settings (cogwheel in Start menu).
- Click Time & language > Date & time.
- Pick formats from Short date & Long date dropdown menus.
- Expand Regional format, choose “Change formats” and pick time format (AM/PM or 24hr) under Short time or Long time.
How do I permanently change the time zone in Windows 11?
Permanently change time zone in Windows 11:
- Open Settings (cogwheel in Start menu).
- Click Time & language > Date & time.
- Turn off “Set time zone automatically”.
- Pick your new time zone from the dropdown menu.
- (Optional) Click “Sync now” for accuracy.
Share your thoughts in the comments
Please Login to comment...