How To Remove Table Lines In Google Docs
Last Updated :
26 Dec, 2023
How to remove table borders in Google Docs – Quick Steps
- Select the Table
- Go to “Table” in the top menu.
- Choose “Table border” and select “None” or “0 pt
Google Docs is a free online word processor for collaborative document editing. It offers various tools, including a drawing feature with shapes and tools for visual appeal. If you’re working with tables and want to remove column lines for customization, here’s how. How To Remove Column Lines In Google Docs
In Google Docs, to remove your column lines from the document we need to follow the below steps. These steps will be helpful for easily performing to remove the column lines in Google Docs:
.webp)
How to Remove Table Border in Google Docs
To eliminate table borders, start by creating a table. Navigate to the Insert menu at the top of your Google document and click it. Hover over Table in the dropdown menu, choose the table size (column x row dimensions), and click to confirm. The table will now be visible in your document.
How to Remove Table Lines in Google Docs
Step 1: Open Google Your Google Docs
In the first step, we need to visit the official website of Google Docs (G-docs) and open the document.
Open Your Google Docs.
Step 2: Create Table
Create the table, If you don’t have any pre-table. Click On Insert–>Click On Table–> Select row & column.
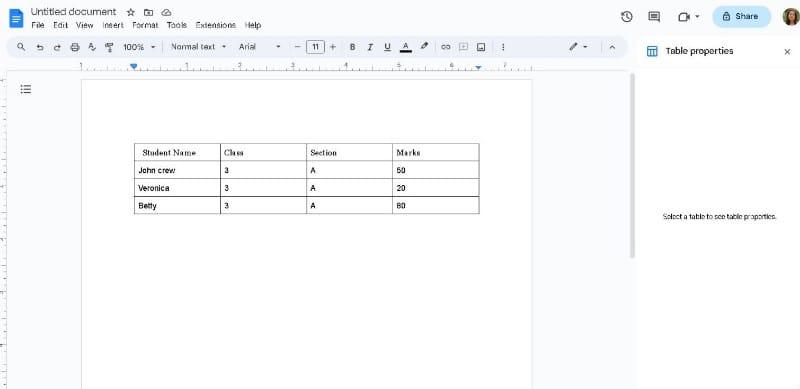
Create Table.
Step 3: Select All the Table
Select the entire table that you create to remove column lines.
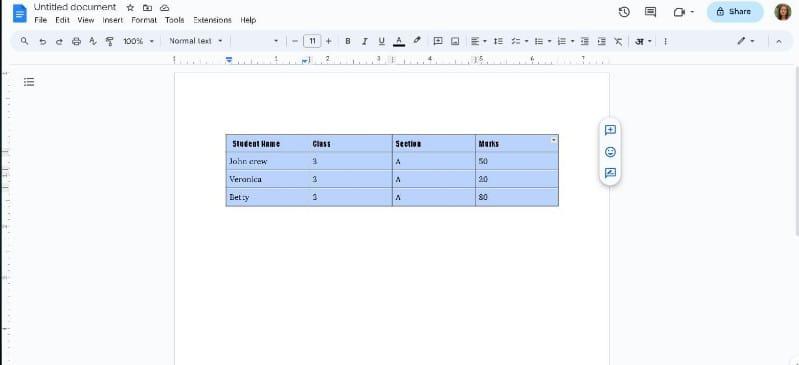
Select the entire table.
Step 4: Go to the Format Option and Select Table
Once the table is selected, navigate to the “Format” menu at the top of the screen. Select the Table option there.
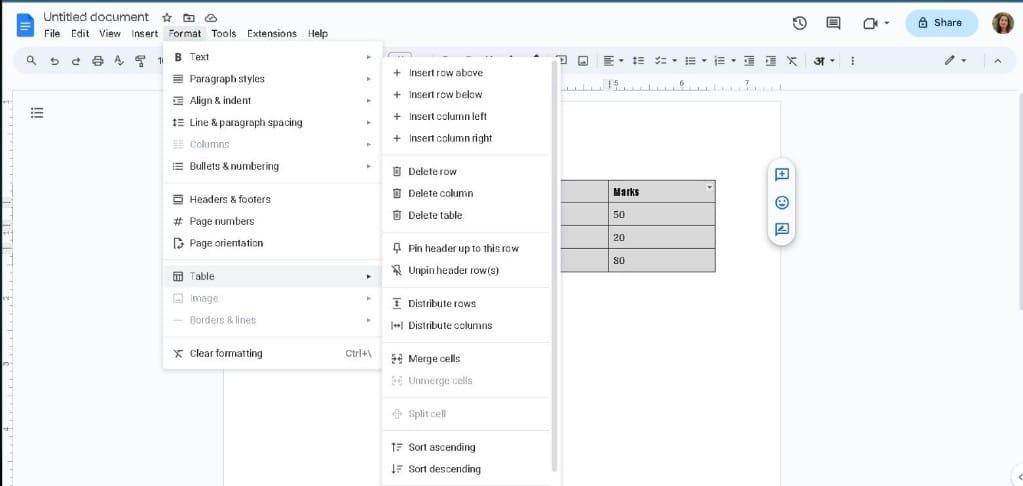
Click on Table from the Format menu.
Step 5: Click Table Properties
Click on “Table Properties” to open a dialog box with various customization options.
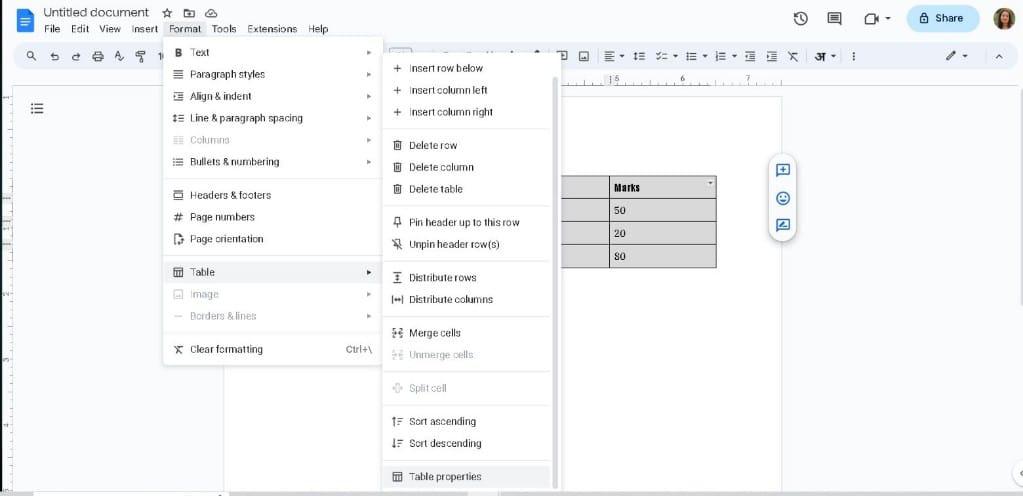
Click on Table Properties
Step 6: Click on the Color Section
In the “Table Properties” dialog box, find the Color section
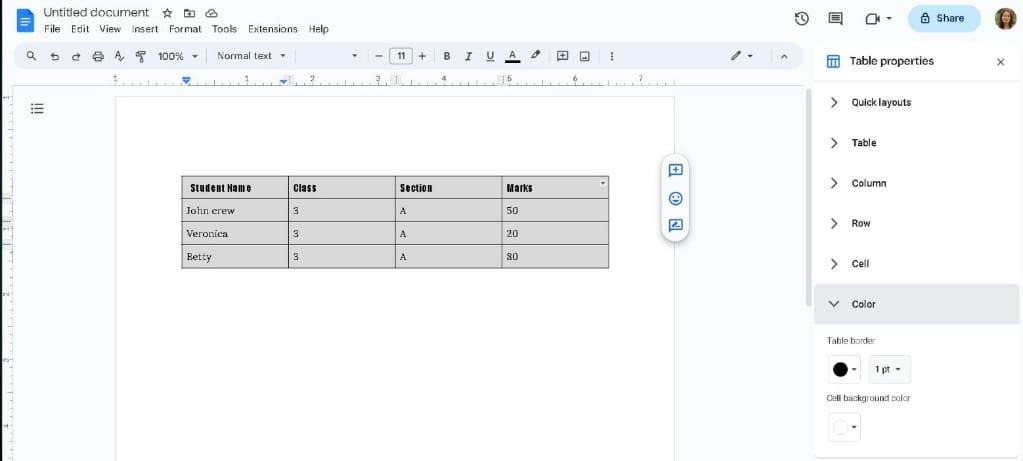
click the color option
Step 7: Set the Table border to “0pt”
Confirm your settings by setting the table border to “0pt”.
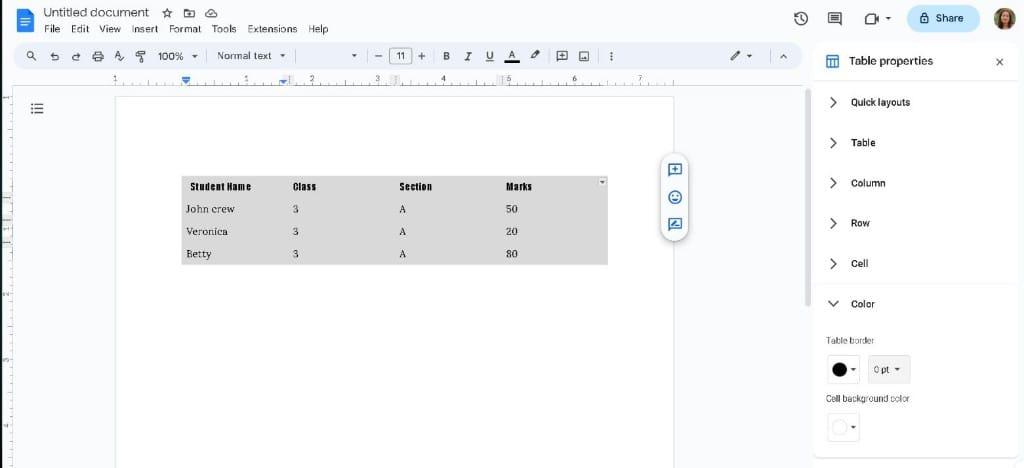
Set the Table border to “0pt”.
Step 8: Preview Table Changes
Column lines were removed from the Table. Once you set the border to 0pt, the column lines removed and your table will look like this.
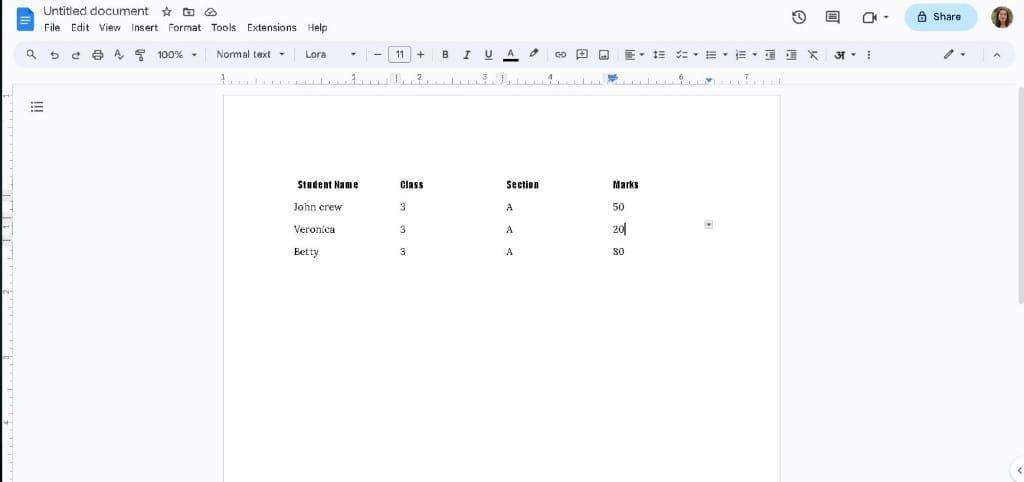
Column Lines are removed.
Conclusion
By following these simple steps, you can easily remove column lines in Google Docs, giving your document a more polished and professional look. Customizing the appearance of your document enhances readability and ensures that it aligns with your intended presentation.
FAQs
How do I add column lines back if needed?
Simply repeat the steps above, but set the “Border Thickness” to your desired value when in the “Table Properties” dialog box. and set table border to 1pt.
Will removing column lines affect the overall formatting of my document?
No, removing column lines only affects the specific table or section you modify. The rest of your document remains unchanged.
Can I use this method to hide specific rows or cells within a table?
Yes, you can select the particular row column or cell to customize its border, lines text anything you want by using table properties.
Will hiding the column lines affect the readability of my table?
Hiding column lines may slightly impact the visual separation between cells.
Share your thoughts in the comments
Please Login to comment...