How to Fix Common Audio Problems in Windows 10?
Last Updated :
19 Apr, 2024
Quick Solution!
Here is a quick solution for our active and speedy learners. Follow these steps to fix the audio issue in Windows:
Update Driver
- Press Win + S, type “Device Manager,” expand “Sound, video, and game controllers,” right-click “High Definition Audio Device,” select “Update Driver,” then restart.
Run the Audio Troubleshoot
- Press Windows Key + I to open the Settings app, navigate to the System section, select Sound, and then click on Troubleshoot.
Audio issues frequently plague Windows 10, particularly after updates to the operating system or audio driver. This can be especially troublesome for devices equipped with Realtek audio cards, commonly found in Surface, Dell, HP, and other popular brands. Such problems can render users unable to play videos, use specific applications, or even hear any sound from their devices.
In this article, We will show you how to fix audio issues in Windows.
List of Methods to Fix sound or audio problems in Windows
How to Fix Audio Not Working in Windows 10
If you’re facing audio issues in Windows 10, there are several methods to troubleshoot and fix the problem. These steps can help resolve most audio problems and improve your overall sound quality:
Method 1: Check all the Audio Connections
Securely and correctly plug in your speakers or headphones. For wireless devices, confirm they’re paired and connected to your system.
Step 1: Connect your speakers or headphones properly.
Step 2: Inspect the wires, plugs, volume, speaker, and headphone connections.
Step 3: Connect them to another device to rule out any hardware issues.
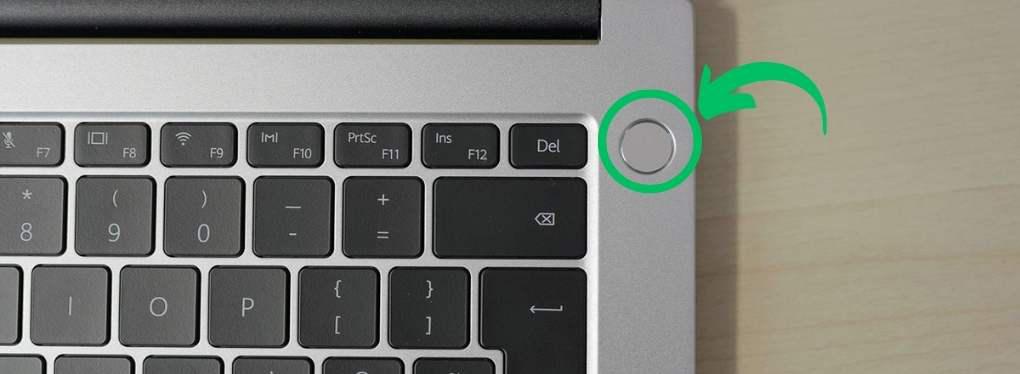
Method 2: Restart your System
Resolve seemingly unsolvable issues, like temporary software glitches affecting audio, by restarting your PC. Close all applications, restart your computer, and see if the problem continues
- Press and hold the power button for 5-10 seconds.
- Wait 30 seconds, then press the power button again.
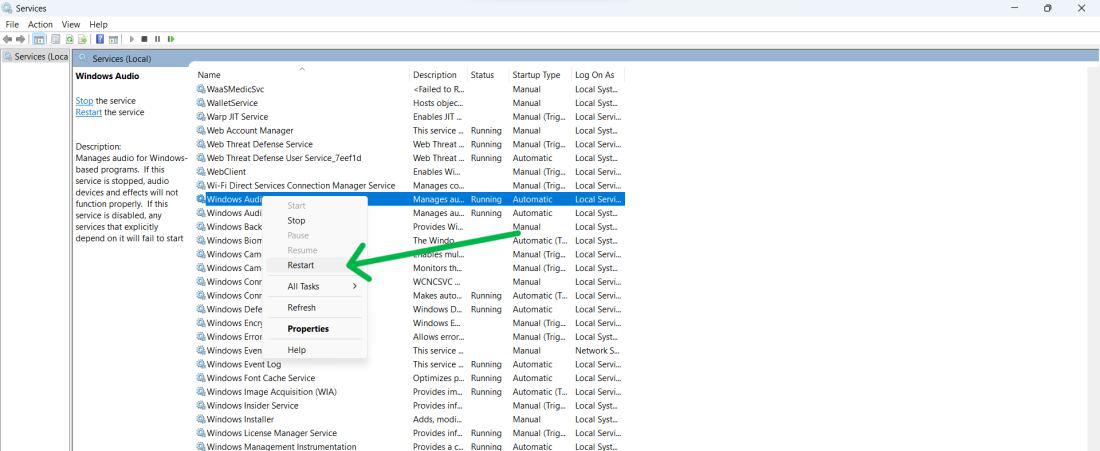
Method 3: Restart the Windows Audio Services
Windows audio services manage the audio devices and processes on your system. However, these services can sometimes stop working or malfunction, leading to audio problems .
To solve follow the given steps to fix audio issue in windows :
Step 1: Press Win + R to open the Run dialog box.
Step 2: Type services.msc and press Enter.
Step 3: Scroll down and find Windows Audio Services.
Step 4: Right-click and select Restart.
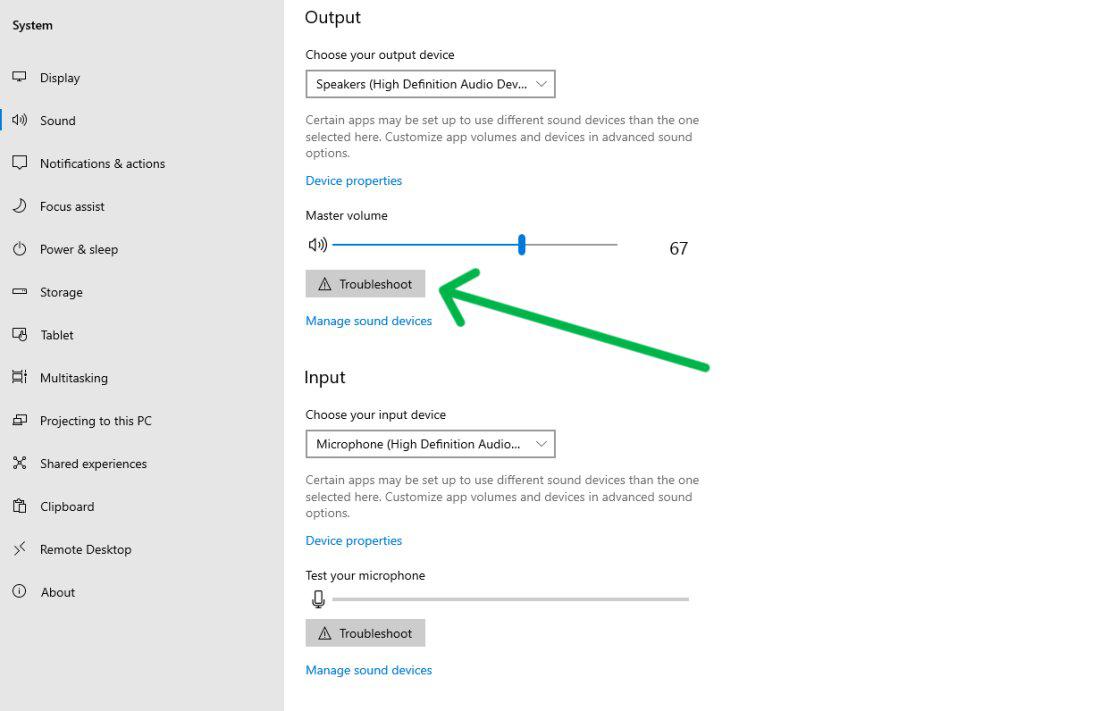
Method 4: Run the Automatic Audio Troubleshoot
It will check all major audio settings and installed drivers, either resolving the issue or identifying the exact problem for you.
Step 1: Open the Settings app by pressing Windows Key + I
Step 2: Go to the System section.
Step 3: Click on Sound.
Step 4: Click on Troubleshoot.
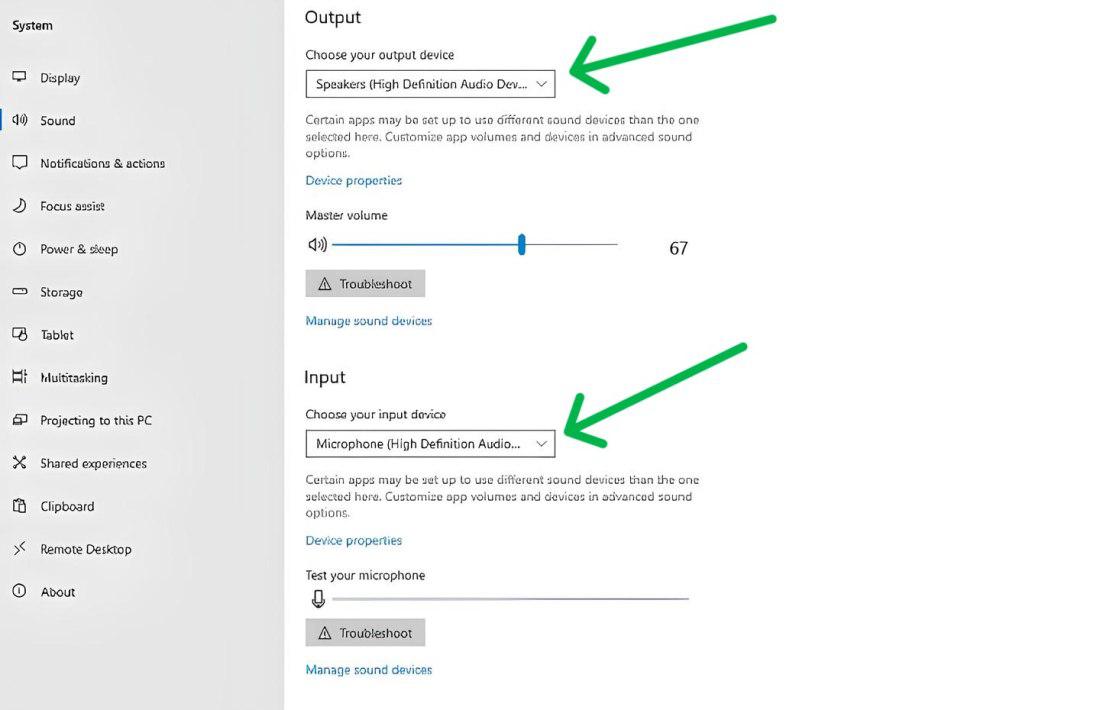
It might be incorrect or incompatible audio settings that are causing your audio issues. Maybe you had the wrong audio input or output device, or the wrong sample rate or bit depth were set. To rectify this, check and adjust the default input and output for audio.
Follow these steps to fix common audio problems in Windows 10:
Step 1: Open the Settings app by pressing Windows Key + I
Step 2: Go to the System section.
Step 3: Click on Sound.
Step 4: From “Input” and “Output” select the default output device and ensure it is connected and functioning properly on your computer.
Method 6: Update the IDT High Definition Audio CODEC
To fix common audio problems in Windows 10, you may need to update the IDT High Definition Audio CODEC. This is how your computer manages audio devices. Follow these steps:
Step 1: Press Win + S, then type “Device Manager” into the search bar.
Step 2: Expand the “Sound, Video, and Game Controllers” section.
Step 3: Right-click on “High Definition Audio Device” and select “Update Driver”.
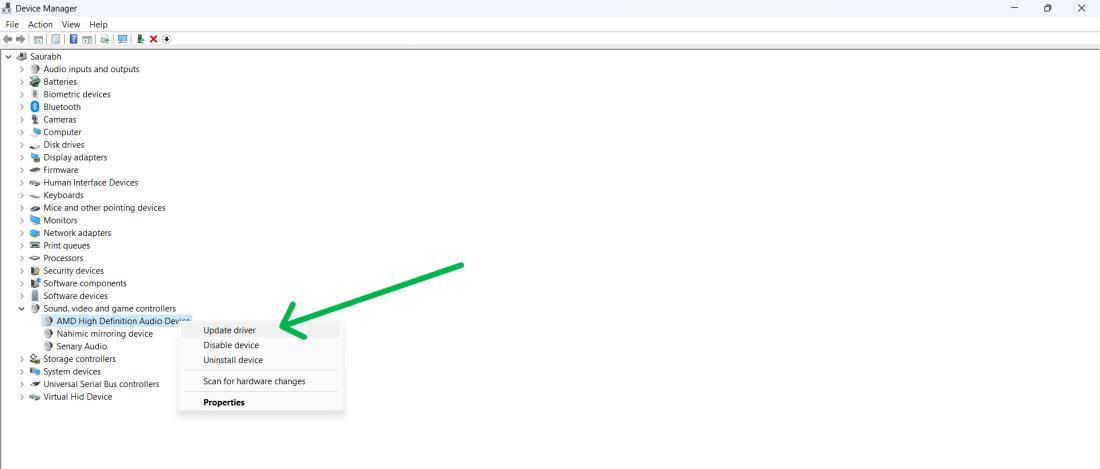
Step 4: Restart Your system
Method 7: Disable the Audio Enhancements
Audio enhancements, while designed to improve your audio’s quality and performance, can sometimes lead to compatibility issues or conflicts with certain audio devices or applications. To address this, consider disabling the audio enhancements.
Follow these steps to do so:
Step 1: Right Click on ” System Tray” and then select “Sounds“
Step 2: in Headphones properties, navigate to “Playback” tab
Step 3: Then, Select “Properties”
Step 4: In next window, navigate to “Enhancements” tab.
Step 5: Check the box labeled “Disable all enhancements” then click on then “Apply” button
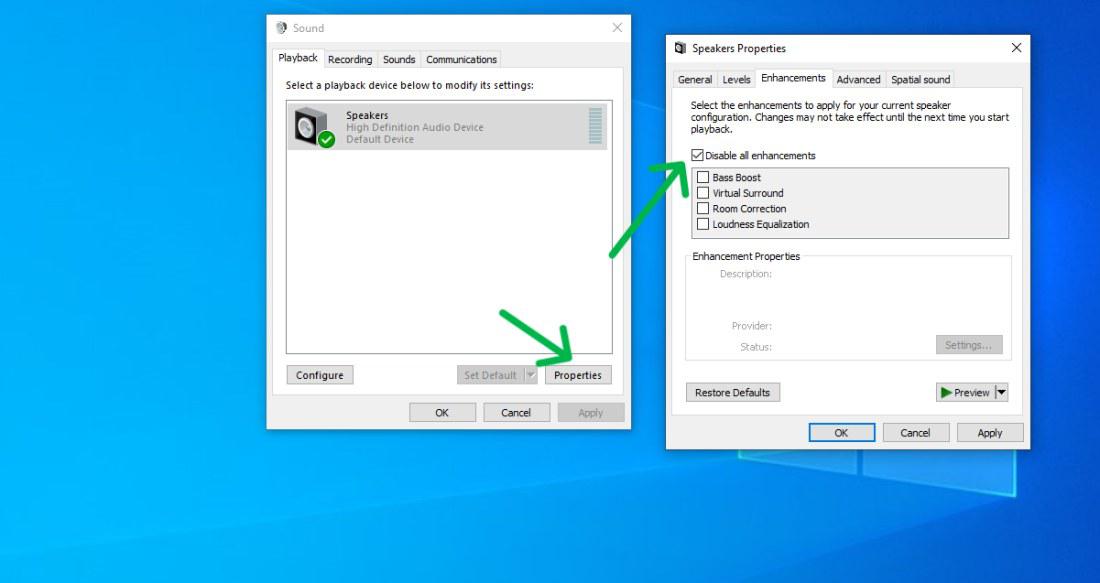
Step 6: Click on OK
Conclusion
In conclusion, addressing common audio problems in Windows 10 can significantly improve your computer’s performance and user experience. By following the methods outlined in this guide, such as updating audio drivers, checking audio settings, and troubleshooting hardware issues, you can quickly resolve most audio-related issues. Remember, keeping your system up to date with the latest software and driver updates ensures your audio runs smoothly and efficiently. These straightforward solutions will help you achieve crisp, clear audio for all your needs.
Also Read
How to Fix Common Audio Problems in Windows 10? – FAQs
How to Fix Common Audio Problems in Windows 10?
To fix audio issue in windows, follow these steps:
Press Win + S, type “Device Manager,” expand “Sound, video, and game controllers,” right-click “High Definition Audio Device,” select “Update Driver,” then restart.
How Do I Run Audio Troubleshooter?
To Troubleshoot audio device follow these steps:
Press Windows Key + I to open the Settings app, navigate to the System section, select Sound, and then click on Troubleshoot.
Why Is My Realtek Audio Not Working In Windows 10?
Outdated drivers, active enhancements, and Windows audio service malfunctions are common issues with Realtek audio
Share your thoughts in the comments
Please Login to comment...