How to Reset All Audio Settings in Windows 11?
Last Updated :
08 Jan, 2024
Short Preview!
Here is a short preview of our active and speedy learner. Follow these steps to fix laptop sound problem in Windows 11:
- Open Settings (Win + I)
- Go to System > Sound > Advanced sound options.
- Scroll to the bottom and click “Reset.”
- Confirm the reset by clicking “Yes.”
Windows 11 introduces new features and enhancements. However, some users may encounter audio-related problems, such as low volume, distorted sound, or complete absence of sound. If you find yourself facing these issues there’s no need to worry. There are ways to reset audio settings in Windows 11 and troubleshoot your sound problems effectively.
In this article, we will show you six methods to fix the laptop sound problem in Windows 11.
Method 1: Reset volume settings
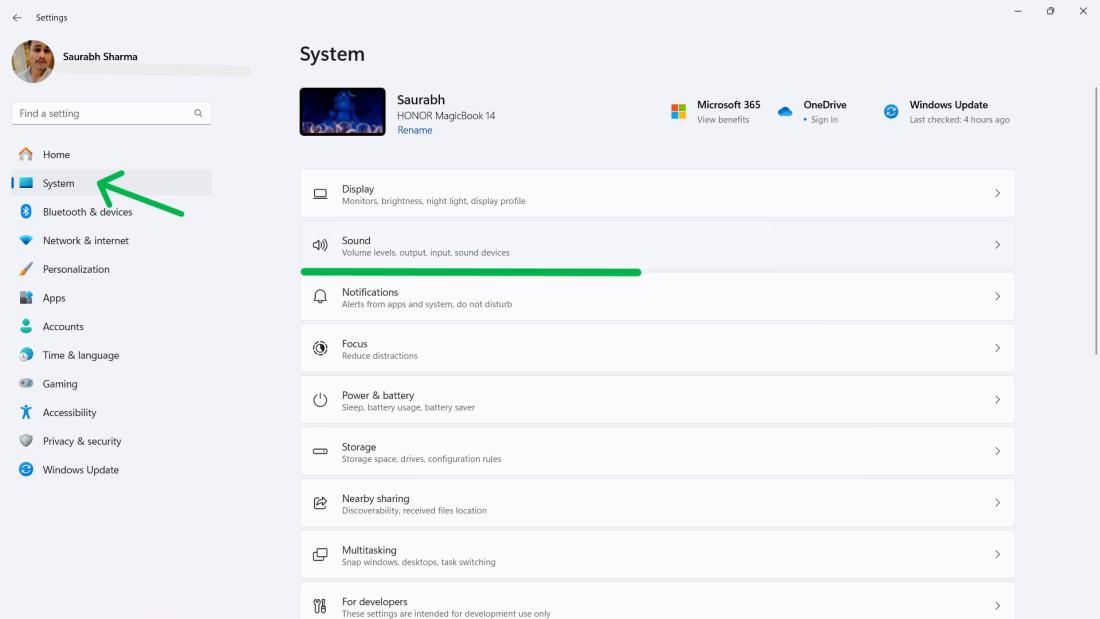
Step 1: Open the Settings app (Win + I) and navigate to System > Sound.
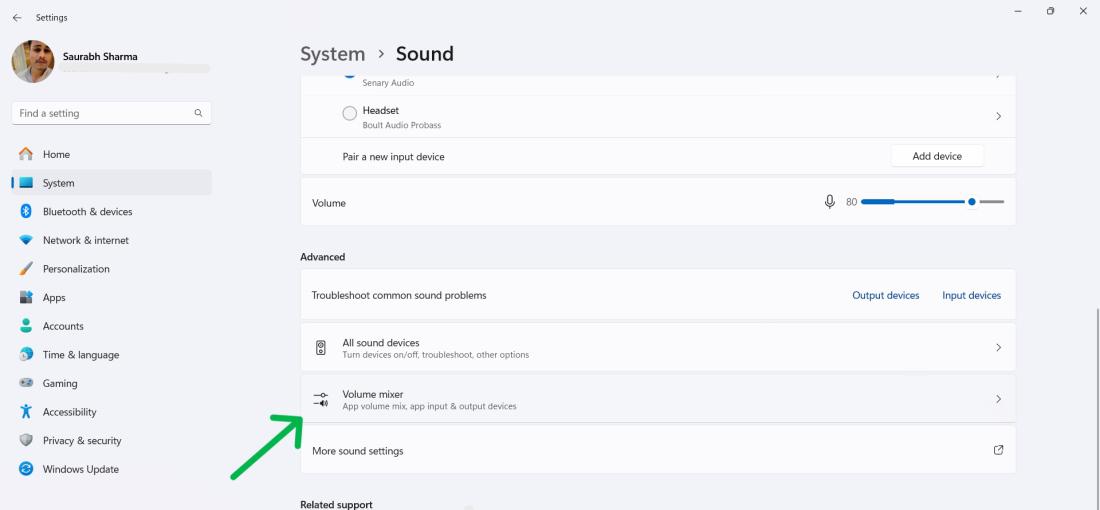
Step 2: Scroll down and click “Volume mixer” under the Advanced section.
Step 3: Click the “Reset” button under “Reset sound devices and volumes for all apps to the recommended defaults.”

Method 2: Reset Individual Sound Device Settings
Step 1: Open the Settings app and navigate to System > Sound.
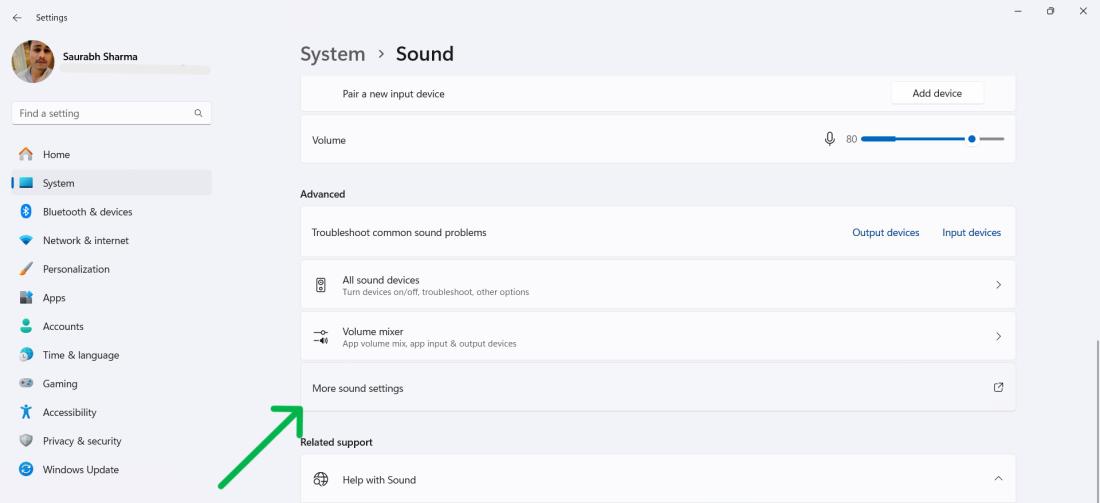
Step 2: Click “More sound settings” under the Advanced section.
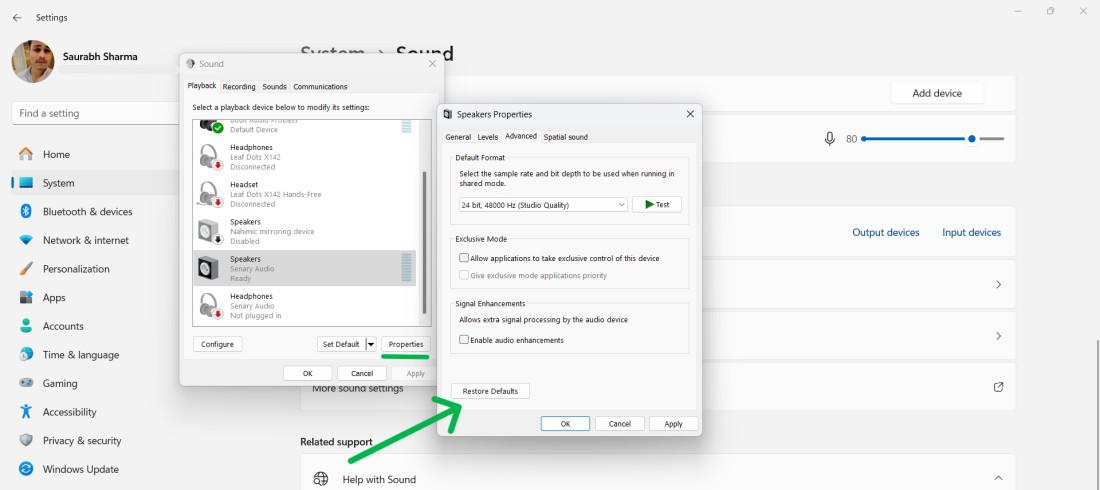
Step 3: Click your desired device (speaker, microphone, etc.) and select Properties.
Step 4: Click the “Advanced” tab and hit “Restore Defaults.” Repeat for Enhancements and Spatial Sound tabs.
Method 3: Reset Audio Driver settings
Step 1: Press Win + S open search bar
Step 2: On search bar type “Device Manager” then open it.
Step 3: Right click on audio adapter
Step 4: Then click “Uninstall Device” click on “Uninstall“
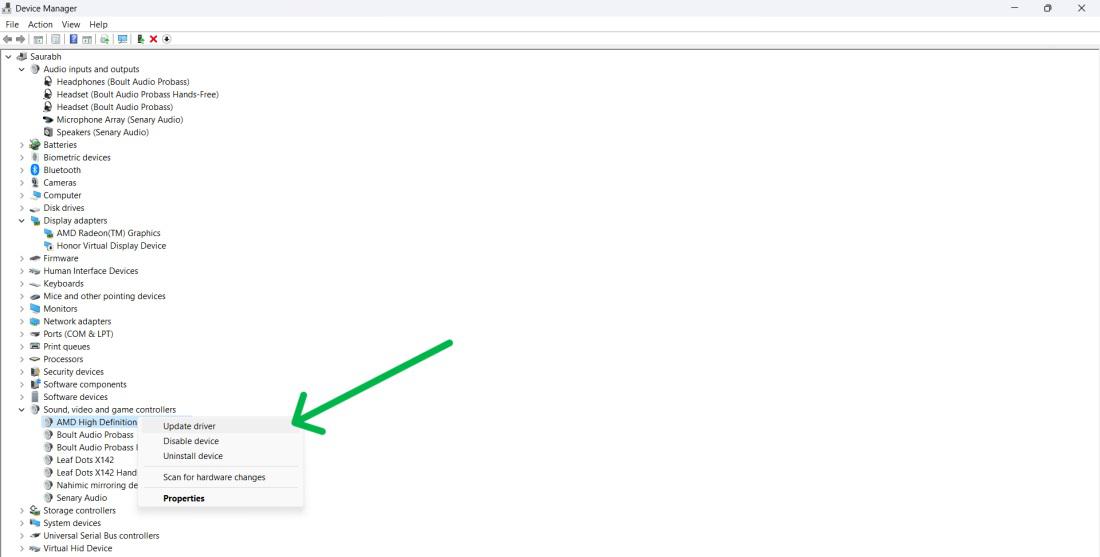
Step 5: Restart the device
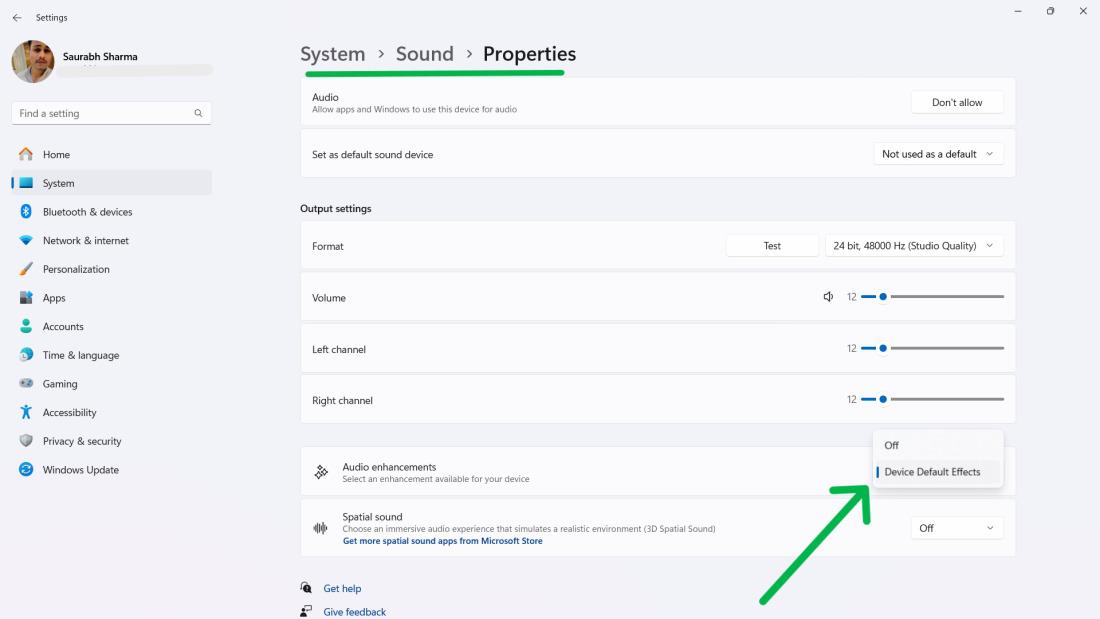
Method 4: Reset Volume for Devices
Step 1: Open the Settings app by pressing Win + I and navigate to System > Sound.
Step 2: Under the Output section click on “Speakers“
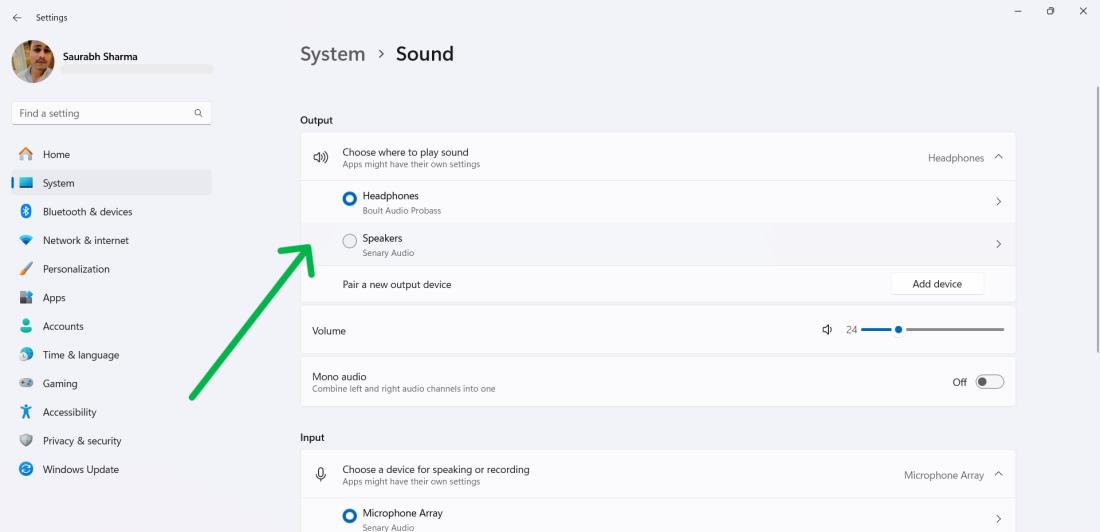
Step 3: Scroll down then on Audio enhancements drop down select Device Default Effects.
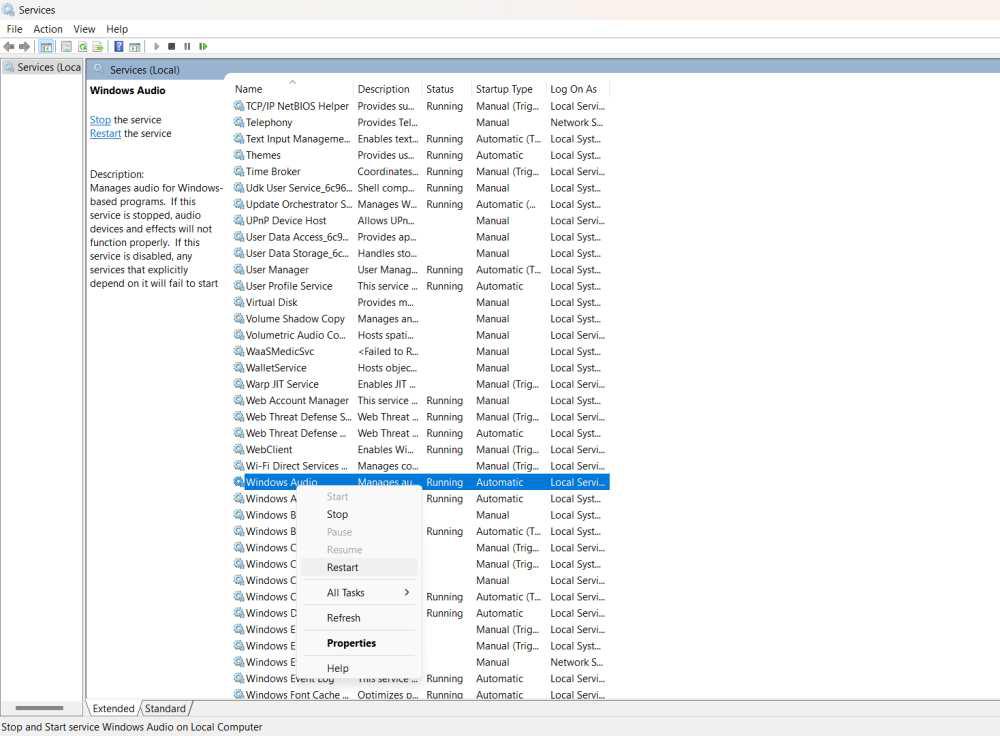
Method 5: Restart the Windows Audio Service
Step 1: Press Win + R and type “services.msc” in the Run dialog box.
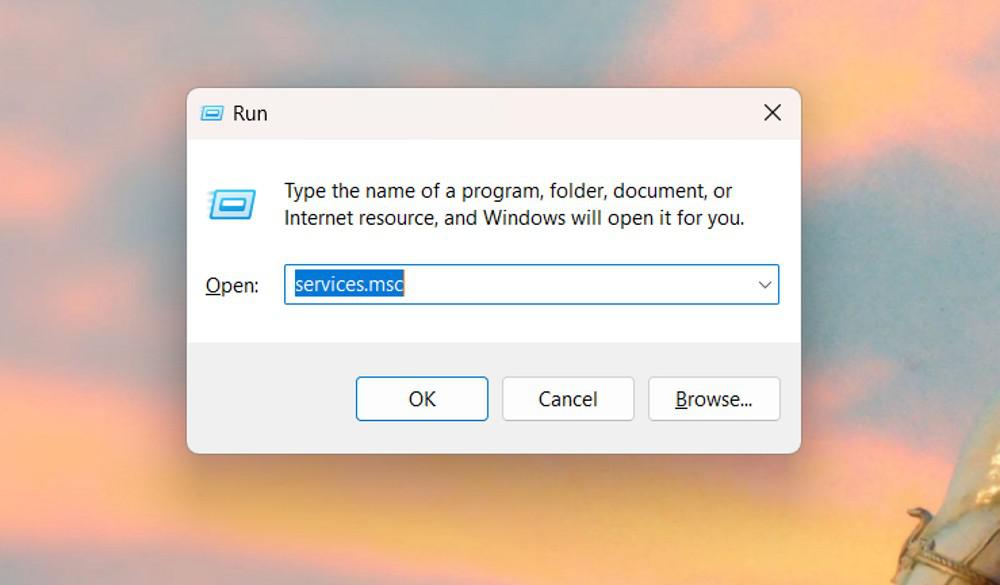
Step 2: Find “Windows Audio” and right-click it.
Step 3: Choose “Restart” and wait for the service to reload.
Method 6: Reset System Sounds on Windows 11
Step 1: Open the Settings app (Win + I) and navigate to System > Sound.
Step 2: Scroll down and click “More Sound Settings” under the Advanced section.
Step 3: Switch to the “Sounds” tab.
Step 4: Choose “Windows Default” from the dropdown menu. Click “Test” and “Apply” if satisfied.

Step 5: Click On “OK“
Conclusion
If you follow these methods you can effectively restore settings on Windows 11 and fix fix laptop sound problems. Whether you need to adjust volume levels reset device settings or address driver related issues these steps offer solutions to regain full audio functionality on your system.
Also Read
FAQ’s on How to Reset All Audio Settings in Windows 11
1. How to Reset All Audio Settings in Windows 11?
To reset all audio settings in Windows 11, open Settings (Win + I), navigate to System > Sound > Advanced sound options. Scroll to the bottom and click “Reset.” Confirm the reset by clicking “Yes.”
2. Will resetting settings delete any of my files or applications?
No resetting audio settings only impacts sound configurations. Your files and applications will remain unaffected.
3. Will updating Windows help resolve my audio problems?
Sometimes updating Windows can fix driver and service issues. It’s worth giving it a try.
4. Will resetting settings solve hardware related problems?
No, if the problem is related to hardware (such, as speakers) resetting software settings might not be able to resolve the issue.
Share your thoughts in the comments
Please Login to comment...