How To Change Audio Output Device On Windows 11?
Last Updated :
19 Jan, 2024
Quick Solution!
Here is a quick solution for our active and speedy learners. Follow these steps to change the audio output device on Windows 11
- open Settings ( Win + I )
- Navigate to System > Sound.
Shortcut key: Press Win + Ctrl+ V
Here, you can choose your desired audio output device
Windows 11 the operating system developed by Microsoft provides users with options, for modifying the audio output device. This flexibility enables users to effortlessly switch between devices based on their specific requirements. Whether you are utilizing headphones, speakers or any other audio device Windows 11 simplifies the process of managing your settings.
In this article, we will show you how to change the audio output device on Windows 11.
Method 1: Change the Audio Device via Taskbar
To swiftly switch the sound output device from the taskbar, follow these steps:
Step 1: Click the speaker icon in the system tray near the clock.
Step 2: Click the arrow next to the volume slider.
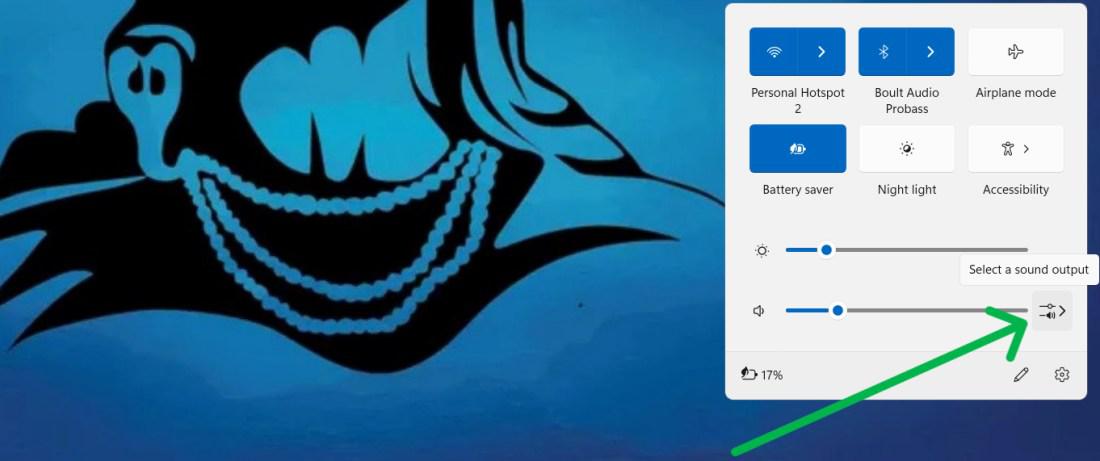
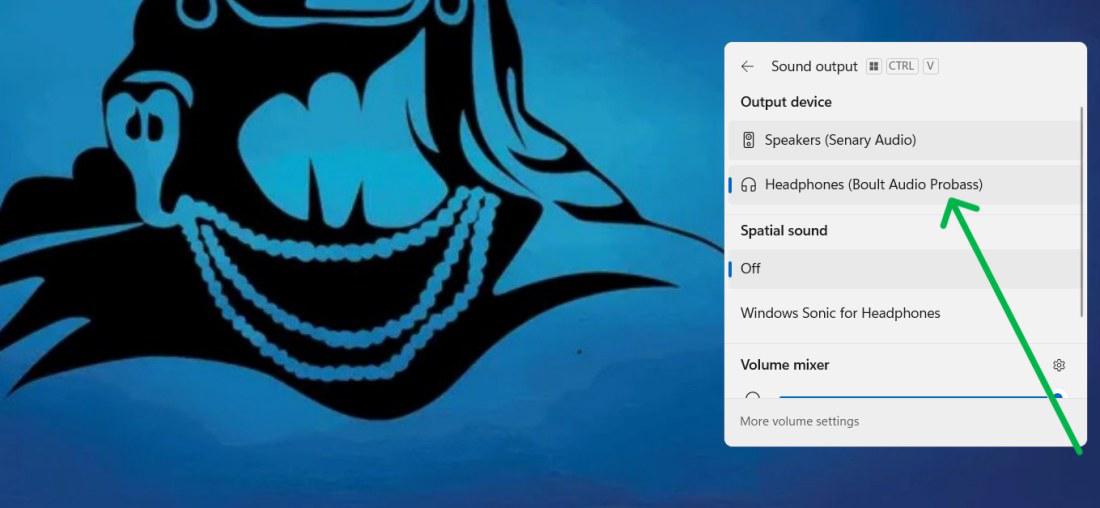
Step 3: Choose your desired audio output device from the list.
Method 2: Change Sound Output Devices via Volume Mixer
Step 1: Right-click the speaker icon in the system tray.
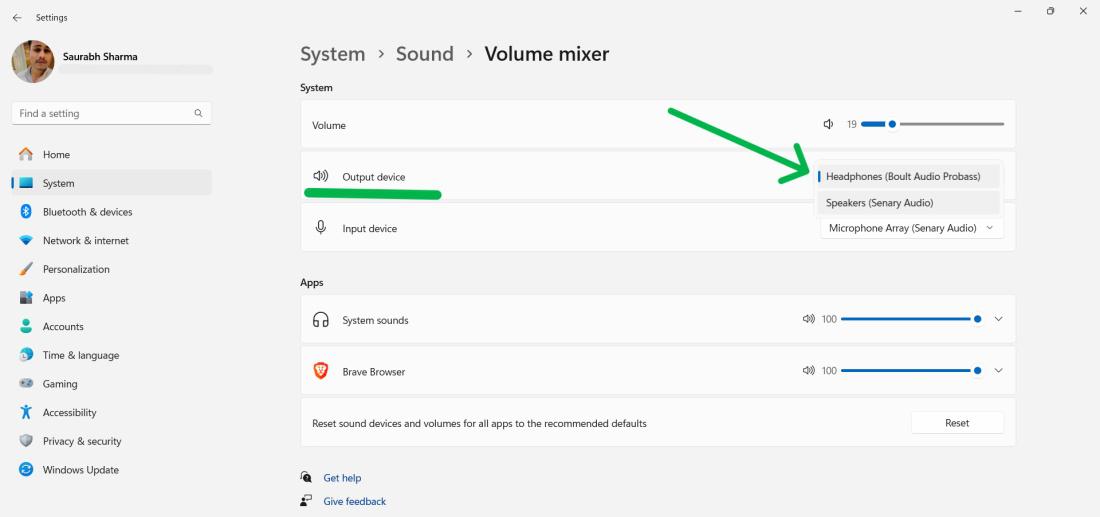
Step 2: Select “Open Volume Mixer.”

Step 3: Choose your desired audio device from the Output device drop-down menu.
Method 3: Change Audio Output Device via Settings
Step 1: Press Win + I to open Settings.
Step 2: Navigate to System > Sound.
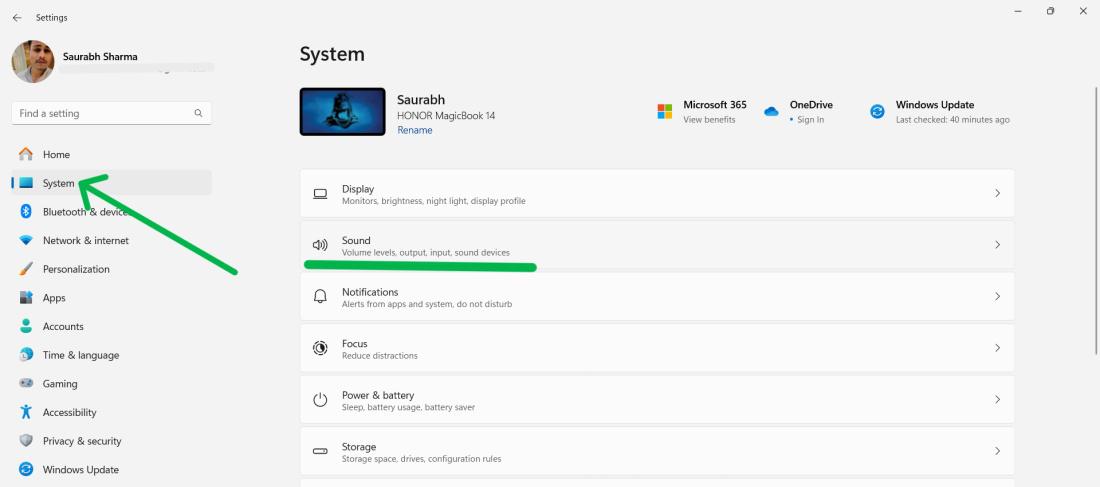
Step 3: Choose your desired audio output device under “Choose where to play sound”

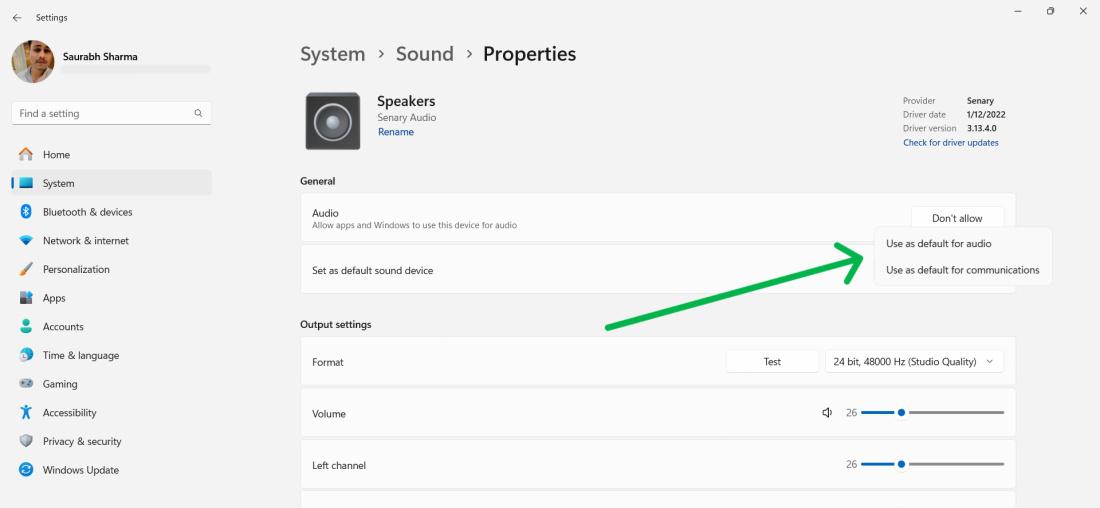
How to Set the Default Audio Device on Windows 11?
Method 1: Using the Settings App
Step 1: Press Win + I to open Settings.
Step 2: Navigate to System > Sound.
Step 3: Click and select your desired output device under Output.
Step 4: To set your device as the default simply click on the drop down menu next to “Set as default sound device.” From there choose either “Use as default, for audio” or “Use as default for communications” based on what you prefer.
Method 2: Using the Xbox Game Bar
Step 1: Press Windows key + G to open the Xbox Game Bar.
Step 2: Click the speaker icon and choose your desired audio output device.

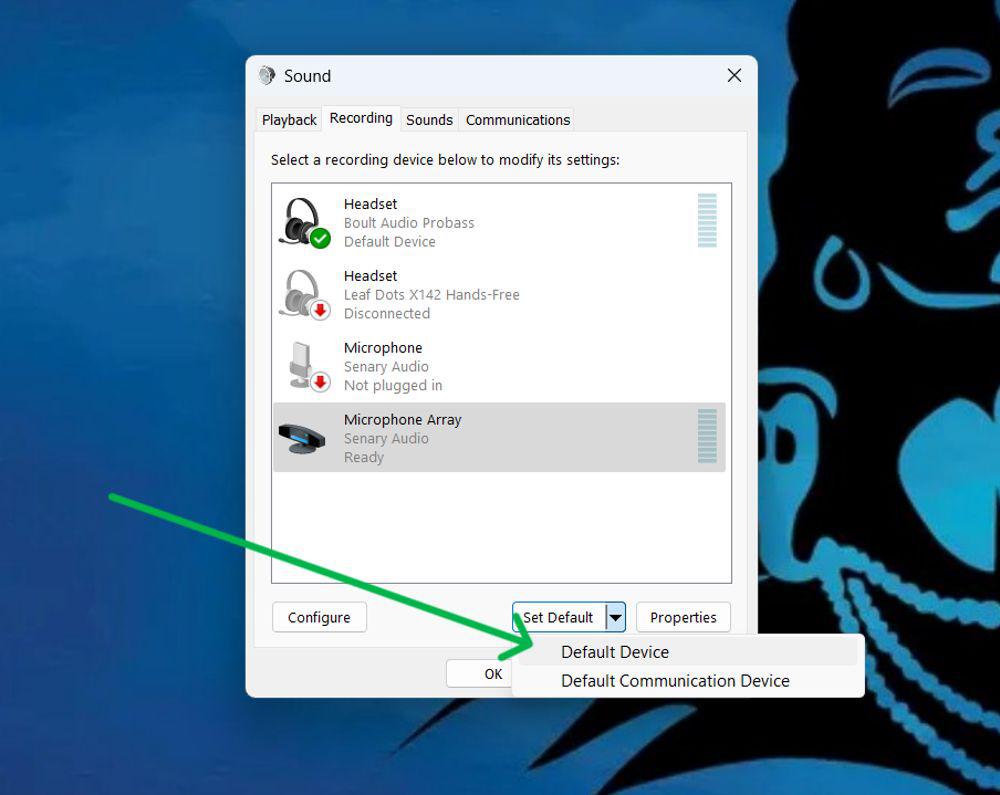
Method 3: Using Advanced Sound Settings
Step 1: Press Windows key + R to open run dialog then input type “mmsys.cpl“
Step 2: In sound window, Switch to the Recording tab.
Step 3: Click ‘Set Default,’ and then click ‘Apply‘ to save the changes.
In Conclusion, changing the output device on Windows 11 is a process with multiple ways to do it. Whether you like the convenience of accessing it from the taskbar or prefer diving into settings, Windows 11 offers flexibility to cater to your preferences.
Also Read
FAQ’s: How To Change Audio Output Device On Windows 11?
How To Change Audio Output Device On Windows 11?
To change the audio output on Windows 11, open Settings (Win + I), go to System > Sound, or use the shortcut Win + Ctrl + V. From there, select your preferred audio device.
Can I customize the output, for applications?
yes! You have the ability to utilize the Volume Mixer feature to modify the output device on an application basis.
My audio devices are not showing in the sound settings, how do I troubleshoot?
Make sure there are no issues with physical connections, verify that drivers are updated and try rebooting your computer. If the problem continues, contact your device manufacturer’s support. For detailed guide click here
Share your thoughts in the comments
Please Login to comment...