Chakra UI Form Textarea
Last Updated :
09 Feb, 2024
Chakra UI is a react library to create a website’s UI components. Among the provided components, there is a component called `Textarea` which is used to take multiple line text inputs.
Prerequisites
Given below are the different approaches to using the Chakra Textarea component discussed in this article.
Approach 1: Basic Textarea:
The basic textarea provided in Chakra UI has no special behavior. It’s like the normal textarea input fields and it’s the easiest way to implement the textarea.
Syntax:
function MyForm() {
    return (
        <Textarea placeholder="Enter your text" />
    );
}
Approach 2: Controlled Textarea:
Controlled textarea provides the feature of managing the value inside the textarea through state. That means, you can explicitly update the value of the textarea on each user input.
Syntax:
function MyForm() {
    const [value, setValue] = useState('');
    const handleChange = (event) => {
        setValue(event.target.value);
    };
    return (
        <Textarea value={value}
            onChange={handleChange}
            placeholder="Enter your text" />
    );
}
Approach 3: Resizing the behavior of the textarea:
In this approach of using the textarea, we can provide a `resize` prop to the component to change the behavior of textarea expanding. (horizontal or vertical)
Syntax:
function MyForm() {
    return (
        <Textarea resize="horizontal/vertical" placeholder="Enter your text" />
    );
}
Approach 4: Disabled textarea:
Disabled textarea prevents user input into the textarea field. This is helpful in case of conditional prevention for using the textarea.
Syntax:
function MyForm() {
    return (
        <Textarea disabled placeholder="Enter your text" />
    );
}
Approach 5: Invalid Textarea:
This approach of using the textarea allows us to provide indication on user inputs provided is valid or not.
Syntax:
function MyForm() {
    return (
        <Textarea isInvalid placeholder="Enter your text" />
    );
}
Steps to create a React app and installing the modules:
Step 1: Create a React app and enter into it by using the following commands:
npx create-react-app my-react-app
cd my-react-app
Step 2: Install ChakraUI dependency by using the following command:
npm i @chakra-ui/react
Project Structure:
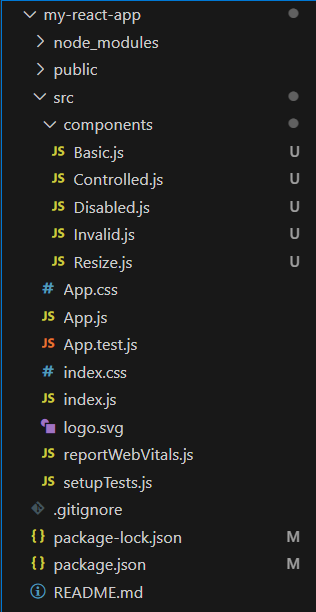
project structure
The updated dependencies in package.json file will look like:
"dependencies": {
    "@chakra-ui/react": "^2.8.2",
    "@testing-library/jest-dom": "^5.17.0",
    "@testing-library/react": "^13.4.0",
    "@testing-library/user-event": "^13.5.0",
    "react": "^18.2.0",
    "react-dom": "^18.2.0",
    "react-scripts": "5.0.1",
    "web-vitals": "^2.1.4"
}
Example: Given below are the examples of different approaches of using a textarea.
Javascript
import React,
{
useState
} from 'react';
import {
Textarea,
Button
} from '@chakra-ui/react';
function Basic() {
const [value, setValue] = useState('');
const handleChange = (event) => {
setValue(event.target.value);
};
const handleSubmit = () => {
console.log("Data entered:", value);
};
return (
<>
<p>Basic</p>
<Textarea value={value}
onChange={handleChange}
placeholder="Enter your text" />
<Button color={"white"} padding={"8px"}
border={"none"} background={"teal"}
onClick={handleSubmit}>
Submit
</Button>
</>
);
}
export default Basic;
|
Javascript
import React,
{
useState
} from 'react';
import {
Textarea,
Button
} from '@chakra-ui/react';
function Controlled() {
const [value, setValue] = useState('');
const handleChange =
(event) => {
setValue(event.target.value);
};
const handleSubmit =
() => {
console.log("Data entered:", value);
};
return (
<>
<p>Controlled</p>
<Textarea value={value} onChange={handleChange}
placeholder="Enter your text" />
<Button color={"white"} padding={"8px"}
border={"none"} background={"green"}
onClick={handleSubmit} >
Submit
</Button>
</>
);
}
export default Controlled;
|
Javascript
import React from 'react';
import {
Textarea
} from '@chakra-ui/react';
function Disabled() {
return (
<>
<p>Disabled</p>
<Textarea disabled
placeholder="Enter your text" />
</>
);
}
export default Disabled;
|
Javascript
import React,
{
useState
} from 'react';
import {
Textarea,
Button, Alert
} from '@chakra-ui/react';
function Invalid() {
const [value, setValue] = useState('');
const [isValid, setIsValid] = useState(false);
const handleChange = (event) => {
setValue(event.target.value);
setIsValid(event.target.value.length > 0);
};
const handleSubmit =
() => {
if (isValid) {
console.log("Data entered:", value);
} else {
console.log("Form is invalid. Cannot submit.");
}
};
return (
<>
<p>Invalid</p>
<Textarea value={value} onChange={handleChange}
placeholder="Enter your text"
border={
!isValid && "3px solid red"
} borderColor={isValid ? undefined : "red"} />
<Button color={"white"} padding={"8px"}
border={"none"} background={"crimson"}
colorScheme='teal' size='md'
onClick={handleSubmit}>
Submit
</Button>
{!isValid && (
<Alert color={'red'} status="error"
borderRadius="md">
Please enter valid text.
</Alert>
)}
</>
);
}
export default Invalid;
|
Javascript
import React from 'react';
import {
Textarea
} from '@chakra-ui/react';
function Resize() {
return (
<>
<p>Resize Vertical</p>
<Textarea resize="vertical"
placeholder="Enter your text" />
</>
);
}
export default Resize;
|
Javascript
import logo from './logo.svg';
import './App.css';
import Basic from './components/Basic';
import Controlled from './components/Controlled';
import Disabled from './components/Disabled';
import Invalid from './components/Invalid';
import Resize from './components/Resize';
function App() {
return (
<div className="App" style={{
display: "flex",
flexDirection: "column",
maxWidth: "400px",
gap: "12px",
margin: "auto",
padding: "40px"
}}>
<Basic />
<Resize />
<Controlled />
<Disabled />
<Invalid />
</div>
);
}
export default App;
|
Step to start your application with the help of the command provided below:
npm start
Output:

Output
Share your thoughts in the comments
Please Login to comment...