How to Set Internet Priority on Windows 11?
Last Updated :
08 Jan, 2024
Short Preview!
Here is a short preview of our active and speedy learner. Follow these steps to set Internet priority on your Windows PC.
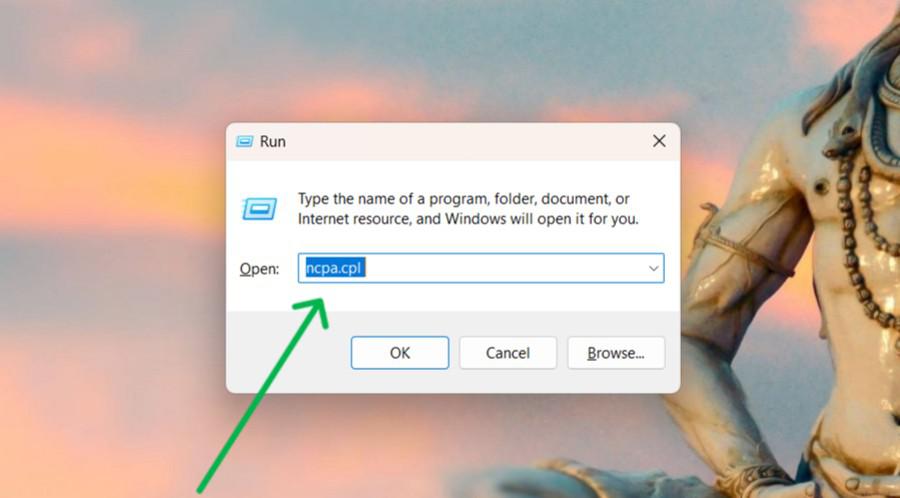
- Press Win + R > type “ncpa.cpl” > Enter.
- Right-click “Wi-Fi” or Ethernet > select “Properties.”
- Double-click on IPv4 or IPv6 > Click “Advanced.”
- Uncheck Automatic Metric > Enter 1 (or your desired number) > Click OK.
The priority of different network connections is how your computer sequences networks to access the Internet. For instance, if you have both a wireless and a wired connection available, you’d place the wired as a priority to ensure that your computer would use it. This can also be used to ensure a fast, stable connection to the Internet; you would find that very useful if your wireless signal were poor or unreliable.
In this article, we will show you how to check and change the network priorities on Windows 11.
What is Network Priority?
Network priority means how your computer prioritizes its network connections. For example, in Windows 11 you can set preferences for various network adapters. The system automatically chooses the most preferred option when multiple options are available. Now Lets see how to check network priority on your Windows PC.
How to Check Network Priorities on Windows?
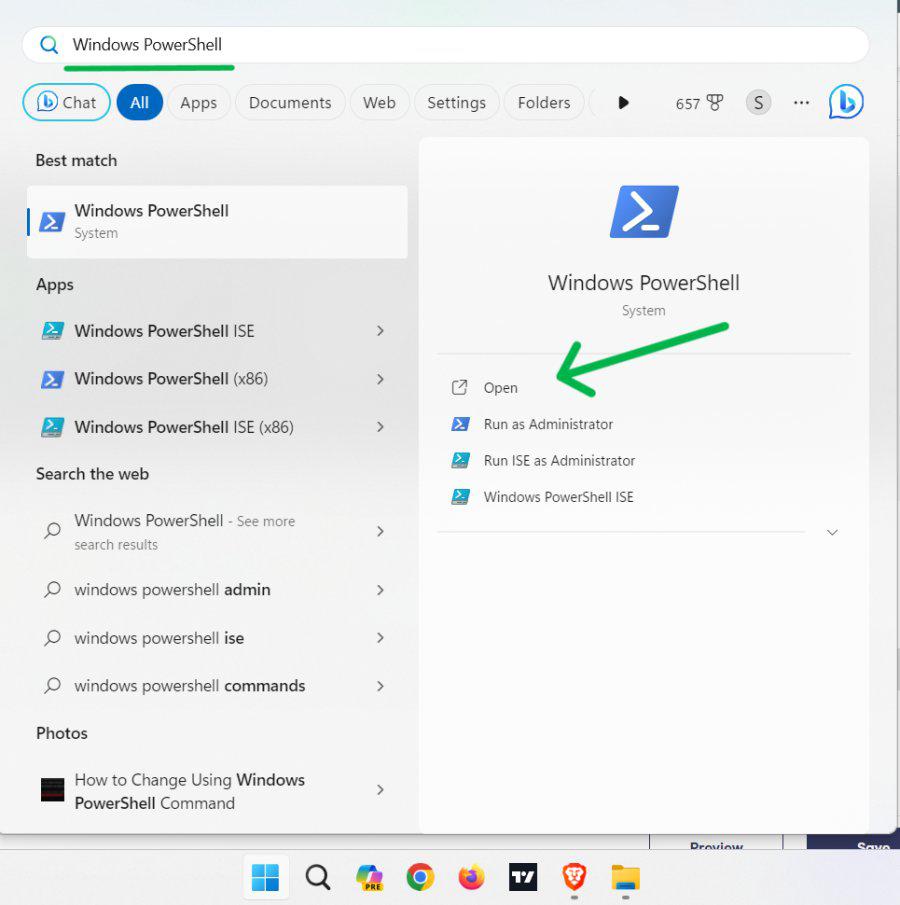
Step 1: Press Win + S to open the search bar then on the search bar type “Windows PowerShell” and open it.
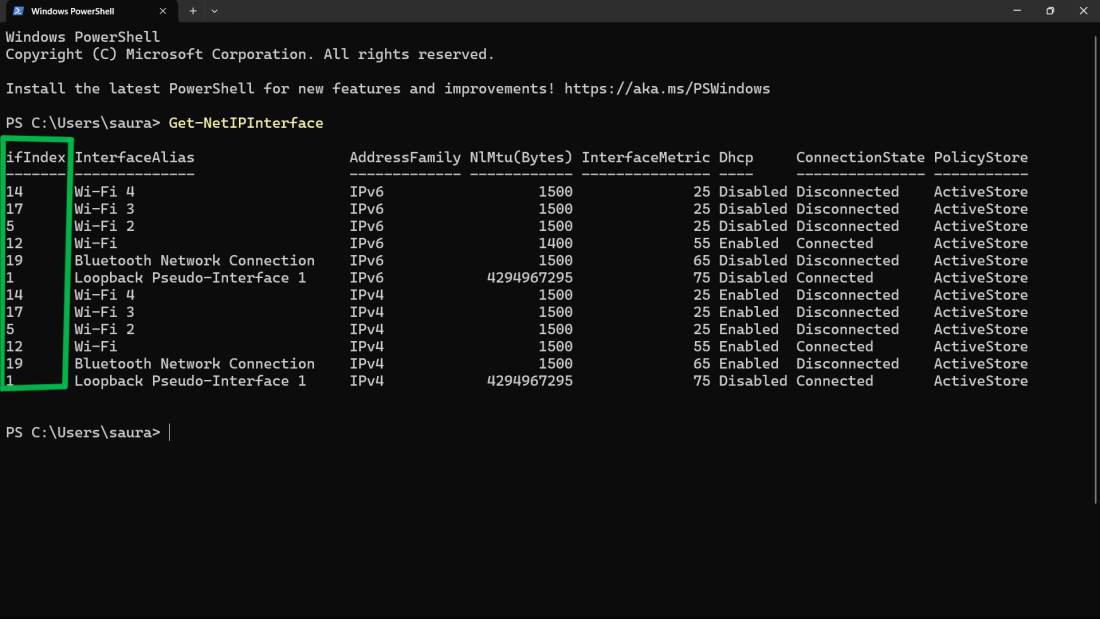
Step 2: In windows powershell type this command and hit enter
Get-NetIPInterface
Step 3: Look for the “InterfaceMetric” value.

Method 1: Change Network Priorities Using PowerShell?
Step 1: Press Win + S to open search bar then on search bar type “Windows PowerShell” then click on Run as administrator.
Step 2: Type Get-NetIPInterface to list network adapters. Note the “InterfaceIndex” (Ifindex) for your desired adapter.
Step 3: Replace “IFIndex” with the “InterfaceIndex” and “IFMetric” with your desired priority (lower for higher) in the command:
Set-NetIPInterface -InterfaceIndex [IFIndex] -InterfaceMetric [IFMetric]
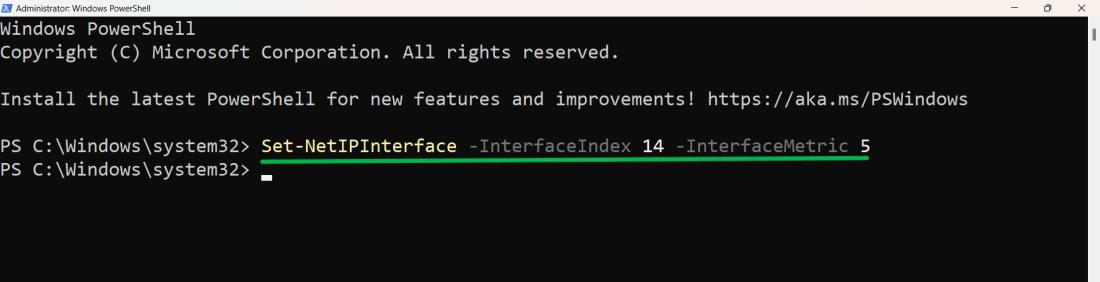
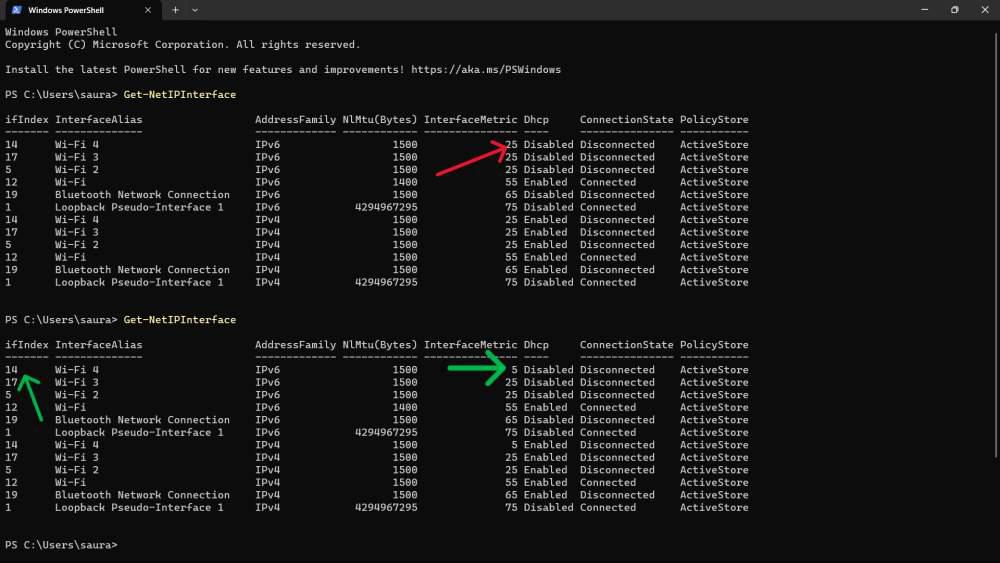
Now you can see the interfaceMetric has been changed to IfIndex 14
Method 2: Change Network Priorities Using Command Prompt
Step 1: Press Win + S to open search bar then on search bar type “Command Prompt” then click on Run as administrator.
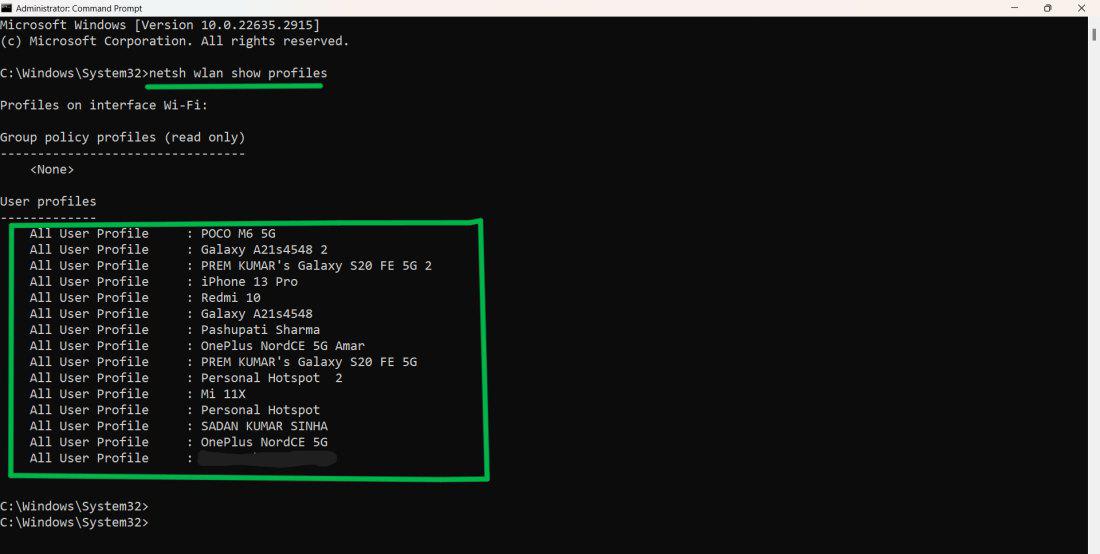
Step 2: In Command prompt type this command to show all profiles
netsh wlan show profiles
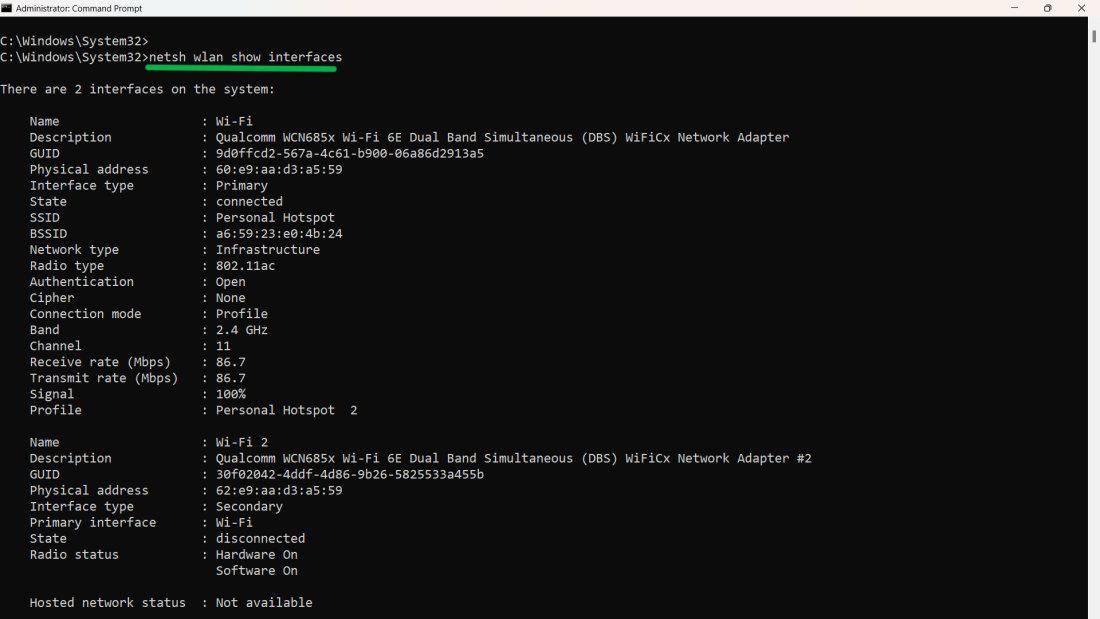
Step 3: To see details of wireless interfaces type this command
netsh wlan show interfaces
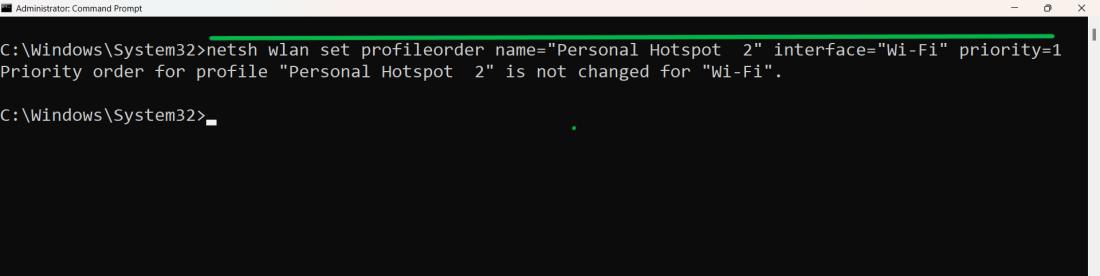
Step 4: Then, Type this command,
[WifiProfileName] should be replaced with the name of your network, [AdapterName] with the name of your wireless adapter, and [PriorityValue] with a priority number (1 being the highest priority).
netsh wlan set profileorder name="[WifiProfileName]" interface="[AdapterName]" priority=[PriorityValue]
Restart your network adapter or PC for changes to take effect.
Method 3: Change Network Adapter Priorities in Control Panel
Step 1: Press Win + R to open run dialog on run dialog type “ncpa.cpl“
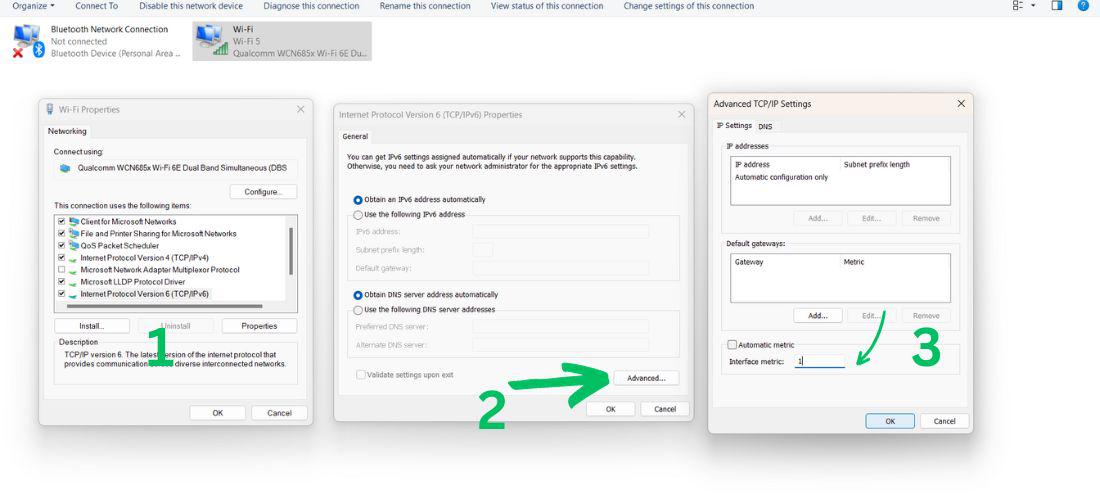
Step 2: Right click on “Wi-fi” or ethernet then select “Properties“

Step 3: Double Click on Internet Protocol Version 6 (TCP/IPv4) or Internet Protocol Version 6 (TCP/IPv4).
Step 4: Click On “Advanced“
Step 5: Uncheck the Automatic Matric then on Interface Matric enter the 1 or your desired number
Step 6: Click On “OK“
Conclusion
In Conclusion, we have shown you how to set internet priority on Windows 11 using three different methods: PowerShell, Command Prompt, and Control Panel. Suppose you have several different networks that your computer can connect to, by adjusting the network priorities of each connection. In that case, you’ll be able to ensure more stable and faster access to information.
Also Read
FAQ’s To Set Internet Priority on Windows 11
1. How to Set Internet Priority on Windows 11?
To change network adapter priorities, press Win + R, type “ncpa.cpl,” and press Enter. Right-click Wi-Fi or Ethernet, choose Properties, double-click IPv4 or IPv6, click Advanced, uncheck Automatic Metric, enter 1 or desired number, then click OK.
2. Can I prioritize different applications?
No, Windows 11 does not support specifying preferences for applications. Network adapters are the listing item that can only be set as a priority.
3. Are changes in network priorities permanent?
Yes. Changes in network priorities remain until the next change.
4. Can changing network priorities improve internet speed?
Although adjusting network priorities won’t increase speed per sec, it can help you get the most out of available connections.
5. Will this work on older Windows versions?
Similar methods exist for Windows 10 and 7, but steps and interfaces may differ.
Share your thoughts in the comments
Please Login to comment...