How To Set Up VPN on Windows 10?
Last Updated :
13 Mar, 2024
Windows 10 provides the ability to configure and manage VPN connections via the Settings app where users can connect with different VPNS services, thereby enhancing their online privacy. The establishment of a VPN is important for accessing streaming services outside the country and ensuring privacy. While Windows 10 has some modifications, the process is still recognizable and simple to navigate. Manual configuration is beneficial for corporate VPNs or work-related VPNs.
In this article, We will show you how to manually configure a VPN connection and how to install a VPN app.
How To Manually Configure A VPN Connection On Windows 10
Step 1: Press Win + I to open the settings app
Step 2: Click on Network & internet
Step 3: Then, Click on VPN.
Step 4: Click Add a VPN connection option.
Step 5: Select “Windows (built-in)” from the VPN provider dropdown list. In the “Connection name,” enter a familiar brand such as IPVanish or Private Internet Access. In the Server name or address, type the VPN server’s address such as vpnserver.com or an IP Address
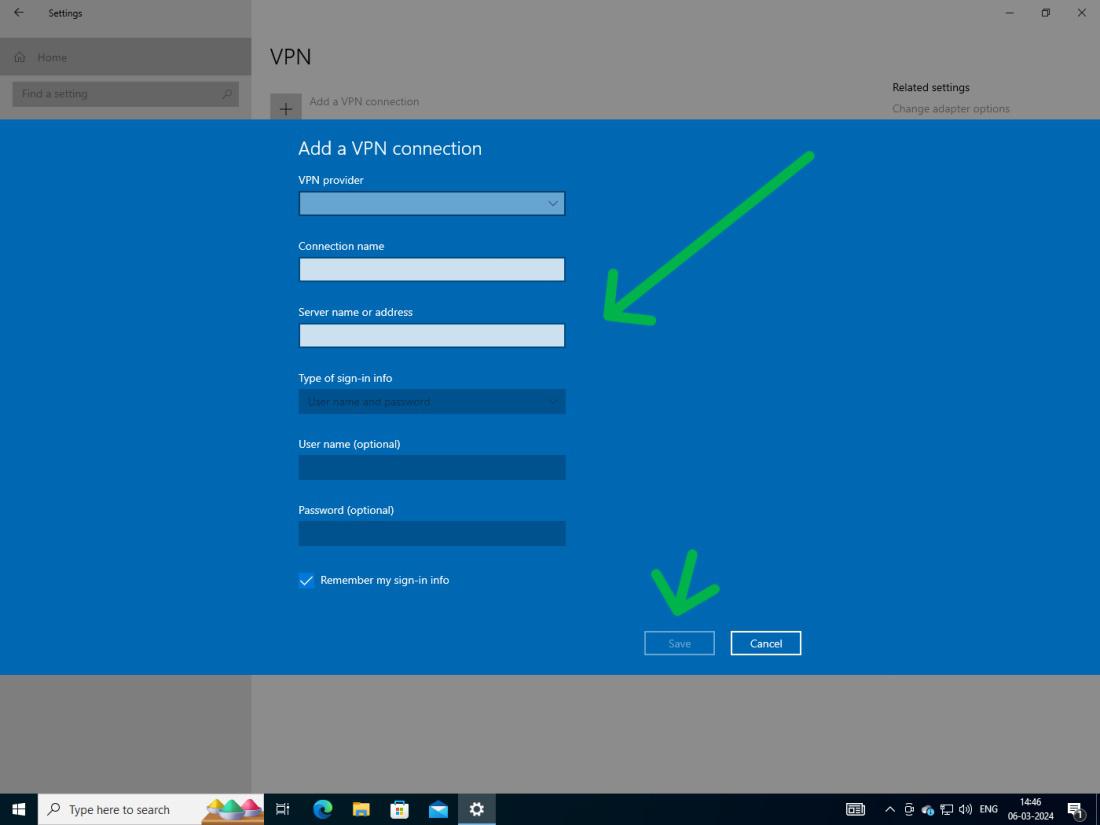
Step 6: Click on “Save”
Choose “Automatic” or the specified protocol in the drop-down list under VPN type. Select the authentication method from “Type of sign-in info.” Enter credentials if necessary. Click Save. Either from Settings or Taskbar, connect to the VPN.
How To Install VPN On Windows 10
Step 1: Choose any VPN and visit their website then,
Step 2: Download the VPN client software from the provider’s website.

Step 3: Double click on downloaded file
Step 4: Open the VPN client and log in with your account credentials.
Step 5: Connect to a server
How To Connect A VPN Connection On Windows 10
Step 1: Press Win + I to open the settings app
Step 2: Click on Network & internet Then, Click on VPN.
Step 3: Click on “Connect.”
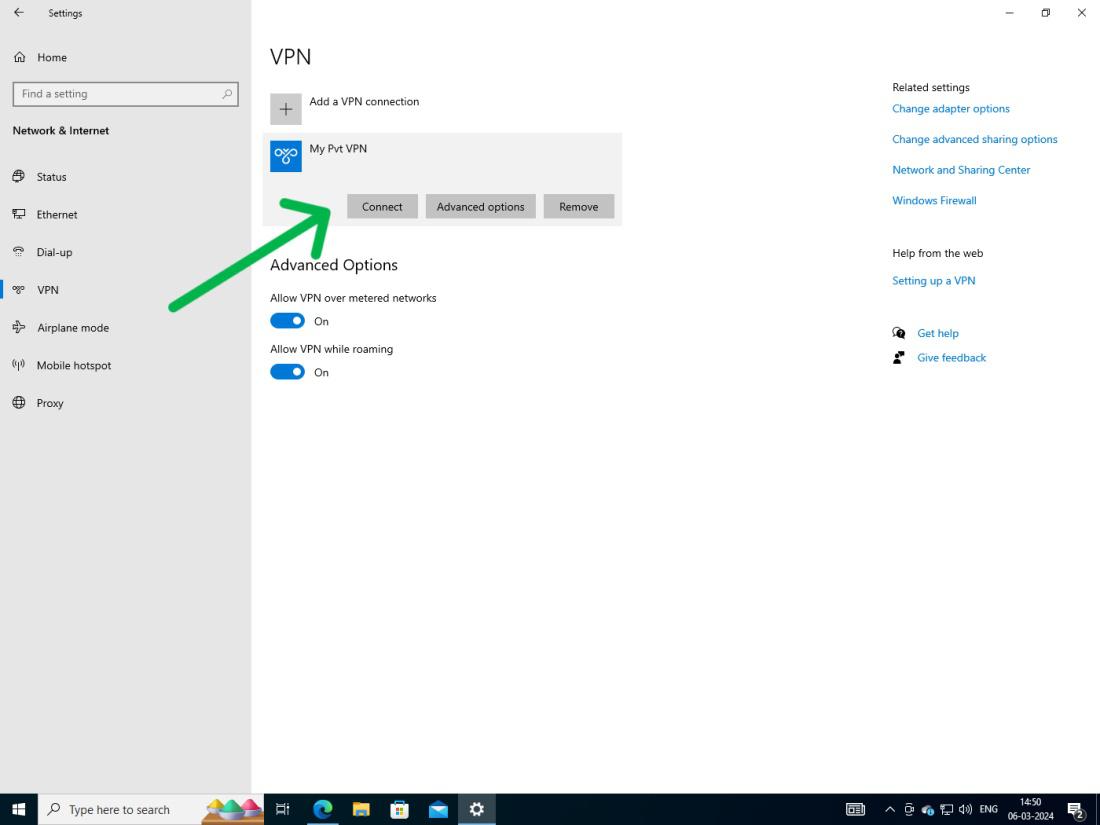
Step 4: Enter your VPN username and password if prompted.
Step 5: Once connected, you’ll see a notification confirming the successful connection.
To Disconnect a VPN connection on Windows 10
Simply click on the “Disconnect” button.
How To Remove A VPN Connection On Windows 10
Step 1: Press Win + I to open the settings app
Step 2: Click on Network & internet Then, Click on VPN.
Step 3: Click on connected VPN to expand then click on “Remove“
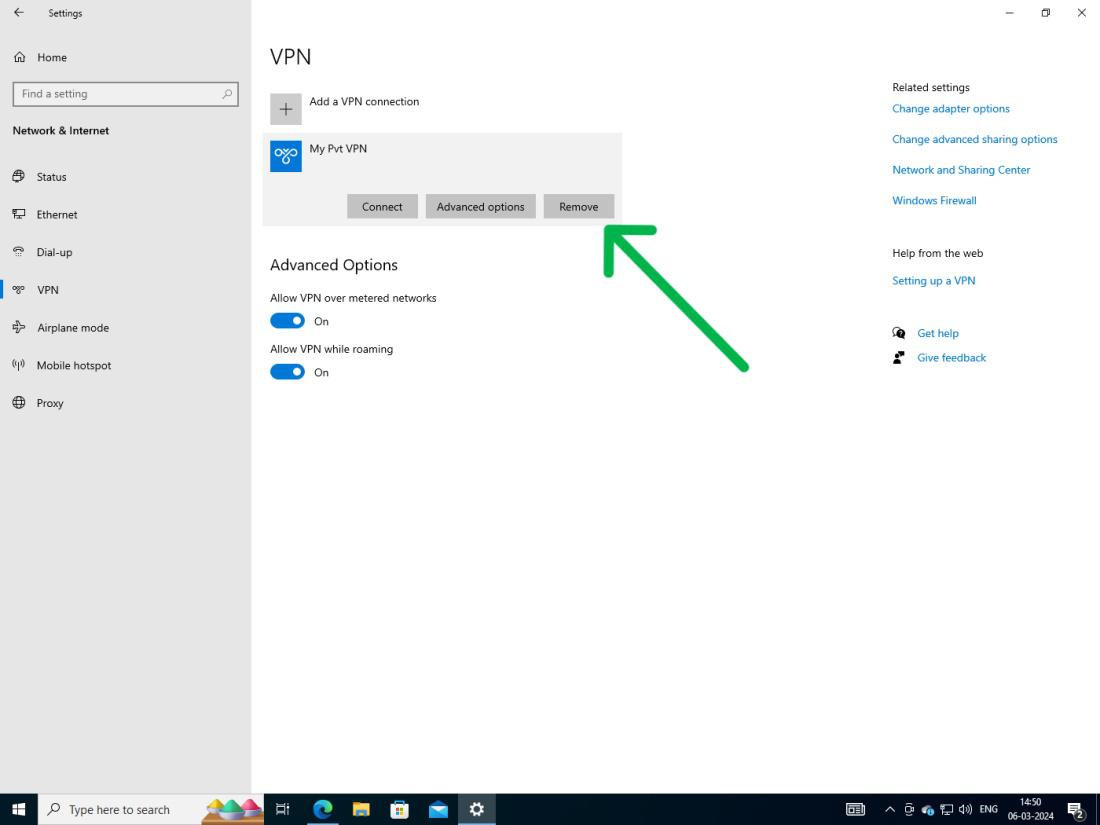
Step 4: Confirm the action by clicking on “Remove” again in the confirmation dialog box.
Conclusion
In Conclusion, Installing a VPN on a Windows computer is relatively easy and provides benefits like enabling free streaming of region-locked content, boosting privacy & security while online by encrypting data communication between your devices and servers; and improving internet performance. You can decide to set up a VPN connection manually or install the application of a virtual private network on Windows 10.
Also Read
Frequently Asked Questions to Set Up VPN on Windows 10
How To Set Up A VPN On Windows 10
To set up a VPN on Windows 10, press Win + I to open Settings, then navigate to Network & internet > VPN. Click Add VPN, choose “Windows (built-in)” as the provider, and input the connection details. Select the VPN type, authentication method, and save. Connect via Settings or Taskbar.
Does Windows 10 have a built-in VPN?
Windows 10 does not feature a built-in VPN, but it has an integrated VPN client which may connect to external third-party service.
Why is Windows 10 not allowing VPN?
If Windows 10 isn’t allowing VPN, it could be due to firewall or antivirus blocking, outdated network drivers, incorrect VPN settings, or service issues. Troubleshoot by allowing VPN access, updating drivers, configuring settings, or contacting the provider.
Share your thoughts in the comments
Please Login to comment...