Google Docs is extensively used by students as well as professionals to create reports, newsletters, resumes, and much more. It is no surprise that Google Docs owes this popularity to its wide range of easy-to-use tools. Splitting text into columns is one such brilliant feature that Google Docs offers.
You might want to create something similar to a newspaper article or splitting text into vertical columns might be a requirement for a school report. Maybe a space around a picture is bothering you or you might just want your document to look neat and professional. Whatever you need to make columns for, Google Docs makes it a cakewalk.
In this post, we will cover all the steps you need to follow to split text into columns in Google Docs. We will also look at how we can do the same in the Google Docs mobile app. Further, we will look at how we can customize or even remove these columns when they are not needed anymore.
So, let’s jump right in!

How to Make Two Columns in Google Docs
The simplest way to split text into columns in a Google document is to apply the column formatting in an existing document. If you have an existing document whose text you would like to split into columns, then follow these steps:
Step 1: Open the Document
Go to the Google Docs home page and open the required document by clicking on it.

open the required document
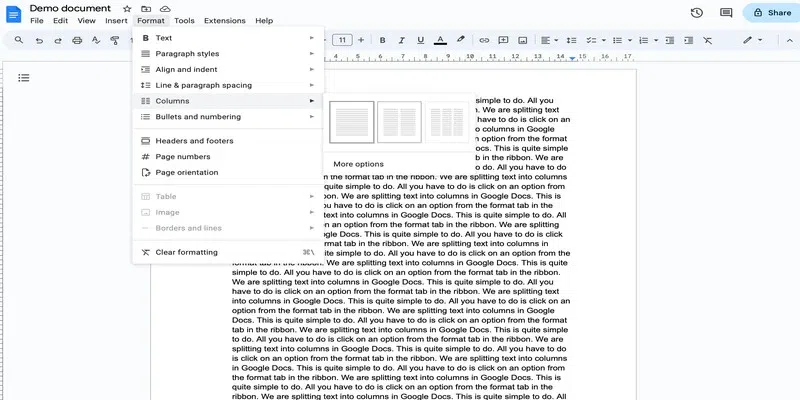
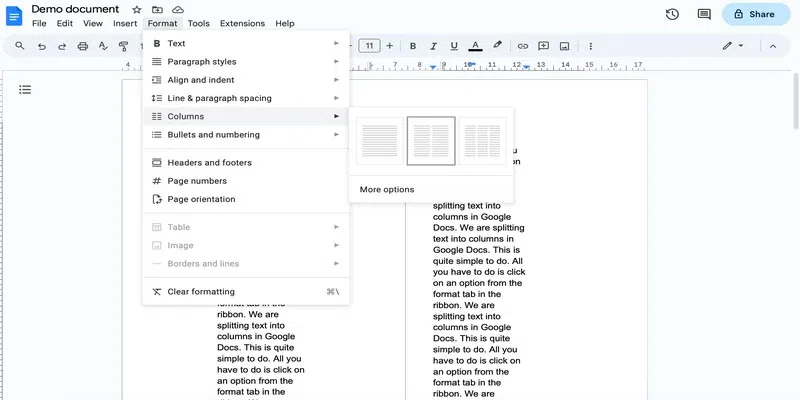
Step 2: Access Format and Click on the Columns
Go to the Format tab in the ribbon and click on the Columns option given in the drop-down.

columns drop-down
Step 3: Choose the Two-Column Style
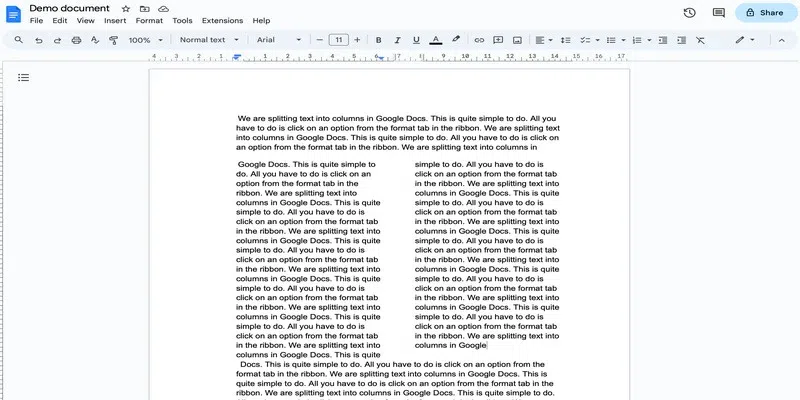
Choose the two-column option from the drop-down. Note that all the documents in Google Docs are in the one-column format by default.
choose a column style
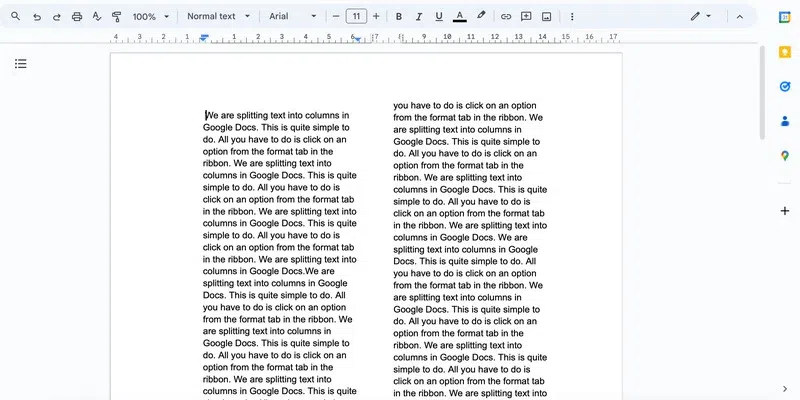
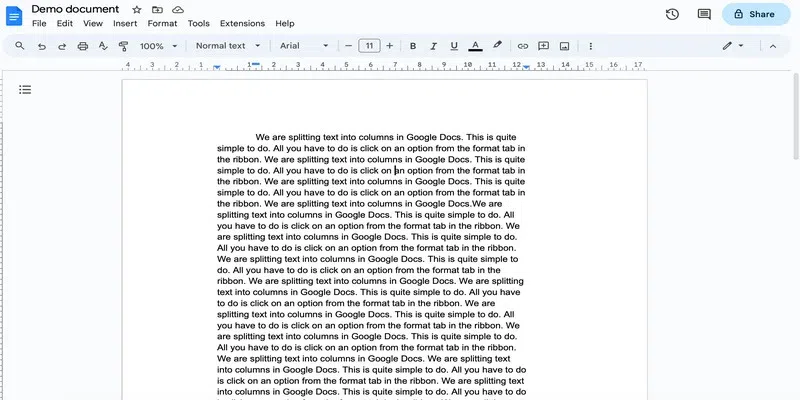
This is how the document looks in the two-column format:
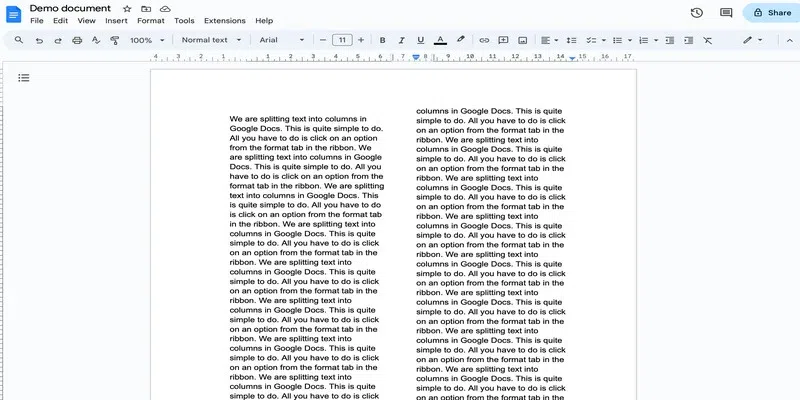
result – two columns
How to Format Columns in Google Docs
You can format columns in Google Docs in the following ways:
How to Make Google Docs Two Columns for Part of Page
In the above section, we added columns to an entire document, but we can do that for a small part of the document as well. Here is how to do that:
Step 1: Open the Document
Go to the Google Docs home page and open the required document by clicking on it.

open the required document
Step 2: Select the Desired Part of the Document
Select the part of the document that you wish to split into columns.
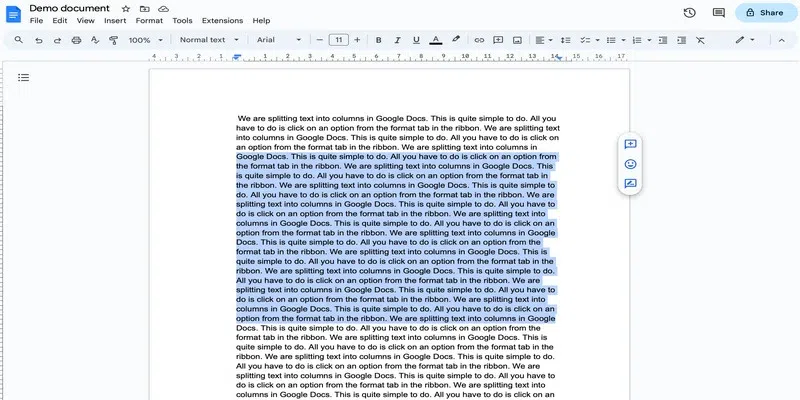
select the required part
Step 3: Find the Format Tab and Click on the Columns
Go to the Format tab in the ribbon and click on the Columns option in the drop-down.
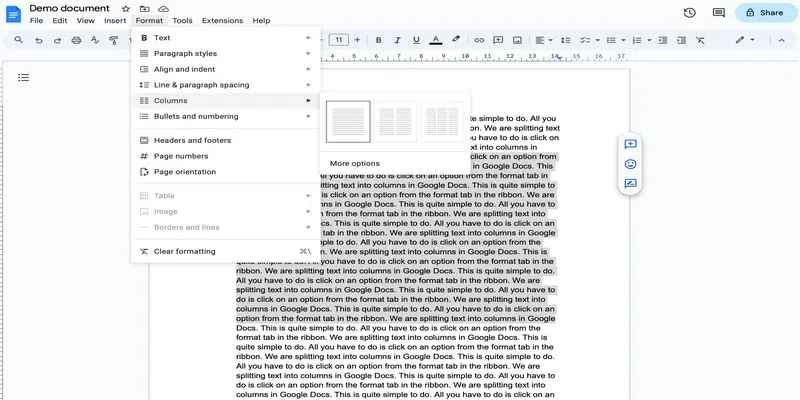
columns drop-down
Step 4: Choose the column style
Choose the two-column style.

choose the desired style
Here is what the document looks like now-
result
Adding Three Columns in Google Docs
In the previous section, we used the two-column format but if required, you can add three or more columns as well. Google Docs itself provides a three-column format.
Adding More Than Three Columns in Google Docs
Step 1: Go to Insert Tab and Select Table
Go to the Insert tab and click on the Table drop-down.

table drop-down
Step 2: Choose the Number of Columns
From the table drop-down, choose the number of columns you want to insert. Make sure you only select one row. For the sake of this example, let’s create a 4 by 1 table.
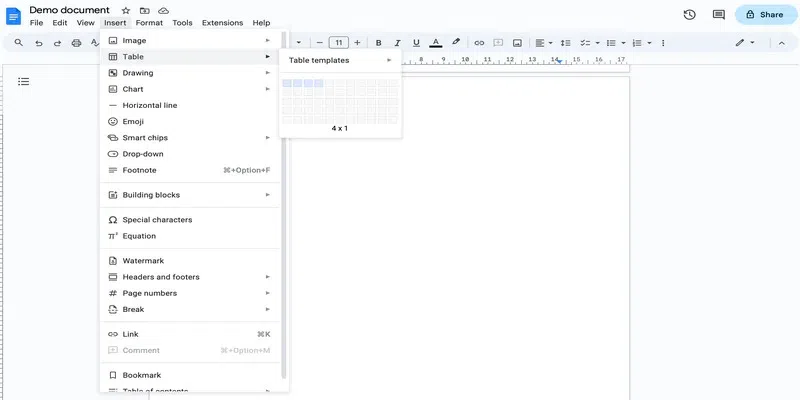
choose columns and a single row
then you can start typing in the different columns:
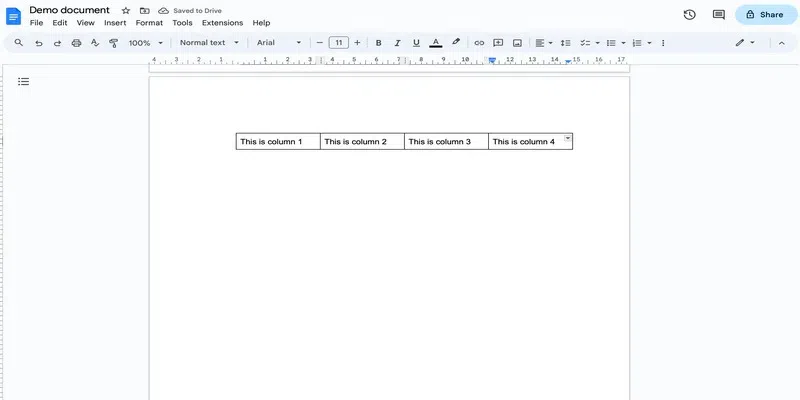
add content
If you wish to remove the table borders, then follow the next steps:
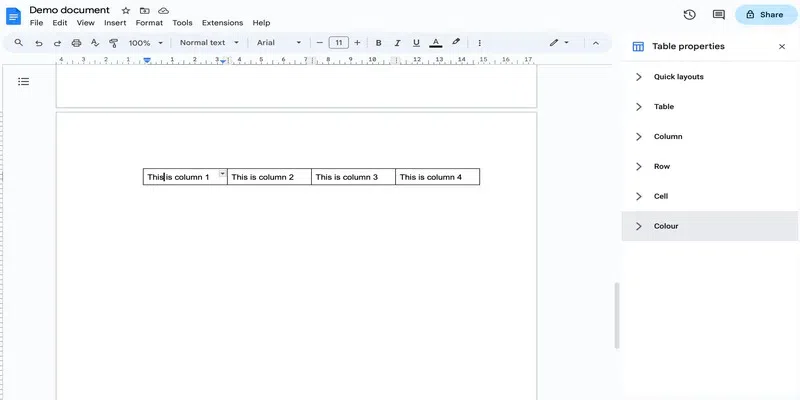
Step 3: Go to Table Properties
Go over to the Format tab and click on the Table option from the drop-down. Click on Table Properties.
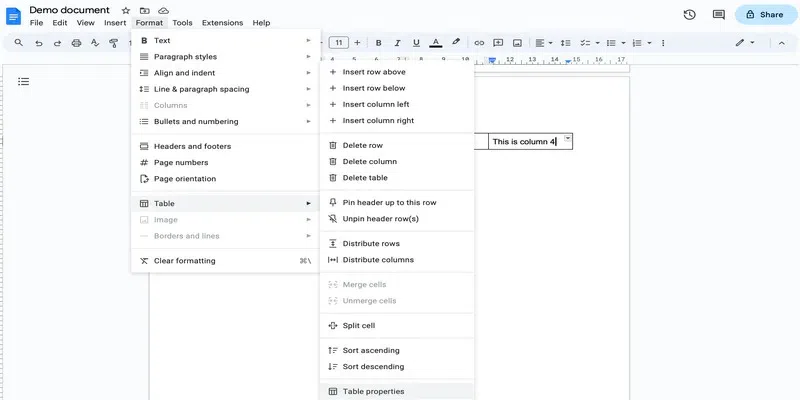
table properties
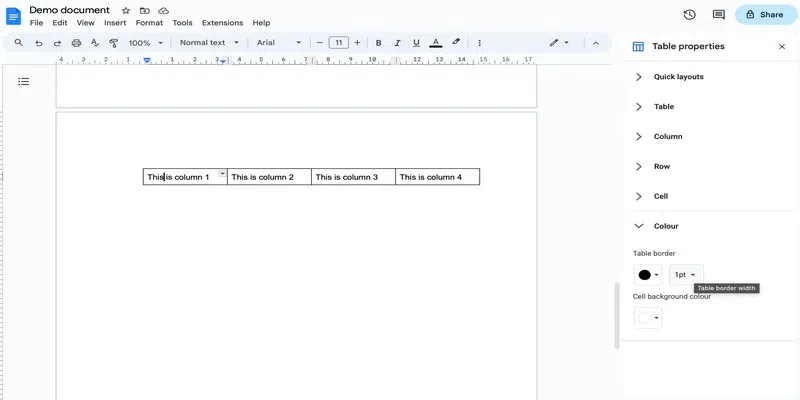
Step 4: Select the Colour
In the Table properties side pane, click on the Colour option.
color drop-down
Step 5: Select Table Border Width
Under the Table border section, click on the drop-down and set it to 1 pt by default.
size drop-down
Step 6: Set the table border
Go to the Table border option and set it to 0 pt option from the drop-down.
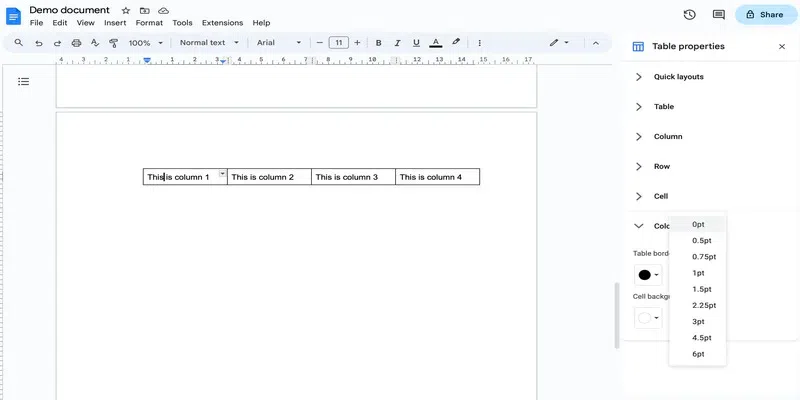
select 0 pt
This will remove the table borders as you can see:
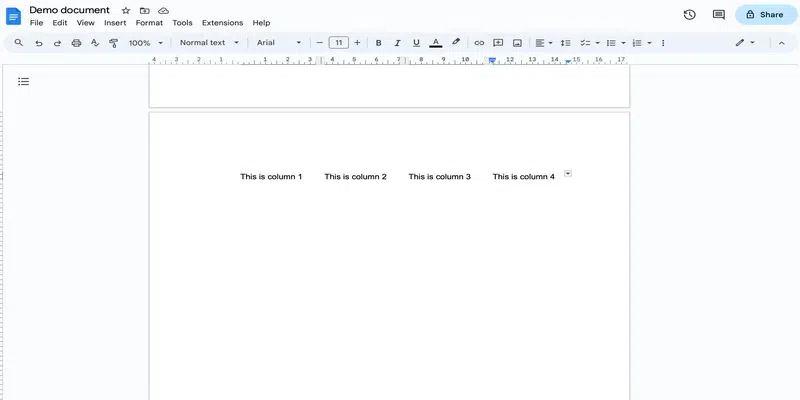
removed table borders
How to Add a Vertical Line Between Columns in a Google Docs
Here is how you can add a vertical line between columns in Google Docs:
Step 1: Go to the Columns in Format Tab
Click on the Format tab and go to the Columns drop-down.
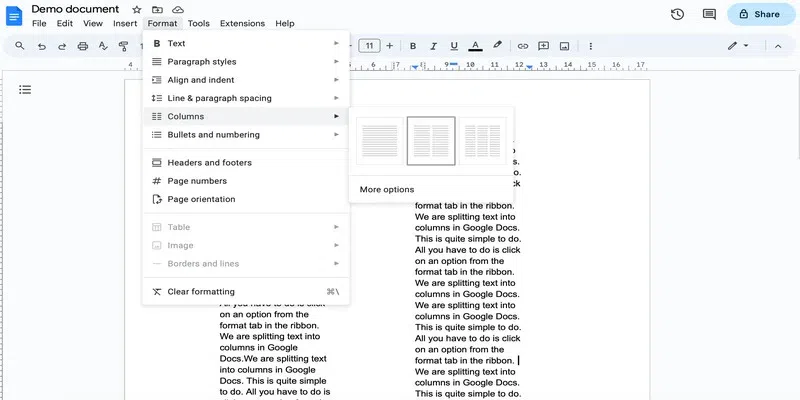
columns drop-down
Step 2: Go to more options
In the small panel that opens, click on More options present at the bottom.
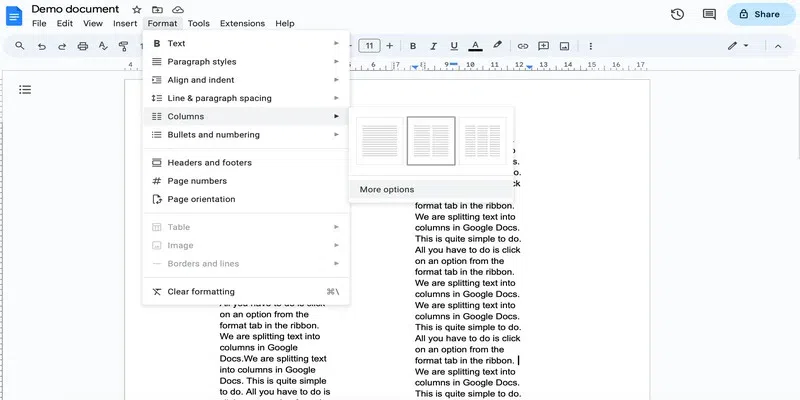
more options
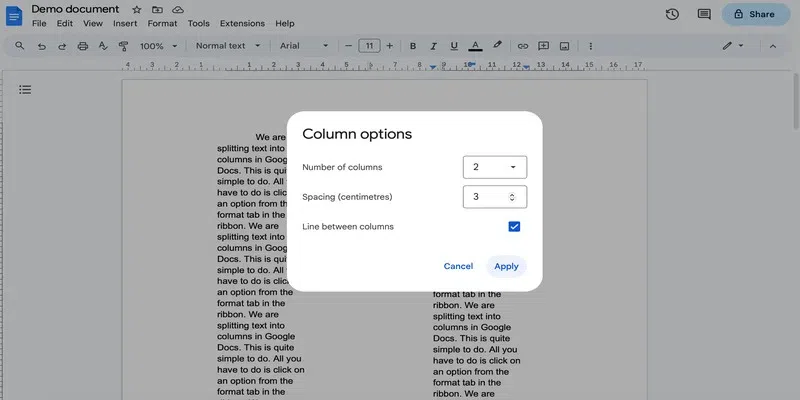
Step 3: Select the Line Between Spacing
Check the Line between the spacing box and click Apply to save changes.
check the line between the columns’ box
This is what the document looks like now:
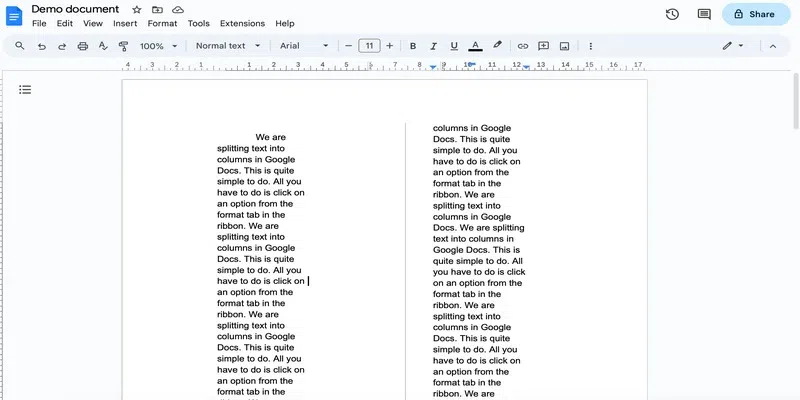
line between columns
How to Use Columns to Create a Horizontal Half Page Document
Often, the column layout is used to create a half-page horizontal document. Here is how you can do that:
Step 1: Open the Document
Go to the Google Docs home page and open the required document by clicking on it. You can also begin by creating a blank document.
open the desired document
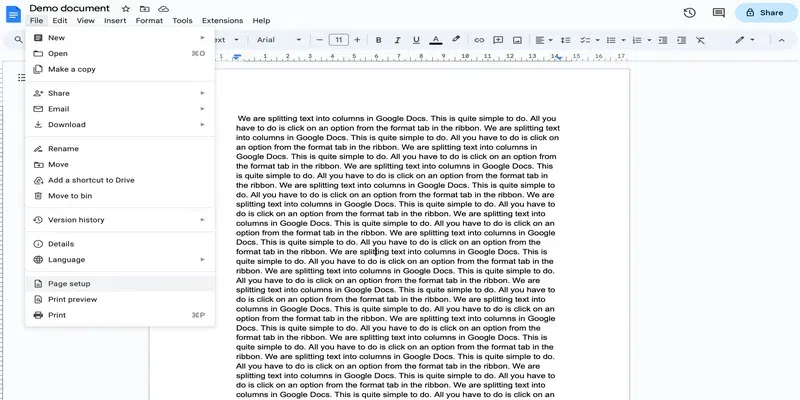
Step 2: Go to File and Select Page Setup
Go to the File tab and click on Page setup from the list.
page setup
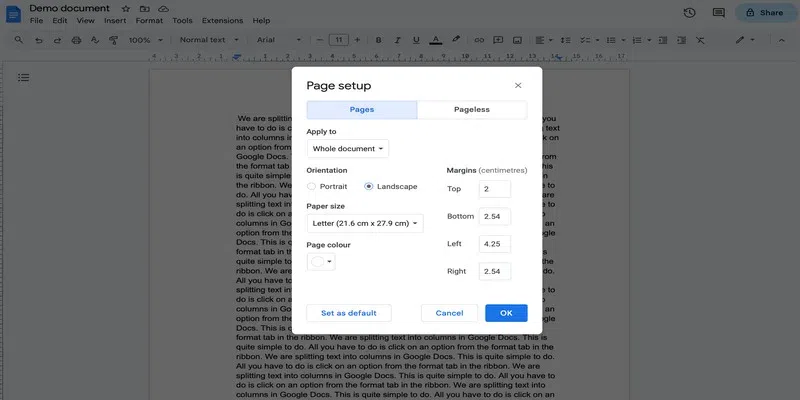
Step 3: Choose the Landscape Mode
In the pop-up that opens, click on the Landscape option and click OK.
landscape option
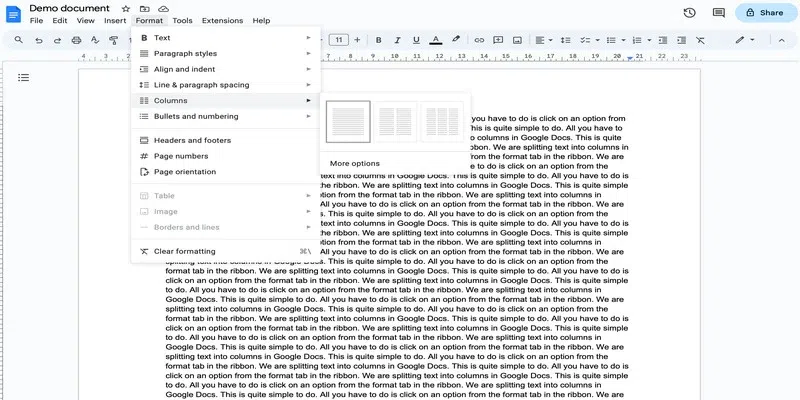
Step 4: Go to the Format Tab and Click on the Columns
Go to the Format tab in the ribbon and click on the Columns option from the drop-down.
columns drop-down
Step 5: Choose the Column Style
Choose the two-column format from the drop-down.

choose the two-column format
How to Use Columns to Fit an Image in a Google Document
Look at the example given below. There is an image between two paragraphs and the space to the right of the image looks odd.
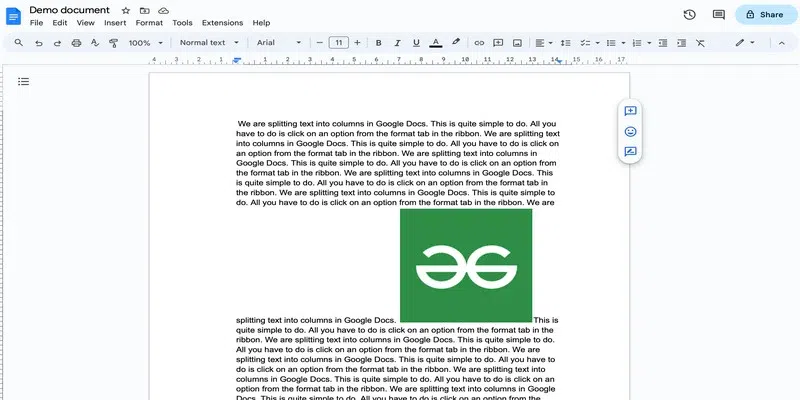
text around an image
Step 1: Select the Image and the Text Surrounding It
Select the image along with the text surrounding it.

make selection
Step 2: Click on the Columns Drop-down
Go to the Format tab in the ribbon and click on the Columns drop-down.

columns drop-down
Step 3: Choose the Column Style
Preferably, choose the two-column format.

select the desired format
This is what the document looks like now-
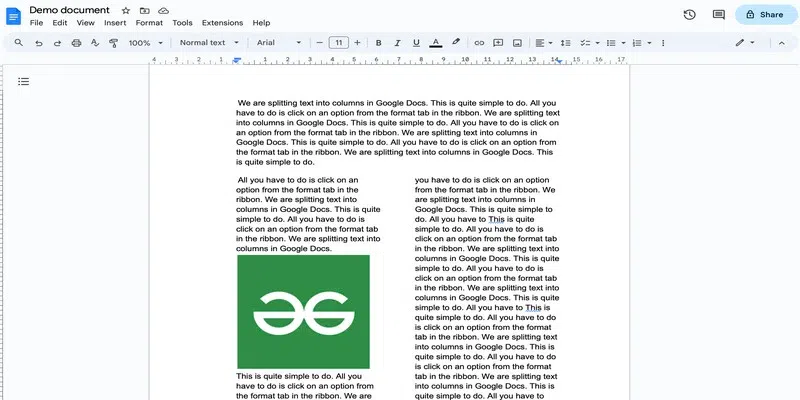
result
How to Use Column Break in Google Docs
When a document is in a two or three-column format, then you can move to new columns only when the previous columns are filled. However, needs using a column break enables you to move between different columns without having to wait for the space of one particular column to run out. Here is how you can use column breaks in Google Docs:
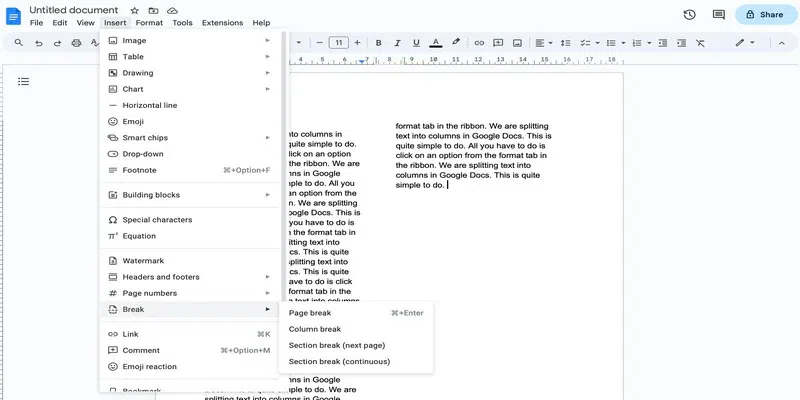
Step 1: Go to Insert Tab and Click on Break Option
Click on the Insert tab and go to the Break option.
Break option
Step 2: Select the Column Break Option
In the Break drop-down, click on the Column Break option.
column break
Alternatively, you can right-click and select the Column break option.
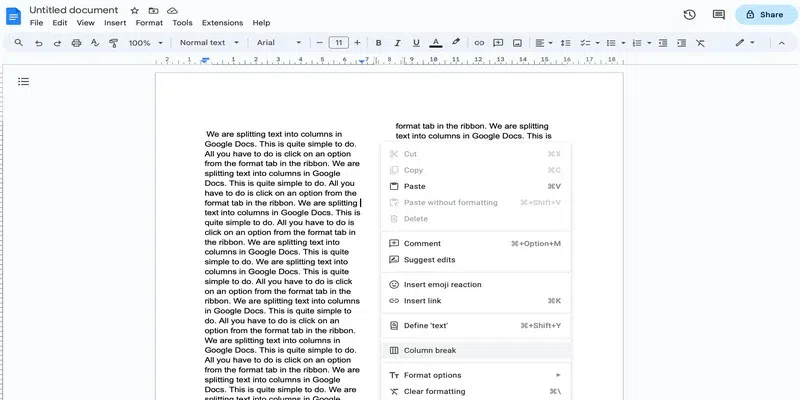
right click to insert a column break
You can now switch between columns as desired.
Customizing Columns in Google Docs
Once you have split the text into columns in a Google document, you can further change and customize the column settings to suit your needs concerning. Here are a few things that you can change to customize columns in Google Docs:
Change Indentation of columns in Google Docs
Changing the indentation of columns not only helps in aligning the text properly concerning the page borders, it also helps in changing the width of text columns. Here is how you can change the indentation of a column in Google Docs:
Step 1: Select the Column
Click anywhere inside the column whose indentation you wish to change.
select a column by clicking inside it
Step 2: Drag the Arrows to Change the Indentation
In the margin(numbered) present on the top, you will notice a blue down arrow to the right of the column and a Blue Down Arrow with a Bar to the left of the arrow.
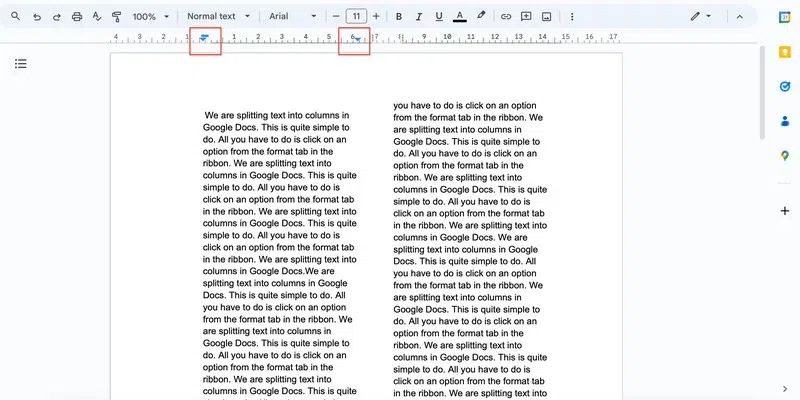
indentation bars
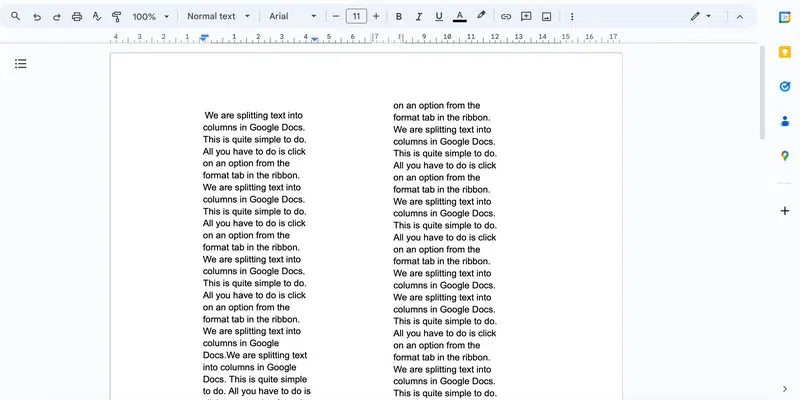
To change the left or right indentation of a column, simply drag these arrows. For the sake of this example, let’s use the arrow to the right side to change the right indentation:
drag arrows to change the indentation.
Note that the bar on top of the first down arrow changes the indentation of the first sentence of the column. If you wish to change the indentation of the first sentence of the column, then simply drag this bar.
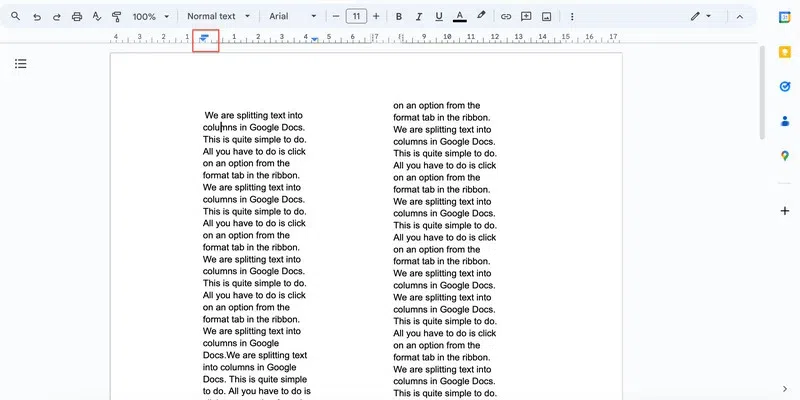
indentation bar
This is what the first column looks like now:
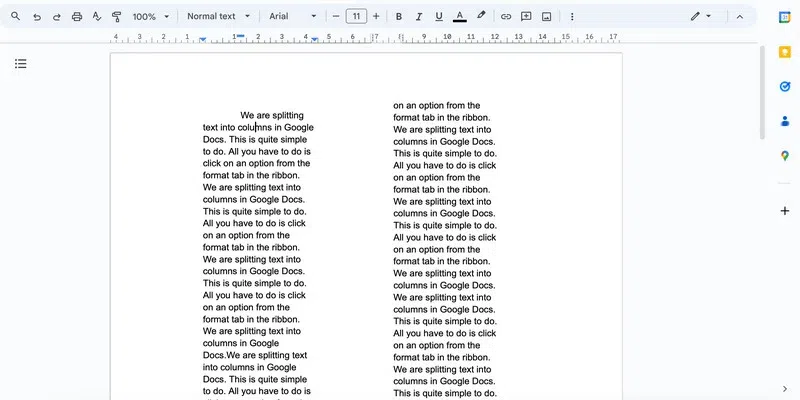
result
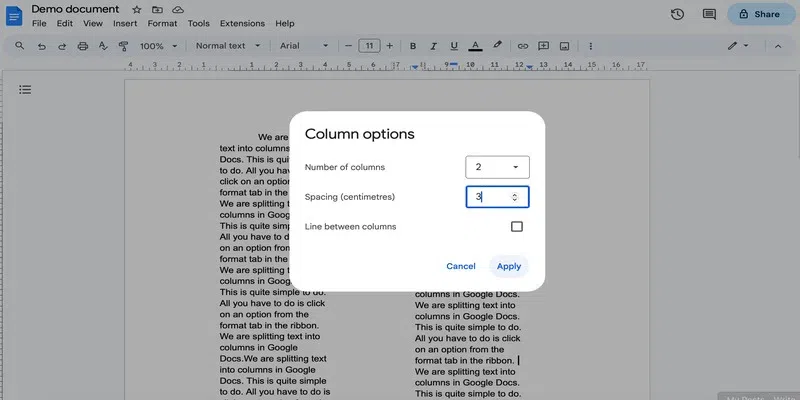
You Change the spacing between columns in Google Docs
To change the spacing between columns in Google Docs, follow these steps:
Step 1: Go to the Columns in Format Tab
Click on the Format tab and go to the Columns drop-down.
columns drop-down
Step 2: Select More Options
In the small panel that opens, click on More options present at the bottom.
more options
Step 3: Change the Spacing
In the Spacing box, set the desired number and click Apply to save changes. For the sake of this example, we are using 3.
change spacing
Here is what the columns look like now:
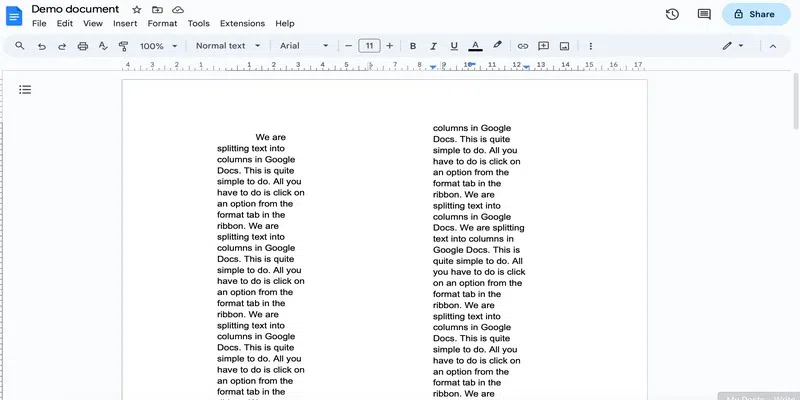
resultant spacing
How to Delete Columns in Google Docs
Removing the column layout and going back to the default single-column style of Google Docs is very simple and quick.
Step 1: Open the Document
Go to the Google Docs home page and open the required document by clicking on it.
open the required document
Step 2: Click on the Columns Drop-Down
Go to the Format tab in the ribbon and click on the Columns drop-down.
columns drop-down
Step 3: Choose the Single-Column Style
Choose the single-column layout from the drop-down.

single column layout
The document will be set to the default layout:
default layout
How to Switch Between Columns
As discussed in one of the above sections, you cannot move from one column to another while typing unless the space in the first column runs out completely. To be able to switch between columns, you must use column break as shown previously.
How to Make Columns in the Google Docs on Mobile App
Although there is no direct way to add columns in the Google Docs mobile app, you can use tables to achieve the same result to some extent. Why some extent? Because we cannot remove the border lines of the table in the phone app as we did in one of the previous sections.
Step 1: Open a new Document
Go to the Google Docs phone app and click on the plus icon to open a new document.
open a new document
Step 2: Tap the Pen Icon
Once you click on the plus icon, you can then select the pen icon to start a blank document. If you want to choose a template, then you can do that as well.

click on the pen icon
Step 3: Tap the Plus Icon
Click on the plus icon present on the right side of the ribbon.

click on the plus icon
Step 4: Choose the Table Option
Click on the Table option.
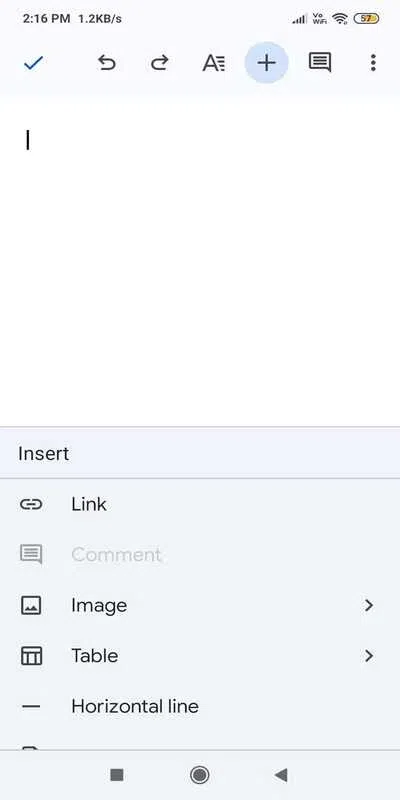
table option
Step 5: Set the Rows and Columns
Set the table rows to 1 and columns to the desired number of columns and click on the Insert table option.
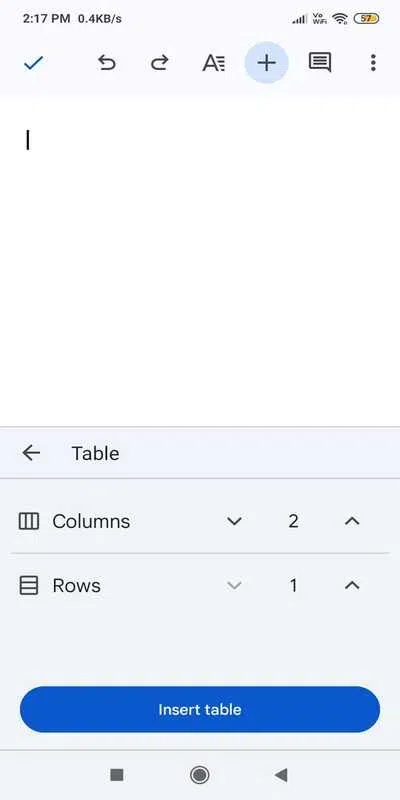
set columns and rows
Note that by default, the inserted table will look like this:
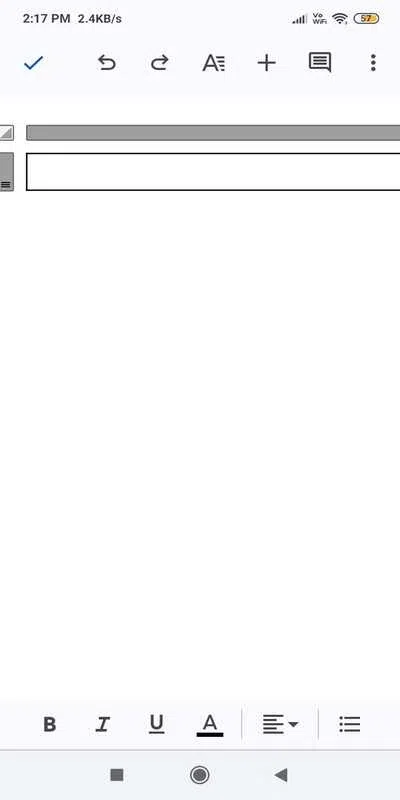
resultant table
But you can change the size of the columns by dragging the three vertical lines present on the top right of the row and then you can start adding content in these columns as desired:

resultant columns
Conclusion
In this post, we took a deep dive to learn all about adding text columns in Google Docs. Not only can we make text columns in a Google document on the browser but also in the phone app, even if it’s a workaround. Columns are a great way of laying out text in a Google document which becomes even more useful with the customisation that Google Docs offers. To add more to your skills, you can check out this post next – How to move a table in Google Docs.
FAQs
How to switch between columns in Google Docs?
To switch between columns in Google docs while typing, you can use the column break option. Simply right-click and select column break.
Can I add lines between columns in Google Docs?
Yes. You can use the column formatting options to do so. Go to the column drop-down -> more options -> check line between spacing box -> apply.
How can I format text into columns in Google Docs?
Simply go to the Format tab -> Columns Drop-down -> Select the number of columns.
How can I create two columns of bullets in Google Docs?
Once you have written the bullet points, go to the Format tab -> Columns Drop-down -> Select the number of columns.
Can I make different column sizes in Google Docs?
Yes. You can do so by changing the indentation. Simply drag the arrow bars present in the numbered margin on top of page until you are happy with the columns.
Share your thoughts in the comments
Please Login to comment...