Plugin is a software extension that brings in additional functionalities to an already existing application, especially in cases where implementing additional functionalities in the base code will be very complex and time-consuming.
Plugins are one of the best ways to use services beyond limitations. As of now, there are 230+ plugins available for ChatGPT. Now, the question is how you can create your own ChatGPT plugin. So here, we have provided a step-by-step guide on how to create a ChatGPT plugin.

Normal Plugin vs ChatGPT Plugin
The main difference between a normal plugin and a chatGPT plugin is that the plugins from ChatGPT are made specifically to cater to AI-based solutions, whereas the other plugins are not specifically built for AI chatbots, hence may include steps that may be unnecessary or quite redundant in nature.
ChatGPT plugins are mostly used to create custom-made plugins which solve a specific problem or task of an organization at that moment. ChatGPT plugins also have seamless uses whereas other plugins may have a free-tier limit, which is not a problem ChatGPT plugins may possess.
The most popular plugin types in ChatGPT are mainly, Translation Plugins (used to translate to different languages), Task-oriented Plugins (plugins created for a specific task), Entertainment Plugins (incorporating, games, quizzes, jokes, and so on), and Social Media Plugins (Enable ChatGPT to interact with social media platforms).
Some of the most popular plugins used in ChatGPT in recent times are:
- OpenTable (making restaurant reservations)
- Speak (Communicate in different languages)
- Zapier (Provide seamless communication via prompts in Gmail, MS Teams, Outlook, and so on.)
- Wolfram (Provides access to real-time data)
With the release of GPT-4, they have released a beta version, in which it is possible to use plugins present in GPT or furthermore, create our custom plugin. Here, we’ll learn how to create and implement a custom plugin in ChatGPT.
Creating a ChatGPT Plugin – Step-By-Step Guide
Basic Outline
Before we start creating a plugin, we need to decide on what we will be basing our plugin on. Here, as a demonstration, the top headlines of news will be displayed using News API, a free API to which you can register and get a free API key that helps you to use the API for your own projects. After creating the application which utilizes the API key, we then wrap it in an application and host it in a server so that ChatGPT can go through the servers and print the top news headlines via ChatGPT.
Installation
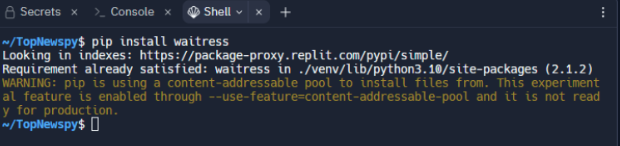
For this, we need to install the Waitress library in our repl.it library, generally used in developer applications to initiate a request using the command:
pip install waitress
Other than that, we need to import the requests library in order to send requests to the API URL. We also need to import OpenAI in order to create a ChatGPT plugin in our system without using ChatGPT Plus.
pip install --upgrade openai
First, go to the news API present in newsapi.org and register for an account.
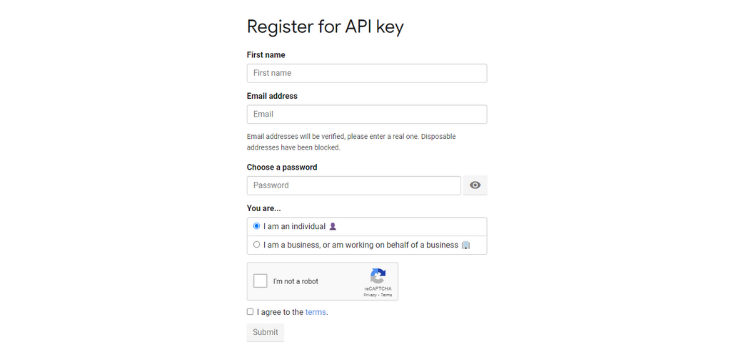
After registering, you will be provided with an API key, with which you can integrate your work using the API.
Note: Any API key is supposed to be kept secret. In case it is leaked, it is possible to generate a new API key.
Now that we have our API key, let us run a simple program that utilizes the API to print the top headlines in India.
Step 1: Testing and Creation
In order to build an application, we first need to test its functionalities separately, before combining them to form an application on which we can base our plugin. In this case, we’ll be using the News API key to help print us the top news headlines. This code will be the base from which we will later base our plugin.
Code:
Python
import requests
def fetch_news(api_key):
params = {
"country": "in",
"apiKey": api_key
}
response = requests.get(url, params=params)
data = response.json()
if response.status_code == 200:
articles = data["articles"]
for article in articles:
title = article["title"]
source = article["source"]["name"]
print(f"{source}: {title}")
else:
print("Failed to fetch news:", data["message"])
API_KEY = 'YOUR_API_KEY'
fetch_news(API_KEY)
|
After importing the requests library, the URL of the API is used to get the top news headlines, specifying the country and your API key. A request is then made from your API and the response is stored in a JSON file as data. The output for this code prints the most popular news headlines along with their citations or news media outlets. The output is executed in Windows Powershell.
Output:
Step 2: Wrap the Functionality Into An Application
We will need to wrap this functionality into an application in order to turn it into a plugin. We can refer to other functionalities available in News API linked here.
In order to create a plugin, an HTTP server domain is needed and in that case, we need to create our own domain. In this demonstration, Repl.it is used as the hosting domain as it provides a free HTTP domain in which we can send requests which ChatGPT will do when utilizing the Plugin.
After this, we need to create an OpenAPI application, which is significantly different from a Flask application. A detailed explanation of how to create a plugin is provided in the OpenAPI documentation.
Let us create an application to print the top news headlines using Python in a Repl.it environment.
Code:
Python
from flask import Flask, jsonify, send_from_directory
from waitress import serve
import requests
import os
my_secret = os.environ['API_KEY']
app = Flask(__name__)
@app.route('/convert', methods=['GET'])
def top_headlines():
api_key = my_secret
country = 'in'
params = {
"country": country,
"apiKey": api_key
}
response = requests.get(url, params=params)
data = response.json()
if response.status_code == 200:
articles = data["articles"]
headlines = []
for article in articles:
title = article["title"]
source = article["source"]["name"]
headlines.append({"source": source, "title": title})
return jsonify(headlines)
else:
return jsonify({"error": data["message"]}), response.status_code
@app.route('/.well-known/ai-plugin.json')
def serve_ai_plugin():
return send_from_directory('.', 'ai-plugin.json', mimetype='application/json')
@app.route('/.well-known/openapi.yaml')
def serve_openapi_yaml():
return send_from_directory('.', 'openapi.yaml', mimetype='text/yaml')
if __name__ == "__main__":
serve(app, host='0.0.0.0', port=8080)
|
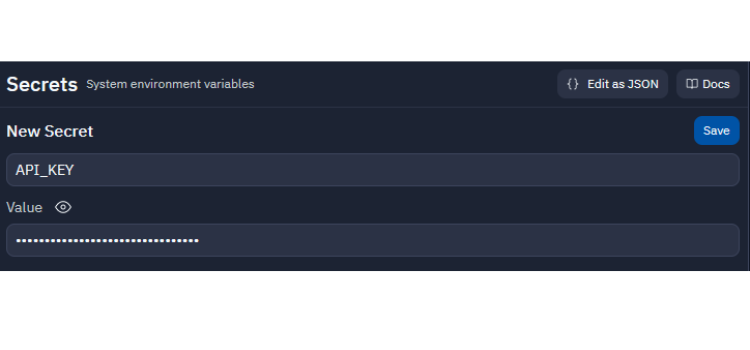
Since we’re using a repl.it hosting system, anyone can view your repl and hence, we declare an environmental secret as API_KEY in the System environment variables section. It has a similar function to the gitignore file in Github.
For the directories of the JSON files, it is advisable to add a “/.well-known” directory for both the JSON and YAML files.
Step 3: Configure the JSON and YAML Files and Link Them to the Application
For an application, we need a JSON file to store data, and a YAML file to configure the application. Using the blueprint provided by the OpenAPI documentation, we can configure our own JSON and YAML files.
Using the OS library, we call the environmental secret. After which, we send a request to the News API to collect data and print the news headlines and their sources upon request. Using the blueprint from the docs, we create a YAML file for our needs and save it as ‘openapi.yaml’.
In this YAML file, edit the URL section with your registered domain. Here, the free HTTP domain provided by repl.it has been utilized. It is used to define the configuration settings for our plugin.
YAML File:
Python
openapi: 3.0.3
info:
title: News API Browser Extension
description: An API for fetching top headlines from News API
version: 1.0.0
servers:
- url: https://topnewspy.2211jarl.repl.co
paths:
/top-headlines:
get:
summary: Get top headlines
description: Retrieves the top headlines from News API
responses:
'200':
description: Successful response
content:
application/json:
schema:
$ref: '#/components/schemas/TopHeadlinesResponse'
components:
schemas:
TopHeadlinesResponse:
type: array
items:
type: object
properties:
source:
type: string
title:
type: string
|
Similarly, to store the data generated while users utilize the plugin, we need to create a JSON file to store our data and save it as ‘ai-plugin.json’.
JSON File:
{
“schema_version”: “v1”,
“name_for_human”: “News API Plugin”,
“name_for_model”: “newsapi”,
“description_for_human”: “Plugin for accessing top headlines from the News API.”,
“description_for_model”: “Plugin for accessing top headlines from the News API.”,
“auth”: {
“type”: “none”
},
“api”: {
“type”: “openapi”,
“url”: “https://topnewspy.2211jarl.repl.co/.well-known/ai-plugin.json”,
“comment”: “Replace with your domain”,
“is_user_authenticated”: false
},
“logo_url”: “https://example.com/logo.png”,
“contact_email”: “support@example.com”,
“legal_info_url”: “https://example.com/legal”
}
Output:

The repl.it website returns “URL Not Found” since it lacks an HTTP domain. Additionally, this demonstrates that the server hosting our News Headlines plugin is operational.
Step 4: Create The Plugin
A. If you do not have a ChatGPT Plus account:
The OpenAI API provided without charge by OpenAI, the business that created ChatGPT, allows us to achieve this. By using the Openapi API connection to develop our Top News headlines Plugin-NewsBot – the name of the plugin that we have created. We can create our plugin in our system by following the instructions provided in this documentation.
We incorporate our News API application inside the NewsBot Plugin, whose function is specified in the messages, by wrapping it and setting a five-headline maximum. With this, we can program our chatbot to behave like ChatGPT and give us the most recent news stories.
Code:
Python
import openai
import requests
openai.api_key = "OPENAI_API_KEY"
messages = [
{"role": "system", "content":
},
]
def fetch_news(api_key, num_headlines=5):
params = {
"country": "in",
"apiKey": api_key
}
response = requests.get(url, params=params)
data = response.json()
if response.status_code == 200:
articles = data["articles"]
for i, article in enumerate(articles[:num_headlines]):
title = article["title"]
print(f"{i+1}: {title}")
else:
print("Failed to fetch news:", data["message"])
API_KEY = 'NEWS_API_KEY'
def chatbot(input):
if input:
messages.append({"role": "user", "content": input})
chat = openai.Completion.create(
engine="text-davinci-002",
prompt=f"{messages[-1]['content']}\nUser: {input}\nNewsBot:",
temperature=0.8,
max_tokens=2048,
top_p=1,
frequency_penalty=0,
presence_penalty=0
)
reply = chat.choices[0].text.strip(fetch_news(API_KEY))
messages.append({"role": "assistant", "content": reply})
print(chatbot("What are the top news headlines in India?"))
|
To get the desired output, run the code in your system using Windows PowerShell.
Output:
B. With ChatGPT Plus Account:
If you have a Plus account, we must first enable plugins in GPT-4 since it is disabled by default. We need to go to the settings and click the beta option and click “Enable plugins”. Then click the plugins pop bar on the top of ChatGPT and select “Create Custom Plugin”.
Then copy and paste the domain, that is, our repl.it link for ChatGPT to read the application along with the JSON file and YAML file to create the custom plugin.
Now, the plugin has been created and commands can be asked utilizing the plugin.
Note: Errors can be raised when the proper engine for the openai module is not defined. There can also be server errors, especially when the HTTP servers are down. The plugin may not work properly if there is no proper HTTP server.
Conclusion
Consequently, it is only available in ChatGPT Plus and only in GPT-4, which is a paid subscription, hence, it is not accessible to everyone as of now. The beta version of GPT-4 is a very powerful tool and is constantly expanding to meet developers’ creativity. Implementing plugins in ChatGPT has been the most powerful functionality given to the users to improve upon its creation.
Must Read
Share your thoughts in the comments
Please Login to comment...