In this era, one of the most groundbreaking discoveries was the introduction of ChatGPT created by OpenAI in the year 2021. With ChatGPT, you could chat with it like a chatbot, ask various questions, and get a response from it.
But, before we get into it, why is ChatGPT so successful?
What is ChatGPT?
ChatGPT is a Generative AI which is an LLM (Large Language Model). It has been trained to mimic human interactions while chatting with people. Its constant updates have improved at all times. OpenAI reportedly spends $11.2 million to maintain and upgrade ChatGPT.
Its name provides more explanation to its purpose “Chat” in it is a chatbot, and GPT is the name of the transformer architecture used to train the LLM. GPT stands for “Generative Pre-trained Transformer”. It has several engines that constantly get updated, such as GPT 3, GPT 3.5, and then, the recently released GPT 4.
Now that we know about ChatGPT, you need to know how LLMs work, and also how the transformer architecture plays a role in the working of ChatGPT. This is important to learn as you build your very own ChatGPT to create it correctly so that it doesn’t confuse you in the end.
What is the Transformer Architecture?
Transformer Architecture has caused a breakthrough in the field of NLP with its ability to generate coherent texts without any human interference. It has two parts, an encoder which encodes the data and then, sends it for processing, after which, the output is sent to a decoder which decodes the output to readable format. This is much better for NLP (Natural Language Processing) compared to other Neural Networks such as ANN (Artificial Neural Network), RNN (Recurrent Neural Network), or CNN (Convolutional Neural Network).
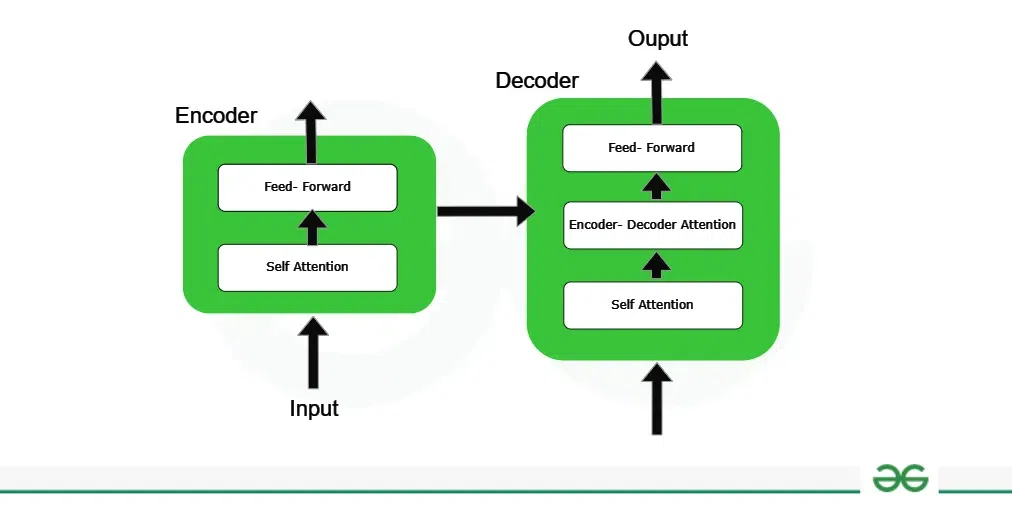
Similar to the other Neural Networks, the transformer accepts inputs sequentially. But, it transforms the entire input at once instead of doing it in parts. This is very useful especially when it is important to keep the semantic context of the text you want to process. One of the transformer architectures used in ChatGPT is the “Generative Pre-trained Transformer”.
GPT-Generative Pre-trained Transformer
It is a type of transformer architecture used in Generative AI due to its major success in its use case. It wasn’t until 2017, that Google developed the transformer architecture. Fast forward to 2018, OpenAI developed the GPT model from which, they based their massively successful chatbot, ChatGPT on. In 2021, it released ChatGPT with the GPT-3 transformer model. Ever since that, OpenAI has constantly updated the model, trying to improve it as much as possible.
What is Custom ChatGPT?
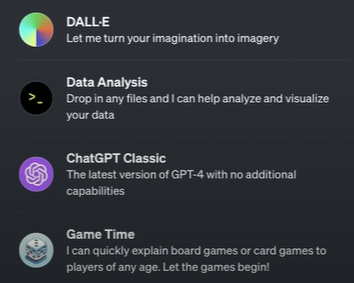
To maximize user interactions and step up their game, they’ve recently rolled out a new update where GPT-4 users, the ChatGPT Plus users can create their custom ChatGPTs which can analyze their local storage and perform better data analysis in their local storage. In their recent blog, they announced the release of users being able to create their custom ChatGPTs for various uses, even something as simple as creating an AI Agent to play board games with. Creating your very own ChatGPT has never been easier.
To be able to do so, you’ll need to either have Enterprise GPT or ChatGPT Plus. You now have the ability to create and deploy your very own ChatGPT to the public. If you have either, the process to do so is simple. They’ve also created demo links to try out some of the custom GPTs created.
They call this deployment as GPTs.
Keep in mind that if you have Enterprise GPT, you can only make your GPT private.
Why do you need to create a custom ChatGPT?
If you are the kind of person who struggles with organizing and storing data, developing a personal GPT to do so will make your life way easier. Another reason to do so is if you are intimidated by coding, don’t worry! This has no coding at all whatsoever.
With custom ChatGPTs, you have more freedom to develop it and make it provide the responses you need by training it with the data you have locally. This increases individuality and in the long run, improves efficiency. It also gives room to test and have fun with your friends. If any of these sound appealing to you, you need to start creating a custom ChatGPT by following the steps below.
What are the Prerequisites to Create a Custom ChatGPT?
There are a few things you’ll need to have to be able to create your custom ChatGPT.
- Account access: You’ll need to have an account with a subscription to ChatGPT Plus or Enterprise GPT
- Define your objectives properly: Before you go around creating a custom ChatGPT, write somewhere or define what you need for your custom ChatGPT and write it.
- Clear goals: Maximize your GPT’s accuracy by defining the end point of its use case.
With that out of the way, you can start building your custom ChatGPT by accessing the builder as shown.
How to Create Custom ChatGPT with OpenAi’s GPT Builder?
You can build your very own GPT from OpenAI by following the steps below. You must have ChatGPT Plus or Enterprise GPT.
Step 1: Go to the Website
Go to the home page of Open AI to start with the creation of your GPT. Make sure you have ChatGPT Plus account. In case you haven’t logged in or your log-in has expired, it will redirect you to the log-in page. After logging in, you’ll go to the page.
Step 2: Start GPT Builder
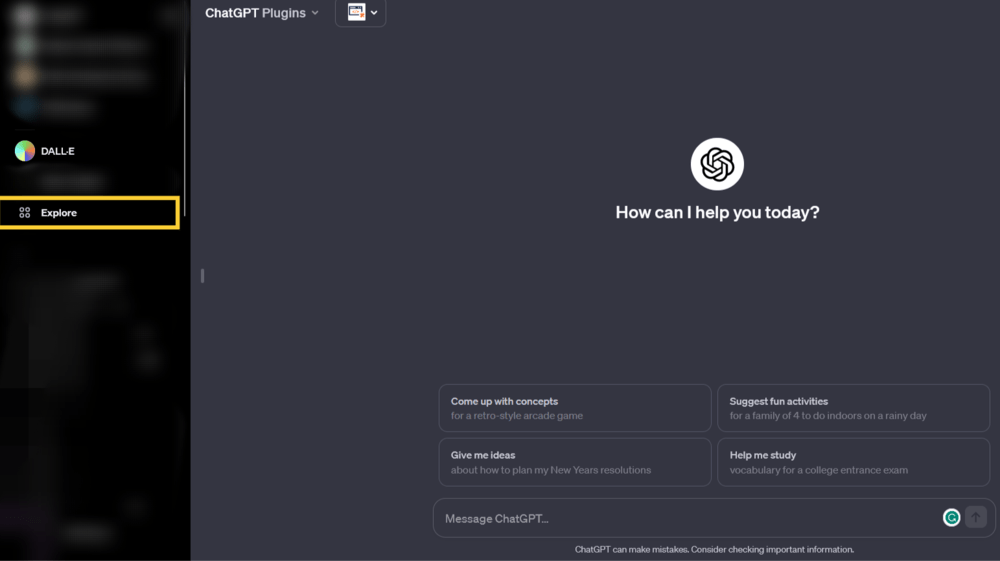
On the left-hand side of the Chat, click “Explore” in there.
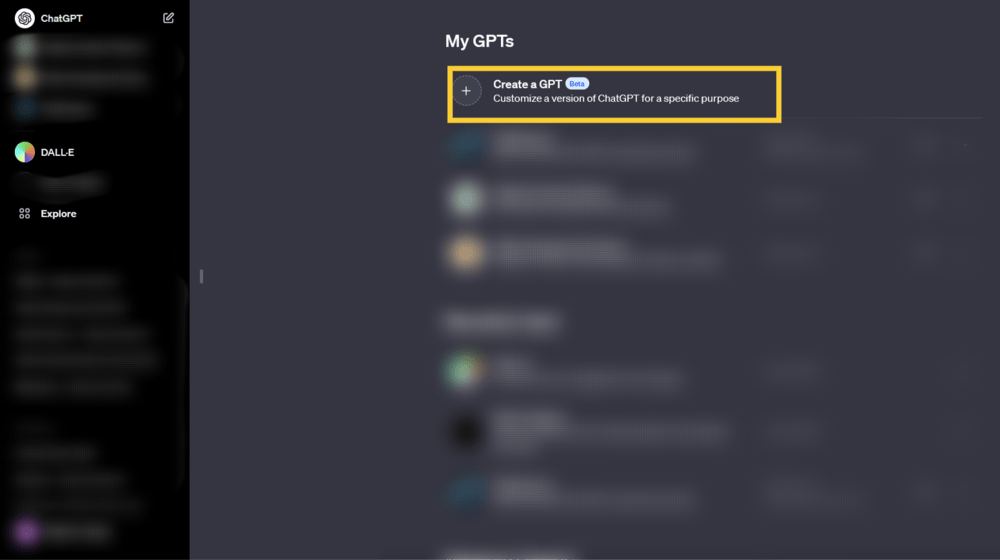
Step 3: Use the Builder to set up
Another screen opens where you can click “Create a GPT” to start creating your custom GPT.
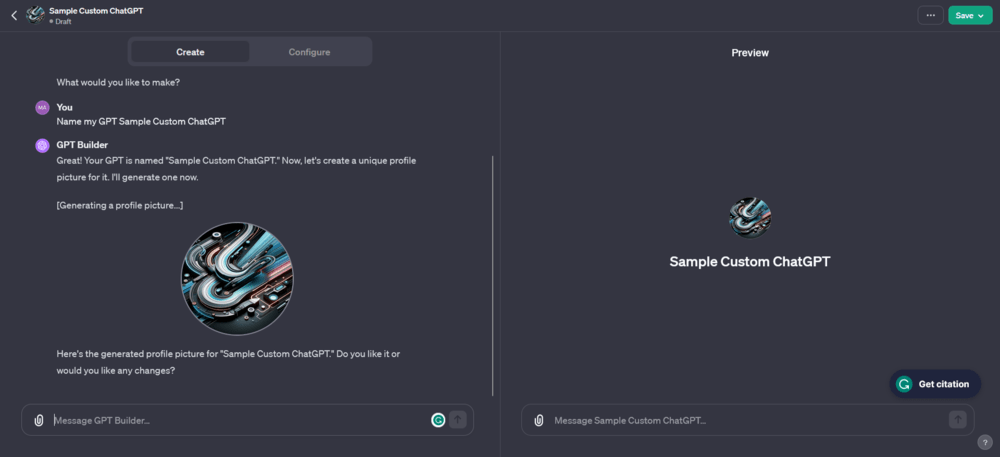
Step 4: Customize and preview
After clicking the “Create a GPT” option, you will go to a split screen where you can type in prompts with the objectives written out.
The GPT Builder will come out with examples to guide you along the way.
You can make your prompts more specific or less specific. You can check if the GPT model is to your satisfaction by checking its progress by querying it in the “Preview” section. You can then add more prompts to the builder to improve it if it doesn’t meet your standards.
Step 5: Advanced Configuration
After you’re satisfied with the responses of your custom ChatGPT, you can select “Configure” to add further modifications.
The advanced configurations in question include:
- Custom app logo (If you want to, you can get high-quality images from Canva or generate them using Midjourney or DALL-E 3).
- Modify the custom ChatGPT’s behaviour (Possibly add precautions to stop the bot from hallucinating or misbehaving with other users).
- Initial interactions (You can develop custom prompts to start as an introductory message telling users what your custom ChatGPT does, or remove it completely).
- Upload reference files (For referring and training, you can upload some sample text files related to your objective and upload them).
Step 6: Save your changes
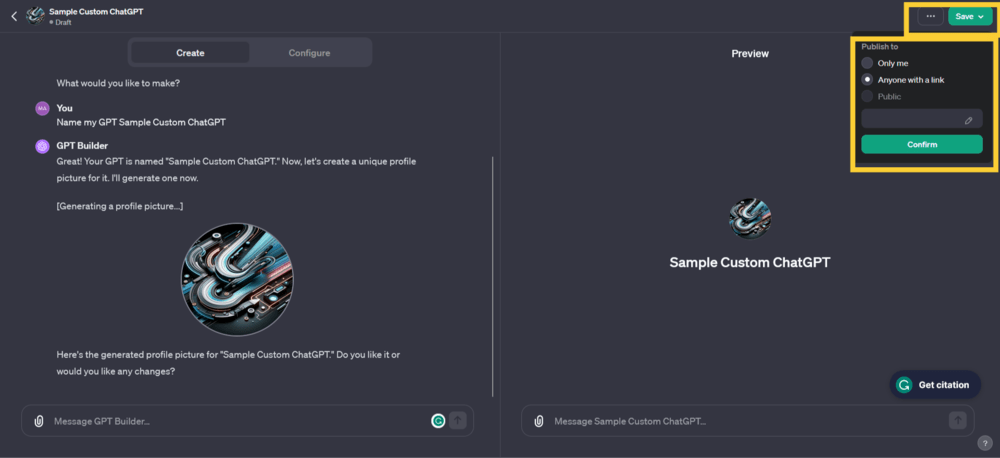
After customizing and configuring your ChatGPT to your liking, click the “Save” button on the top right-hand corner of the screen.
Before saving, you’ll get the option to choose to whom you want your custom ChatGPT to be shared. You’ll have 3 options, similar to sharing documents in Google Drive:
- Only me
- Anyone with a link
- Public
With that, you’ve successfully created your very own ChatGPT for personal use.

How to Update Custom-made ChatGPT?
Say you have created your Custom ChatGPT, but you want to include some changes or add some tweaks to it. This is very easy to do, barely an inconvenience.
Step 1: Select the GPT to be changed
In the sidebar of ChatGPT, click “Explore” and go to the ChatGPT of your choice below the “Create a GPT” option. Click the “…” option next to your custom ChatGPT and select “Edit”.
Step 2: Change the settings
Modify the settings in either the “Create” or the “Configure” part by adding more prompts, changing the icon and so on.
Step 3: Save the changes
Once you’re done with the updates, click on the “Update” button (where the “Save” button would be if you’re creating a new GPT). You’ll get a pop-up asking you to confirm your changes. Select “Confirm” to save the update.
But, if you don’t like the way you’ve made your GPT, and would like to get rid of it, you can delete your custom ChatGPT.
How to Delete your custom ChatGPT?
Step 1: Select the GPT
Go to “Explore” in the ChatGPT sidebar and select the ChatGPT you want to delete. Next to it, click “more options” and select “Delete GPT”.
Step 2: Confirm the deletion
Once you click on the delete option, confirm your choice.
After that, your custom ChatGPT will be deleted.
Conclusion
This new release of OpenAI will encourage creativity and allow people to experiment with their ideas with their AI Agent. This will encourage users to be more creative and come up with better ways to make their lives enjoyable. Learning doesn’t have to be all pain. Learning can also be a lot of fun.
The users must also ensure that they don’t accidentally reveal their personal information in the process of creating their custom ChatGPT. They’ll need to be cautious while approaching new technology and need to stay up to date in order to find ways to protect themselves.
Share your thoughts in the comments
Please Login to comment...