How to Check for Updates in Windows 11?
Last Updated :
19 Apr, 2024
Updating your Windows 11 allows you to get the latest version of the drivers which will help in improving your device’s performance. The updated version of the software provides improved functionalities that are not there in the previous version, it also increases the security and compatibility as in overall experience improves.
In this article, we are going to see how to check for Windows 11 updates.
Benefits of Windows 11 updates
- Increase in security
- Fixing Bugs/Errors
- Improved Performance
- Extended Feature
How to Check for and Install Windows Updates?
This is a step-by-step illustration of how to check for Windows 11 updates on the operating system. Follow the below steps:-
Step 1: On your desktop, click on the “Windows icon” on your screen press “Windows key” on your keyboard or just click on the “Search bar”. This will allow you to go to various functionalities present on your PC or laptop.
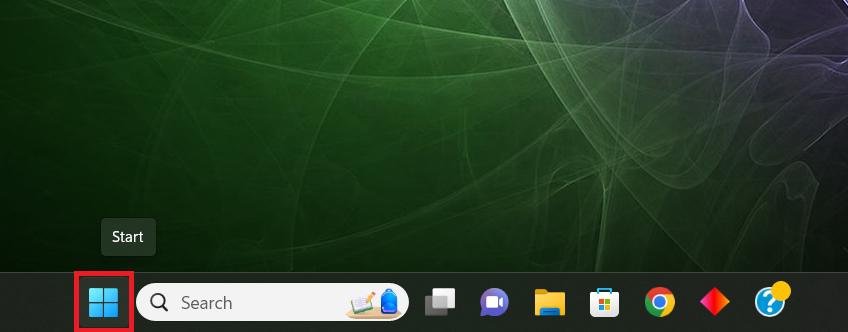
1. Search
Step 2: Search for “Settings” and click on Open or you can double-click on the settings to open it or press “Windows+ I” on your keyboard to directly go to Settings.
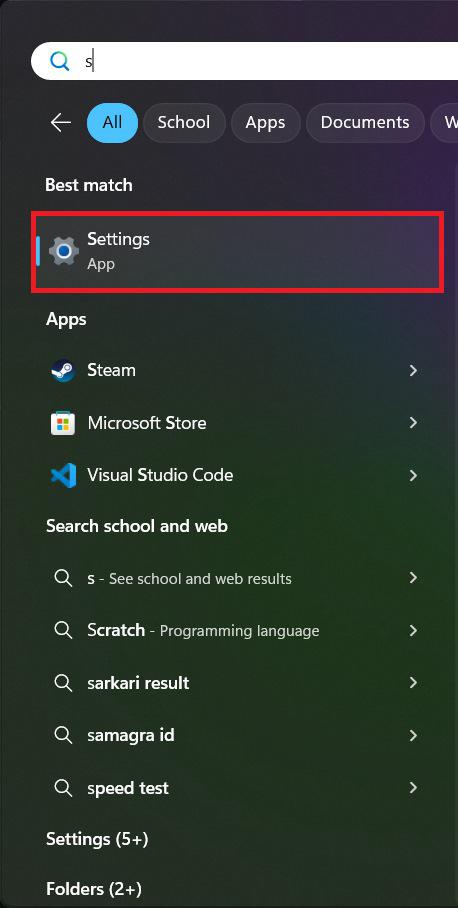
2. Settings
Step 3: Settings page will open as shown in the figure, on the left panel click on “Windows Update”, where you can find the updates that are required.
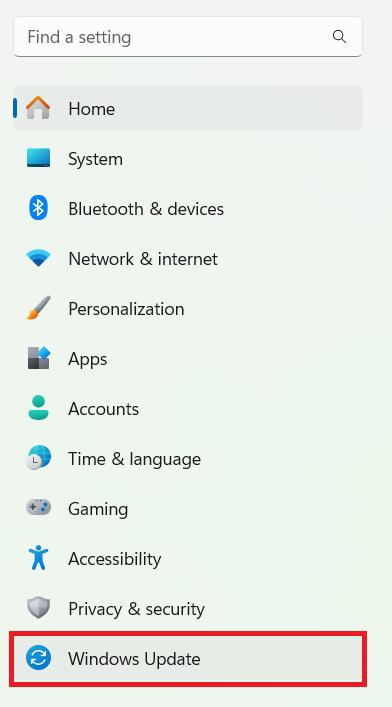
3. Left Menu
Step 4: After clicking on Windows Update, you will see a blue button on the right side of the screen with the title “Click for updates”, click on that and you can see what apps need to be updated. Just click on update and it will start getting updated and a newer version will get installed in your system. The update time depends on the size of the application, make sure your device has a stable internet connection.

4. Check for Updates
Follow these steps to get your system up to date, in some cases you will be required to reboot/restart your computer/laptop, so just restart it and get the latest version of windows 11 installed in your system.
Conclusion
This is how we can check & install updates in windows 11, Keeping your Windows 11 system updated is a breeze with just a few clicks. By following these steps regularly, you’ll ensure your device is running at peak performance, protected from security threats, and equipped with the latest features. For even more convenience, consider enabling automatic updates to keep your system on autopilot!
How to Check for Updates in Windows 11- FAQs
How to Check for Updates in Windows 11?
Open Settings, select Windows Update, click “Check for updates”, download and install any available updates, and restart if required.
Why is it necessary to update your applications?
Regular updates helps in fixing security issues, and protects the users from threat activities and bug fixes as well as provides smooth user experience.
Do you always need to manually update in windows 11?
No, you don’t need to always manually update, you can schedule updates in Windows 11, you can choose a specific time to update. Also you can set it on auto-update whenever there is an update.
What to do when you are not able to check for updates in Windows 11?
If such problem occurs then you can go to Settings> Update & Security > Troubleshoot > Additional troubleshooters to resolve your issue.
In what interval should I check for updates?
You should check it on regular basis, at least once a week, to make sure your device is free from an security loopholes.
Share your thoughts in the comments
Please Login to comment...