How to Fix Hard Drive Not Showing Up on Mac?
Last Updated :
21 Feb, 2024
Quick Preview to Fix Hard Drive Not Showing Up on Mac:
- Click on Finder & go for the Settings.
- Under the General Tab, select External Disks.
- Search for Disk Utility from Spotlight Search.
- Click on the Unmount option.
- Search for Disk Utility from Spotlight Search.
- Click on the First Aid & run operation.
- Search for Disk Utility from Spotlight Search.
- Click on the Erase option.
- From the Popup Window, go for Erase.
Mac External Hard Drives are used to keep our important files and folders safe or to securely transfer a large amount of data between two computers without losing data or information. But when the External Hard Drive on Mac encounters serious issues, it stops appearing. This issue is known as the Hard Drive Not Showing Up on Mac.
Sometimes Mac OS does not recognize the Hard Drive even after several attempts to connect. It becomes a bit frustrating to reach some technician to Fix Hard Drive Issue on Mac wasting a lot of money and time. However, you will be happy to know that there are certain tricks present to Fix Hard Drive Showing Issues on Mac without moving to any technician.
In this article, we will discuss a few handfuls of methods required for Resolving Hard Drive Issues on Mac in no time.
What is the Hard Drive Not Showing Up Error on Mac?
The Hard Drive Fix Issue error on Mac occurs when some of the hard drives are not compatible with Mac OS, they are less mac-friendly such that the system is not able to recognize the hard drive. This error needs some solutions and methods to fix right away.
There are several external and see-through reasons why the external hard drive is not visible and showing up on the Mac OS:
- The USB Port of the Mac OS might be broken.
- Partition Problems in Hard Drive.
- Outdated Mac OS External Drivers.
- The Hard Drive is accidentally Formatted.
How to Fix Hard Drive Not Showing Up on Mac?
We will explore and discuss Six Methods to Fix Hard Drive Not Showing Up on Mac by users themselves. Let’s come to method one i.e. Checking Hard Disk Drive cable.
Method 1: Check the Hard Drive Cable to Fix Hard Drive Not Showing Error
One can check and examine the physical hard drive ports and cable to make sure the hard drive is not physically defective and the cable is not bent or cracked.
The user can check if the hard drive cable is not loose or physically damaged from any point of connection or in between the flowing wire. If there is any such issue, replace the old cable with the new cable and you are good to go.
Method 2: Check the Port and Power to Fix Hard Drive Not Showing Error
Another reason why a hard drive is recognized by Mac OS is the normal functioning of ports present on the sides of the MacBook. One can ensure while plugging in any cable that ports can easily inject any cable wire of the same dimension. Also one can check the power supply of the hard drive as a bonus point that might solve the problem of the Hard Drive issue.
Hard Drives require enough amount of power to be able to connect to the Mac OS, making sure the user is using the right type of cable having two split ends for a USB type A connector and another connector to plug into the USB ports present in your Mac Book.
Method 3: Change Finder Settings to Fix Hard Drive Not Showing Error
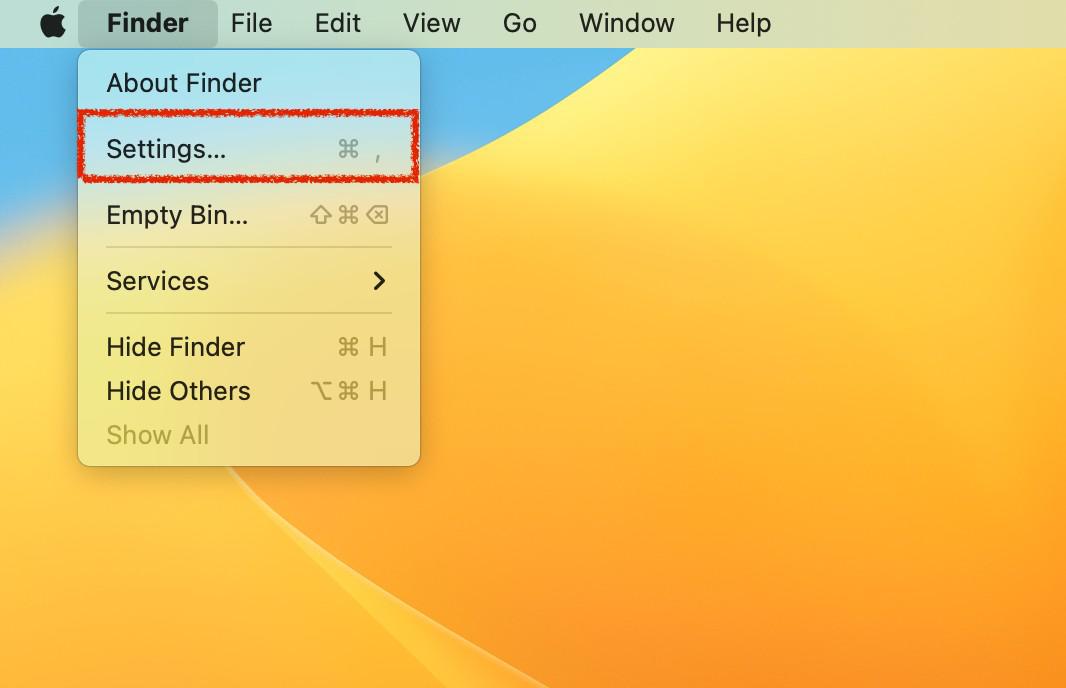
Step 1: Open the Finder App on your Mac and click on Preferences if your version is 12.1 or above, else click on Settings option as shown below:
Step 2: Now, navigate to the General tab and choose the External Disks option as shown below:

Now save your options and this method will fix the hard drive not show in the up-on-Mac issue.
Method 4: Change Disk Utility Settings to Fix Hard Drive Not Showing Error
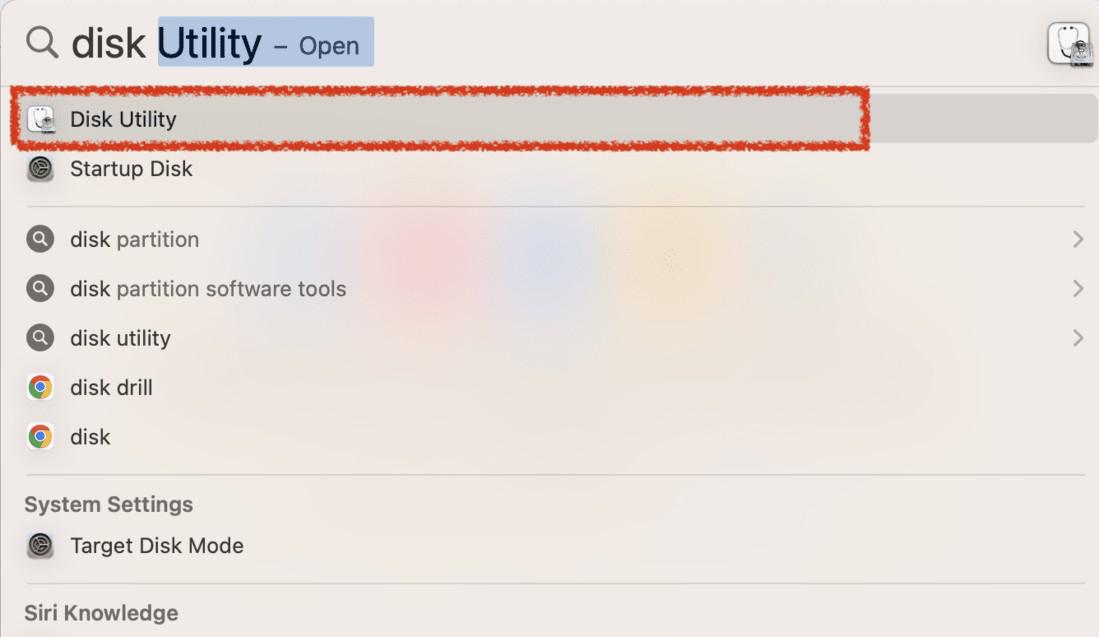
Step 1: Press command and space bar simultaneously to open the Spotlight Search and search for Disk Utility in the Spotlight search bar. Press Enter and this will open the Disk Utility page.
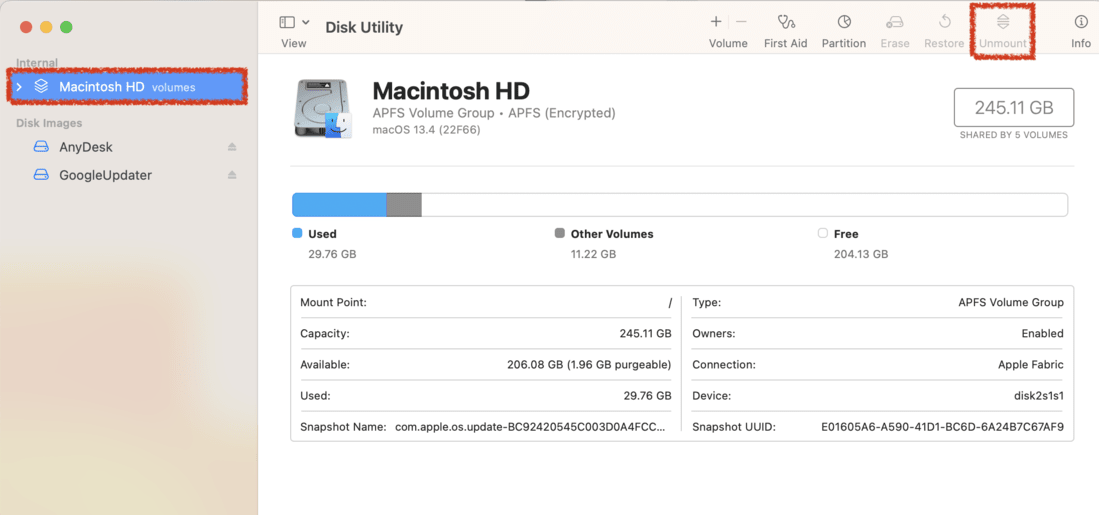
Step 2: Now, select your hard drive from the left panel and click on the Mount button for the selected hard drive which is present at the top-right corner of the panel.
Mounting will allow the system files, folders and data appear on the desktop to be able to access directly from the Finder app.
Method 5: Run the First Aid on Hard Drive to Fix Hard Drive Not Showing Error
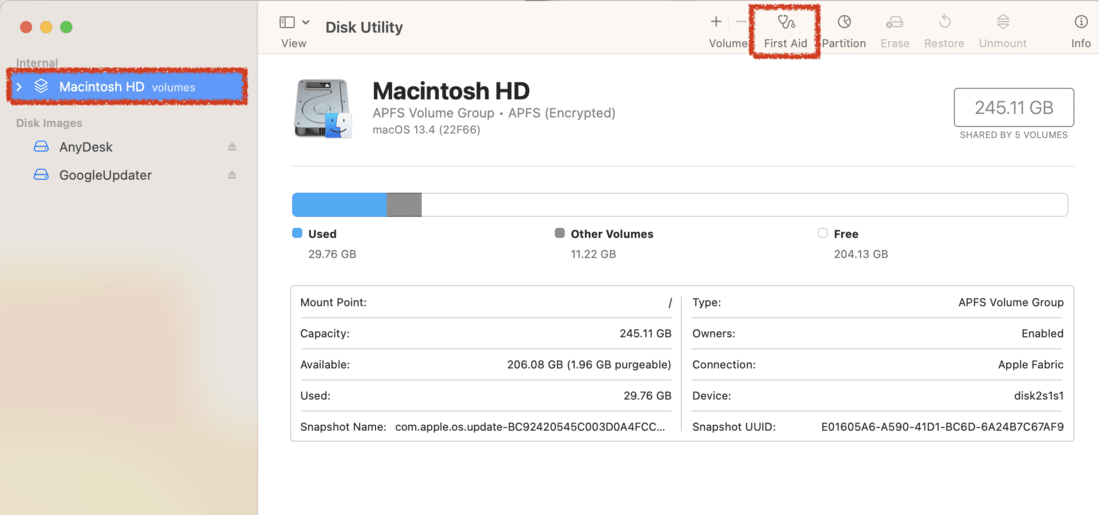
Navigate to the Spotlight Search by pressing the command and space bar simultaneously. Now, search for Disk Utility and select your hard drive from the left panel. Now, click the First Aid feature at the top panel of the screen as shown in the image below.
This the will run First Aid debugging process for the selected hard drive. Now, close the disk utility and check if the hard drive issue is fixed.
Method 6: Change the File System on the Hard Drive to Fix Hard Drive Not Showing Error
Step 1: Open the Disk Utility feature and select the hard drive you want to reformat from the left panel. Now, select the Eraser button on the top panel as shown.
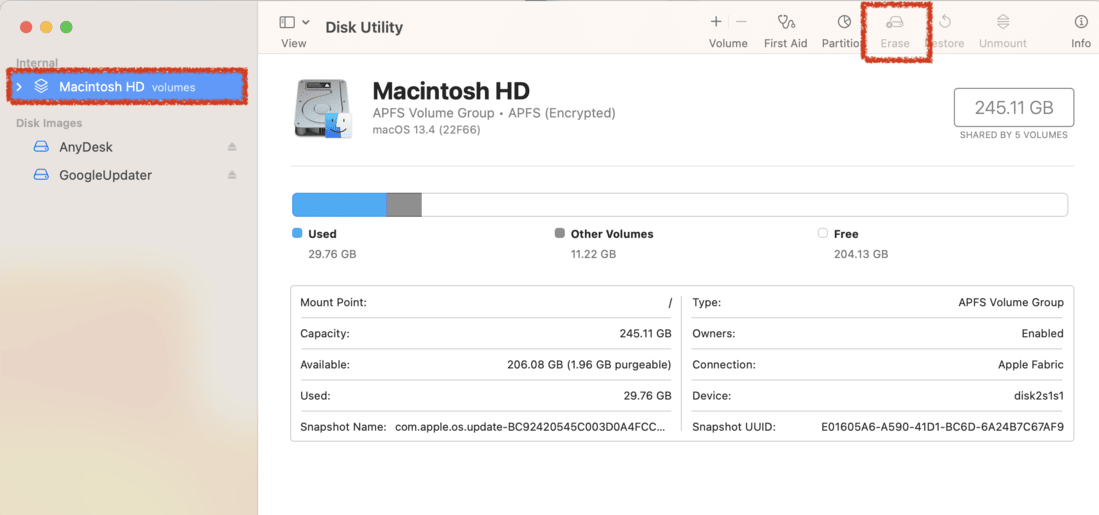
Step 2: A pop-up page will open as shown.
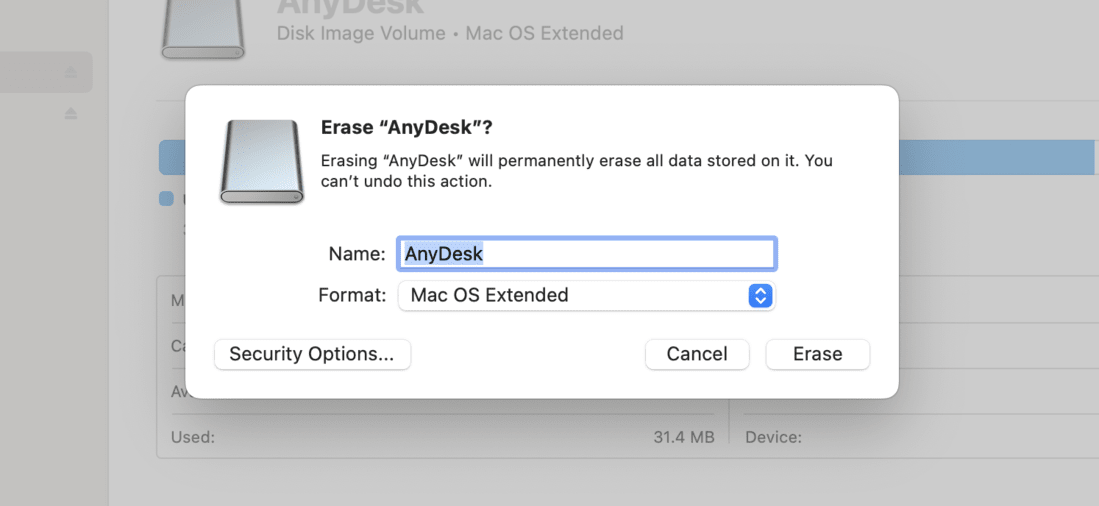
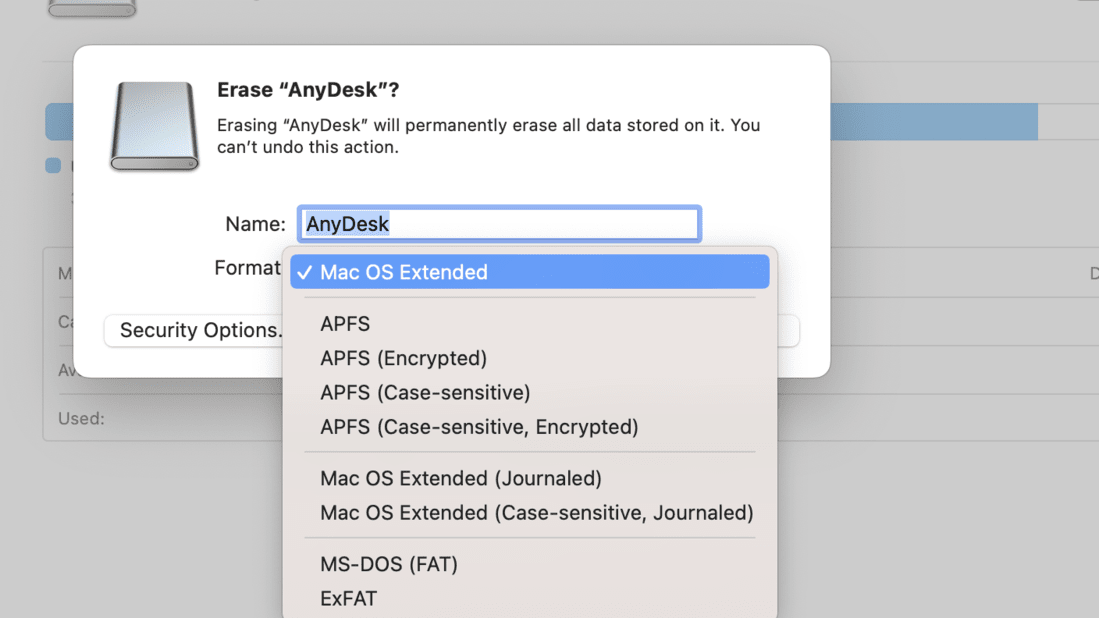
Step 3: Choose the compatible option for Name and Format from the drop-down menu. Select APFS or ExFAT that is compatible with the hard drive format in most cases.
So, these are the simple yet effective methods to Act on Hard Drive Not Showing Up Issue on Mac. There can be an array list of potential damages to the hard drive and its compatibility with Mac OS, one can use the above methods we discussed to successfully fix the issue on their own without any technician interference.
Also Read
Frequently Asked Questions
How do we fix the Hard Drive not showing up on the Mac issue?
To fix the Hard Drive not showing up on the Mac issue, the following guidelines should be properly used.
- Open Disk Utility option.
- Click on the First Aid option on the Hard Drive.
- The process will go on & fix the issue.
How can I unmount any Hard Drive on a Mac?
To Unmount the hard drive on Mac to resolve any hard drive issues, the steps are following.
- Open Spotlight Search.
- Go for the Disk Utility.
- Click on the Unmount option.
What are the steps needed to Erase the Hard Drive on a Mac?
The steps required to Erase the Hard Drive on a Mac are the following.
- Press Command + Space Bar to open Spotlight Search.
- Search for the Disk Utility.
- Click on the Erase option.
- On the popup window, go for the Erase option.
Share your thoughts in the comments
Please Login to comment...