How to Change the Notification Sound on Windows 11?
Last Updated :
16 Apr, 2024
Windows 11 provides a modern interface with improved features. Users can customize notification sounds to change how their computer alerts them to messages, emails, and reminders. This helps users stay updated and engaged.
In this article, we will show you how to change the notification sound on Windows 11. Customizing your notification sounds can make your computer more personal and enjoyable to use. Windows 11 system sounds offer many options to choose from, allowing you to create a unique experience every time you receive an alert. By following these simple steps, you can easily adjust your notification sounds on Windows 11.
Short Preview!
Here is a short preview of our active and speedy learner. Follow these steps to change the notification sound on your Windows PC.
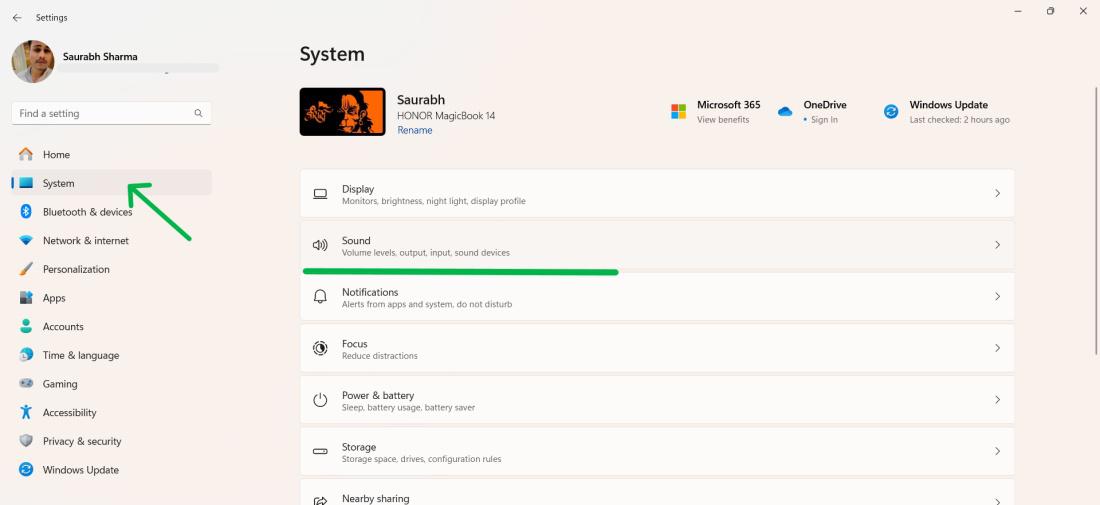
- Press Win + I and Go to System> Sound.
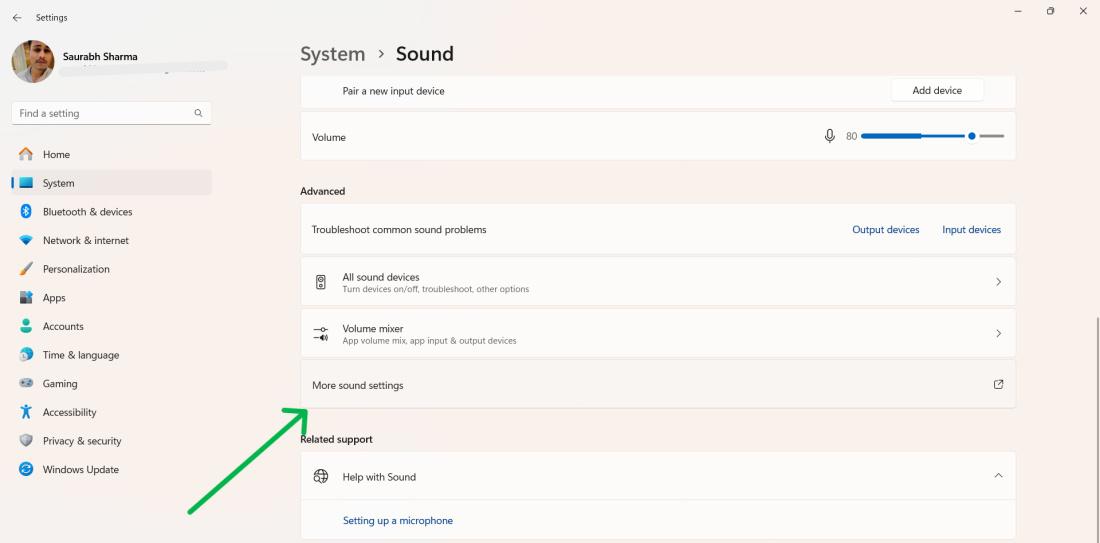
- Click More Sound Settings.
- Click on the Sound tab and Select Notification.
- Choose the desired sound and Click Apply
Now, you will receive a message, email, or reminder notification with your desired sound.
How to Change Windows 11 System Sounds
Method 1: Change Notification Sound on Windows Using Settings
To change the notification sound in Windows 11, follow these easy steps:
Step 1: Open the Settings app (Win + I) and navigate to System > Sound.
Step 2: Under the Advanced section and click More Sound settings
Step 3: Under the Sounds tab, scroll down and select Notification.
Step 4: Choose your desired sound from the menu, preview it, and hit Apply.

Step 5: Click on “OK”
You have now successfully changed the notification sound in Windows 11. This will help you customize your Windows 11 system sounds to your preference.
Method 2: Change Notification Sound on Windows Using Control Panel
You can change Windows 11 system sounds using the Control Panel. Follow these steps:
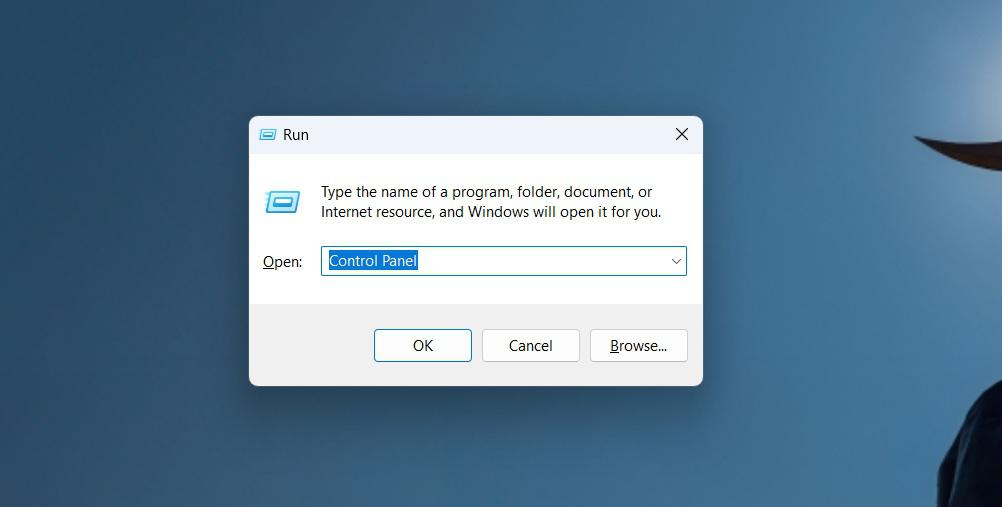
Step 1: Press Win + R then on run dialog input type “Control Panel” then hit Enter button
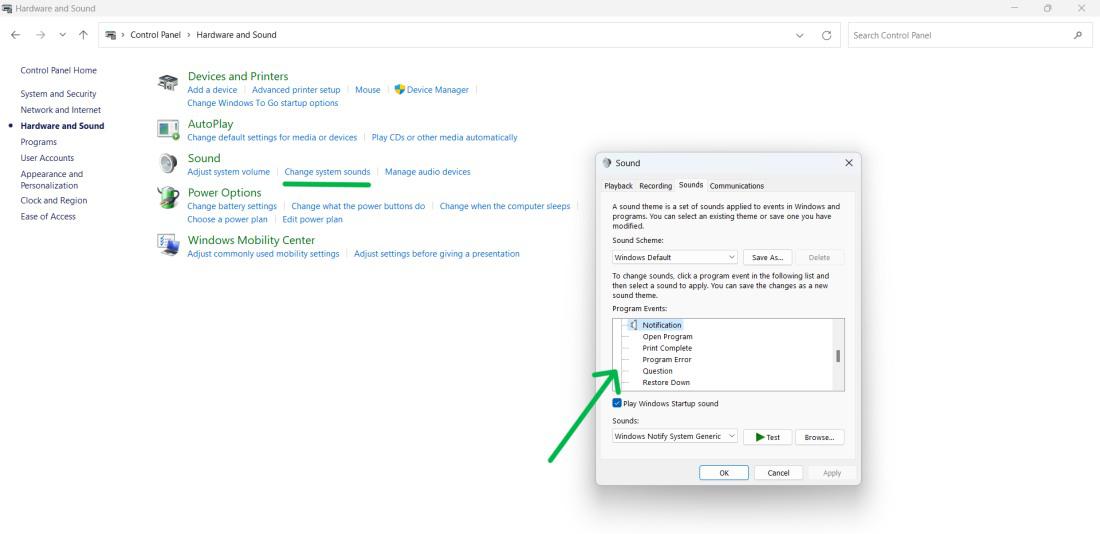
Step 2: Navigate to “Hardware and Sound.”

Step 3: Under “Sound,” click on “Change system sounds.”
Step 4: In the “Sounds” tab, locate “Notification” in the Program Events list.
Method 3: Change Notification Sound on Windows Using Registry Editor
You can change notification sounds in Windows 11 by using the Registry Editor. Here’s how:
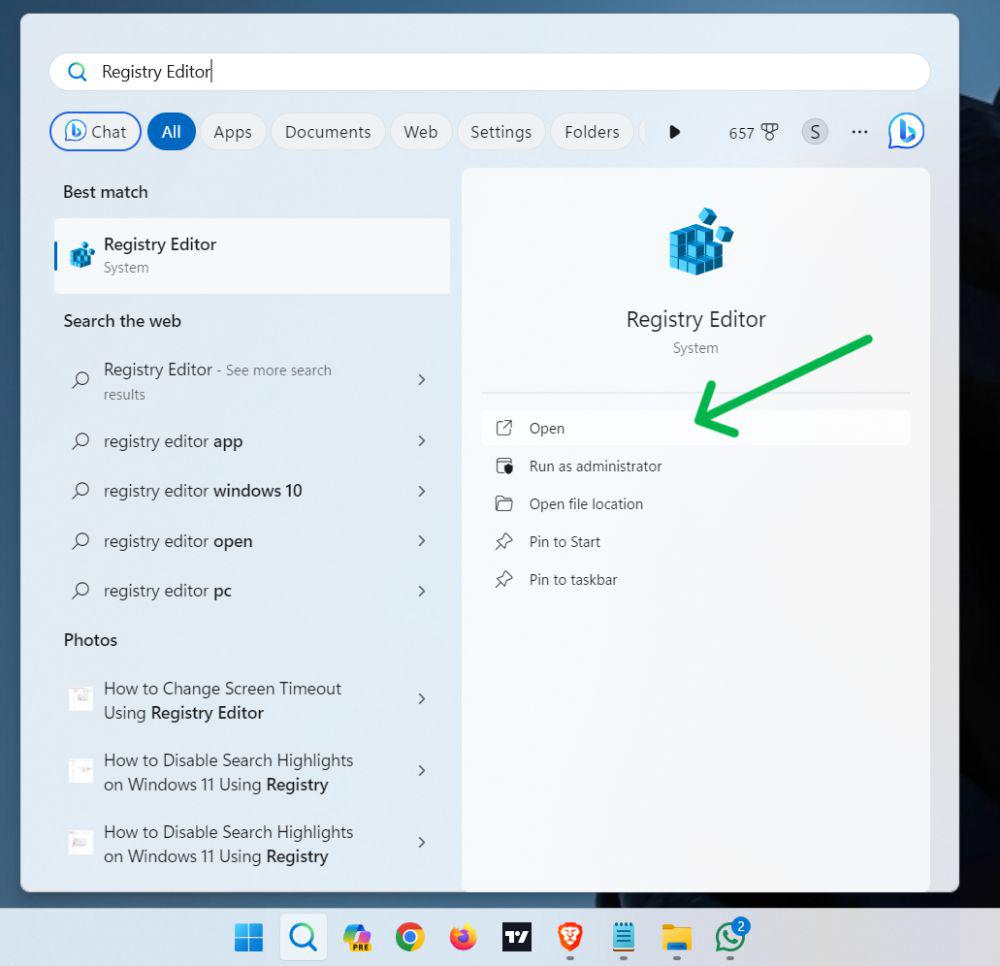
Step 1: Press Win + S to open search bar
Step 2: On search bar type “Registry Editor”
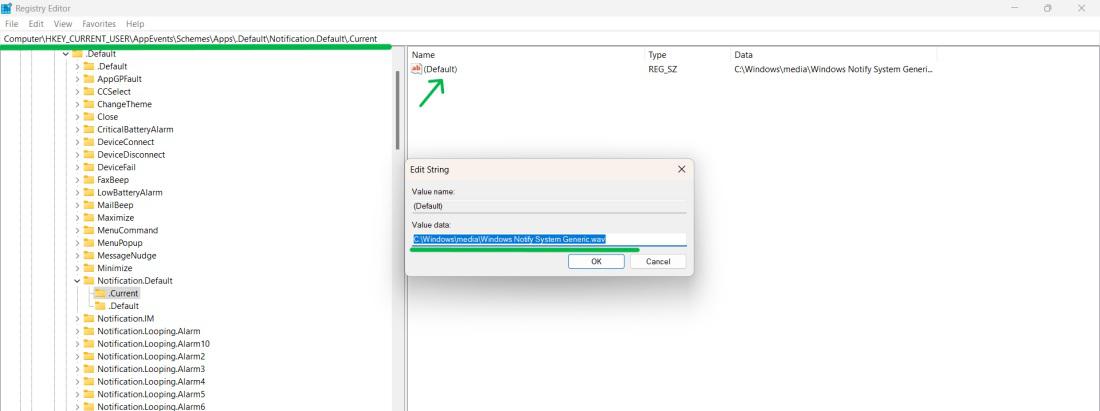
Step 3: Navigate to Computer\HKEY_CURRENT_USER\AppEvents\Schemes\Apps\.Default\Notification.Default\.Current in the Registry Editor.
Step 4: Double-click “Default,” then input the desired sound file’s name (e.g., C:\Windows\Media\Chime.wav) in the “Value” field.
After following these steps, restart your computer to apply the changes. Now, your Windows 11 system sounds will include the custom sound you selected for notifications.
How To Turn Off Notification Sound On Windows 11?
To turn off notification sound on Windows 11, follow these simple steps:
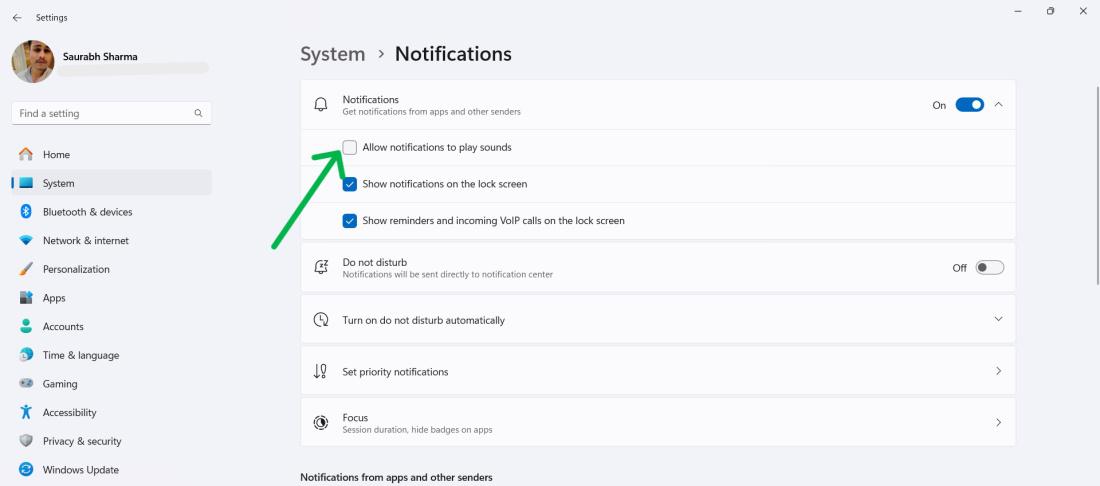
Step 1: Open the Settings app (Win + I).
Step 2: Go to System > Notifications.

Step 3: Expand the “Notifications” option at the top.
Step 4: Uncheck the box next to “Allow notifications to play sounds.”
This will stop your computer from playing any notification sounds. By adjusting the Windows 11 system sounds, you can customize your notifications to suit your preferences.
Conclusion
Customizing Windows 11 system sounds allows you to create a personalized experience on your computer. By changing the notification sound, you can make your alerts stand out and match your style. You have the flexibility to change these sounds through options, like the Settings app, Control Panel, Personalization settings or even the Registry Editor. This allows you to choose between modifications or more advanced customization possibilities. Additionally, if you prefer a quieter experience, you can turn off the notification sound completely. These methods give you control over the sounds on your Windows 11 setup, improving your experience and reducing interruptions. Experiment with different sound options to find the perfect fit for your needs!
How to Change the Notification Sound on Windows 11? – FAQs
Is it possible to have different notification sounds for apps?
Unfortunately at present Windows 11 does not offer a native feature that allows users to set distinct notification sounds for individual apps.
Will modifying notification sounds affect system audio cues?
No! When you change the notification sound it only alters the audio associated with system notifications. Other system sounds remain unaffected.
Can I use a custom sound for notifications?
Yes! In either the settings or Control Panel you can explore and choose a custom sound file, for your notifications.
How do I turn on System Sounds in Windows 11?
To turn on system sounds in Windows 11:
- Right-click speaker icon on taskbar.
- Open “Volume Mixer” and check the slider under “System sounds”.
Where are Windows 11 Sounds located?
System sounds are built-in, not in one folder. You can browse for replacements (.wav files) in C:\Windows\Media if customizing.
Why does Windows 11 keep making noise?
Windows 11 may make noise due to notifications, background apps, system sounds, hardware issues, or audio from media apps and web browsers.
Share your thoughts in the comments
Please Login to comment...