How to Make a Discord Server Public
Last Updated :
08 Sep, 2023
How to Make a Discord Server Public – Easy Steps
- Right-click on your server’s icon
- Open “Server Settings.”
- Click “Enable Community”
- Complete 3 steps to enable community
- Apply for Discovery
Discord has emerged as a powerful communication platform for building online communities, building connections, and enabling seamless communication among millions of users. While creating a Discord server, many server owners face the challenge of making their server more visible and accessible to the public. One effective way to achieve this is by making your Discord server public, allowing it to be discovered by users searching for communities of interest. So, whether you’re a gaming enthusiast, a hobbyist, or a professional looking to network, making your Discord server public can unlock a world of opportunities. So, let’s dive in and discover how you can take your server to new heights by harnessing the power of public exposure.
What is Discord server privacy?
Discord server privacy refers to the level of control and visibility you have over your server’s content, members, and overall accessibility. Discord offers various privacy settings that allow server owners to customize their server’s privacy according to their preferences and needs. These settings determine who can join the server, what content is visible, and how much control server members have over their own privacy within the server.
Make Discord Server Public – Steps
Step 1: Open Discord App
To launch the Discord application on your desktop, locate the Discord icon and give it a click.
If you do not have the Discord app installed, you can simply access Discord directly through any web browser on your desktop.

Click Discord Icon to open Discord App
Step 2: Right-click on the server icon to open the server menu
Perform a right-click to access multiple options for the server you want to make public.
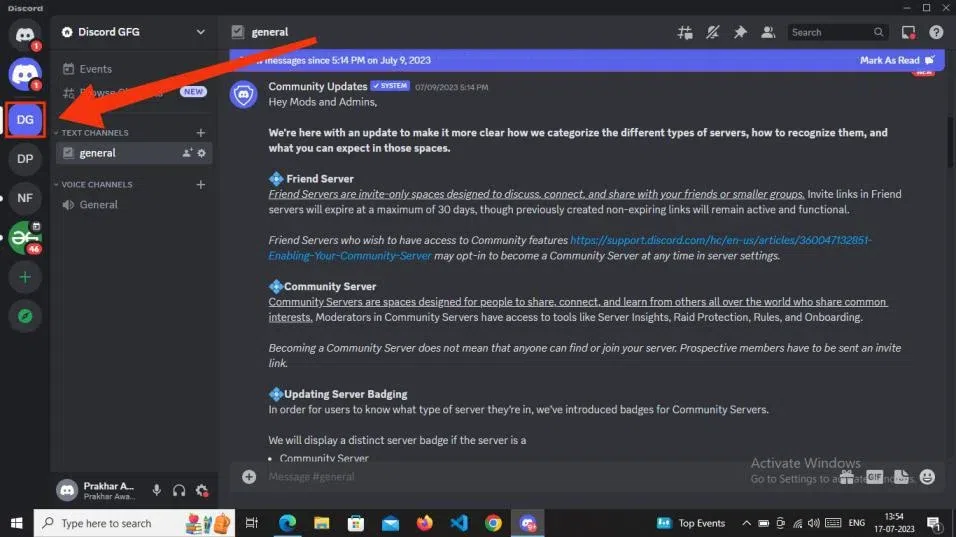
Select Server > Right Click on Server Icon
Step 3: Select Server settings from the server menu
Once you have right-clicked on the server icon, you can select “Server Settings” from the menu that appears.
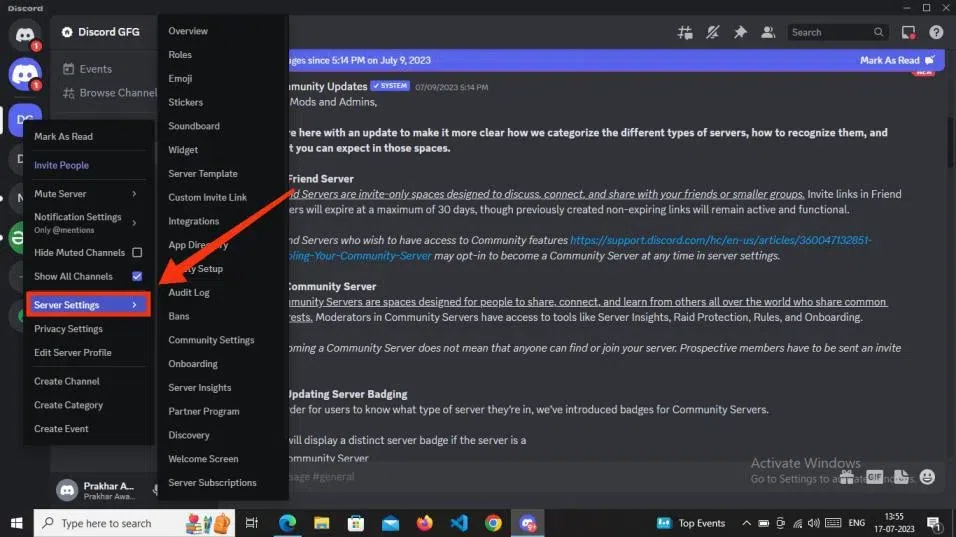
Right Click on Server Icon > Server Menu > Select Server Settings
Step 4: Go to the ‘Enable Community’ tab
If you’re ready to convert your server into a Community Server, navigate to enable community option and complete the enabling process. Now you can now designate your server as a Community Server.
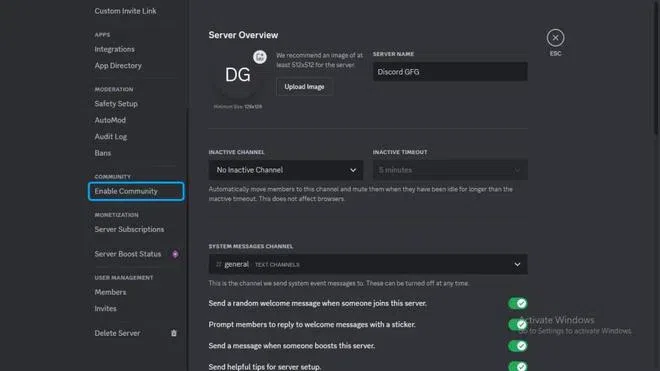
Server Settings > Enable Community
Step 5: Select “Get Started” & Complete three steps to set up your community
In order to enable the community for your Discord server, you are required to have the following steps and settings enabled in order to ensure safety in the community. These steps are named “Confirm Safety checks, Add & Confirm details in Setting up the basics, and Finishing touches”.
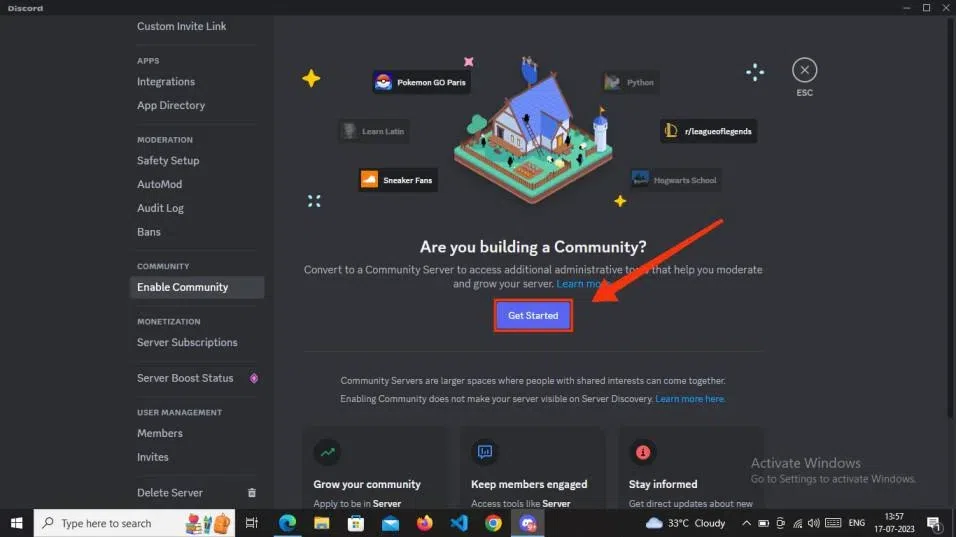
Enable Community > Get Started > Create a Community
A: Confirm Safety checks
In this step, a verified email is necessary, and all members’ media should undergo scanning. After enabling both the option click the ‘Next’ button.

Create a Community > Add verified Email > Enable Scan Media content from all members > Next
B: Add & Confirm details in ‘Setting up the basics’
In this step, proceed to add the required confirmation details and carefully review all the rules and regulations of the channel.
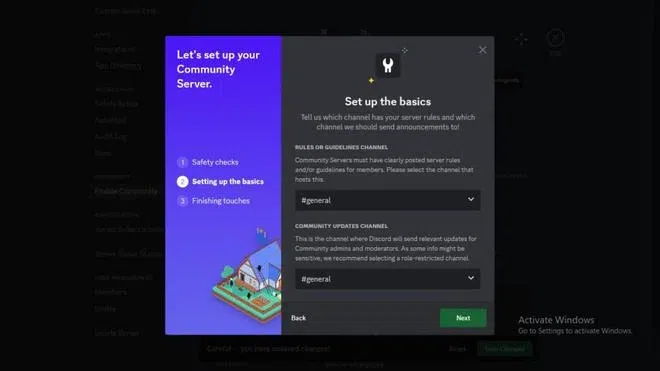
Add details in Setting up the basics > Next
C: Finish the third step “Finishing touches”
In the final step, ensure to confirm the safety checks available in the “Finishing Touches” section. This includes agreeing to and understanding the rules for setting up a community server. Once you have completed these steps, click the “Finish Setup” button to finalize the process.
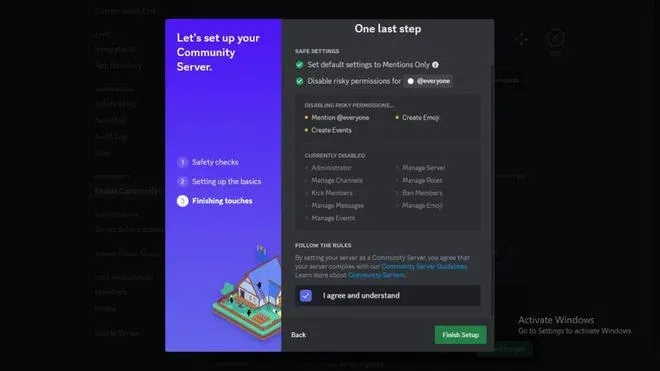
Complete Finishing Touches > Agree & Understand > Finish Setup
Step 6: Enable “Discovery”
Once you’ve activated the “Community” feature on your server, simply navigate to the left sidebar. There, you’ll find several new tabs, such as overview, server insights, partner program, and more, all located under the “Community” header. Among these tabs, you’ll also notice one labeled “Discovery.” By enabling Discovery, your server will be listed on the “Explore Public Servers” tab, making it easier for people to find your server through search. To activate discovery, simply click on the “Enable Discovery” option. However, it’s crucial to meet the minimum requirements before you can enable discovery for your server.
Note: It’s important to note that if you’re using Discord on a mobile device, you won’t be able to see this tab, as it’s not available on the mobile version. However, on the desktop version, you can select the “Discovery” tab to access the discovery feature.
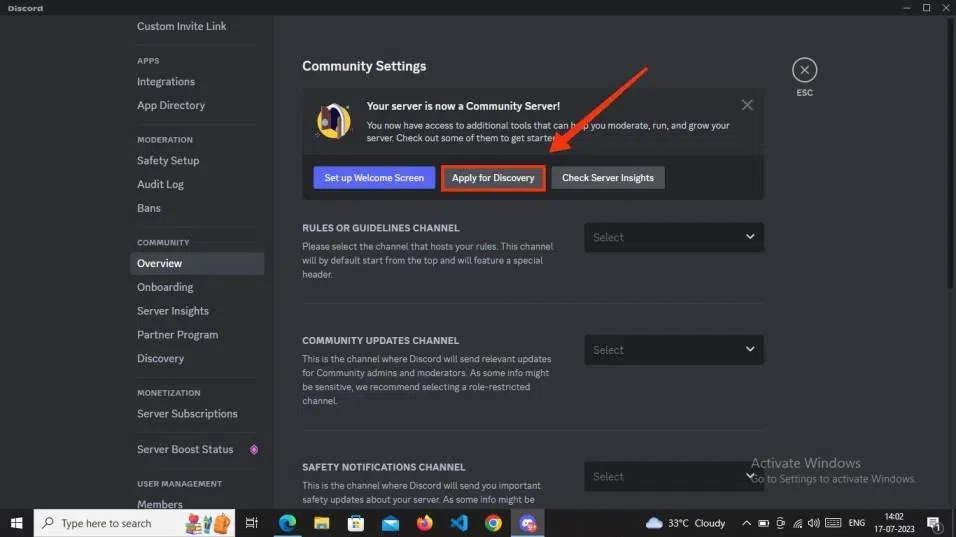
Community Setting > Apply for Discovery
Minimum requirements to enable discovery for your server:
- Enabling safety requirements for a safe environment.
- The server must have at least 1,000 members to qualify. (Earlier it was 7000 members)
- Servers need to be at least 8 weeks old to be in Discovery.
- Servers must meet certain activity requirements to be in Discovery.
- Your server name, description, and channel name look clean!
- Enable the 2FA Requirement For Moderation Setting
Conclusion
Discovering public Discord servers can often be challenging, but websites like top.gg and disboard.org come to the rescue. These platforms provide a convenient way to search for Discord servers based on their names, categories, and other criteria. If your server doesn’t meet the minimum requirements for enabling the discovery feature, you have the option to add your server to these websites. By doing so, your server becomes publicly accessible, allowing anyone to discover and join it. This approach reduces the need for excessive self-promotion of your Discord server link, as users can find and join your server organically through these dedicated platforms.
Share your thoughts in the comments
Please Login to comment...