How to Set AFK in Discord
Last Updated :
08 Sep, 2023
How to Setup a Discord AFK Channel
- Open Discord App
- Create new Voice Channel > Name it AFK Channel
- Edit AFK Channel Settings > Disable Channel Voice Permissions
- Go to Server Settings > Click on Overview
- Set AFK Channel in Inactive Channel
- Select “Inactive Timeout”
- Click “Save” button”

What is AFK in Discord
An “AFK” channel, short for “Away from Keyboard,” is a designated channel on Discord for users who are currently inactive or not actively using their keyboards. This type of channel is particularly useful when someone is online but not participating actively on the server. It serves as a space for conversations with specific friends or for relaxation. Creating an AFK channel on your Discord server has several advantages. Firstly, it helps indicate who is available for chatting and who isn’t, which is especially helpful in larger servers with many users. Additionally, an AFK channel helps reduce notifications for individuals who are busy working or studying and don’t want interruptions from Discord alerts. Moreover, this type of channel helps keep the server’s voice channels organized by moving inactive users to a separate space, making it easier for those engaged in voice chats to find each other. Overall, setting up an AFK channel is a straightforward way to enhance your Discord server, benefiting both your users and the overall server experience.
Tip: Know this before you create a Discord AFK Channel
- Only server members and administrators with admin privileges have the ability to create Discord AFK channels.
- Only voice channels can be designated for AFK channels.
- It’s not possible for members to share their screens or stream videos within an AFK channel.
- Additionally, individuals can only enter AFK channels if they are not actively using Discord.
How to Create an AFK Channel in Discord on PC and Mac
Step 1: Open Discord on your PC
To launch the Discord application on your desktop, locate the Discord icon and give it a click.
If you do not have the Discord app installed, you can simply access Discord directly through any web browser on your desktop.
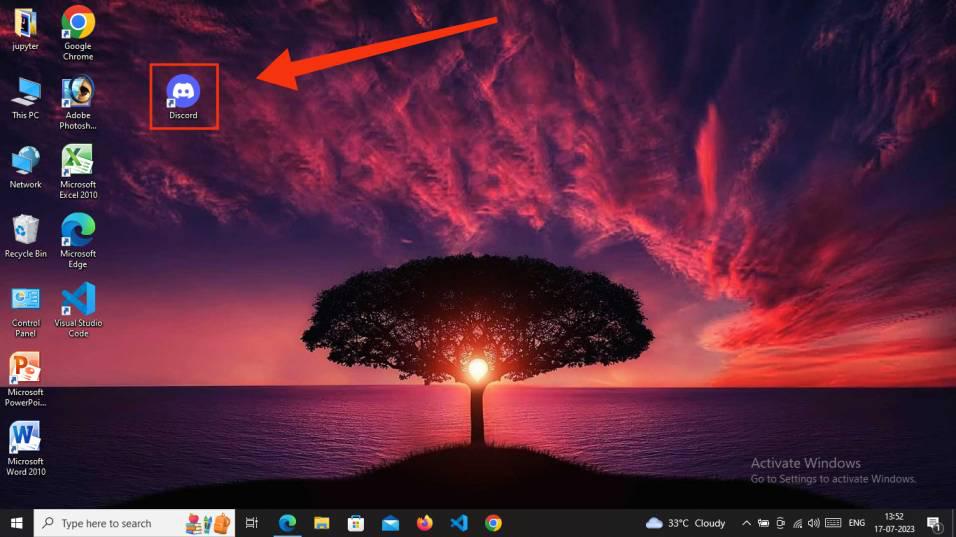
Click on the Discord icon to open Discord App
Step 2: Select A Server
Choose a “Server” from the left-hand side of your screen where you intend to establish an AFK Channel. Ensure that you have administrative privileges for the server in order to create an AFK Channel within it.
Select a Server
Step 3: Navigate to Voice Channel and Click “+”
Now simply create a voice channel by navigating to the voice channel from the left hand side of the discord screen and click “+” icon.
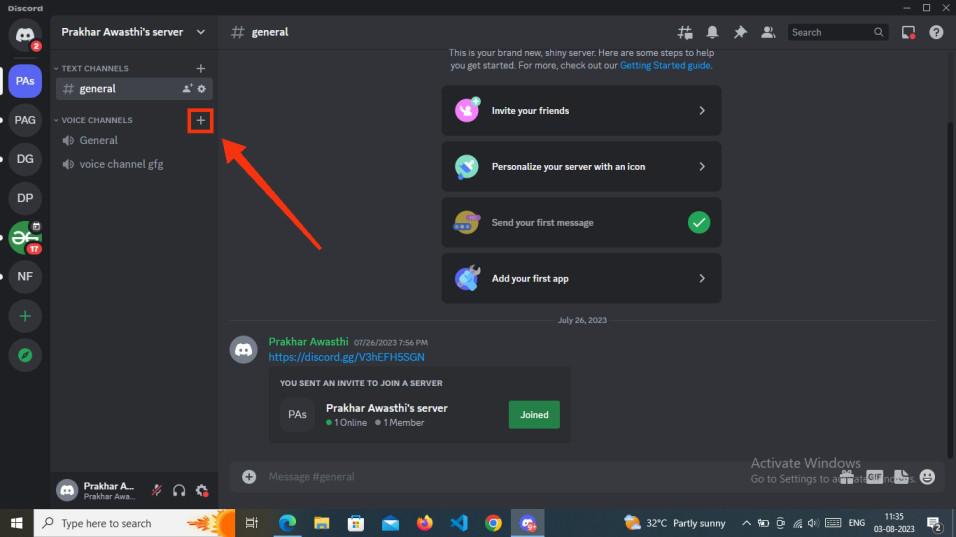
Navigate to Voice Channel and Click “+” icon
Step 4: Select Voice and Type Channel Name
Now select the Channel type as “Voice” and type “AFK Channel” in Channel Name and click the “Create channel” button.
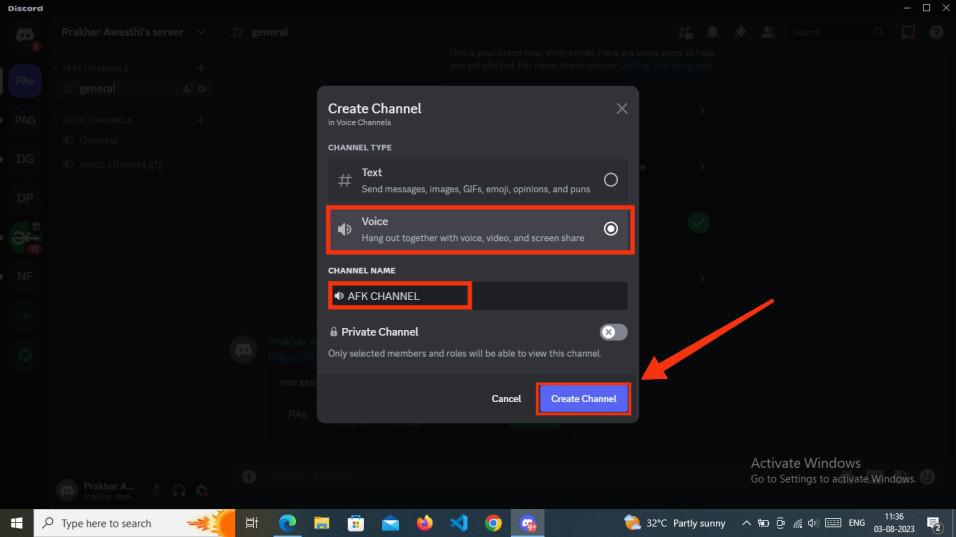
Select Voice >> Name your channel >> Click Create channel
Step 5: Select AFK Channel and edit Settings
After creating a voice channel click on the “Settings” icon to open all the settings of the AFK Channel.
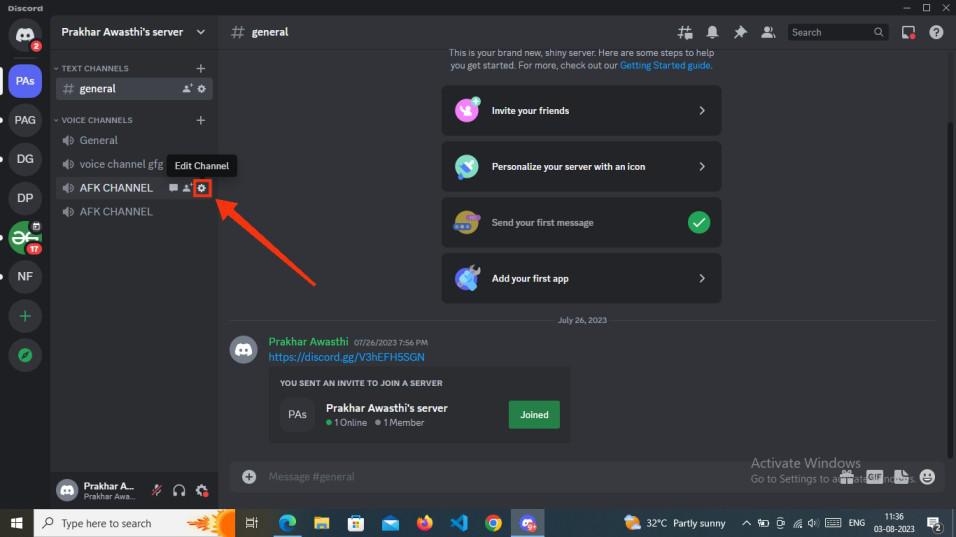
Select newly created channel and Click on Settings icon
Step 6: Disable Permissions of AFK Channel
Now Click on “Permission” from the left hand side and “Disable Voice channel permissions”.
Note: Remember to click “Save Changes” button to save all the changes you made.
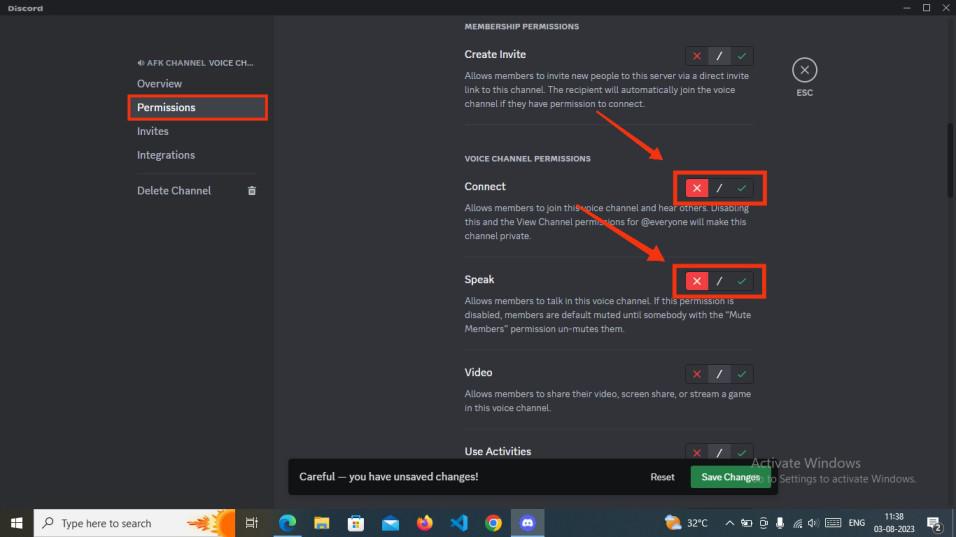
Click Permissions tab >> Disable permissions >> Click Save changes
Step 7: Go to the “Server Settings”
Now click on your “Server” in which you have created an AFK channel and click on the “Server setting” icon to access all the settings options of the server.
.jpg)
Go to “Server Settings”
Step 8: Select Overview and Navigate to Inactive Channel
In the “Overview” section, go to the “Inactive Channel” and click on the dropdown arrow icon. Choose the newly created AFK channel by selecting “AFK Channel”.
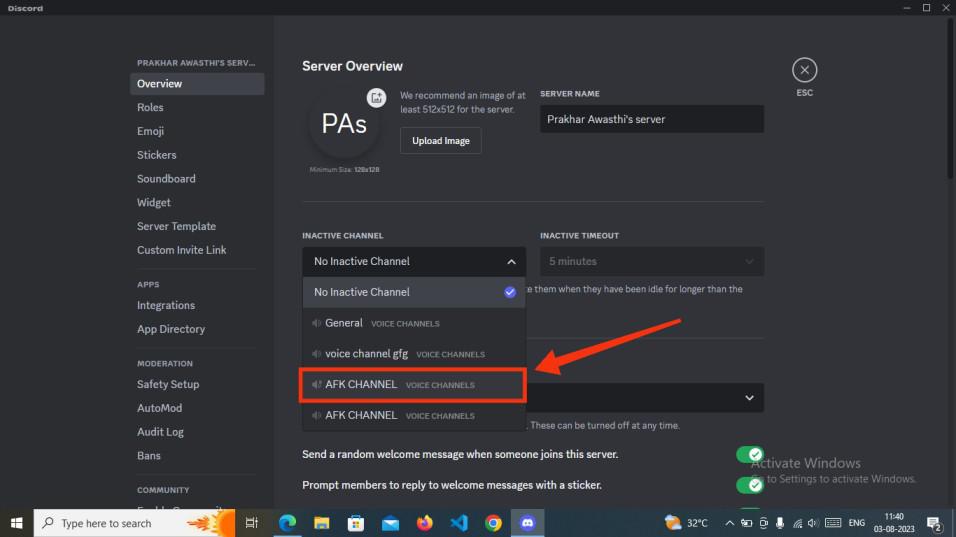
Select Afk Channel
Step 9: Set “Inactive Timeout”
Now proceed to the next option, “Inactive Timeout,” and choose your preferred time duration. This determines when users will be automatically moved to the AFK channel.
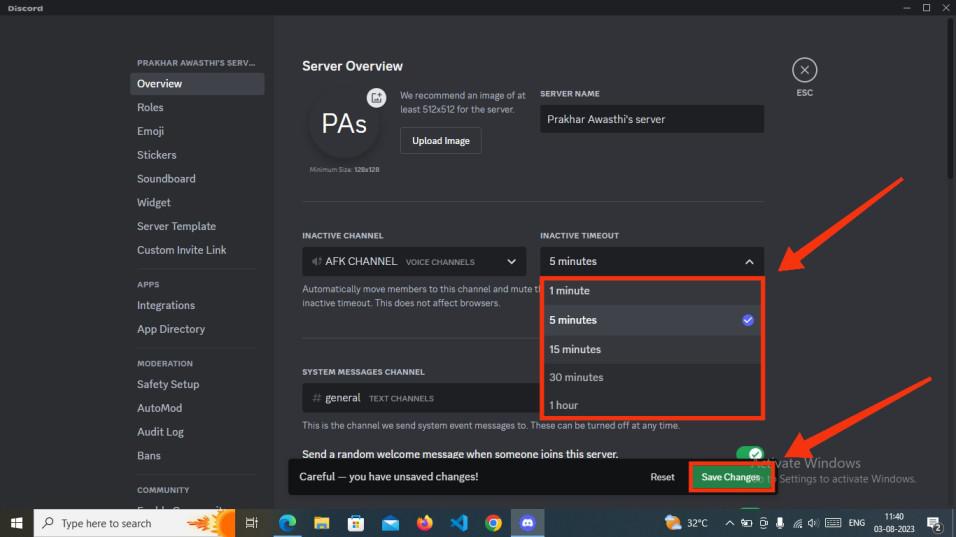
Set Inactive Timeout >> Click Save Changes
How to Make an AFK Channel in Discord on Android, iPhone, and iPad
Step 1: Open Discord App on your Mobile
To launch Discord Application click on the Discord Icon.

Click on the Discord Icon to the App
Step 2: Select a Sever and Select Voice channel and click “+”
Select a “Server” where you want to create an AFK channel and navigate to the voice channel and click on the “+” icon to create a new voice channel.
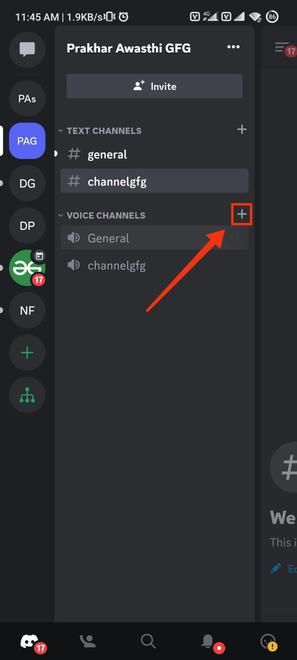
Click ‘+’ button
Step 3: Select Channel Type and Type Channel Name
Now simply type the channel name as “AFK Channel” and select the channel type as “Voice” and tap the “Create” button displayed on the top right corner of your mobile screen.
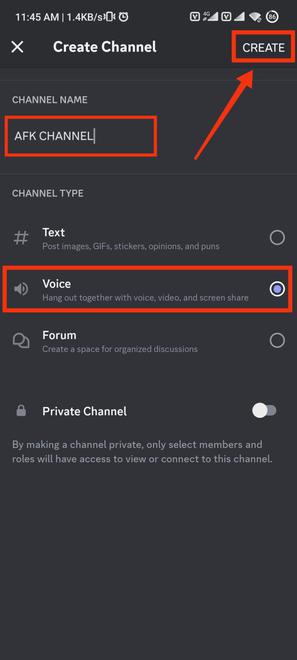
Name Channel >> Select voice >> Click Create
Step 4: Long press on AFK Channel to open Channel settings
Now after creating an AFK channel, next move is to change the settings for which long press the channel name to make options appear on your mobile screen.
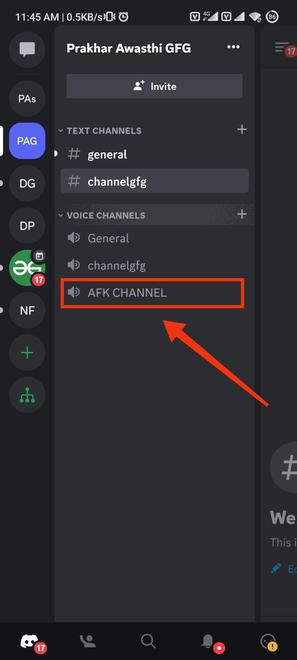
Long press your channel
Step 5: Select “Edit Channel”
From the drop-down menu select “Edit channel” to edit the channel.
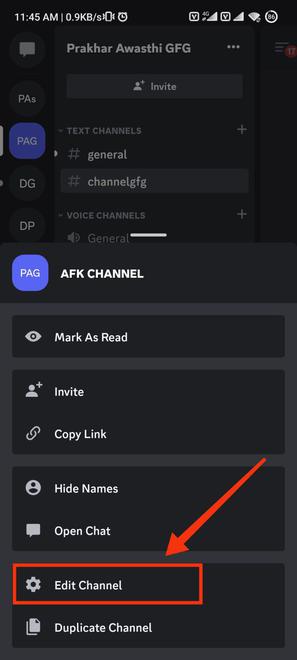
Select Edit Channel
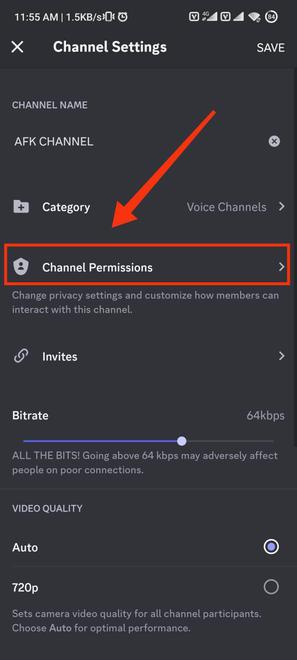
Step 6: Click on the “Channel Permissions”
Click on the “Channel Permissions” to manage the permissions given to the members of the channel.
Click Channel Permissions
Step 7: Click on Advance View and Everyone from Roles
To modify permissions in the AFK Channel, click on the “Advanced view” option. Then, select “everyone” under the role to make the changes to permissions.
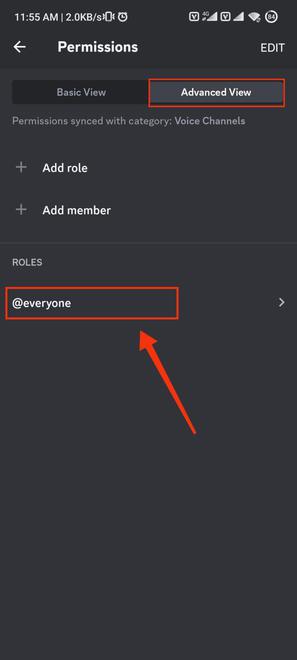
Click Advanced View >> Click everyone
Step 8: Disable Voice Channel Permissions
Now, “disable the voice channel permission” to prevent members joining this channel from connecting to speak in the AFK channel.

Disable permissions
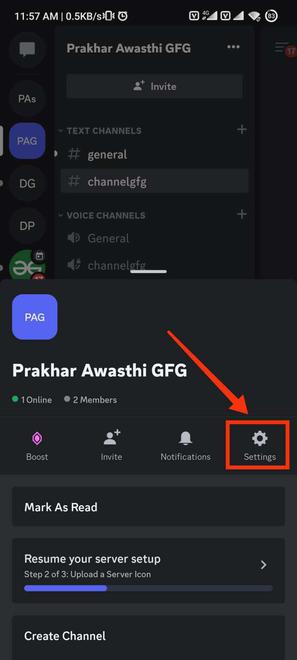
Step 9: Click on Server and open “Server Settings”
Now go back to the “Server” in which you have created an AFK channel and open “server settings”.
Go to Server settings
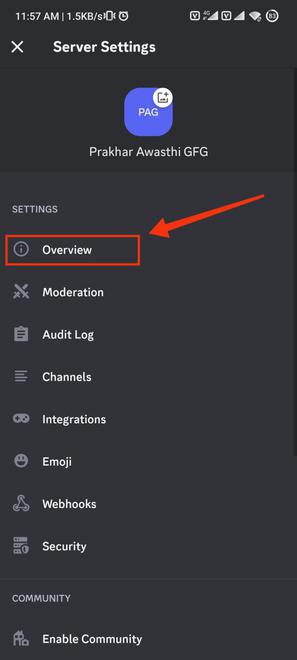
Step 10: Select “Overview”
After going to the server settings click on the “Overview” button.
Select Overview
Step 11: Edit Inactive Settings
Now edit the inactive settings and set “AFK channel” in Inactive channel and select your “preferred time” in Inactive timeout settings and click on save button displayed on the top right corer of your mobile screen.
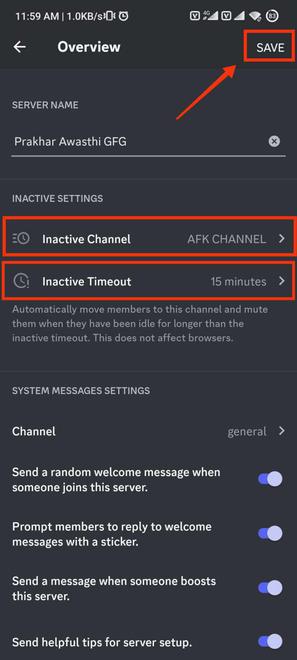
Select Inactive channel >>Select Inactive Timeout
Conclusion
In situations where a user is logged in but not actively participating on the server, a Discord AFK channel serves as a valuable tool. Server owners can establish these channels to prevent unnecessary attempts to engage with users who are currently inactive. Additionally, users have the option to indicate their AFK status, signaling that they are temporarily unavailable, thereby reducing disruptions while they are away from Discord. This feature is particularly advantageous for maintaining seamless communication within the server and respecting the availability of its members.
Share your thoughts in the comments
Please Login to comment...