How to Add and Manage Discord Roles
Last Updated :
12 Feb, 2024
Create and Set Roles Channel in Discord using Carl Bot – Quick Steps
- Open Discord App
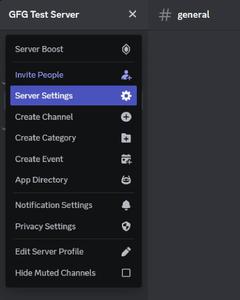
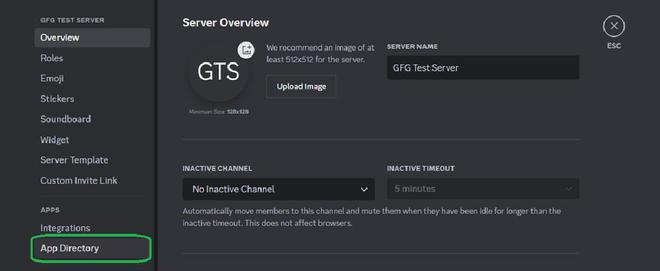
- Navigate to Server Settings > App Directory
- Search “Carl Bot” and add it to the server
- Enable Developer’s Mode in User’s Settings > Advanced
- Create necessary roles in Server Settings > Roles
- Ensure “carl-bot” is at the top of the Roles list
- Create a Text Channel named “roles”
- Send any message in the “roles” channel and copy the Message ID
- Type “/reactionrole add” or “/reactionrole addmany” in the roles channel
- Paste the Message ID, provide Emoji(s), and assign Role(s)
- Users can now take up roles by reacting to Emojis in the Roles Channel
Discord is one of the most used social media applications to stay connected with communities and manage community members by sorting them into different categories. Discord channels are a great way to make sub-categories to manage members!
What is the Roles Channel in Discord
Well, Are you tired of assigning roles to each member individually on your Discord Server? Then here is the solution, you can create a roles channel on Discord where users can take the roles by themselves just by reacting to the emoji!!
Roles Channel can be made with Bots like Carl Bot, MEE6 Bot, Sapphire Bot, and others.
How to Add Roles Channel in Discord
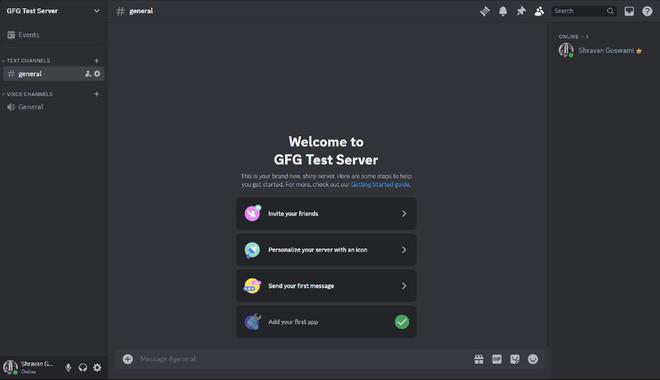
Step 1: Open the Discord App or Discord Web App
Launch the Discord Desktop App or Discord Website and open your server.
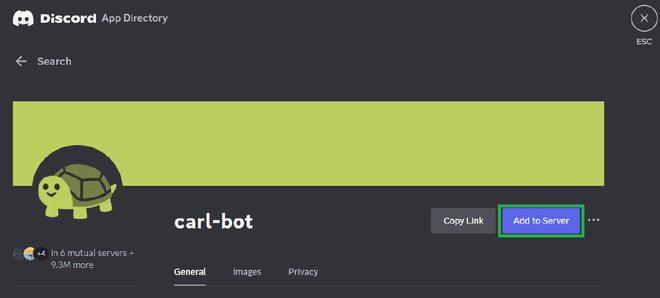
Step 2: Add Carl Bot to the server
- Visit App Directory under the APPS Tab in Server Settings
- Search Carl Bot and click the first bot you see in the Image with the Green Turtle Logo
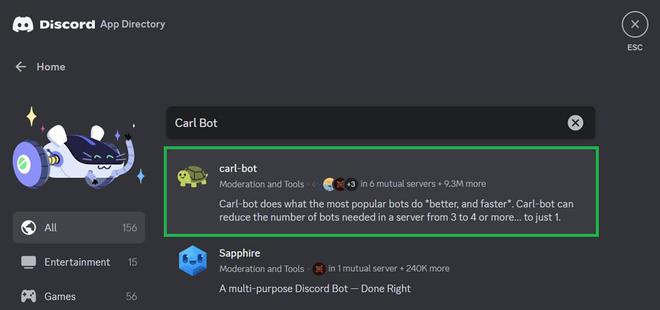
- Add Carl Bot to the Server by clicking on the “Add to Server” button
- Select Server and Click on Continue & Authorize it after Continue.
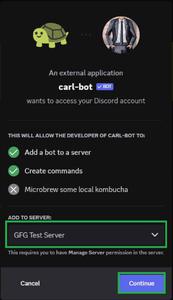
After Authorizing, it will ask for Human Verification so do it and Carl Bot will get added to Server
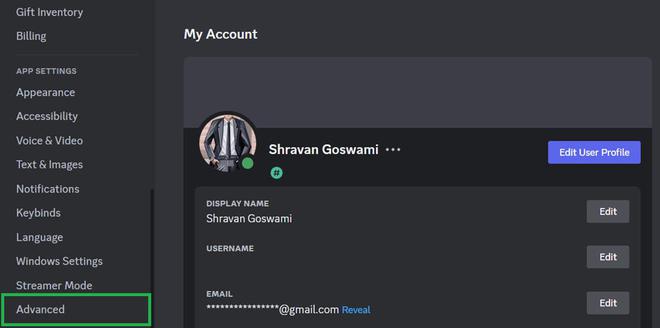
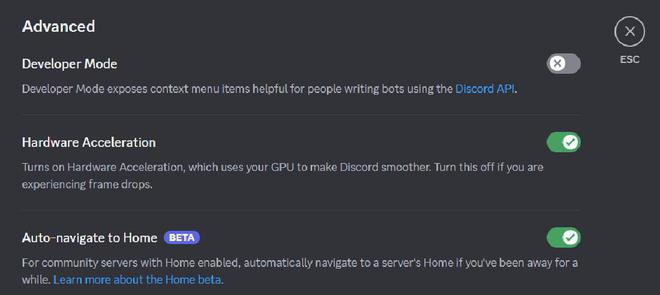
Step 3: Turn on Developer Mode in Discord
Developer Mode should be turned on to get Message ID
- Click on the Setting Button at the bottom left in the profile section

- Scroll left sidebar and click on Advanced Tab
Step 4: Create Roles in Server Settings
- Click on Create Role in the Roles Tab
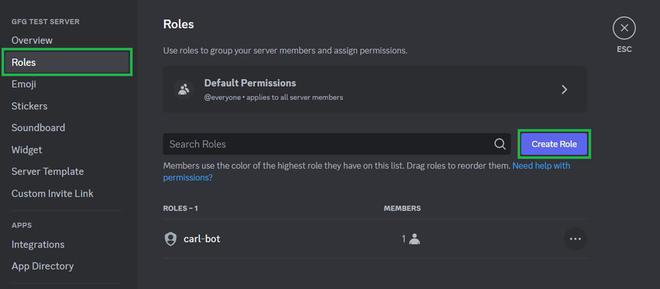
- Create roles based on your requirements, We are adding two roles for this article and they are “Student” and “Teacher”
To properly learn how to create and setup roles in discord click here.
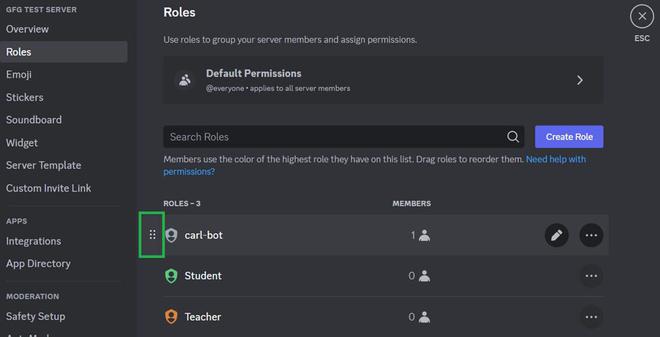
- Make sure that Carl Bot’s role is at the top of other roles in the Roles tab and if it is not at the top then use a slider at the left side of the role to do this.
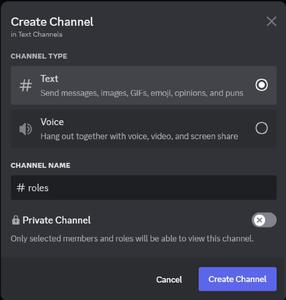
Step 5: Create a Text Channel name as “roles”
- Click on the “+” icon in the sidebar at the right side of TEXT CHANNELS
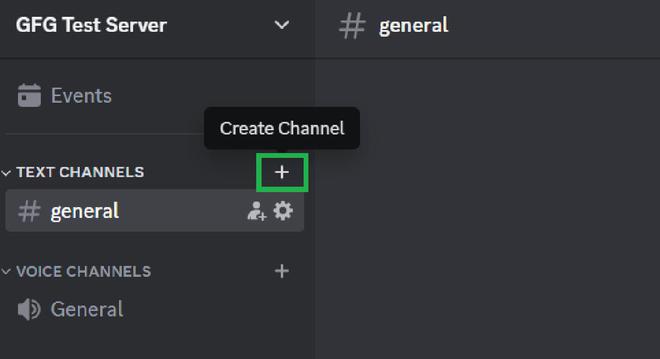
- Write “roles” as the Channel name and click on Create Channel
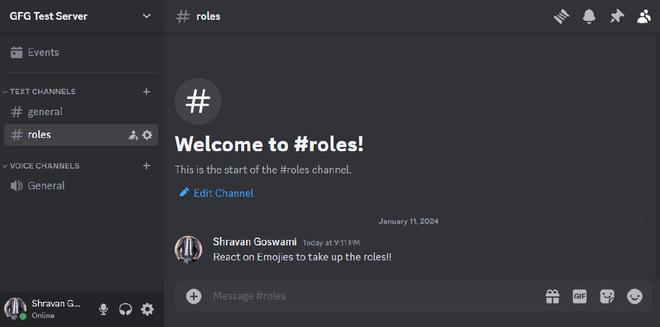
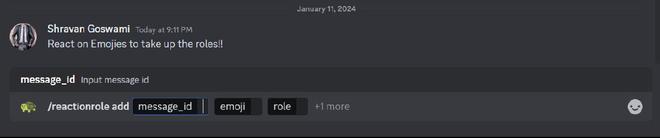
Step 6: Send a message in the roles channel
- Send any message in the roles channel, for example – “React on Emojies to take up the roles!!”
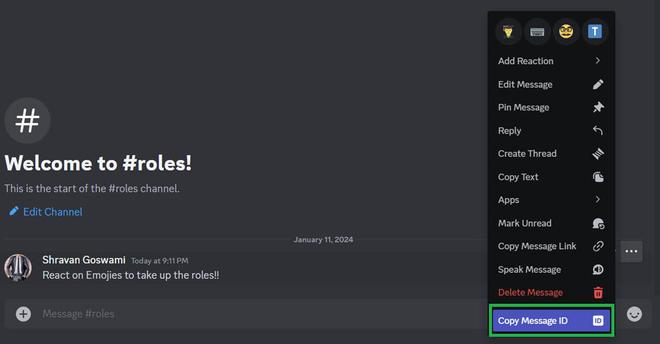
Step 7: Copy Message ID
- Right-click on a message or click on the three dots that come on the right side when a message is hovered over and click on the Copy Message ID.
You cannot see Copy Message ID option if Developer’s Mode is OFF and please follow Step 3 to turn on developer’s mode in Discord!!
Step 8: Type /reactionrole in roles channel
- Make sure to use forward slash and type /reactionrole and select any of these options that you can see in this image based on your requirements.
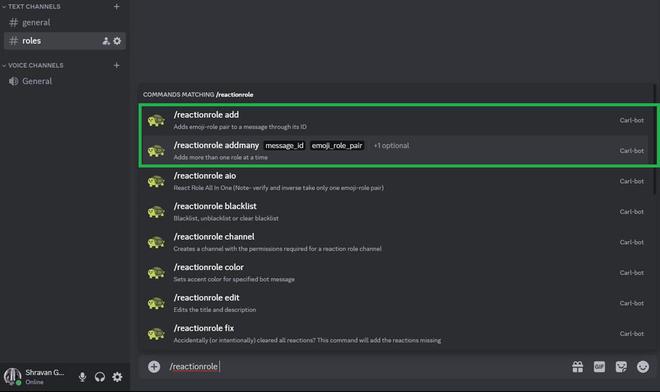
- /reactionrole add is selected for example.
- Paste the Message ID that you copied before in the message_id section in the message, emoji in 2nd section, role in 3rd section and select a channel in 4th section if asked.
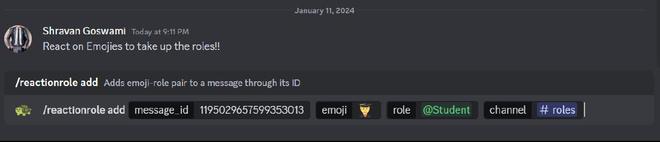
- Send this Message and Wait for some seconds and now users are ready to take up the roles by themselves.

Well, its all set now and you can also use colors in this roles channel and to do this Click here.
How to Assign Roles in Discord – Managing Members within a Role
The “Manage Members” tab shows you who’s in a role, lets you change their settings and adds new people. Click a role name to see who’s in it. In this Zapier role screenshot, you can’t add or remove members from an integration-related role.
Conclusion
With these detailed steps, We have successfully created and set up a roles channel in Discord using Carl Bot. This user-friendly approach not only simplifies role management but also enhances user engagement within your Discord Server. For more features, such as adding colors to the roles channel, refer to this article. Stay Tuned Geeks!!
FAQs on How to Make a Roles Channel on Discord
What is Roles Channel?
A roles channel on Discord allows users to self-assign roles by reacting to emojis.
Can role channels be created with bots other than Carl Bot?
Ofcourse YES, Certainly! While this article is focused on Carl Bot, other popular bots like MEE6 Bot, Sapphire Bot, and others also offer similar features. The steps may vary slightly, but the concept remains the same.
Can I create multiple role channels in my Discord server?
Absolutely! Depending on your server’s needs, you can create multiple roles channels to cater to different roles or responsibilities. Each channel can have its unique set of reactions for role assignment.
How do I remove a role from a user in a roles channel?
To remove a role from a user, an admin or a user with the appropriate permissions can use Carl Bot commands like /removerole [user] [rolename]. Alternatively, server admins can manually remove roles through Discord’s native role management.
How can I troubleshoot issues with the reaction roles setup?
If you encounter issues with the setup, ensure that Carl Bot has the necessary permissions. Additionally, check that Message ID is not link and also check emoji, and role information entered during the setup to avoid any issues.
Can I modify or delete a reaction role message once it’s set up?
Yes, you can modify or delete a reaction role message. Use Carl Bot commands like /reactionrole edit or /reactionrole delete in the roles channel to make necessary adjustments.
Share your thoughts in the comments
Please Login to comment...