Make a Discord Channel Read Only – Quick Steps
- Launch Discord > Select a Server
- Select a Channel > Edit “Channel Permissions”
- Select @everyone > Scroll Down to Text Channel Permissions
- Disable all Text Channel Permissions > Save Changes
Navigating the dynamic landscape of online communication platforms, such as Discord, demands a nuanced understanding of its features and functionalities. Among these capabilities, the concept of read-only channels stands out as a powerful tool for server administrators and community moderators. Whether you aim to restrict certain conversations, curate essential information dissemination, or foster a focused environment, creating read-only channels is a valuable skill on Discord. In this article, we will learn to transform both existing and new Discord channels into read-only spaces. Whether you’re seeking to convert an ongoing discussion hub into an information repository or planning ahead to establish controlled zones for announcements and reference materials, this comprehensive exploration will equip you with the knowledge to navigate the process seamlessly. By effectively utilizing the read-only channel feature, you can exercise precise control over the interactions within your server, enhancing engagement, information flow, and user experience.

What is a Read-Only Chat on Discord
Read-only chats on a Discord server are restricted to moderators or the server owner for communication. Members can read messages in these channels but can’t respond or send new messages. This setup eliminates posting rights for all users except the designated moderator or server owner.
How to Make an Existing Channel Read-Only on a Desktop
Step 1: Launch Discord App
Launch the Discord App on your Desktop or open the Discord Web App
If you do not have the Discord app installed, you can simply access Discord directly through any web browser on your desktop.

Click on Discord icon to open App
Step 2: Select a Server and Select Your Existing Channel
Choose a “server” where you wish to establish the read-only feature, and then pick the specific “channel” you intend to transform into a read-only format.
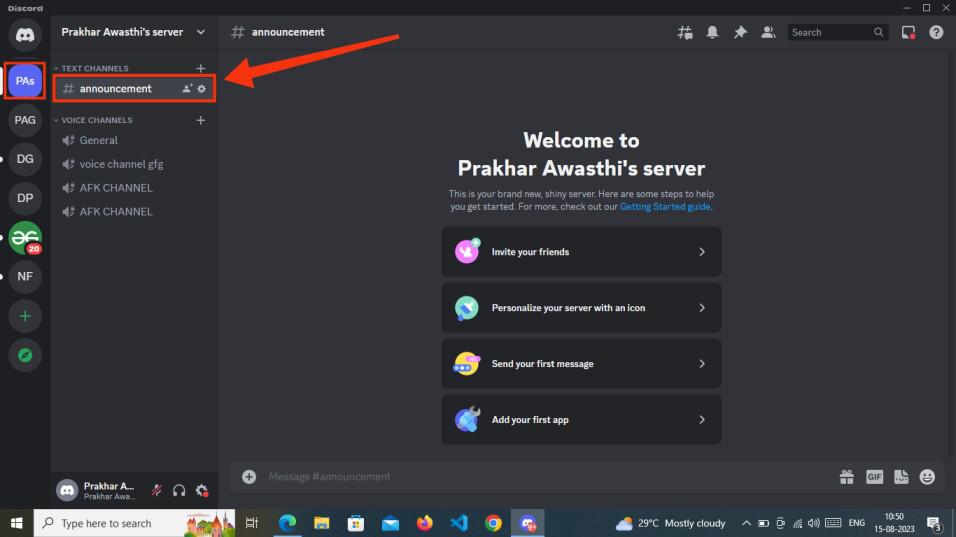
Go to Your Server and channel
Step 3: Click on Gear Icon and Edit the Channel
Once you’ve navigated to the desired channel you wish to turn into a read-only mode, click on the “Gear” or “Edit channel” icon to customize its settings.
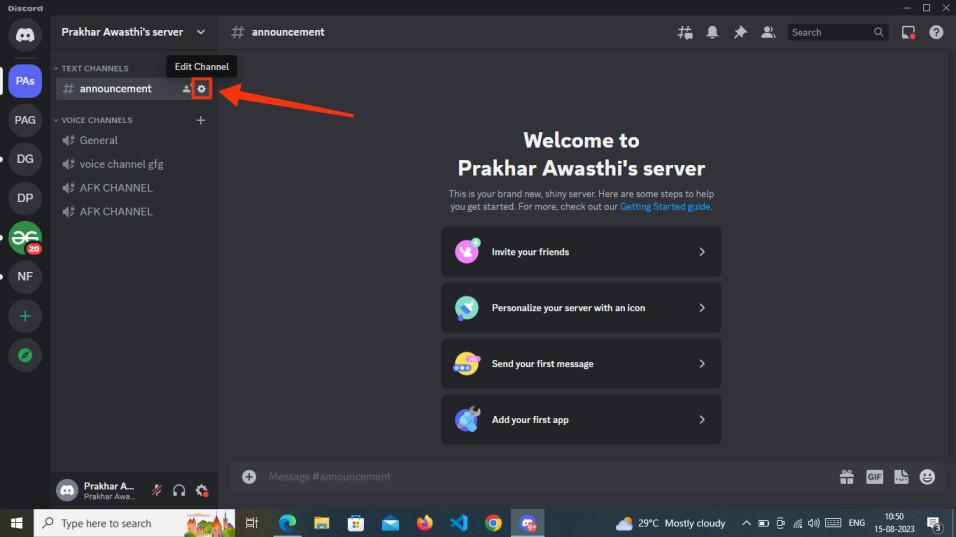
Click on “Edit channel” icon
Step 4: Select “Permissions” tab
Now select the “Permission” tab and scroll down to edit the advance channel permissions.
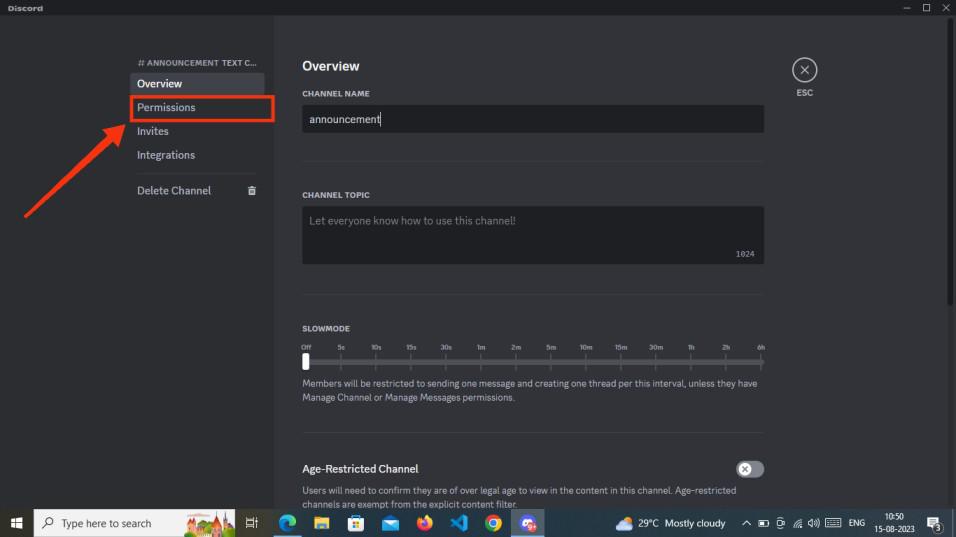
Select “Permissions” tab
Step 5: Click on Advance Permissions and Select @everyone
Within the Permissions tab, proceed to access the “Advanced Permissions” option. Once you’ve clicked on “Advanced Permissions,” choose the @everyone role since you intend to make the channel read-only for all users. This will grant you access to a range of permissions associated with the text channel, enabling you to control the permissions for the @everyone role effectively.
.jpg)
From Advanced permission >> Select @everyone role
Step 6: Disable Text Channel Permissions
Now disable all the permissions which you think gives power to everyone of sending messages, disable all the permissions including Send Messages, Send Messages in Threads, Create Public Thread and Create Private Thread. By disabling all these permissions no member of the group can send message or can create any thread in the group.
Note: Ensure to click on the Save Changes button present at the bottom of the interface to save your all the changes you made.
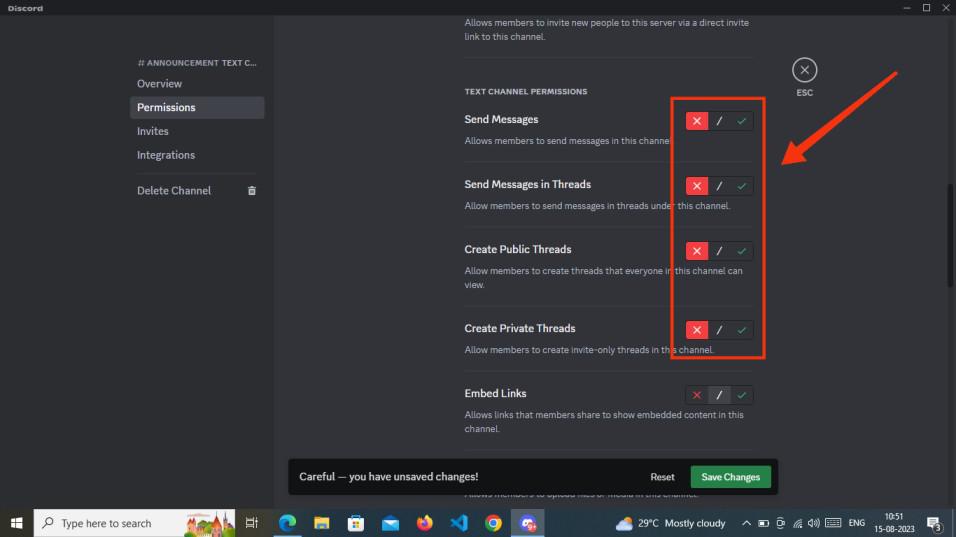
Manage Sending messages permissions
How to Create a New Read-Only Channel in Discord
Step 1: Open Discord App
Launch the Discord App on your Desktop or open Discord Web App
If you do not have the Discord app installed, you can simply access Discord directly through any web browser on your desktop.
Click on Discord icon to open App
Step 2: Select Your Server
Now after opening your Discord application, select your “server” in which you want to create read-only channel.
.jpg)
Go to your Server
Step 3: Create a Channel
After selecting the server, now right-click on the server to open server menu and then select “Create Channel”.

Right click on your server >> Click “Create Channel”
Step 4: Type Channel Name and Click Create Channel
To create a channel, opt for the Text channel type, input channel name as “read-only-channel”, and finalize the process by clicking the “Create Channel” button.
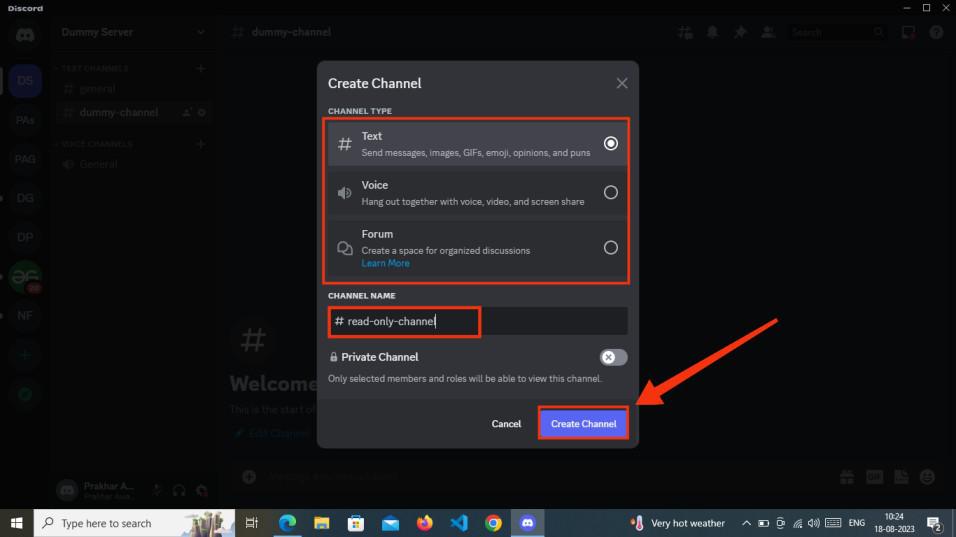
Customize your channel >> Click on “Create Channel” button
Step 5: Edit the Created Channel
To modify the channel, access the channel settings or click on the gear icon and select it to edit permissions.
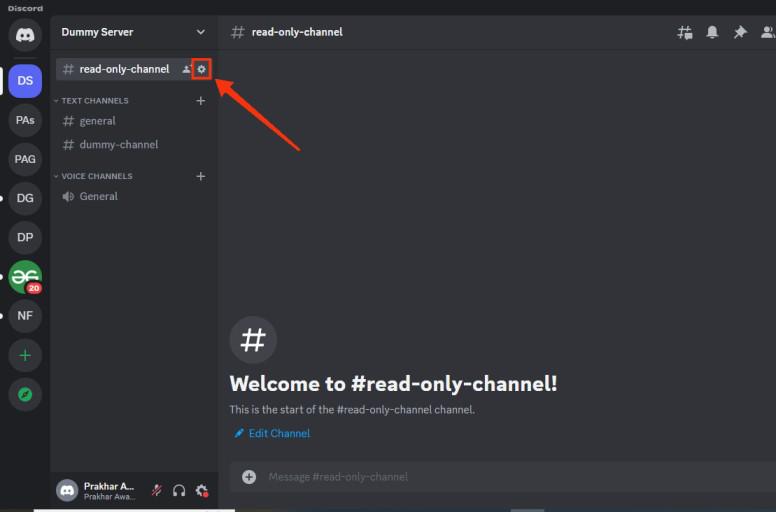
Click on Channel Settings
Step 6: Edit Channel Permission
Select the “Permission ” tab and click on “@everyone”.
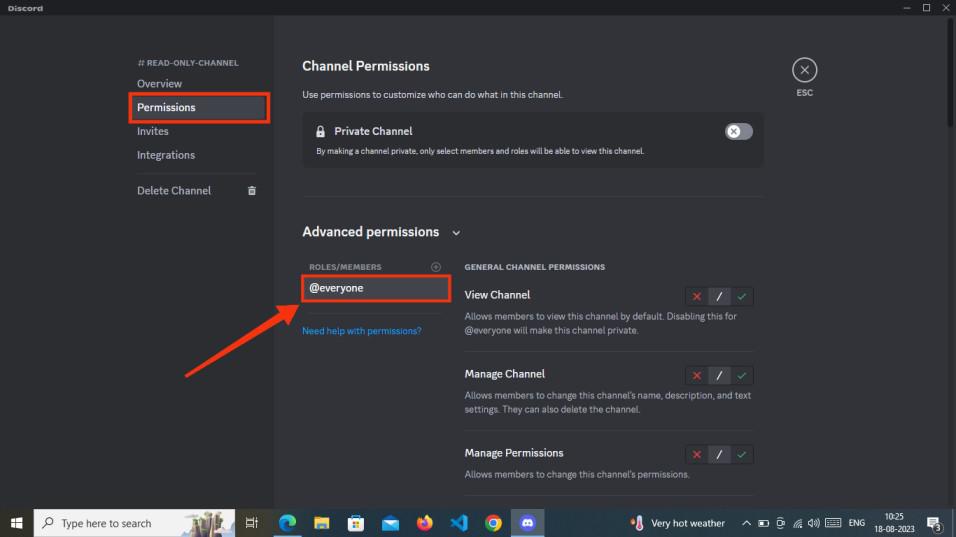
Select “Permissions” tab >> Click on “@everyone”
Step 7: Disable all Text Channel Permissions and Save Changes
Ensure that you disable all permissions listed under “Text Channel Permissions” and then save the changes. You can refer to the image below for guidance on which permissions to deactivate.
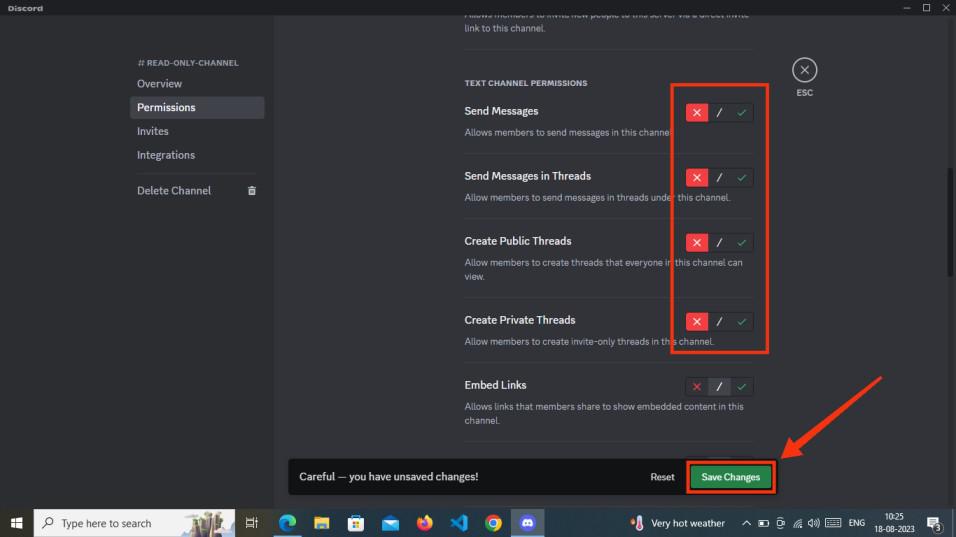
Disable Messages permissions >> Click “Save Changes”
How to make Discord Channels read only on Mobile (Android & iPhone)
Step 1: Open Discord Mobile App
To launch the Discord Mobile App, locate the Discord icon and give a click.

Click on the Discord Icon to open App
Step 2: Select a Server and Click Server Menu
Now select a server in which you want to create a Read-Only Channel and then click on the three-dot icon to access the server menu.
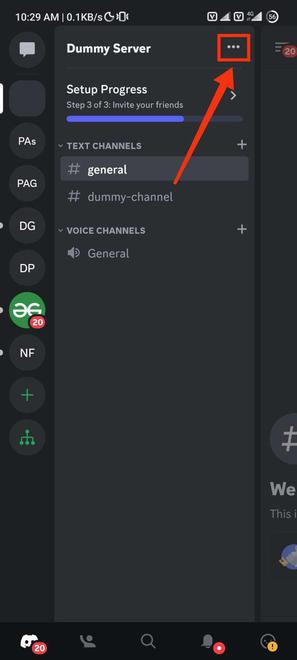
Click Three-Dots
Step 3: Select “Create Channel”
Now from the drop-down menu, select “Create Channel”.
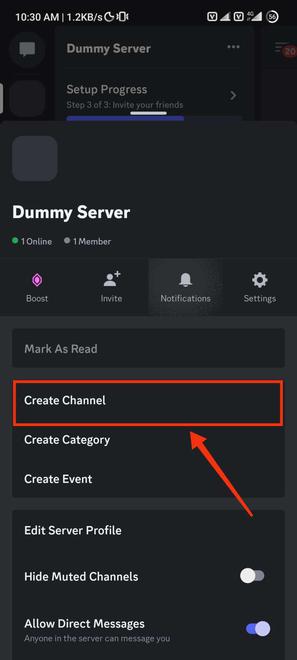
Select “Create Channel”
Step 4: Type Channel Name and Select Channel Type
Personalize your channel according to your preferences by naming it and choose “text” as channel type. Once you’ve customized the channel, press the “Create” button to establish it.
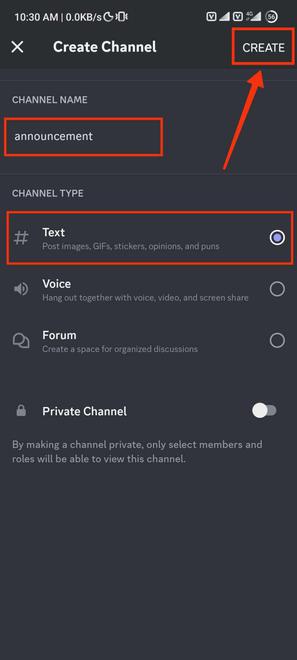
Customize your Channel >> Click “Create”
Step 3: Select “Edit Channel”
Now “Edit Channel” by long pressing the newly created channel for Read-only, a small pop-up will appear and select “Edit Channel”.

Select “Edit Channel”
Step 4: Edit “Channel Permissions”
Now after opening the “Channel Settings”, click on the “Channel Permissions” to access and edit the channel permissions.
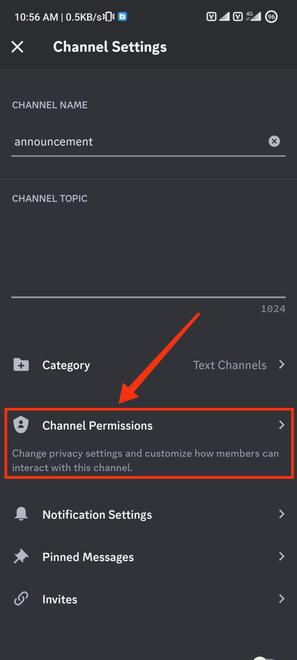
Select “Channel Permissions”
Step 5: Click on Advance View and Select @everyone
After clicking on “Channel Permissions,” proceed to select “Advanced View,” followed by clicking on “@everyone.”
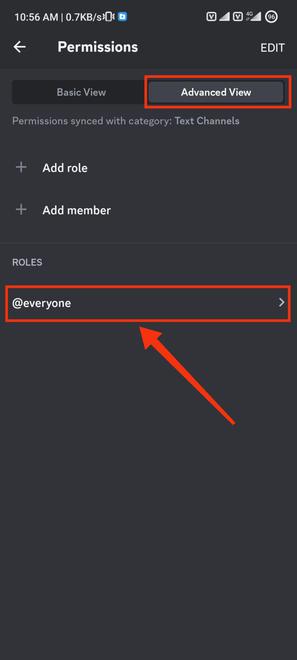
From Advanced View >> Select “@everyone” role
Step 6: Edit Text Channel Permissions
When you access the “@everyone” role, you’ll see a list of permissions that can be enabled or disabled. Within these permissions, deactivate the Text Channel Permissions including “Send Messages,” “Send Messages in Threads,” “Create Public Thread,” and “Create Private Thread.” This action will prevent members from sending messages in any form, limiting their interaction to reading only. Your channel will then be designated as a read-only channel.
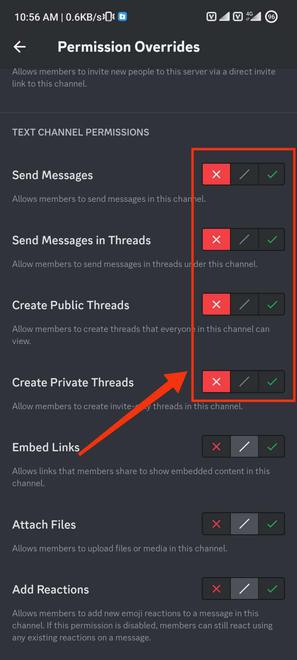
Manage all Messages Permissions
Conclusion
Employing read-only channels on Discord can significantly improve communication within servers. These channels serve as repositories for vital information, announcements, and resources while preventing unrelated discussions. Creating read-only channels is straightforward, involving permission adjustments to ensure controlled interactions. Striking the right balance between open dialogue and controlled information dissemination is crucial. Customizing settings tailored to a server’s needs encourages organized discussions and collaboration. Read-only channels enhance communication efficiency and maintain order, making Discord an even more versatile platform for effective community interaction.
FAQs
Can I make the channel read-only for some certain users?
Yes, you can go through the Channel’s Permissions setting and can disable send messages permissions individually through role options.
Can I undo the read-only channel’s permissions to make it again texting for all users?
Yes, you can reverse the whole process by enabling the send messages permissions for @everyone.
Can any member pin the messages in read-only channel?
No, once all the permissions of sending a message is disabled then a user cannot pin the messages, they can either read or just react the messages if you have enable reaction on messages.
Share your thoughts in the comments
Please Login to comment...