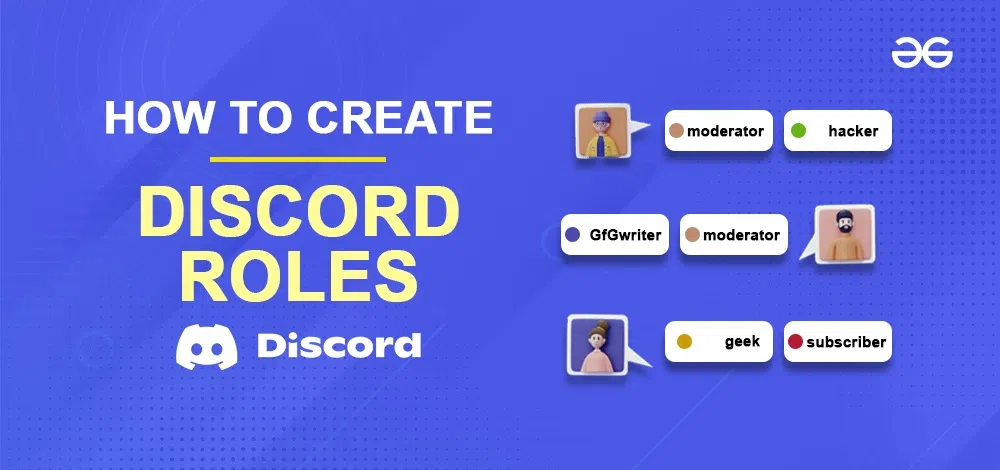
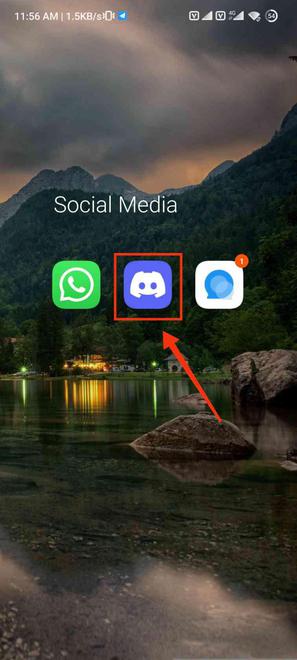
How to Create Server Roles in Discord
Last Updated :
17 Sep, 2023
How to Add Roles in Discord – Quick Steps
- Open Discord App
- Select a Server > Open Server’s settings
- Select Role tab > Click “Create Role”
- Customize Role > Manage Permissions > Add Members
- Review the Changes
Discord is truly remarkable in its dynamic and customizable nature, allowing you to tailor your server to perfection. At the heart of this customization lies a powerful feature known as “Roles.” Roles in Discord aren’t just labels, they’re the backbone of your server’s organization and management. They determine who wields authority, moderates discussions, or simply enjoys a unique identity within the community. Whether you’re creating roles for moderators, members, administrators, or even bots, the process is surprisingly straightforward.
In this article, we’re going to delve into the fascinating world of Discord roles, exploring how to create and assign them. Whether you’re a server owner looking to maintain order or a member seeking to distinguish yourself, this guide will walk you through the steps to harness the full potential of Discord’s role system. So, let’s embark on this journey to discover the art of role creation in Discord.
What are Discord Roles
Discord roles act like special categories where you can neatly organize the members of your Discord server. These roles not only define how they look but can also set the rules and permissions they have within your community. There are several things that you can customize in roles:
- Color of Role Member’s Name.
- Role Members Channel Access Permission.
- Role Members Action in Discord Server.
How to Create Server Roles on Desktop
Step 1: Launch the Discord App or Web App
To launch the Discord app on your Desktop, navigate the Discord app and give it a click.
In the case you are not having the Discord app installed, you can go through your any web browser to the Discord Web.

Click on Discord icon to open the Discord App
Step 2: Select a Server and Right Click to Open Server Menu
First of all, you need is a server you can go through any of your existing server. So, just go to your server and right-click on the server icon to open the drop-down menu.
Go to your Server
Step 3: Select Sever Settings
From the drop-down menu appeared after clicking on the server’s icon gives a lot options to perform anything on the server, among all the options select the “Server Settings” option to open the server settings of the particular server.
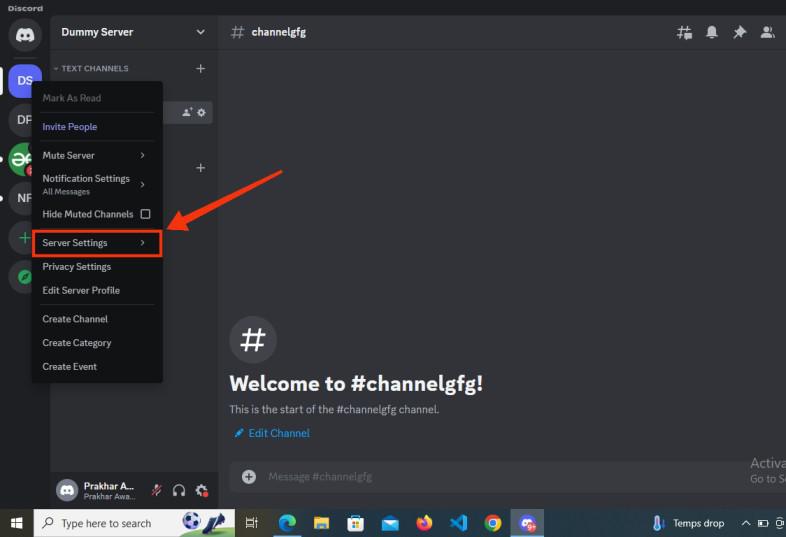
Select Server Settings
Step 4: Select Roles and Click on Create Role Button
After coming to the server settings select the “Roles” tab among all the tabs to go to the roles section of the server and then click on “Create Role” button present before the Default permissions.
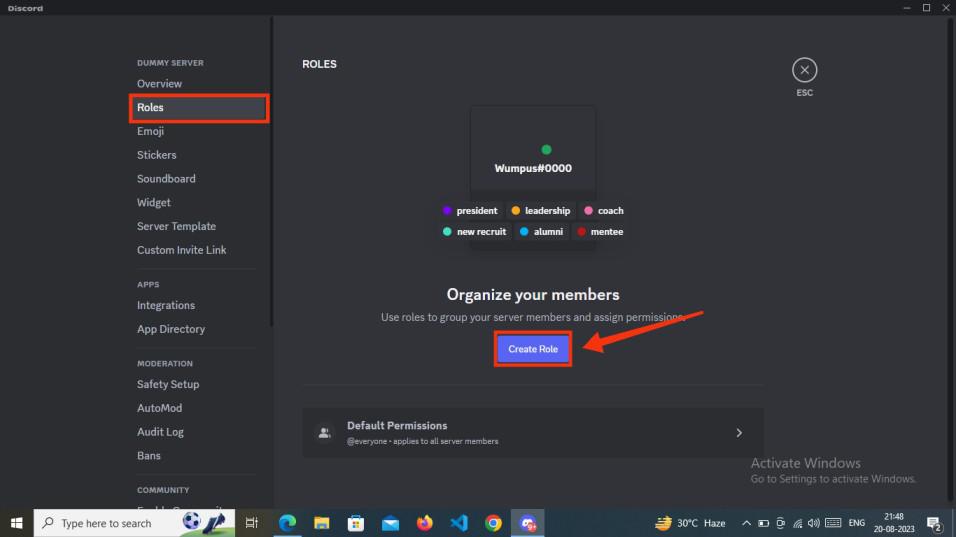
Select “Roles” tab >> Click on “Create Roles”
Step 5: Customize your Role in the Display Section
A role in Discord is created in four steps among the four steps first in Display section you need to customize your role by giving your role a name, for whom you are creating the role and selecting the color for the role. After customizing your role’s name and color go to the permissions tab.
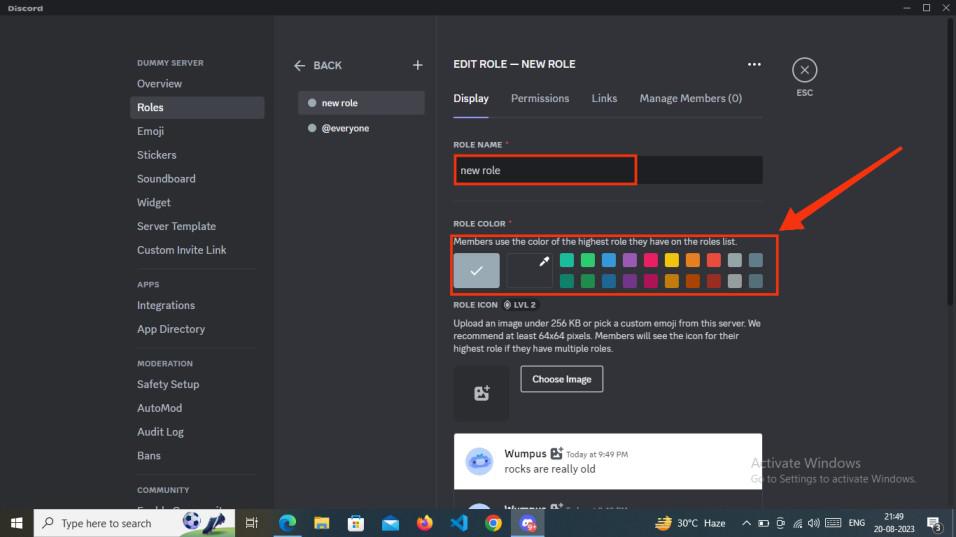
Customize your Role in the Display section
Step 6: Manage Role Permission
Within the permissions section, you can grant specific abilities to the role you’ve created. These abilities can range from viewing channels to managing them, overseeing roles, and more. Granting permissions to your role is as simple as toggling the switch next to each permission name.
Remember to click on “Save Change” button present at the bottom of the interface after giving all the permissions required to the role.
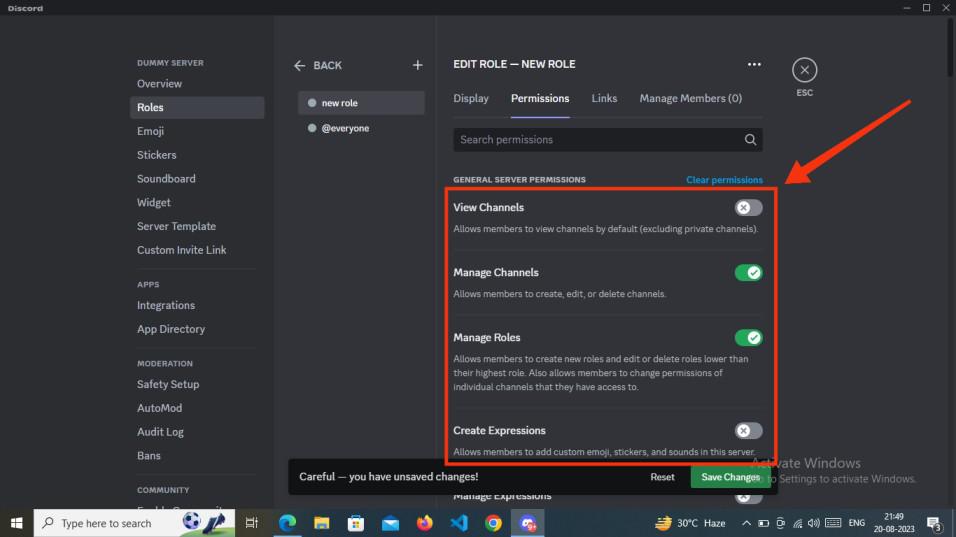
Give Permissions
Step 7: Create Linked Role
Now in the Link tab the person for whom you are creating the role has to link his or her profile to any of the social media account such as Instagram, Facebook, PayPal and so on. You can go through the “Add Requirement” button to add any of the user’s social media accounts.
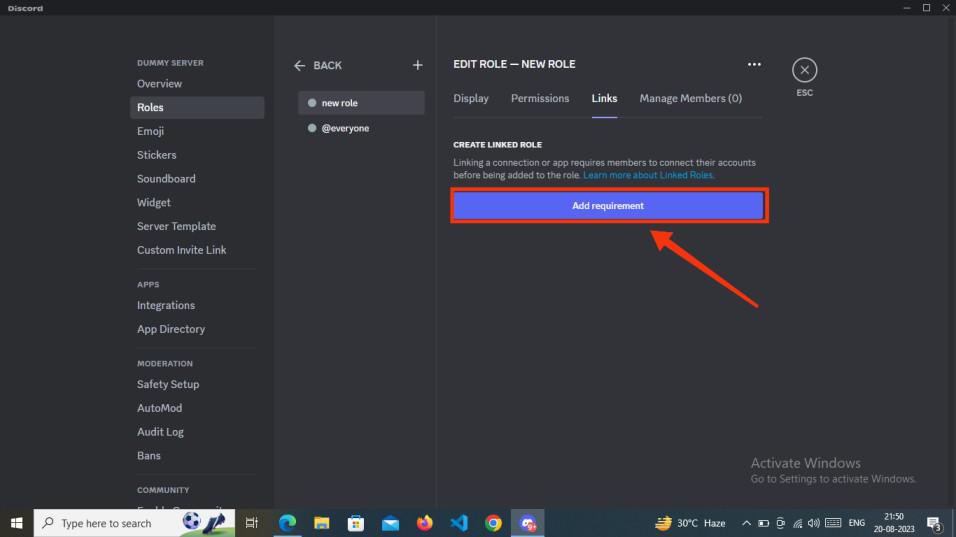
Create Linked Role
Step 8: Add and Manage Members
To assign the newly created role to one of your server members, click the “Add members” button. This action allows you to add members to the role you’ve just created.
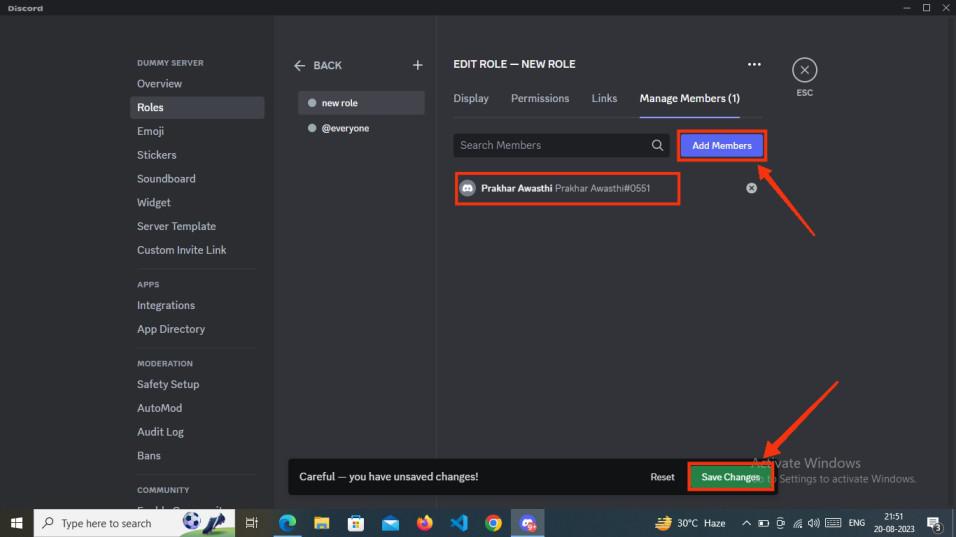
Add members
How to Make Roles on Discord Mobile
Step 1: Open Discord Mobile App
To launch the Discord Mobile App on your mobile, locate the Discord icon and give it a click.
Click on Discord icon to open App
Step 2: Select Server and Click on Three-Dot Menu
Go to your Server in which you want to create roles for member, after coming to your server click on Three Dots present next to your server’s name.
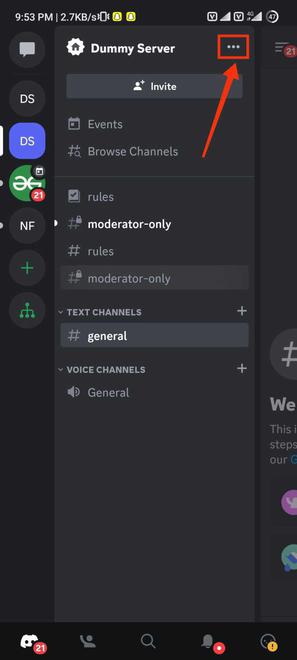
Click on Three Dots
Step 3: Click on Settings Icon
Go to the Server settings by clicking on the Settings (Gear Icon) present in the among options.
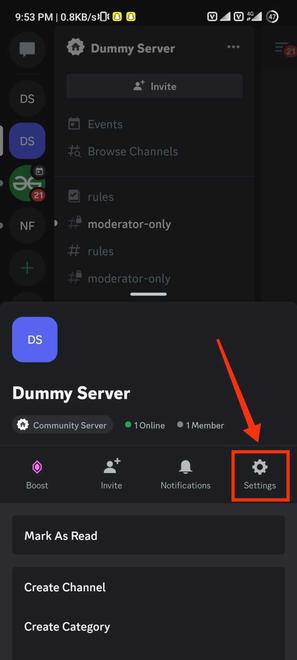
Click on Settings
Step 4: Select “Roles”
After coming to the Server Settings find the Roles option and click on it to open the roles section of the Sever.
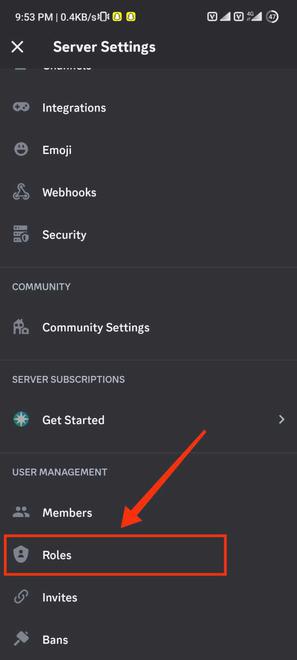
Select “Roles”
Step 5: Click on ‘+’ Icon to Create New Roles
When you click on the Roles option from the server settings you will come to the “Server Roles” of the server and in order to create a new role click on the ‘+’ icon present on the top right corner of the Discord interface.
-660.jpg)
Click on ‘+’ icon
Step 6: Create a New Role and Type Role Name
Now in the first step customize your role by giving the role name and selecting the color. After customizing your role click on the “Create” button.
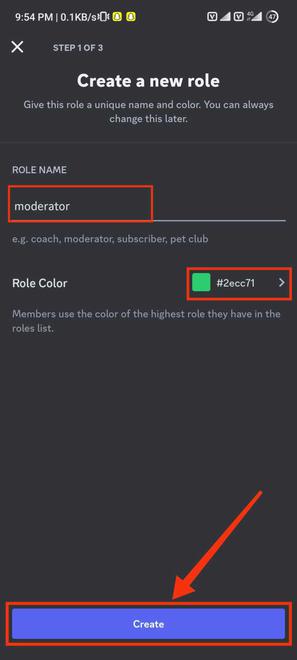
Customize your Role > Click Create button
Step 7: Set Up Permissions
Now give your role the required permissions by clicking on the “Select” button, you can also go for the more permissions by swiping right.
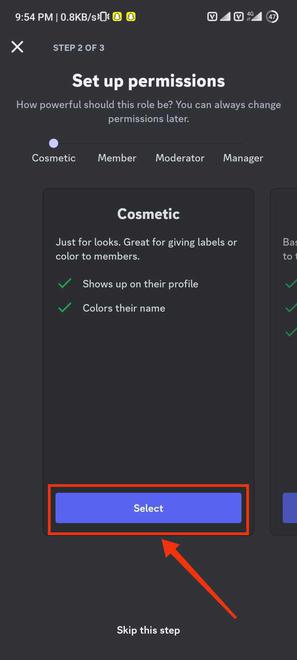
Manage Permissions
Step 8: Add a User and Click Finish
Next, include the members you wish to assign to the newly created role by choosing their names. After successfully adding these members to the role, conclude the process by clicking on the “Finish” button.
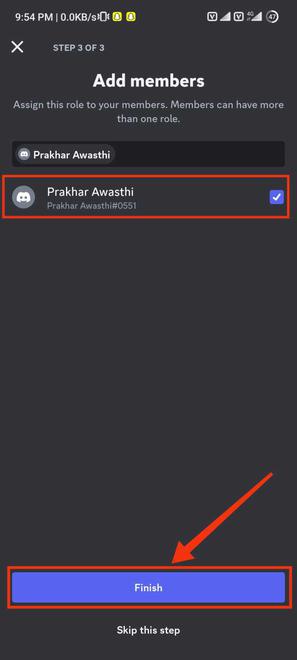
Add Members > Click Finish
Step 9: Review the Changes
Once you’ve completed all the steps in creating the role, take a moment to review the changes you’ve made within the “Server Roles” section.
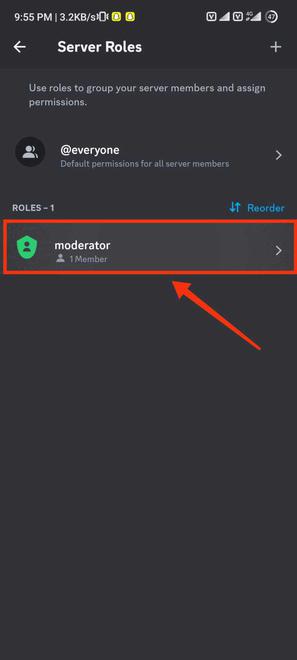
Review all Changes
Conclusion
Discord is a great app providing features to the users within the communities. Making roles in Discord provides a responsibility to the members in the Server, each member selected for the role serves as the job in the server. Roles in Discord can be made in just few steps just follow the steps given above and you will be able to create roles in the Discord. You have to go to your server in which you want to create roles and right-click on the server’s icon to select the Server Settings from the drop-down menu. After encountering to the server settings select the Roles tab and click on “Create Roles” button, after that complete the steps to create a role the steps would be customizing your role, Manage Permissions and Add members. Your role will be created after completing all the steps.
FAQs
Can I Edit the Role?
Yes, as a Server Owner you can edit the role after creating it by going through the server setting >> Roles tab.
Can I customize the color of a role?
Yes, you can customize the color of the role in the Display section. But for this you need to have the rights of Server Owner
Can I assign multiple roles to a single member?
Yes, multiple roles can be assigned to a single member of the server.
Share your thoughts in the comments
Please Login to comment...