How to Change Your User Name on Windows 11?
Last Updated :
24 Nov, 2023
When it comes to Windows 11, our usernames form the unique identity that we bring with us inside the operating system. However, this need may stem from a desire for personalization, security, or a desire for a change of usernames. By following this article, you can change your user name with ease. so Let’s get started.
Methods to Change User Name in Windows 11
In Windows 11, There are several ways to change the User Name, including how to use the Control Panel and the Windows PowerShell command line. Whether you want to change your local account name or Microsoft account name, you will be provided all possible and easiest ways.
Method 1: Changing Your Username Using the Run Command.
Run command helps you to open various Windows utilities quickly as well as change your user name.
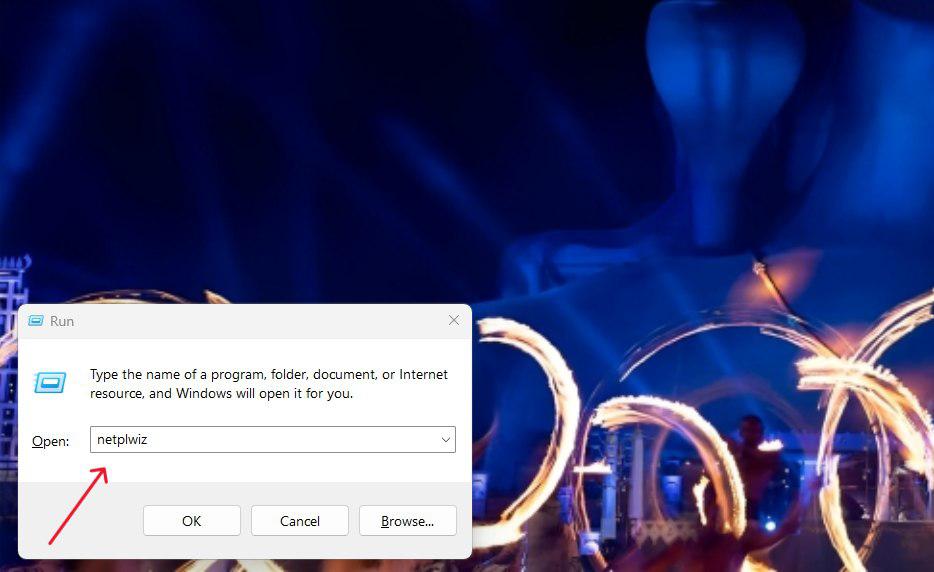
Step 1: Open the run dialog by pressing Win + R.
Step 2: Type “netplwiz” and press Enter.
Step 3: Choose an account, right-click on “properties”, and type in a new username.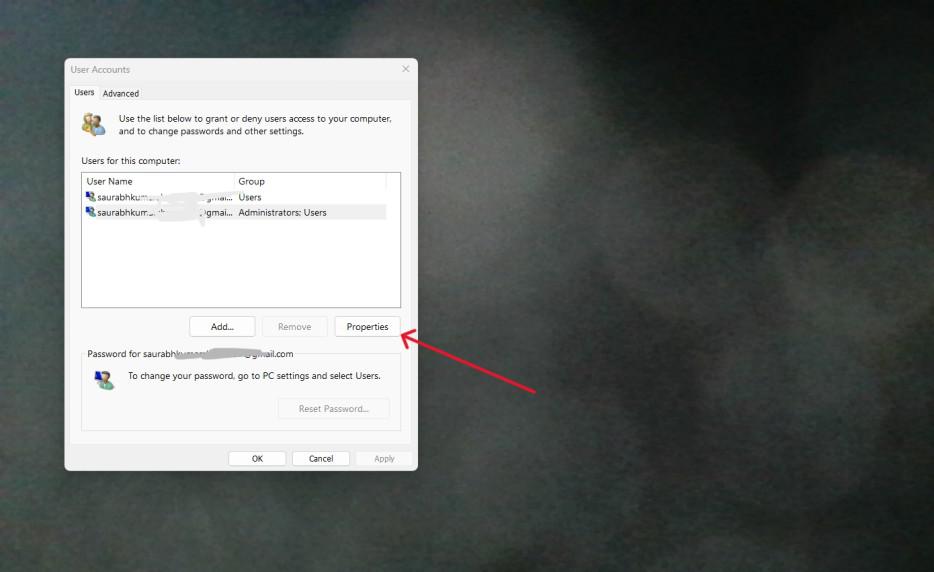
Step 4: Enter the new username in the ‘User Name’ input field. Press ‘Apply’ and ‘OK’ system’s settings’.
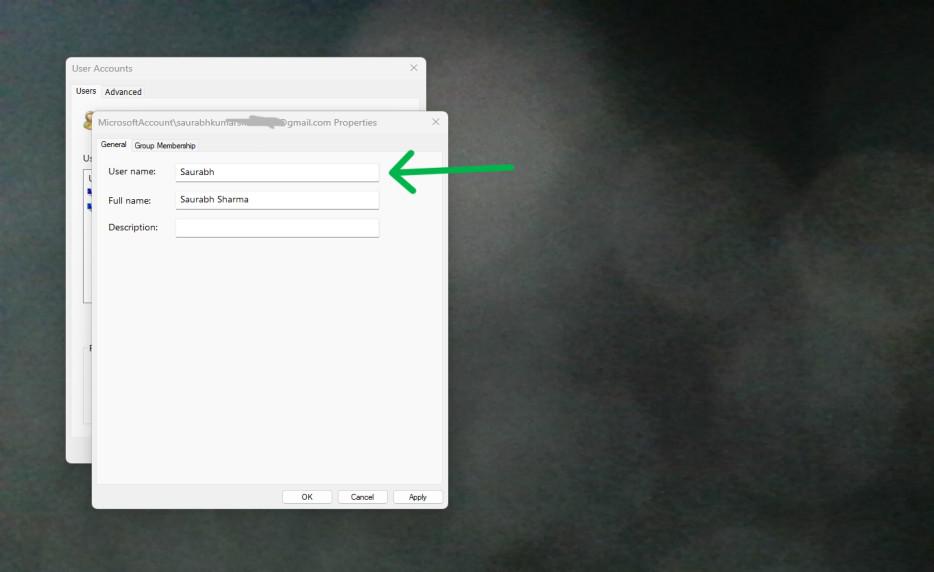
It is an easy to access way of updating the user name without having to go into so much depth in the system’s settings
Method 2: How to Change Your Username Using Windows PowerShell
In this section, the Windows PowerShell is one of the most convenient tools to change usernames amongst those users who feel comfortable with command-line interface.
Step 1: To run PowerShell as an administrator, press Win + X then choose Windows PowerShell (Admin).
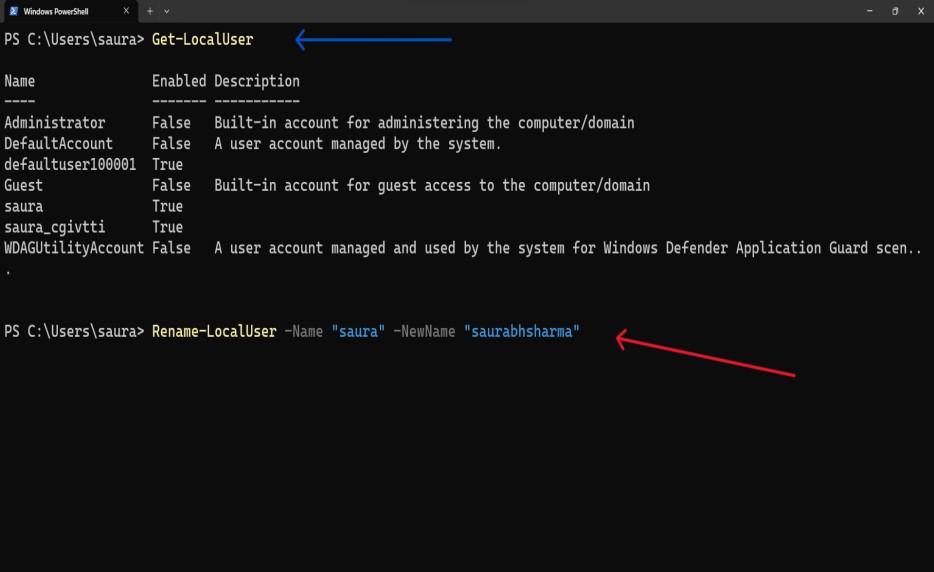
Step 2: The Rename-Local User command followed by the current username and the new desired username. For example:
Get-LocalUser
Rename-LocalUser -Name "currentusername" -NewName "newusername"
Step 3: Press Enter to execute the command.
It works perfectly well for users who like command-line operations as well as automated solutions.
Method 3: How to Change Your Username Using the Control Panel
The Control Panel is a familiar interface for many Windows users, and it provides a straightforward method for changing your username. Here’s how you can do it:
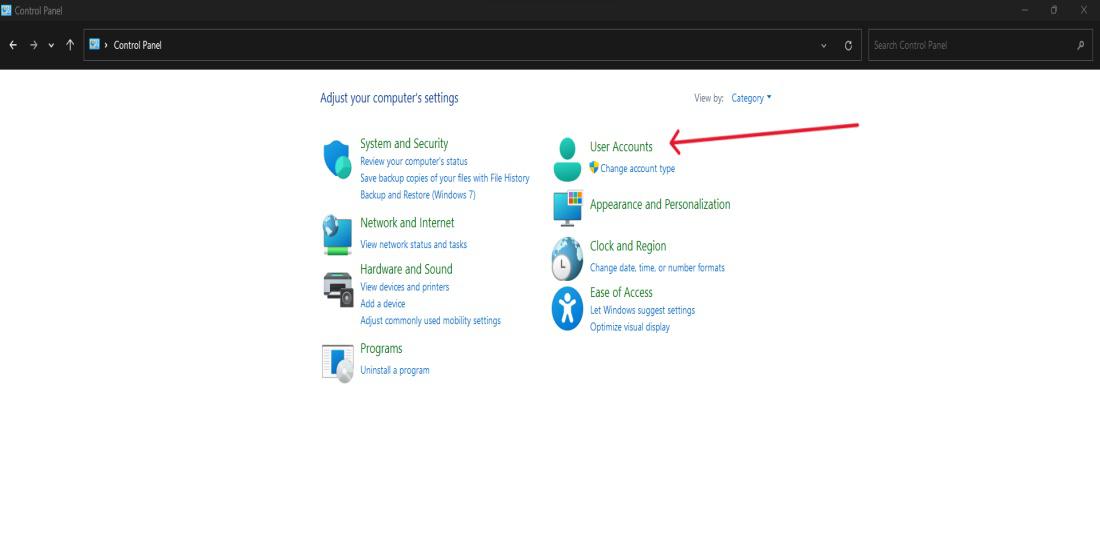
Step 1: Press Win + X and select “Control Panel” from the menu.
Step 2: Click “User Accounts” and then click “User Accounts” again.,
Step 3: Click on “Change your account name.”
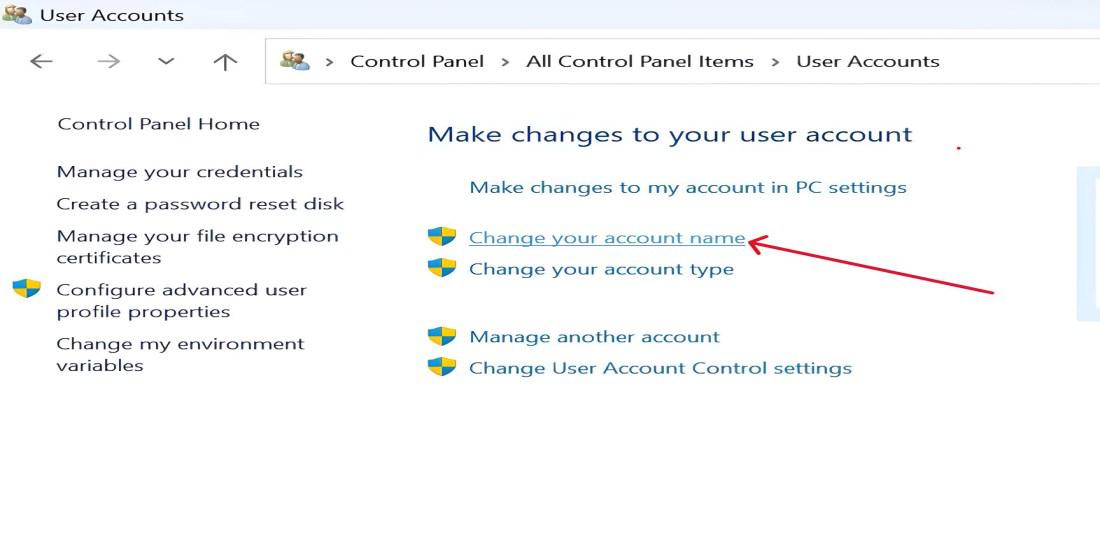
Step 4: Type a new name in the use name field and press “Change Name” button.
The new user name should reflect on your profile, and you are set to log in again using the fresh details.
Method 4: How to Change Your Profile Username From the Microsoft Website
You can also change your user name when signing in if you have a Microsoft account and you can do it through the Microsoft website.
Step 1: Go here Windows and log in or press Win+i, then Account on the right side menu.
Step 2: Click on “Your info” tab.
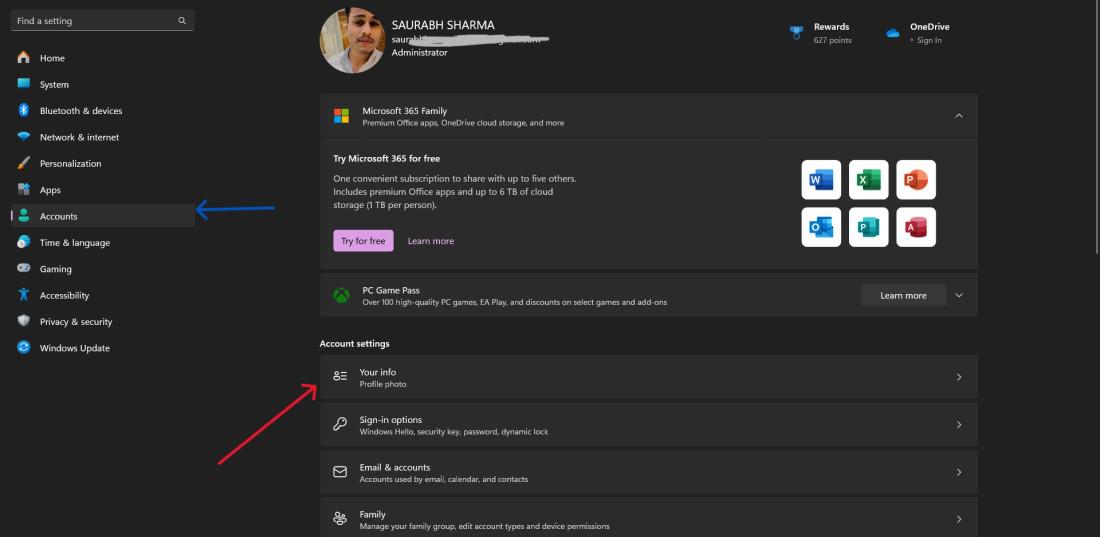
Step 3: Click on “Sign in with a local account instead” and update your first and last name.
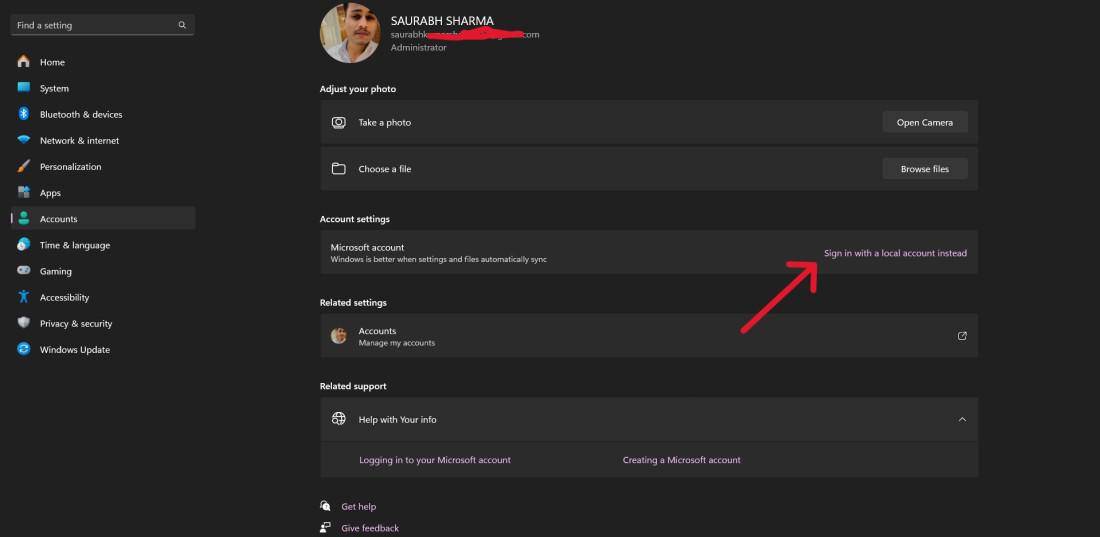
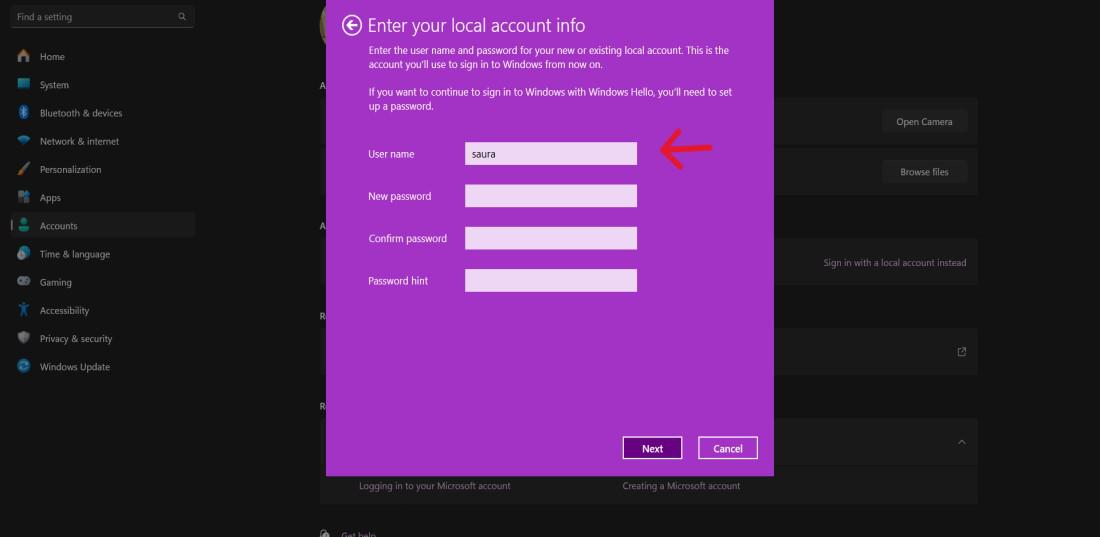
Step 4: Click on the Next button where enter your account password or system PIN then on the ‘User name’ input field, enter the new username
Updating your Microsoft account information will synchronize the changes across all devices linked to that account.
Conclusion
Changing the name of your user on Windows 11 is an easy but customizable procedure which provides multiple alternatives depending on the specifics of the case: if you are familiar or not familiar with other interfaces. The same goes with the easy to use Control Panel and the Run Command command line.
Also, the Windows PowerShell or any other tool, Windows 11 lets you choose how to arrange the computer. You should just select your name but in such a manner that it will protect you or adhere to any security requirements.
Also Read
FAQs to Change Your User Name in Windows 11
1. What would be the reason(s) to change a Windows 11 username?
One may change their username for many reasons, such as to personalize, update information, or enhance security. Such users may prefer a more honest username or one that suits them better at the present moment.
2. Will my files and settings remain unchanged if I change my username in Windows 11?
Changing username generally doesn’t change files or settings. However, it is critical to follow the recommended procedures for smooth transition. Always make the most recent copies of your important files before making any changes to prevent losing data.
3. Are there any limitations on the characters or format I can use for my new username on Windows 11?
Yes, Windows 11 restricts naming in certain ways. Ensure that your username does not have special characters, and it should not exceed set limits. To avoid any issues during username rename, it is advisable to use a username that conforms to these requirements.
Share your thoughts in the comments
Please Login to comment...