Block an Email Address in Outlook – Quick Steps
- Open Microsoft Outlook
- Find Junk Mail Option
- Add E-mail address to Blocklist
- Click “Save”
In the vast digital landscape, our inboxes serve as a gateway to a world of communication and information. Yet, hidden amidst the treasure trove of messages lie the sneaky trolls of the internet – spam, unsolicited solicitations, and pesky nuisances that make their way into our inboxes uninvited. But fear not, for Outlook has armed us with a powerful shield to guard against these email invaders! Blocking unwanted email addresses in Outlook is like donning a virtual armor, ensuring a clutter-free and secure inbox fortress. In this guide, we shall embark on a journey together to unlock the secrets of this mystical power – whether you wield the magic of the desktop version or the enchanting prowess of the mobile app. Prepare to ward off the unwanted, for the time has come to reclaim control of your email universe.
How to Block an Email Address in Outlook on a Windows
Step 1: “Open Microsoft Outlook” Application
Locate the Microsoft Outlook Application on your desktop PC and give it a click.
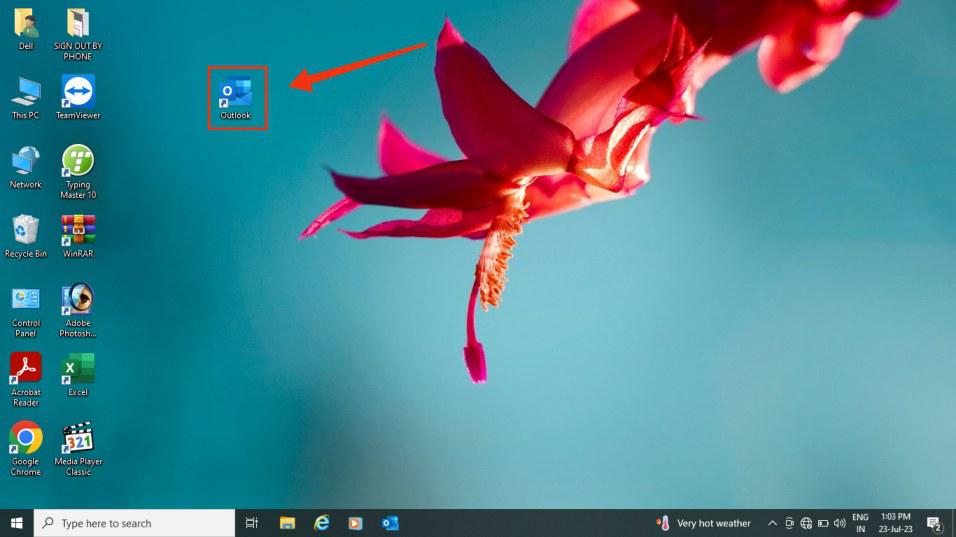
Open the Outlook Application on your Desktop
Step 2: Click the “Junk” button with a dropdown arrow
Please proceed to the Home tab and locate the “Junk” button. Click on the drop-down menu that appears to access the “Junk Email Options…” feature.
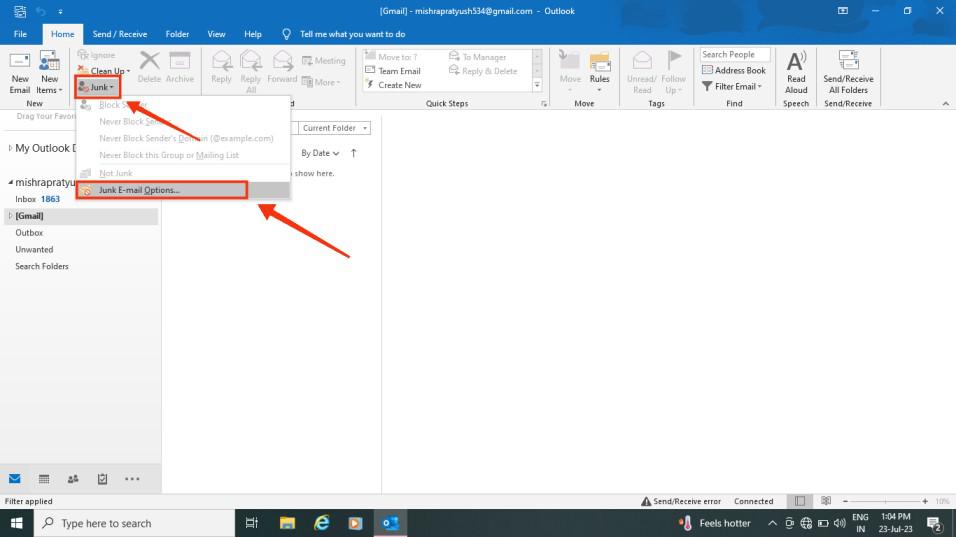
Home > Click Junk > Select Junk Email Options
Step 3: Select “Block Sender”
After clicking on “Junk Email Options,” a small tab will emerge displaying various settings. Navigate to the “Block Senders” option and click “Ok” to apply the changes.
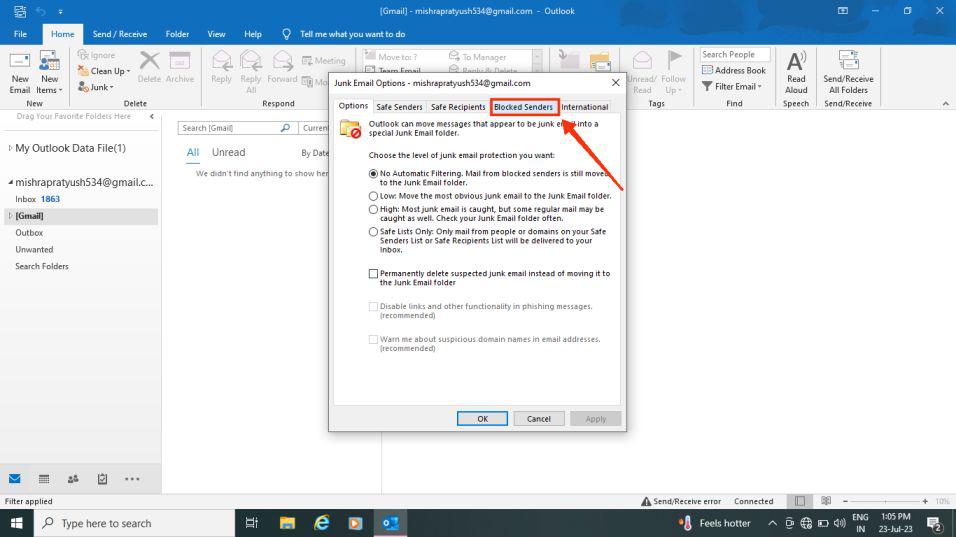
Junk > Junk Email Options > Blocked Senders
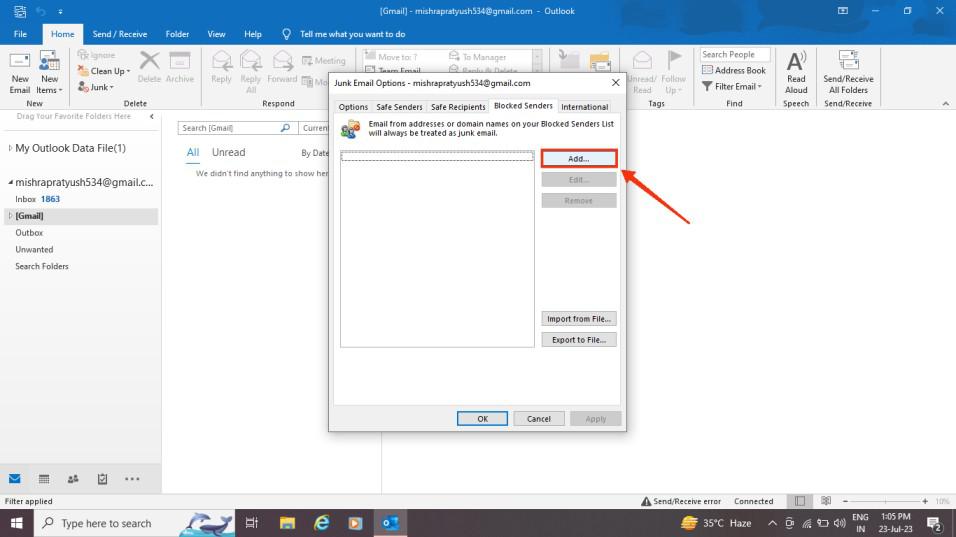
Step 4: Click on the “Add” Button
Now, select the “Add” button in order to include a user you wish to block in your Outlook.
Blocked Senders > Add > Click Ok
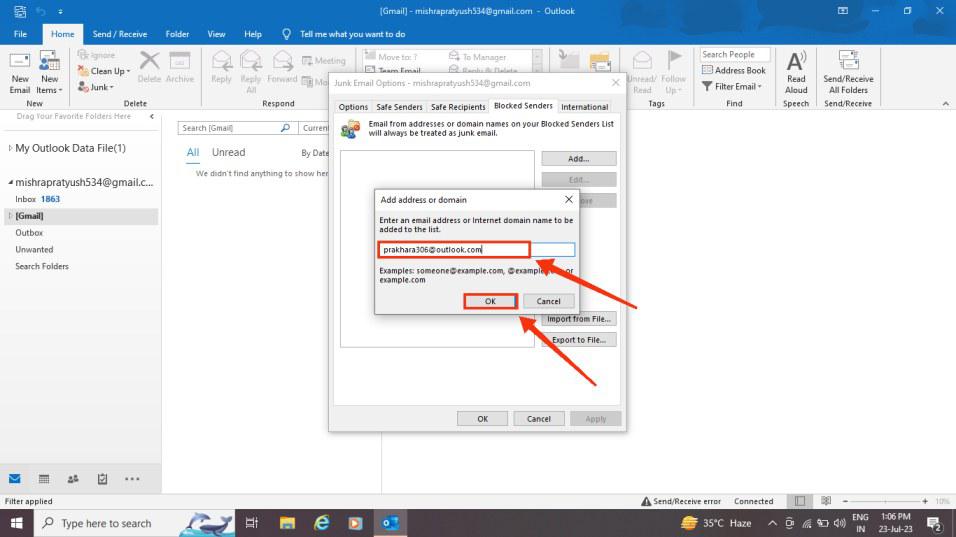
Step 5: “Add Address or Domain” to Block and “Press Ok”
Once you click the “Add” button, you will be prompted to either “type the email address or add the domain” that you want to block on the Outlook app. Press Ok when you have typed the email address.
Note: In Outlook, the blocked senders and safe senders lists can accommodate up to 1,024 addresses or domains. If you need to add more entries, consider blocking domains instead of individual email addresses.
Enter E-mail address >> Click Ok
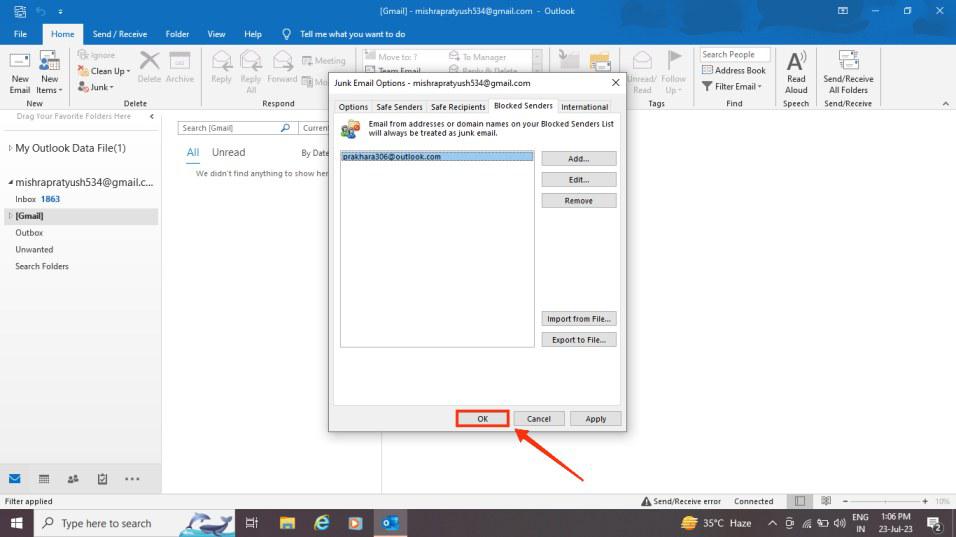
Step 6: Click “Ok” to confirm blocking the sender
After you have added an email ID or a domain, you will be asked to confirm the action to block the user. Press “Ok” to confirm and apply the changes.
Final Confirm > Press Ok
How to Block an Email Address in Outlook for Mac
Please be aware that if you are using the new Outlook, some functions may not be active. In such cases, consider using the Outlook Web App to access all the features of Outlook.
Step 1: Open Microsoft App and Go to your Inbox
Launch the “Microsoft Outlook application” on your Mac and navigate to the “inbox.”
Step 2: Select the Mail whose Sender you want to Block
Choose the email or message from the list that you want to block the sender on your Outlook.
Select the message received
Step 3: Click on the Block Button
Now, click on the “Block Button” located at the top of the menu bar.
Note: In case you are using the new Outlook interface and cannot find the Block button on the Top Menu, follow these steps: Click on the three-dot menu, then select “Add-ons.” Next, click on “Block options.” Now, the Block button will become visible on your Top Menu.
Select a Message > Select Block > Confirm
Step 4: Select Confirm Block a User
Confirm your decision to block the sender of that email, and then press OK. Once confirmed, the sender will be blocked from your Outlook account.
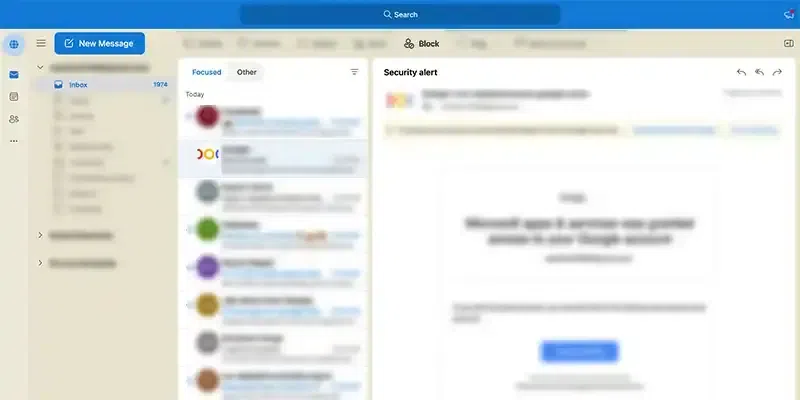
How to Block an Email Address in Outlook on Web App
Step 1: Sign in to Outlook on the web
To access the Microsoft Outlook web app, click here to log in.
.jpg)
Visit the Microsoft Office Outlook login page on your browser
Step 2: Click on the Setting icon
Go to the top right corner of the home screen and click on the settings icon.
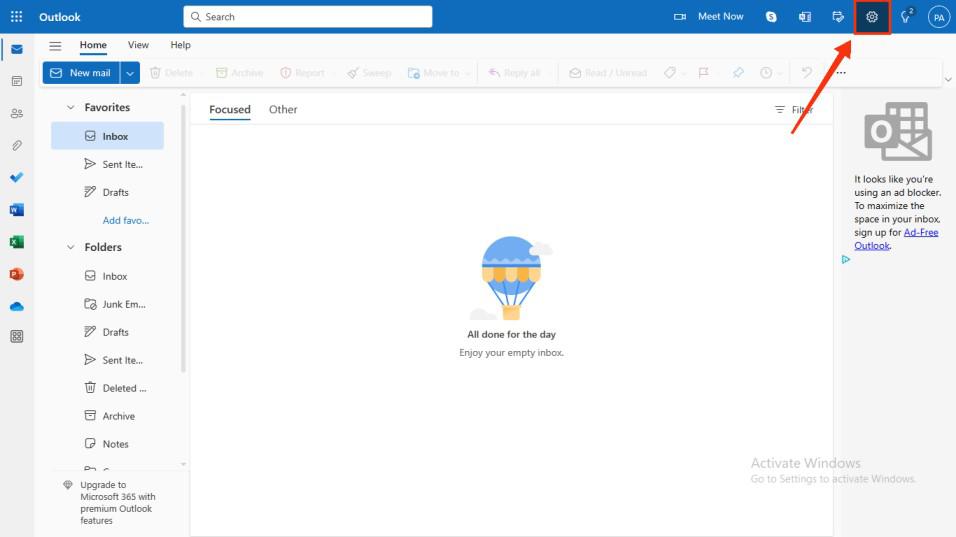
Click on the Setting Icon
Step 3: Select Junk E-mail
Next, from the options provided on the left-hand side of the screen, choose the “Mail” option, and then click on “Junk Email.”
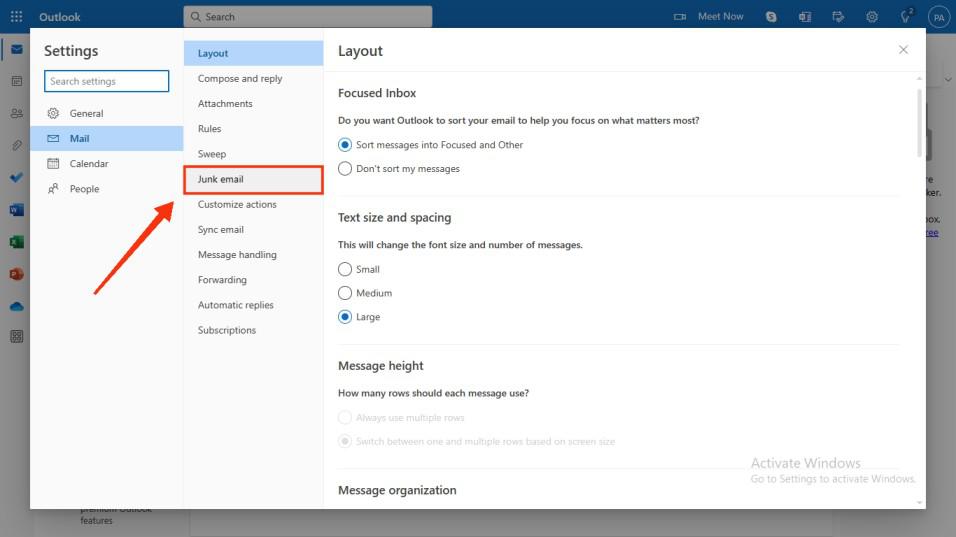
Select Mail > Junk email
Step 4: Click Add and Add the User
Upon clicking “Junk Email,” you will be prompted to add a user whom you want to block on Outlook. Alternatively, you can search for the user by typing their name in the search list.
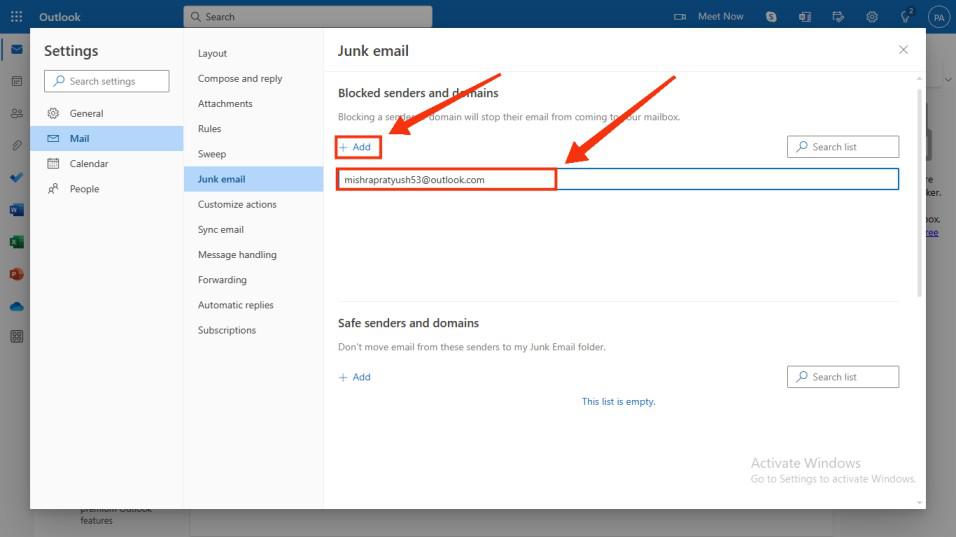
Click + Add > Add User Name or Domain Name
Step 5: Click “Save”
After adding the user to the Junk mail list, make sure to click on the save button to save the changes. As a result, the user you have saved will now be blocked on your Outlook email.
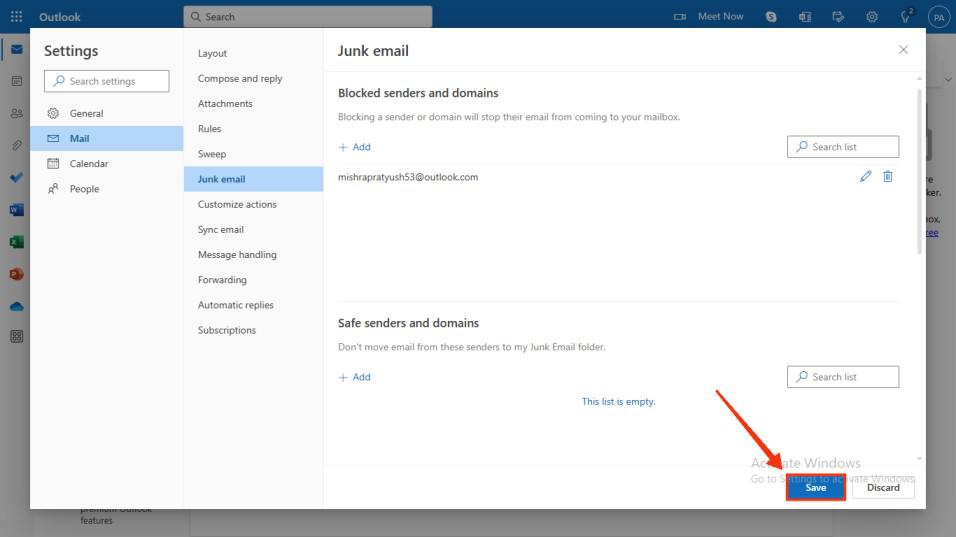
Click “Save” to block the email address
How to Block an Email Address in Outlook on an Android and iPhone
Step 1: Launch the “Mail” App on your Mobile
Open the Mobile Outlook app on your iPhone or Android phone.
-660.jpg)
Open the Microsoft Outlook Mobile App
Step 2: Select the Name of the Sender
Next, choose the name of the sender whose email address you wish to block in your Outlook.
-660.jpg)
Select Sender Name or Message
Step 3: Click on Three Dots to Open the Menu
Now, tap on the three dots displayed on the top right corner of your mobile screen to access the menu options.
iPhone Tip: On an iPhone, you can easily block a sender by tapping on “From” next to the sender’s name and then selecting “Block this Contact.” Confirm the changes, and your iPhone will move all emails from the sender to the trash folder, ensuring your Outlook inbox remains clean and free from unwanted emails from the blocked sender.

Click on Three dots to open the menu
Step 4: Select “Report Junk”
Now, from the menu options, select the “Report Junk” option.
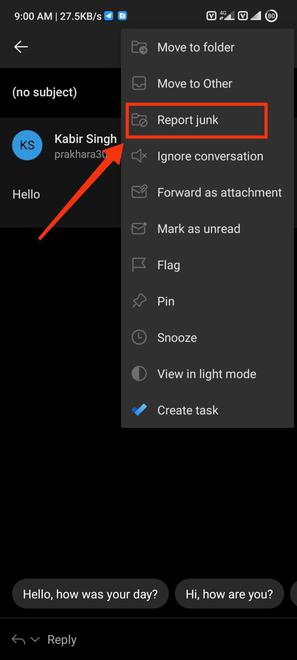
Click on Report Junk
Step 5: Click on “Block Sender”
Upon clicking the “Report Junk” option, you will be presented with three choices to mark the email. Choose “Block Sender” from the options provided.
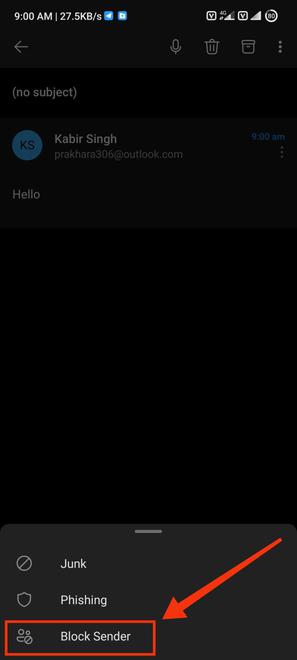
Click “Block Sender”
Step 6: Now Click on “Block Sender” to Confirm
Since you are now requesting to completely block the user from your Outlook, a confirmation prompt will appear saying “Block Sender.” Tap on “Block Sender” to proceed, and this action will permanently block the user and their email address from your Outlook.
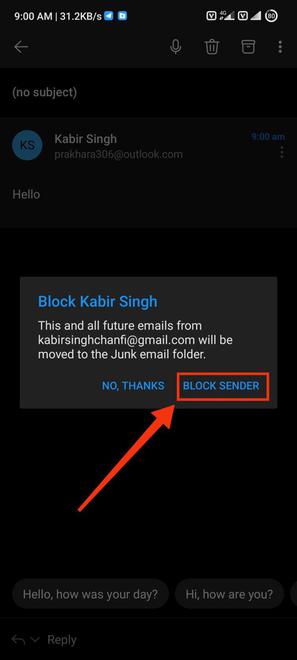
Click Block Sender
Conclusion
Blocking unwanted email addresses in Outlook is crucial for a clutter-free and secure inbox. The above-provided guide outlines simple steps for different devices, enabling users to effectively prevent spam and undesired emails. Whether using the desktop version or the mobile app, Outlook offers various blocking options like Junk Email settings, “Add to Blocked Senders,” and reporting junk emails. The mobile app users can easily block senders by selecting “Block this Contact” through the three-dot menu. These methods not only declutter inboxes but also enhance online security by preventing phishing attempts and harmful content. Taking advantage of these blocking features empowers users to prioritize important emails and enjoy a more efficient and protected email experience with Outlook.
Share your thoughts in the comments
Please Login to comment...