How To Schedule an Email in Outlook
Last Updated :
30 Aug, 2023
Have you ever wondered if there’s a perfect time to hit that “send” button for your emails? According to studies, the best time to send you emails is 10 am, 9 am, 8 am, 1 pm, and 3 pm. These are the hours when the chances of your email being opened by your audience are pretty high.
Unfortunately, life doesn’t always align with these optimal moments. You might be stuck in a meeting or caught up in other commitments. Thus, learning how to send a scheduled email in Outlook comes in handy.
Sending emails when the recipient is most active and likely to engage with your message is essential. Moreover, sometimes, you just cannot afford to lose your email in the sea of thousands of other emails your recipient gets. So, what’s the solution?
Well, here’s a little-known secret- you can schedule an email in Outlook at the exact time you want your email to be sent. Yes, you heard that right! Even if you’re unavailable, your email will do its job.
Follow the below steps and you never have to worry about missing the perfect time to schedule your email:
- Go to Outlook and draft a new email
- Before sending the email, click the ‘Schedule Send’ feature on the ‘Send’ button
- Choose a delivery date and time
- Click ‘Close’ and ‘Send’
If you want to learn how to send a scheduled email in Outlook in detailed, stay tuned until the end, but before that, let us understand what is outlook.
How to Schedule an Email in Outlook – Table of Contents
- How to Schedule an Email in Outlook in the Web Version
- How to Schedule an Email on a Windows PC
- Key Takeaway
- FAQs
How to Schedule an Email in Outlook in the Web Version
Here is the process of how to schedule an mail in Outlook in the web version:
Step 1:
Go to Outlook Web and sign in with your Microsoft/Outlook email.

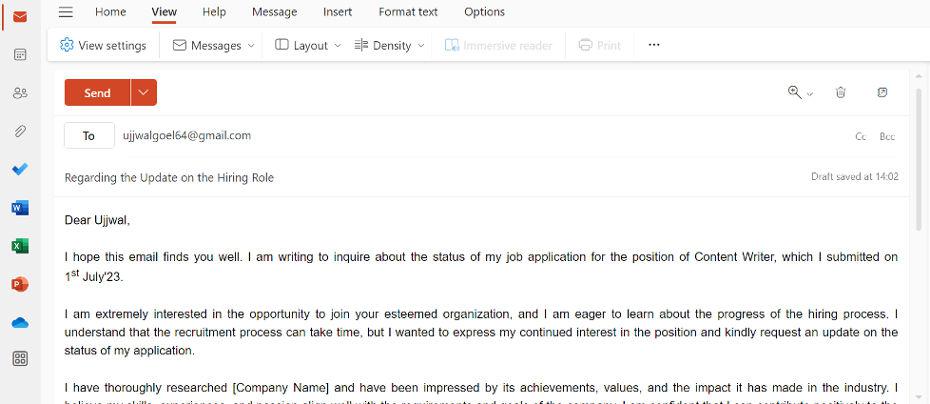
Step 2:
After signing in, draft an email. Don’t forget to fill the body, reciepient and subject line.
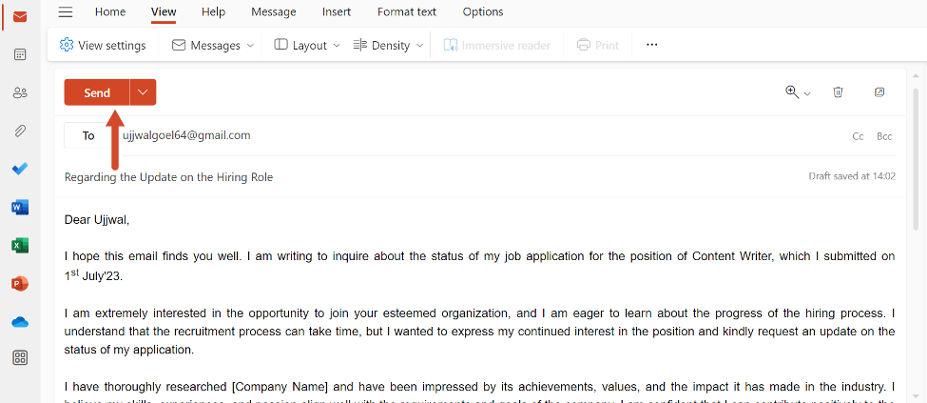
Step 3:
To set up the email, click the right-pointing arrow next to the Send button located at top-left.
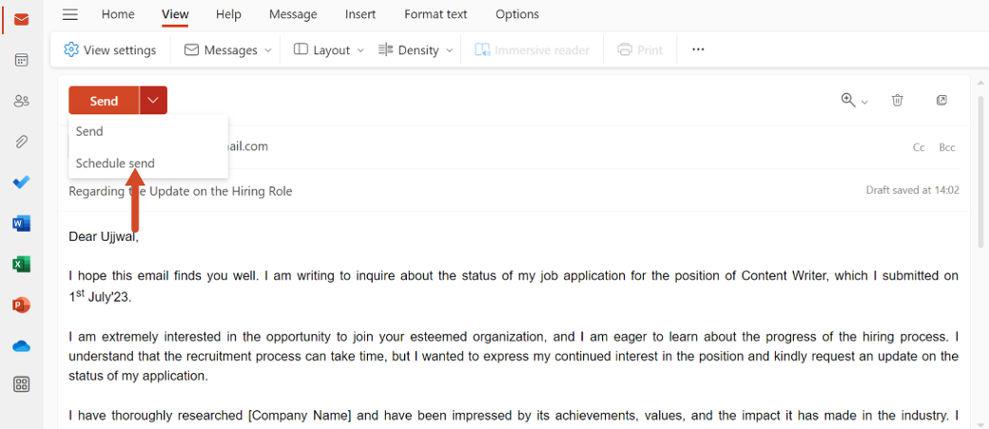
Step 4:
From the dropdown menu, choose “Schedule Send.”
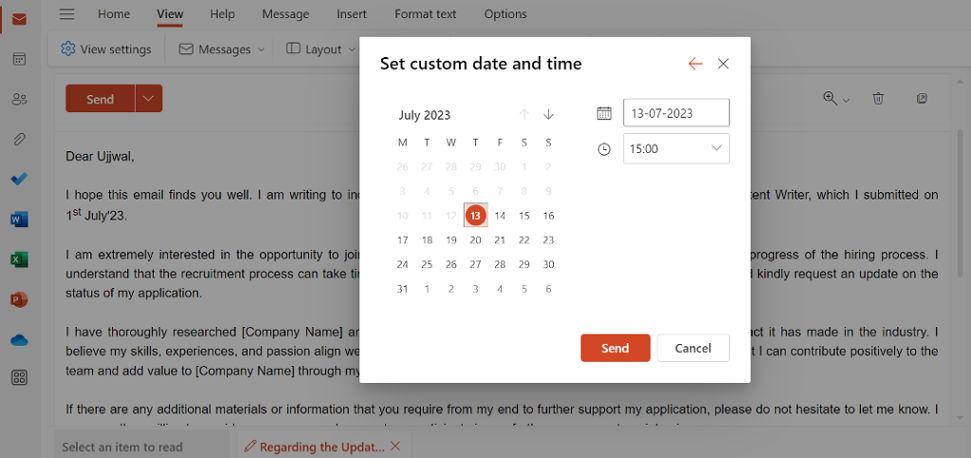
Step 5:
You will see a set of default options for scheduling, such as “Tomorrow morning” or “Next week.” Select one of these options if it fits your desired delivery time. Alternatively, choose “Pick date and time” to set a custom delivery time.
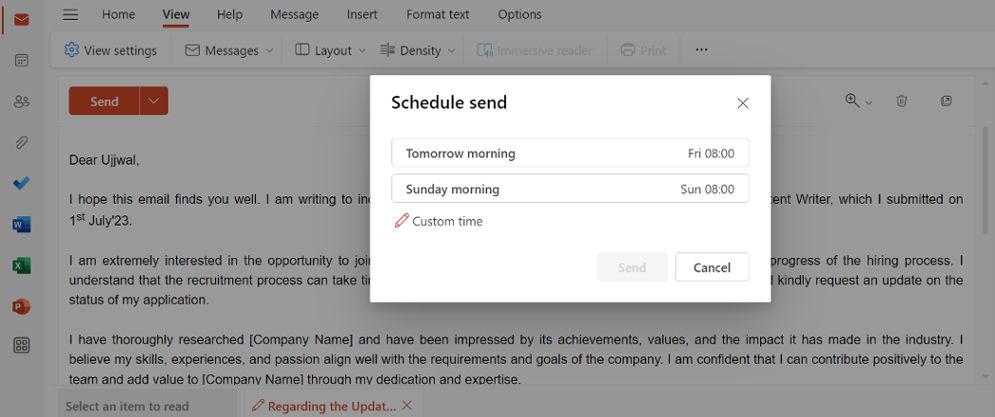
Step 6:
After selecting the desired delivery time option, click the Send button to schedule the Microsoft Outlook email.
Step 7:
Once you click Send, the message will be saved in the Draft folder until the scheduled delivery time.
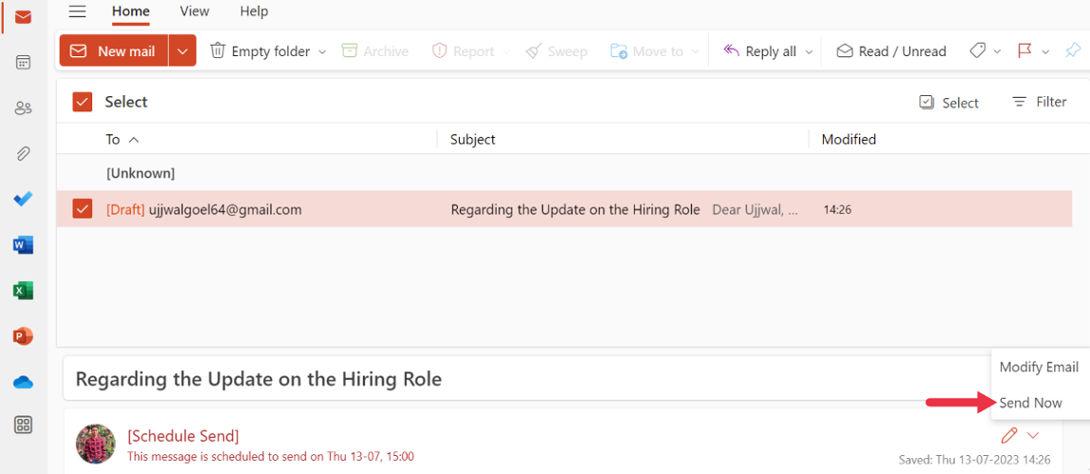
If you change your mind and want to send the message immediately instead of waiting for the scheduled time, follow these steps:
Step 1:
Go to the Draft folder in Outlook web mail.
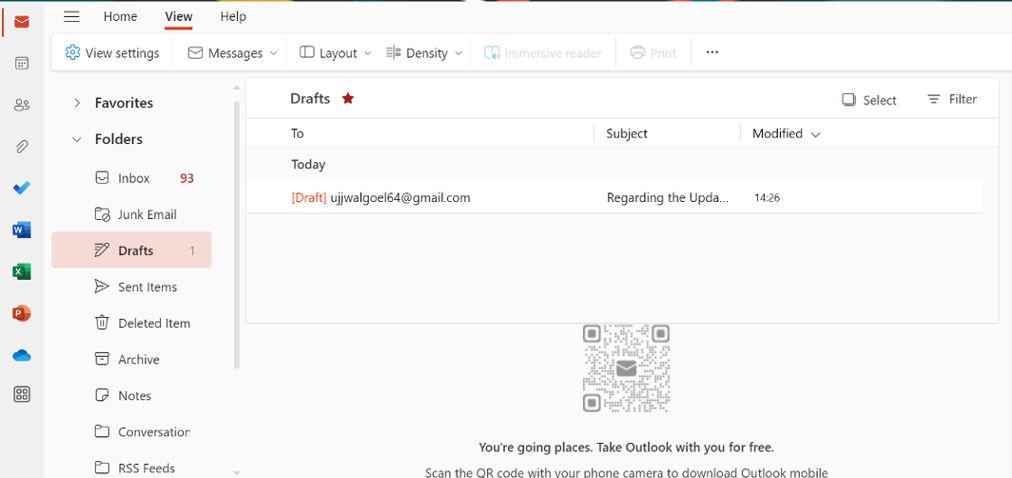
Step 2:
Open the scheduled message from the Draft folder.
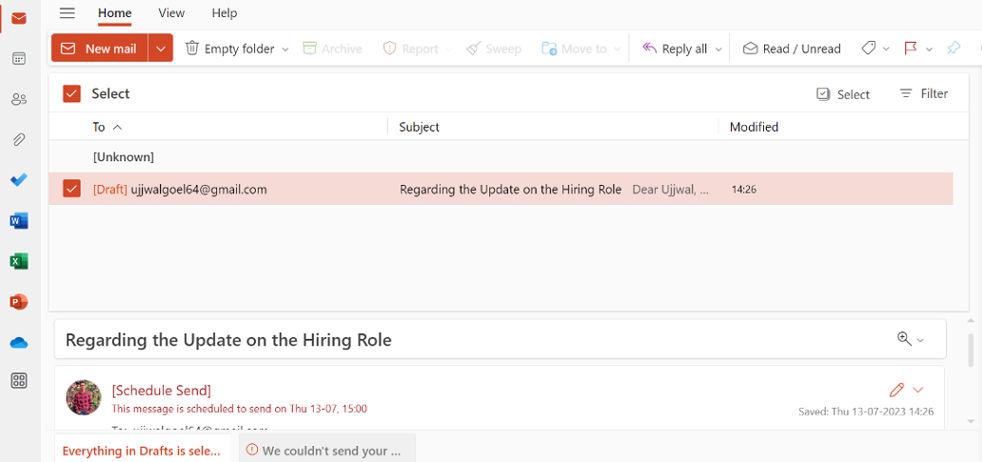
Step 3:
Select the Edit icon to make changes to the email.
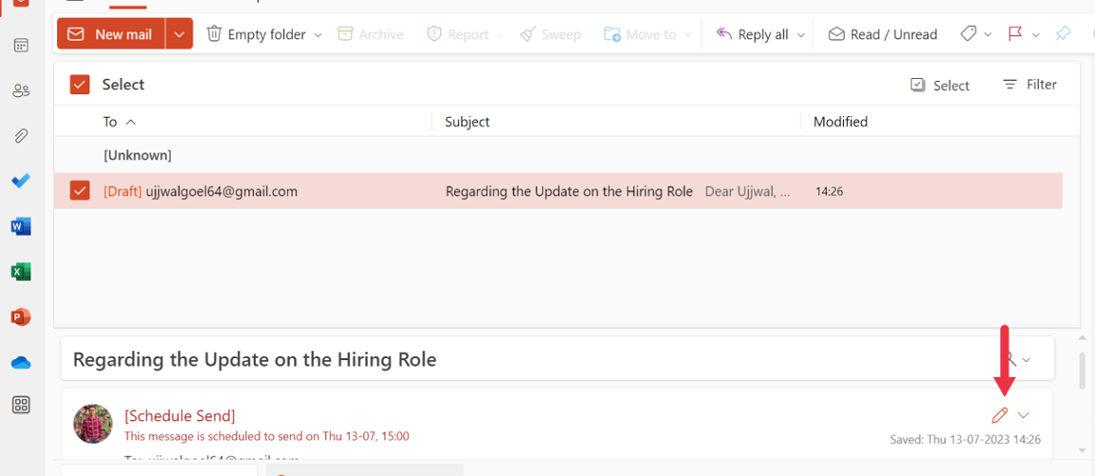
Step 4:
Finally, select “Send Now” to immediately send the message.
How to Schedule an Outlook email on Windows
Scheduling an email in Windows is more simple than you think; just follow these steps:
Step 1: While composing your email in Outlook on your Windows PC, locate the Tags group in the ribbon.
Step 2: Select the More Options arrow in the Tags group to reveal additional options.
Step 3: If you cannot find the More options arrow, it might be because you have the simplified ribbon. In that case, go to the Options tab on the ribbon and choose More commands > Delay Delivery.
Step 4: Under Delivery options, check the “Do not deliver before” checkbox.
Step 5: Click on the delivery date and time you need for your email.
Step 6: Once you have set the date and time, click Close.
Step 7: Finish composing your email message as usual.
Step 8: When you are ready to schedule the email, click the Send button.
Step 9: After clicking Send, the message will be saved in the Outbox folder until the scheduled delivery time.
If you change your mind and want to send the message immediately instead of waiting for the scheduled time, follow these steps:
Step 1: Switch to the Outbox folder in Outlook.
Step 2: Open the delayed message from the Outbox.
Step 3: Select the More Options arrow in the Tags group on the Ribbon.
Step 4: Choose More Options to access the delivery delay settings.
Step 5: If you have the simplified ribbon, go to the Options tab on the ribbon and select More commands > Delay Delivery.
Step 6: You will then have to uncheck the “Do not deliver before” box in the delivery options.
Step 7: webmailto send the message immediately.
The Key Takeaway
With just a few clicks and your emails become time-travelers!
Scheduling emails in Outlook can help you manage your communication effectively. So, whether you are using the Outlook webmail or the Windows PC application, the process is simple and allows you to send emails at a later time.
Well, go now! Take advantage of this feature to plan your communication and ensure your emails reach recipients at the most convenient time.
FAQs on How to Schedule an Email in Outlook
1. 1. Can you use Outlook for Gmail?
Yes, you can use Outlook for Gmail. Outlook supports various email protocols, including IMAP, which allows you to connect and manage your Gmail account within the Outlook application.
2. Can you schedule an email in outlook on your mobile?
Unfortunately, the Outlook mobile app does not have a delay delivery feature. So, If you want to schedule an email, you will need to do it from the web version or desktop app.
3. How long does Outlook app for Android keep emails?
In the Outlook app for Android, emails are stored for 30 days. The limitation is due to the “mail days to sync” option in the app, which can be used to synchronize emails for up to 30 days only.
4. Can you schedule an email to be sent during non-working hours?
Yes, Outlook allows you to schedule an email for any date and time, including non-working hours.
Share your thoughts in the comments
Please Login to comment...