In the fast-paced world of digital communication, email serves as an indispensable tool for professional and personal interactions. Microsoft Outlook, a widely used email client, offers a myriad of features to enhance user experience, and one such customizable aspect is the default font and size. Tailoring these elements not only adds a personal touch to your emails but also contributes to improved readability and a more polished presentation.
Whether you’re aiming for a more professional appearance in your work emails or a touch of personal flair in your casual correspondence, understanding how to change the default font and size in Outlook is a skill that can significantly enhance your overall email experience. Read the full article to unlock the full potential of Outlook and elevate your communication game to new heights.

Outlook
How to Change Fonts in Outlook 2019, 2016, 2013, 2010, and Outlook for Microsoft 365
Step 1: Open Outlook and Go to Options
Launch Microsoft Outlook on your computer. To change the default font and size, click on the “File Tab” in the top-left corner. This will open a menu on the left with different tabs. Select the “Options” tab from the list on the left-hand side below the Feedback Button. This will open a Dialog Box of Name Outlook options.
.webp)
Select Options Tab
Step 2: Go to Mail Category and Click on Stationery and Fonts
In the Dialog Box On the Left-hand Side, a menu will be there containing different tabs. In the Outlook Options window, select the “Mail” category from the left-hand pane Under General tab. Further, Scroll down the right-hand part of the screen and reach the “Compose Message” Section.
In the Compose Message section click on the “Stationery and Fonts” button this will open a Signatures and Stationary dialog box on the screen.
.webp)
Select Mail Tab
Step 3: Click on Font
In the Signatures and Stationery dialog box, under the “Personal Stationery” tab, click on “Font” highlighted in the given below image example.
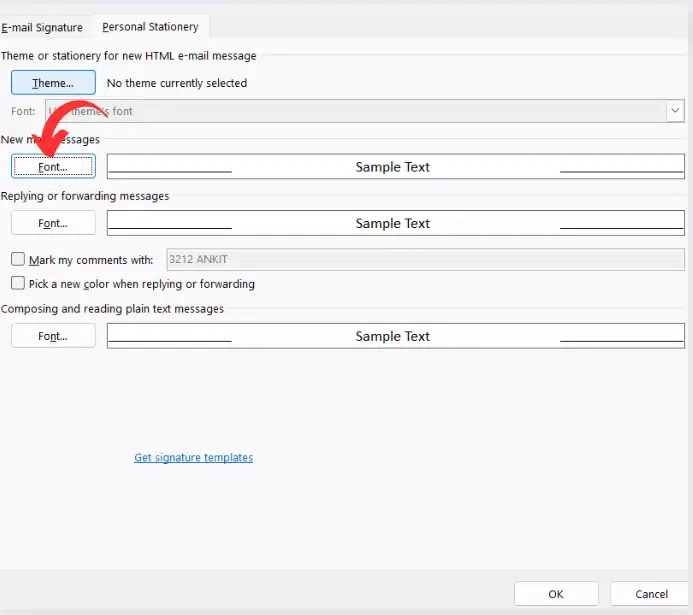
Click on Font to Change
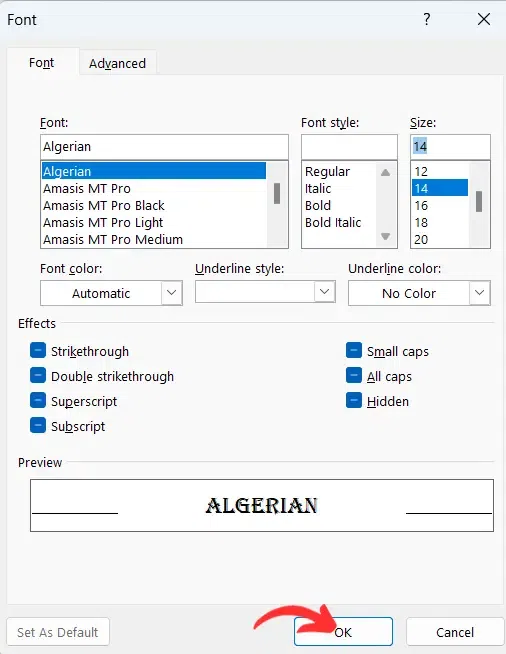
Step 4: Choose Font and Save Changes
A Font dialog box will appear in front of you. Here, you can select the desired font, style, size, and color from the drop-down menu. For example, I have selected an Algerian Font with 14 sizes. Click “OK” when you’ve made your selections.
Change Fonts in Outlook 2007 and 2003
Step 1: Open Outlook, Go to Tools, and Click Options
Launch Microsoft Outlook 2007 or 2003 on your computer to change the default font and its size. Click on the “Tools” menu at the top of the Outlook window this will result in opening a drop-down menu.. Select “Options” from the dropdown menu as shown in the given below screenshot. This will open an Options dialog box on the screen.
-660.webp)
Follow Steps 1 -> 2
Step 2: Click on the Mail Format Tab and Select Stationery and Fonts
In the Options dialog box, click on the “Mail Format” tab. Under the “Stationary and Font “ section, click on the “Stationery and Fonts” button to continue. This will open another dialog box on the screen with the name Signatures and Stationery.
-660.webp)
Mail Format -> Stationary And Fonts
Step 3: Click on Font
In the Signatures and Stationery dialog box, under the “Personal Stationery” tab, click on the “Font” button to select the desired font and size.
-660.webp)
Select Font Button
Step 4: Choose Font
A Font dialog box will appear. Here, you can select the desired font, style, size, and color from the drop-down list. Outlook provides different font styles and also gives the feature of font coloring. Click “OK” when you’ve made your selections to reflect the same while writing the email.
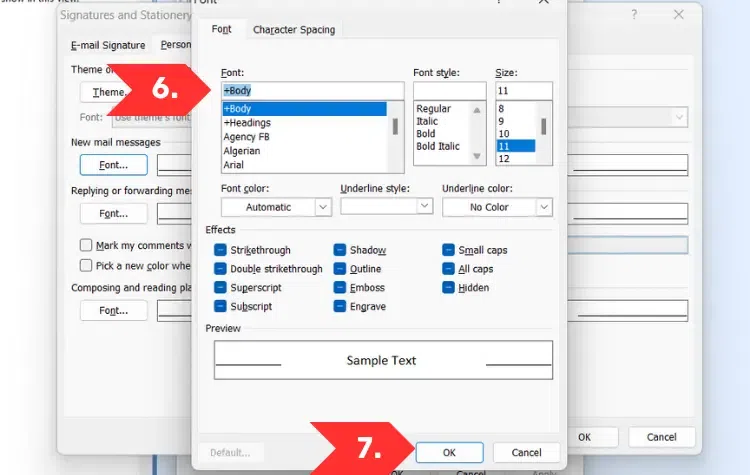
Select Font And Click the OK button
How to Change the New Message Default Font on Outlook.com
Step 1: Log in to Outlook.com and Go to Settings
Open your web browser, go to Outlook.com, and log in to your account to change the default font and size on Outlook.com. Open the “Setting” Menu on the Right Side of the Toolbar. It is represented by a circular dial on the right side. This will open a Settings Dialog Box.
-(1)-660.webp)
Click on Settings Dial
Step 2: Select Mail Tab
Go to the Mail Tab under the general tab from the Menu present on the left-hand side. Select the “Compose and Reply” Tab under the Layout tab from the menu.
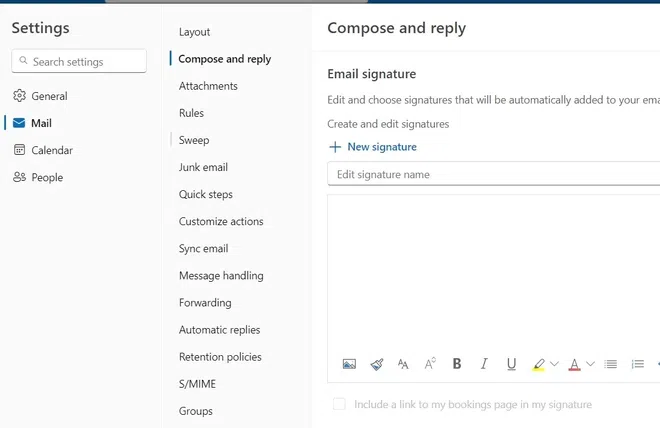
Select Mail > Compose and Reply
Step 3: Message Format and Save Changes
Scroll Down the right-hand part of the screen and Under Message format, select the font dropdown, and choose the new default font you want to use from the given list by Microsoft outlook. You can also change the default font size; set bold, italics, and underline for text; and choose your default font color.
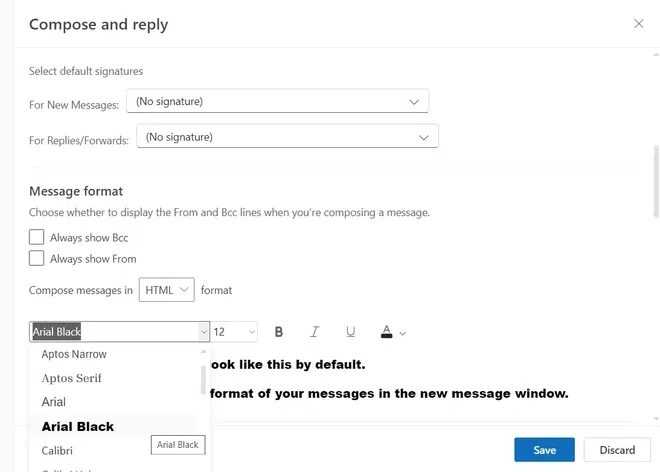
Select the Desired Font and Size
How to Change Font in Outlook on MacOS
Step 1: Open Outlook and Select Preferences
Open Outlook on MacOS and click on the “Outlook” tab present on the toolbar at the top of the screen beside Apple Logo. A dropdown menu will appear. Select “Preferences” from the drop-down menu. This will open a dialog box with the name Outlook preferences.
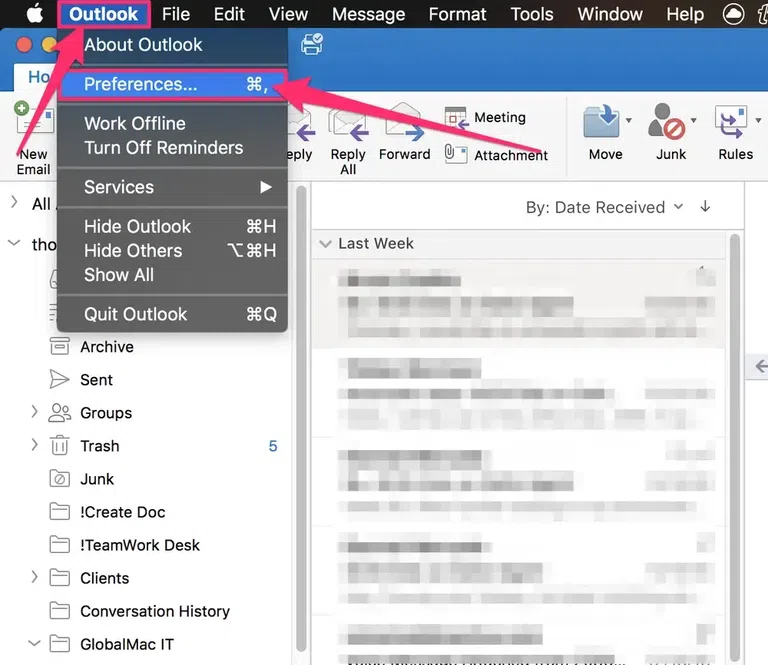
Outlook -> Preferences
Step 2: Select Fonts in Outlook Preferences
Select the “Fonts” Option beside the category option in the Personal Settings. A Fonts dialog box will appear on the screen.
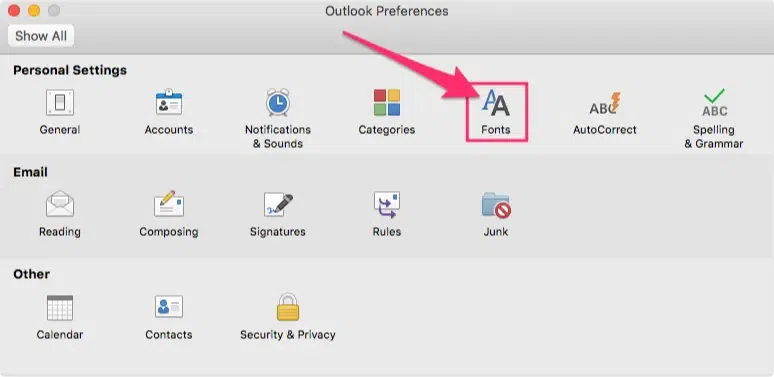
Personal Settings -> Fonts
Step 3: Fonts Dialog Box Displayed
Click on the “Font” Button next to new mail and that will result in the opening of a new dialog box with the name “Font”.
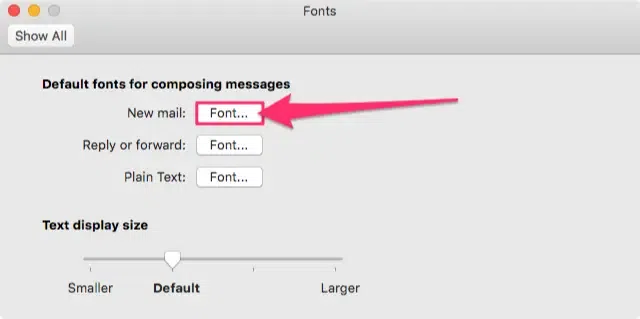
Fonts -> Font
Step 4: Select Font Type and Size
Select the desired Font from the drop-down list and change font size (if desired). Now click on OK to apply the changes and these changes will be reflected while writing the mail.
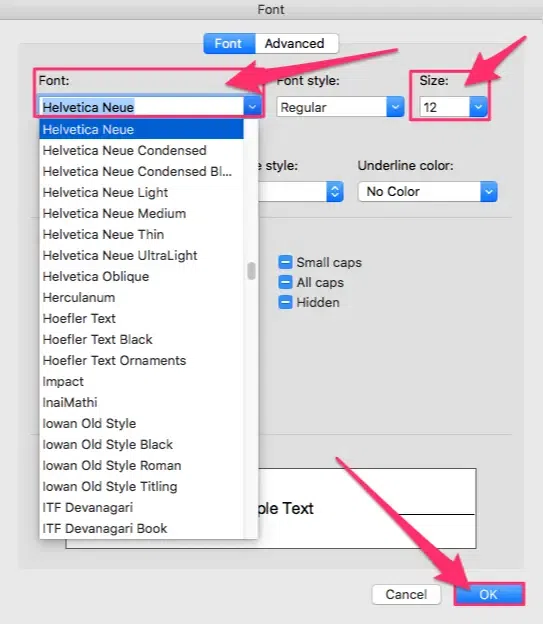
Save the Changes
Conclusion
In conclusion, we’ve covered the essential steps for customizing font and font size in Microsoft Outlook across various platforms. For Windows users, we explored the process in different versions of Outlook, ensuring you can tailor your email experience to your preferences. Mac users were guided through the steps specific to their operating system, ensuring a seamless adjustment of fonts. Additionally, we delved into the steps for Outlook.com users, ensuring a comprehensive guide for all. By following these instructions, you’ll be able to personalize your Outlook experience, making it more comfortable and visually appealing for your specific needs. Don’t hesitate to explore these options and find the perfect settings that suit you best.
FAQs
How do I change the view size in Outlook?
Ans. Outlook Desktop Application:
a. For Windows:
- Open Outlook.
- In the top-right corner, you will see a zoom slider. You can adjust it by dragging it left or right to decrease or increase the zoom level.
b. For Mac:
- Open Outlook.
- Go to the View tab in the ribbon.
- Click on the Zoom button.
- Adjust the slider to increase or decrease the zoom level.
Outlook Web App (Outlook on the web):
- Open your Outlook in a web browser.
- Use keyboard shortcuts:
To zoom in: Press Ctrl + ‘+’ (Windows) or Command + ‘+’ (Mac).
To zoom out: Press Ctrl + ‘-‘ (Windows) or Command + ‘-‘ (Mac).
What is the default font size in Outlook?
Ans. The default font size in Microsoft Outlook can vary depending on the specific version and settings, as well as the type of content you’re viewing (e.g., emails, calendar events, etc.). However, in most cases, the default font size for composing and reading emails in Outlook is typically set to 11 or 12 points.
Will changing the default font and size affect the way recipients view my emails?
Ans. No, changing the default font and size in Outlook only affects how you view your emails. Recipients will see your emails in the font and size settings they have configured on their email clients.
What is the default font color in Outlook?
Ans. The default font color for composing and reading emails in Outlook is typically black.
Share your thoughts in the comments
Please Login to comment...