The “We Couldn’t Set your Default Save Location” error is a common issue in file management. It is often caused by corrupt files in crucial folders and a lack of permission. This error can be frustrating when trying to install or move apps to a different drive on your Windows system.
In this article, We’ll show you how to fix We Couldn’t Set your Default Save Location error in Windows.
How to Fix Default Save Location
Sometimes users face multiple issues to set the default save location in the system. Here, we’ll discuss 4 easy methods to solve or fix the problem properly.
Method 1: Set Your User Account to Administrator
Granting administrative rights to your user account is a fundamental step in troubleshooting various system issues. As an administrator, you have the freedom to modify system settings, install and remove software, and change security settings. This elevated status often resolves problems related to permissions and can be the key to fixing default save location errors.
Step 1: Press Windows Key + I to open settings then navigate to “Accounts” > “Family”
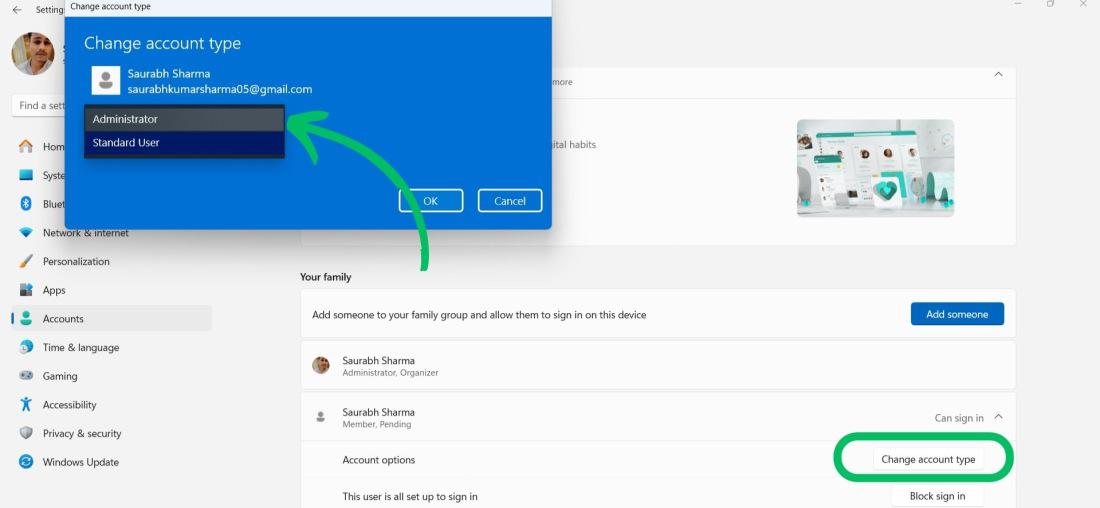
Step 2: Under the “your family” section, Click on the user name then select “Change account type “
Step 3: In UAC click on the yes button
Step 4: From the account type dropdown select “Administrator“
Method 2: Rename the WindowsApps Directory
The WindowsApps directory, crucial for storing Microsoft Store apps within a Windows operating system, sometimes triggers system errors or update issues. To tackle these problems, strategically renaming the directory can reset its condition, possibly resolving errors that block default save location settings.
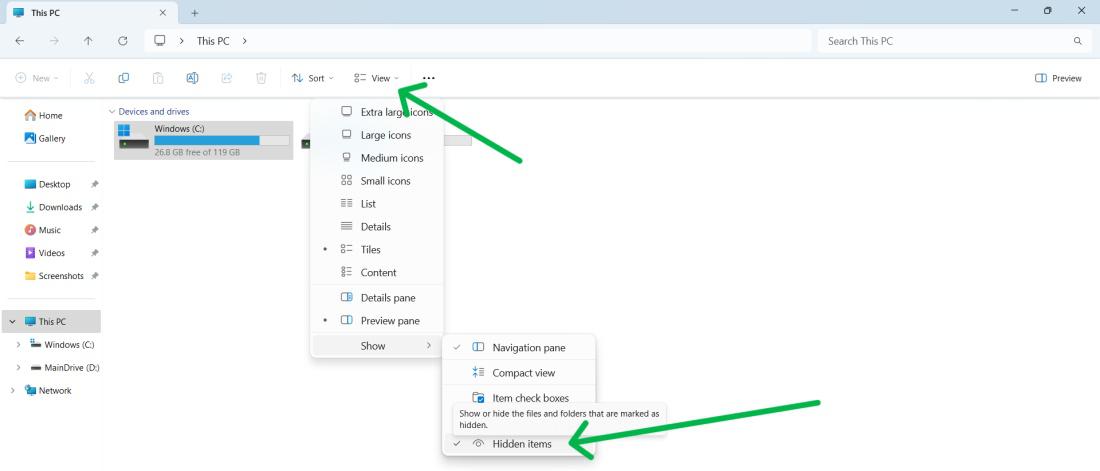
Step 1: Press Windows Key + E to open File Explorer then on the top click on “View” > “Show” then click Hidden items
Step 2: Navigate to the ‘Program Files’ folder in your system drive like C
Step 3: Right-click on “WindowsApps” and select “Rename”
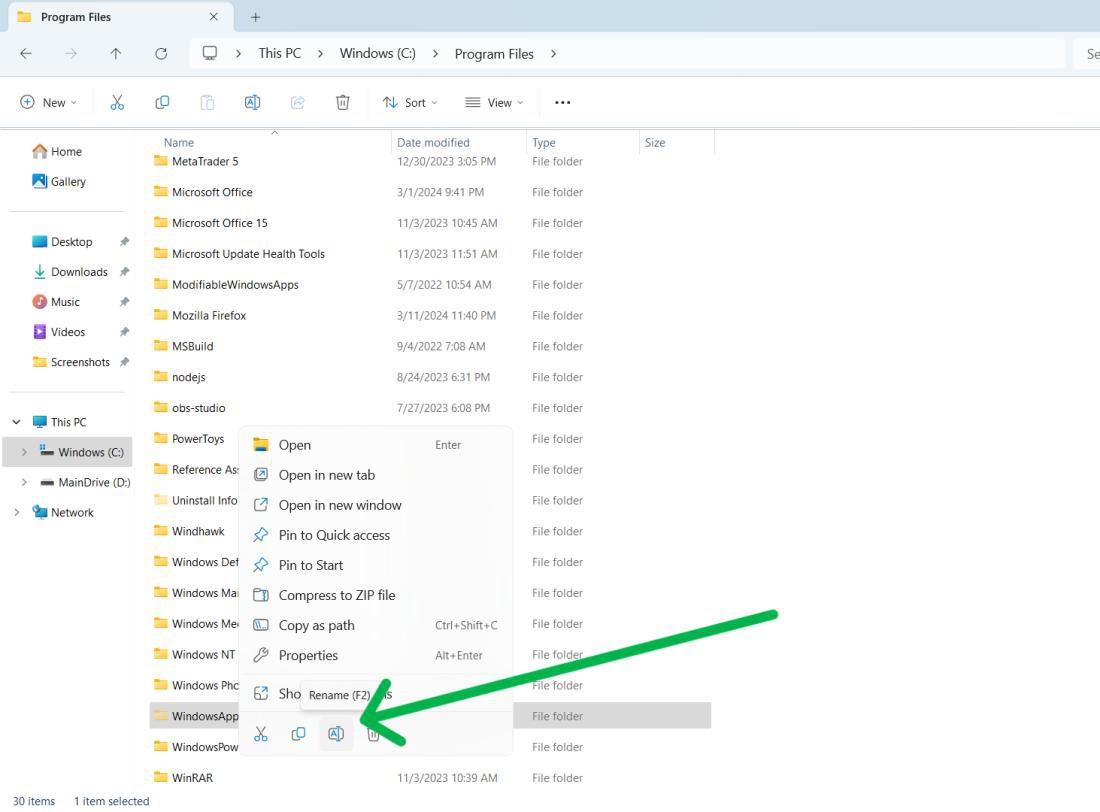
Step 4: Rename the folders (e.g., to ‘WindowsApps.old’).
Method 3: Take full control over the WindowsApps folder
The WindowsApps folder houses all the applications installed from the Windows Store. By default, it’s a protected system folder, and users may not have full access. Taking ownership and gaining full control over this folder can resolve issues where the system is unable to set a default save location due to permission restrictions.
Step 1: Press Windows Key + E to open File Explorer then on the top click on “View” > “Show” then click Hidden items
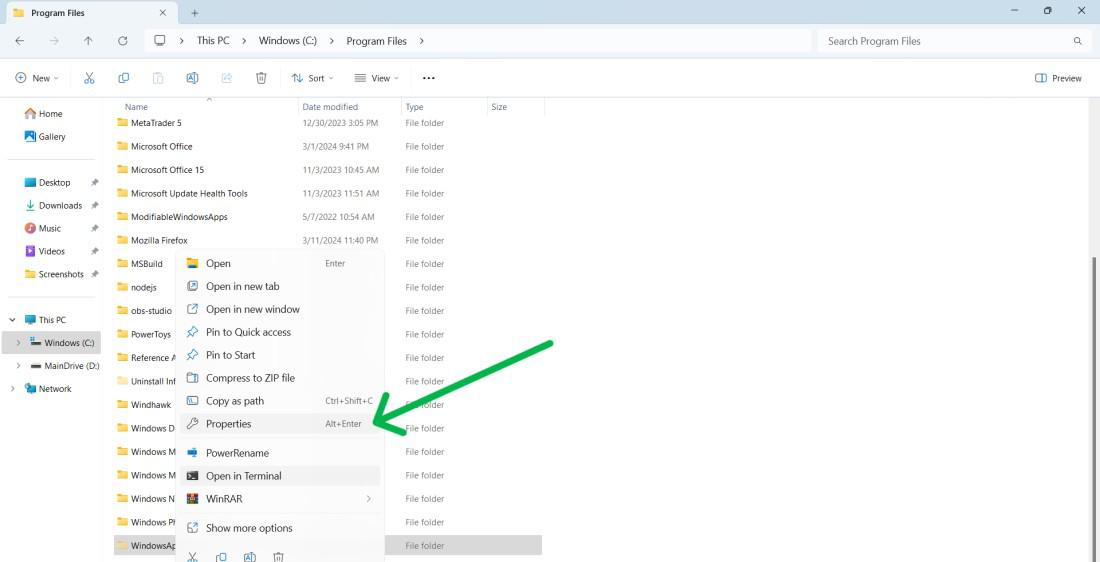
Step 2: Navigate to the ‘Program Files’ folder in your system drive like C
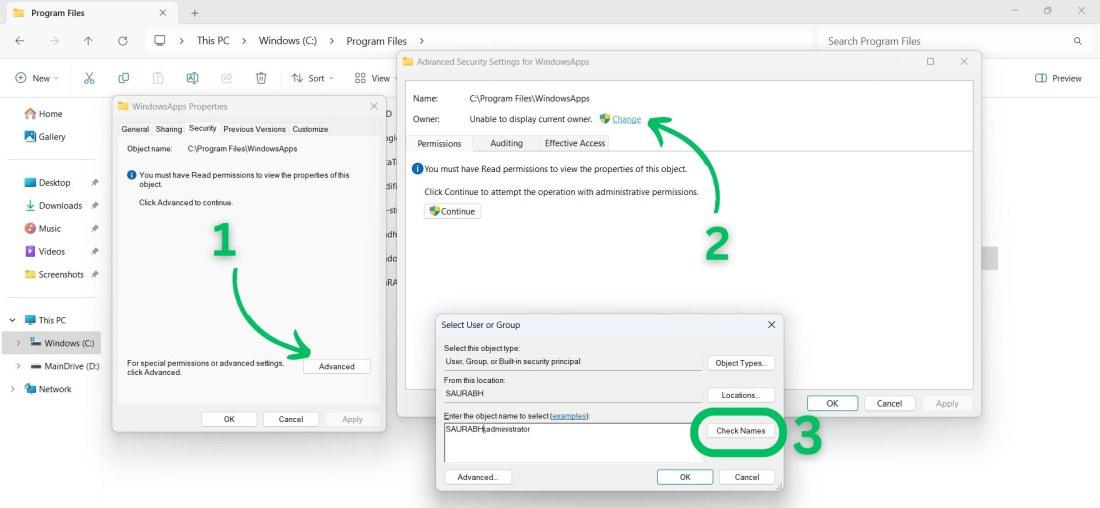
Step 3: Right-click on “WindowsApps” and select “Properties“
Step 4: Navigate to “Security” then click on “Advanced” then click on “Change”
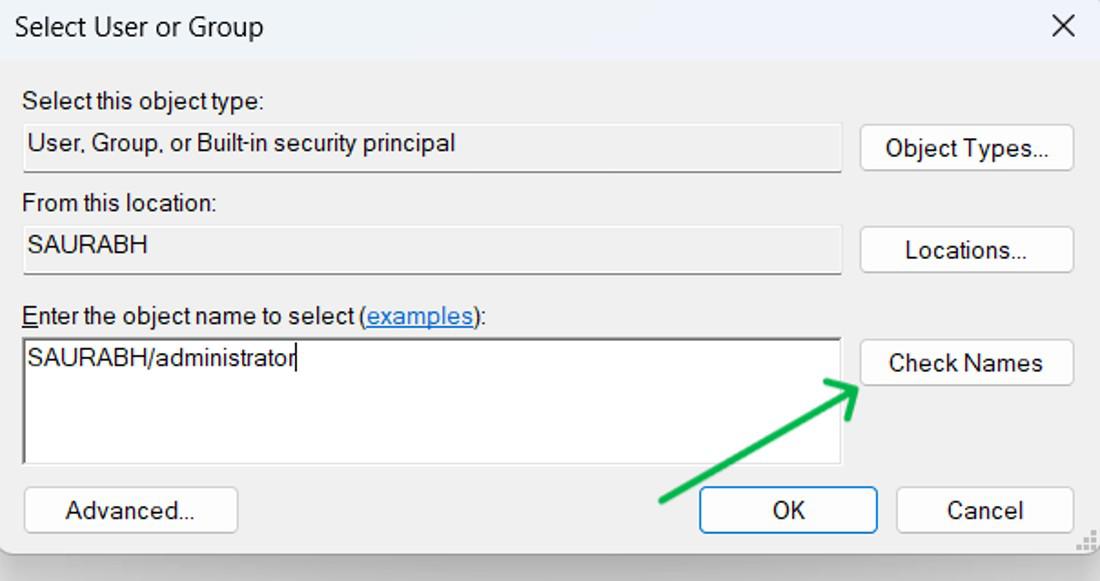
Step 5: Enter your user account name, then click “Check names” to verify.
Step 6: Finally, click “OK” to confirm.
Step 7: In the bottom of the Administrator, Check the box next to “Replace owner on sub containers and objects” > Click on Apply.
Step 8: In the bottom click on the “Add” button after selecting the principal
Step 9: Enter your user account name, then click “Check names” to verify.
Step 10: Check the box for Full Control, then click OK. Apply changes, then OK. Return to Advanced Security settings, enable inheritance, and apply changes. Finally, restart your PC.
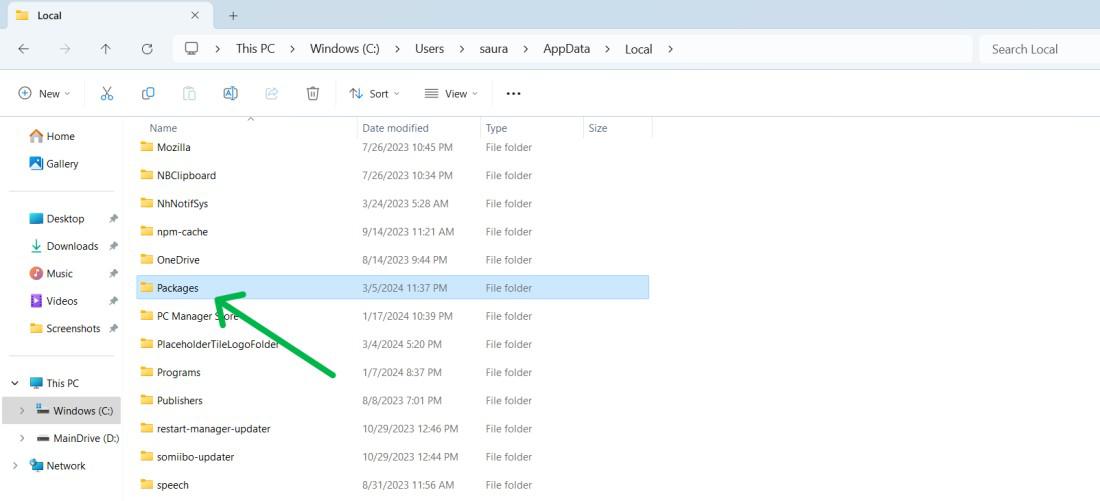
Step 11: If the problem continues, go to the following path and repeat the steps for the Packages folder:
C:\Users\ <username>\AppData\Local
Replace the <username> with the actual username
Method 4: Set Full System Permission for the System Volume Folder
Securing full system permissions for the System Volume Folder is a decisive measure to rectify save location errors. This process involves modifying the folder’s security settings to grant your account unrestricted access.
Step 1: Press Windows Key + E to open File Explorer then on the top click on “three dot” > “options” then uncheck the “Hide protected operating system files (Recommended)”
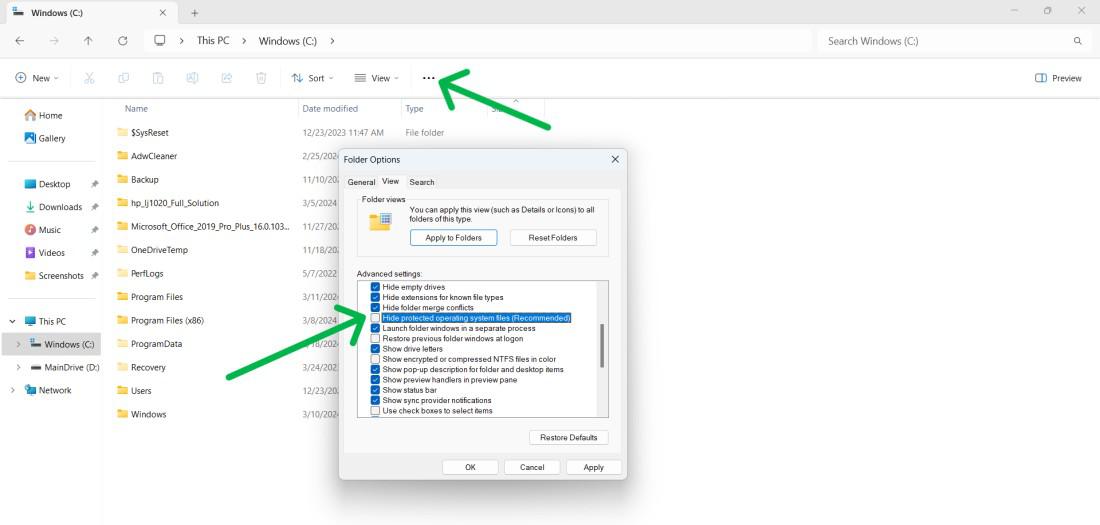
Step 2: Navigate to the ‘Program Files’ folder in your system drive like C
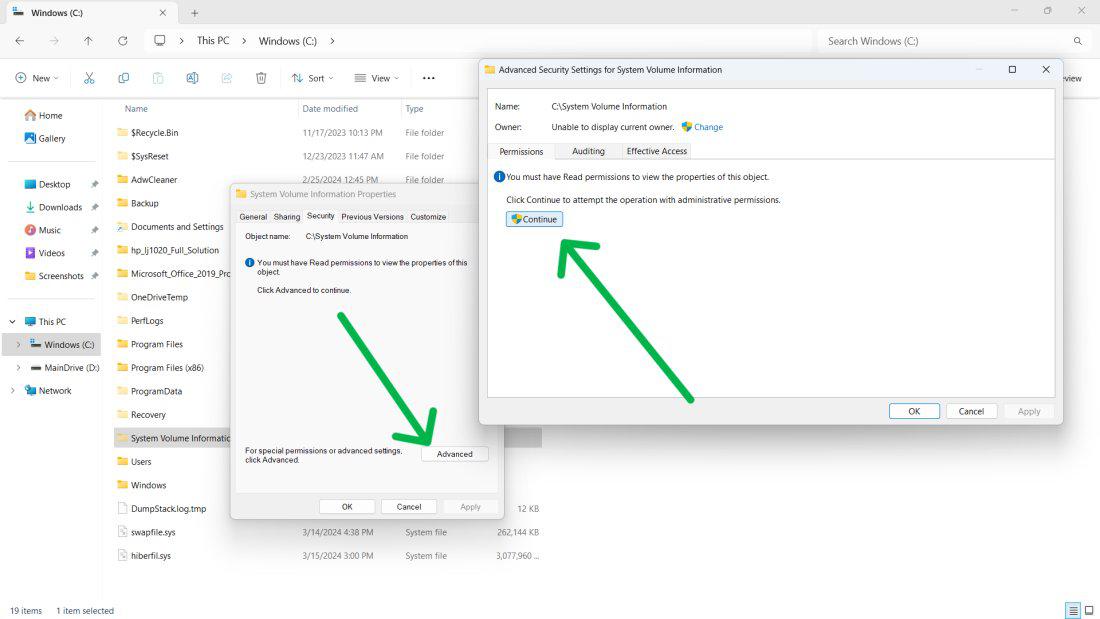
Step 3: Right-click on “System Volume Information” then from the menu select “Properties“
Step 4: Navigate to the “Security” tab then click on “Advanced“
Step 5: A new window will pop up then click on “Continue“
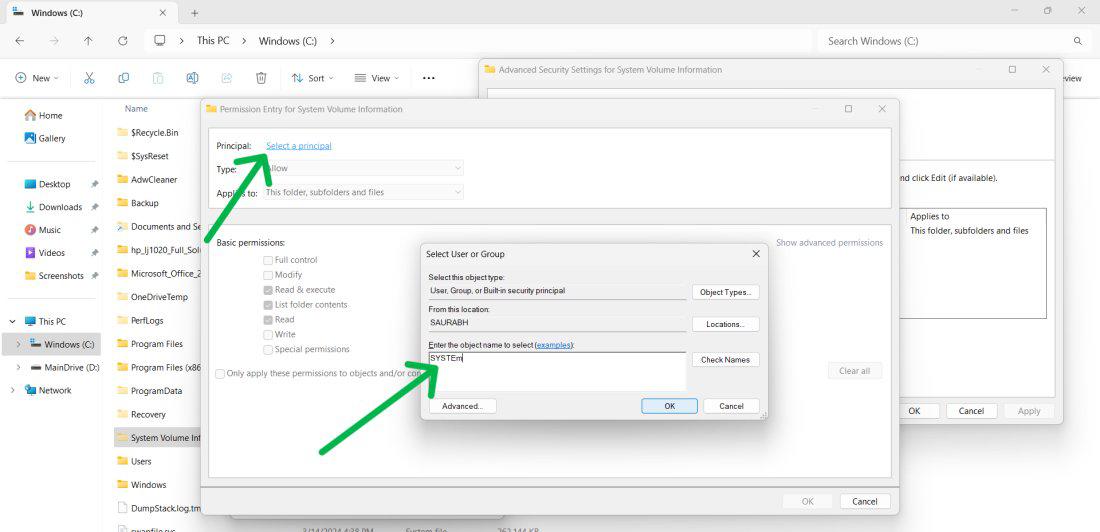
Step 5: Click “Add“
Step 6: Select “Select a principal.”
Step 7: Type “SYSTEM” and click OK.
Step 8: Choose the Full control permission setting, then click OK on both the Permission Entry and Advanced Security Settings windows. Finally, close all windows, restart your PC, and attempt to modify the default save location.
Conclusion
In Conclusion, When you encounter the “We Couldn’t Set your Default Save Location” error, these methods will help you fix the problem and take back control of your file storage settings in Windows. From adjusting permissions to renaming folders and granting full system access, each step provides a reliable solution to this widespread issue.
Frequently Asked Questions to Fix Default Save Location
How to Fix We Couldn’t Set your Default Save Location
Follow these steps to fix We Couldn’t Set your Default Save Location
- Open File Explorer, go to “Options,” uncheck “Hide protected operating system files.”
- Navigate to ‘Program Files’ in your system drive.
- Right-click “System Volume Information,” select “Properties.”
- In the “Security” tab, click “Advanced,” then “Continue.”
- Click “Add,” select “Select a principal,” type “SYSTEM,” click OK.
- Choose Full control, then OK. Restart and try changing the default save location.
How do I change the default app save location?
Follow the steps below to change the default app saving location:
- Open Settings.
- Click on System.
- Select the Storage tab.
- Under “Storage management,” click on “Advanced storage settings.”
- Choose “Where new content is saved.”
- Use the “New apps will save to” drop-down menu to select the new location.
- Click the Apply button
What is 0x80070005 save location?
The error code 0x80070005 occurs if you lack permissions while changing the default save location for apps or files. To resolve it, ensure you have the required permissions.
- Log in with an Administrator account.
- Rename the WindowsApps folder.
- Take full control over the WindowsApps folder
Share your thoughts in the comments
Please Login to comment...