Microsoft Azure – Azure Managed Disk State Details using PowerShell
Last Updated :
30 Mar, 2023
In this article, we will try to understand how we can fetch the VM Disk State by using the Azure PowerShell Commands. With the help of the Azure PowerShell Commands, we will be finding the Managed Disk State of Unattached, Attached, and Reserved of all the Azure VM Disks within Subscription.
Implementation:
Follow the below steps to get azure managed disk state details using Powershell:
Step 1: Log in to Azure Portal.
Step 2: Navigate to Cloud Shell icon and Open Cloud Shell >> then, select PowerShell
Step 3: Executed the below commands to list out the complete properties of Azure Managed Disks
Fetch Azure Managed Disks Details using Azure Cloud Shell/Azure PowerShell
Use the below command to list the details of Unattached Disks:
Get-AzDisk `
| Select-Object -Property Name,ResourceGroupName,Type,DiskSizeGB,DiskState `
| Where-Object -Property DiskState -eq “Unattached”
Output:

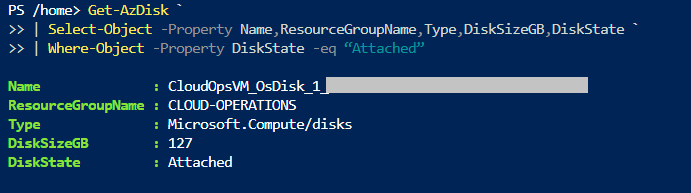
Use the below command to list the details of the Attached Disks:
Get-AzDisk `
| Select-Object -Property Name,ResourceGroupName,Type,DiskSizeGB,DiskState `
| Where-Object -Property DiskState -eq “Attached”
Output:
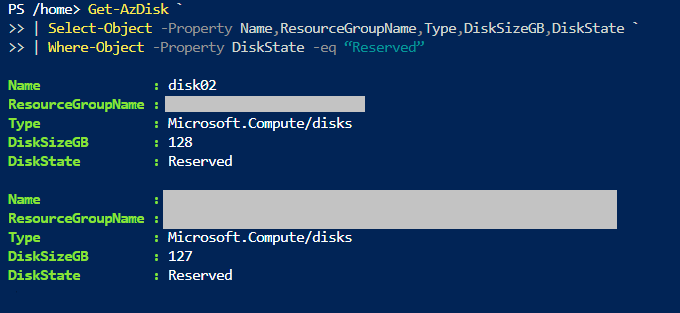
Use the below command to list the details of Reserved Disks:
Get-AzDisk `
| Select-Object -Property Name,ResourceGroupName,Type,DiskSizeGB,DiskState `
| Where-Object -Property DiskState -eq “Reserved”
Output:
Share your thoughts in the comments
Please Login to comment...