Microsoft Azure – Notebooks in Cosmos DB
Last Updated :
31 Mar, 2023
In this article we will learn about how to use Azure Cosmos DB built-in notebooks. So, the easiest way to get started is from the data explorer. You can go to the gallery tab, and so you have official samples written by the Cosmos DB team as well as samples submitted by users in the public gallery. Azure has notebooks written for both C# and Python and samples cover everything from getting started content to general key concepts in Cosmos DB.
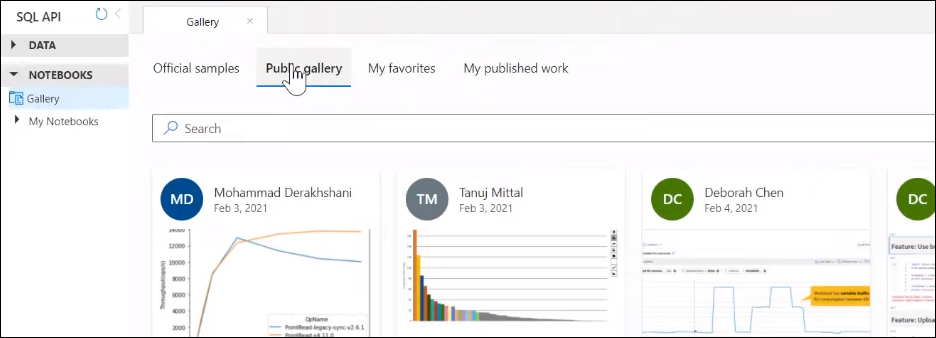
You can also do things like filter and search by tags. So, for example, if you want to look at all the getting started content, you can find one tag, click on it, and see all the relevant notebooks.
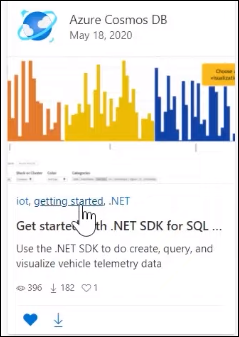
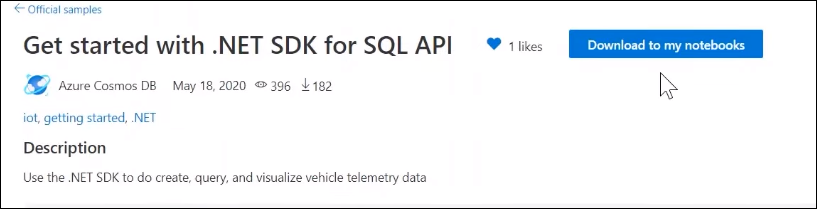
Let’s take a closer look at a notebook, the getting startedwith.NET SDK for SQL API. You can view the notebook, and also can download it to my notebooks, and get started with it right away. Once it’s downloaded to my notebooks, it’ll show up under my notebooks and we can start running.
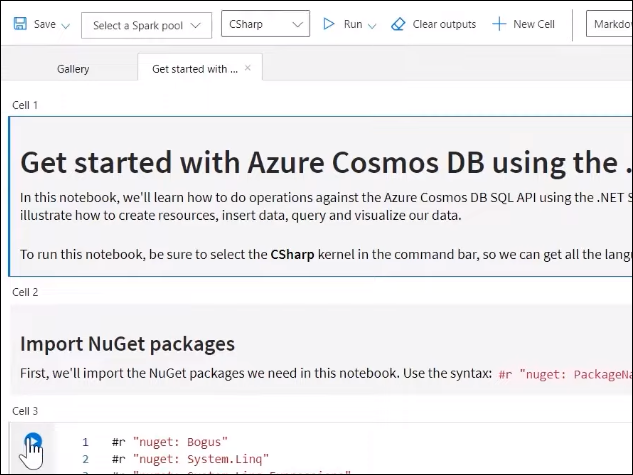
As mentioned earlier, Cosmos DB Azure support both C# and Python notebooks. The one we are using for demonstration is a C# notebook And because it’s C#, we are going to do everything we would expect for C# developers using Cosmos DB. For example, you can start by bringing in relevant NuGet packages. This sample happens to be one where some sample IoT data that we’re writing to our Cosmos DB collection, and you will be using it to query and visualize the data. So, the library that you imported, Bogus, will be very helpful here.
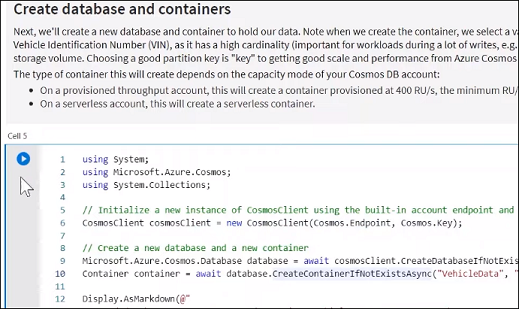
After importing the NuGet package, next, you can use the built-in Cosmos DB .NET SDK to create a new database and container. If you notice here, this Cosmos DB client is already aware of the context of the account so that cosmos. endpoint, cosmos. key, so you don’t even have to hardcode every connection string. It already knows what the context of your account is.
After you run the cell, you will see you have a couple of lines that use the built-in SDK to create a new database and a new container. Then if you go back to your data section here, you see that you actually were able to create the database and container.
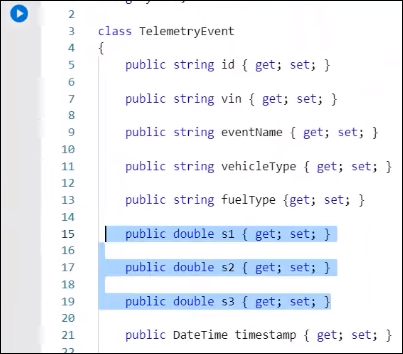
In the next couple of cells, Azure has some helper code to represent the data that you will insert. This is the telemetry event with some sensor data. So, this is just a regular C# class. You see Azure has some sensor data, S1, S2, S3 as well as some vehicle metadata. And then these cells, have some helper code that uses that Bogus library imported to generate some sample data, have it in a helper function, and call that function to insert 100 events into your container. That container is the same reference in the container you created earlier in your database.
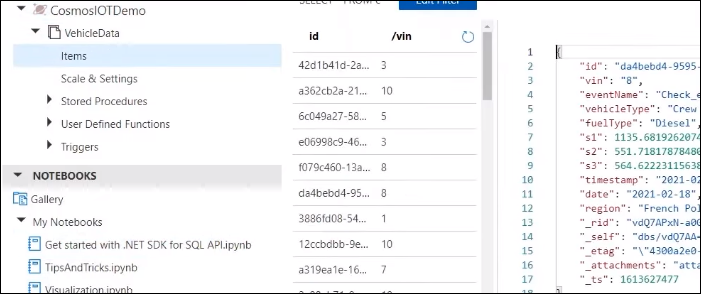
So, once you run that, if you actually go to look at your items or documents, you will see that the items were indeed inserted based on that sample code. Now that you have data inside our container, the next thing you want to do is a query and visualize it.
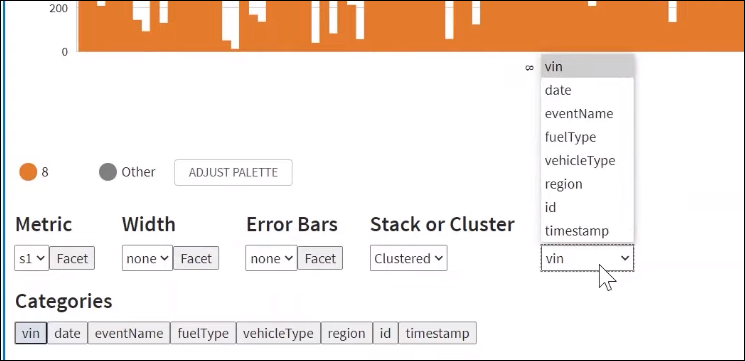
Here Azure has some sample code to run the query to get the top five results. And you notice immediately that in addition to getting the results in this nice grid view, Azure also provides some other options to the right that are built-in visualizations to help you analyze and visualize your data. So, for example, if you use this built-in bar chart view, let’s say you want to look at the S1 metric for the vehicle type or grouped by vehicle type, you can quickly get an interactive bar chart that shows you all the data you have for a quick view without writing any additional code to build this visualization.
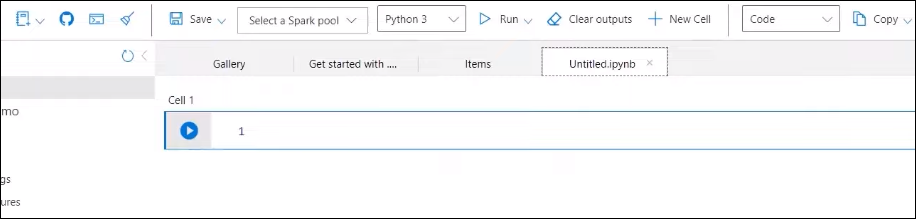
So, in just a few minutes, you are able to get started with Cosmos DB, run in a sample notebook, generate data, and visualize it. But if you want to write your own notebook or share that back to other members, other users of Cosmos DB. If you want to write your own notebook, you can go to the top-right pane and create a new notebook. Once you select a new notebook, it will show up in the notebook’s workspace and you can add your content.
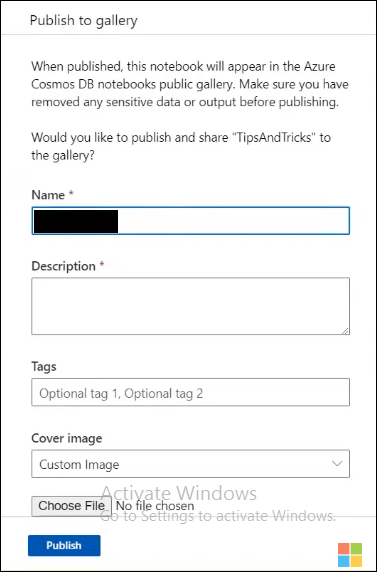
And, if you want to share your notebooks that are available to any user of Cosmos DB, you can publish them to the gallery. So, via the publish gallery action, give it a name. Description, give you some tags, some optional metadata here. And finally, to make it look nice, you can provide a cover image. One nice thing Azure has done here is in addition to letting you upload your own image. You can also even take a screenshot of what your notebook currently looks like. So, if you take a screenshot, it will actually match what you’re currently seeing on-screen in your notebooks. Once you hit publish, takes a second or two, you will be taken into my published work where you can see the notebook you just published. And if you go to the public gallery, you will see there a notebook you have available to anyone who’s viewing this public gallery in Cosmos DB.
Share your thoughts in the comments
Please Login to comment...