How to Make Google Form Public To Everyone
Last Updated :
19 Jan, 2024
How to Make a Google Form Public – The Easiest Way
- Open your Google Form.
- Click on “Send” in the top-right corner.
- Choose the “Link” icon.
- Toggle the switch to make it public (“Anyone with the link can respond”).
- Copy and share the link.
So, you’ve made a cool Google Form, and now you want to share it with everyone? Awesome! Making your Google Form public is like unlocking its superpowers for the world to see. Wondering how to do it? Well, buckle up because we’re about to walk through the easy steps to make your form accessible to everyone. Get ready to share your form far and wide! Let’s do this!
How to Make a Google Form Public
Step 1: Open your Google Form settings
Open a web browser and sign in to your Google account. Go to forms.google.com. Now either create your form from scratch or choose an existing form to make public. After opening the form you want to make public, toggle to the Google Forms “Settings” tab present at the top of the form.
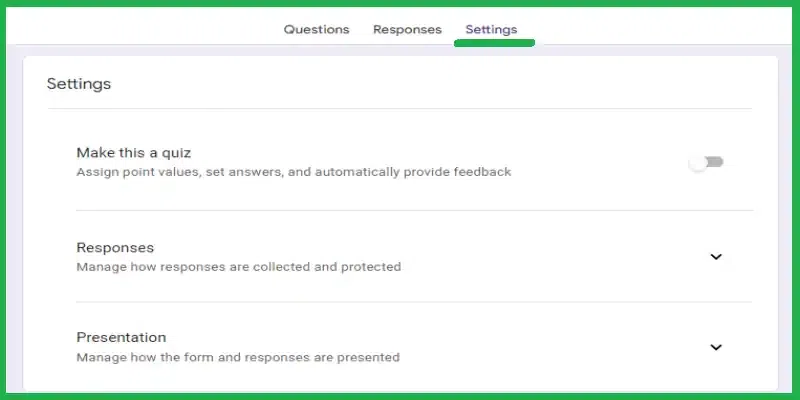
Go to ” Settings”
Step 2: Ensure “Limit to 1 response” is off
Under the Settings tab, open the “Responses” section and toggle the “Limit to 1 response” to be set off. This will make the form public which means that anyone can see your Google form without signing into Google Forms.
Note : This is an optional for you . Within the “Responses” section , in the Settings tab, there is another setting you may turn off: collect email addresses ,however even if this option is turned on, your form can still be public. When this option is on, users must provide their email addresses when responding to your form but , turning this off ensures anyone can fill out your form regardless of if they want to provide an email address or not.
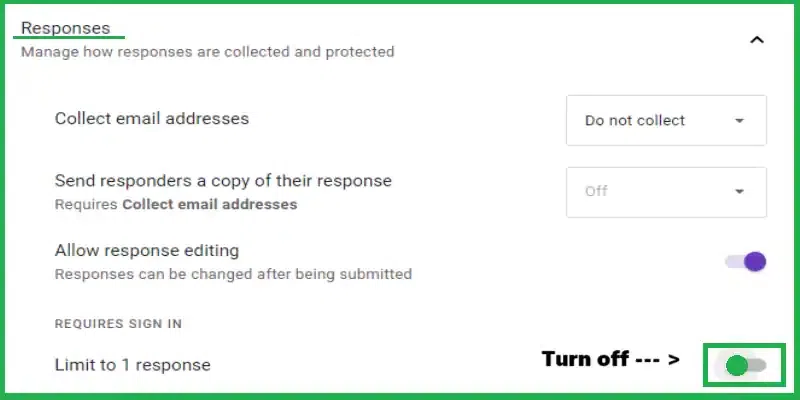
Turn off “Limit to 1 response”
Step 3: Send or Share your Google form
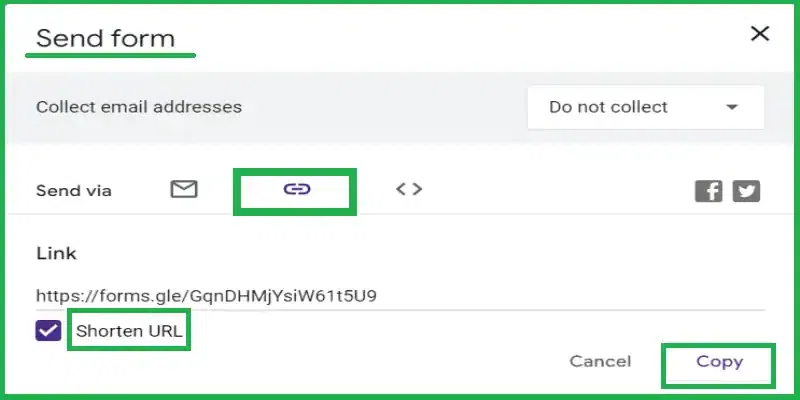
Your form is now made public to everyone and here goes the last step which is to send the form to the right audience. Click on the Send button present at the top right corner of the form. One of the ways to share your form is through the link button, creating a link (you may shorten the link if you feel like it) that you may copy and share it with the right audience of the form. You can even make this link a QR code that can be scanned. Alternatively, you may share via email, or social media, or embed it on your website to gather responses from the public.
Send your Google form
How to Test if your Google Form is Public
Now that you have completed all the steps to make your Google form public, you might wonder if there is a method to verify that your form is public or not. To test whether your form is public or not, follow the steps given below.
Step 1: Press the Send button and copy the link
Press the “Send” button present at the top right corner of the form and toggle to the link tab. You will see a link (you may shorten the link if you feel like it), and copy it by clicking the “Copy” button.
Copy the link
Step 2: Open a browser
Open a browser where you will not be automatically signed into your Google Form. Alternatively, you can also open an incognito tab. Paste the copied link into the URL field. This should open your form without requiring a sign-in. However, if you have not successfully made your form public, you will see a pop-up window given below, requiring a sign-in.
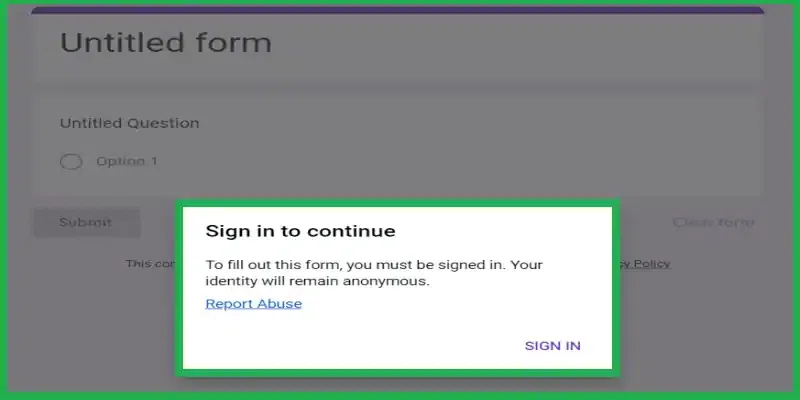
Pop-Up window
Step 3: If it asks a “Sign In”, check the settings made
If there appears a pop up asking for a “Sign In”, go back to your form and double-check that you turned off the right settings, i.e. ensure “Limit to 1 response” and “Collect email addresses” are off, under the Settings tab, “Responses” section.
Things to keep in mind when making a Google Form public
Making a Google form public is a very easy task, but there are a couple of things to be kept in mind to ensure that your Google form is made public successfully.
How to make a Google Form public but not editable
There are two ways in which a user may interact with your form: as respondents or as collaborators.
- Respondents can view your form and provide their responses but, they can not edit the form or view other responses.
- Collaborators, on the other hand, can edit the form and the responses. You can add collaborators to a form by following the steps given below.
Step 1: Click on the “More options” button
Click on the “More options” button i.e. the three dots present next to the Send button.
Step 2: Select the “Add collaborators” option
From the options available, select the “Add collaborators” option. This will give you the facility to add the emails of the collaborators.
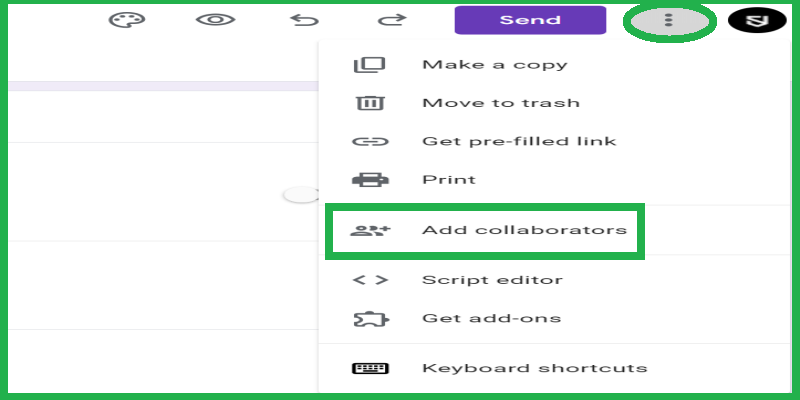
Click on “three dots” and select “Add collaborators”
Step 3: Restrict the access
Another window will open where you need to enter the email of the people you want as collaborators to your form. You should ensure that the Google form access is set to “Restricted,” which means only the people you grant access to can edit the form.
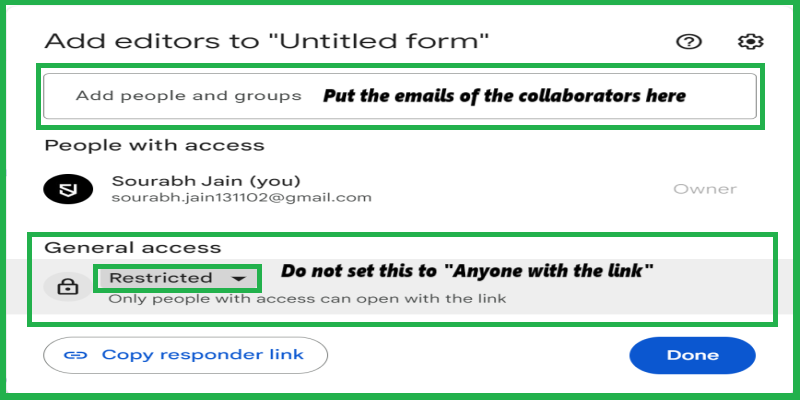
Add emails and restrict access
Note : Selecting the other option i.e., “anyone with the link” will grant the editor access to anyone with the form URL/link and make your form publicly editable. Giving editor access to everyone should not be done in almost all cases.
Remember you can stop accepting responses any time
When you make a form public, there is a very high chance of getting a huge number of responses. However, if you’ve reached the limit of the responses you need, there is a simple way to stop receiving responses immediately.
Step 1: Go to the Responses tab in your Google Form
Go to the “Responses” tab present at the top of the form Here, you will find that the “Accepting responses” setting is turned on.
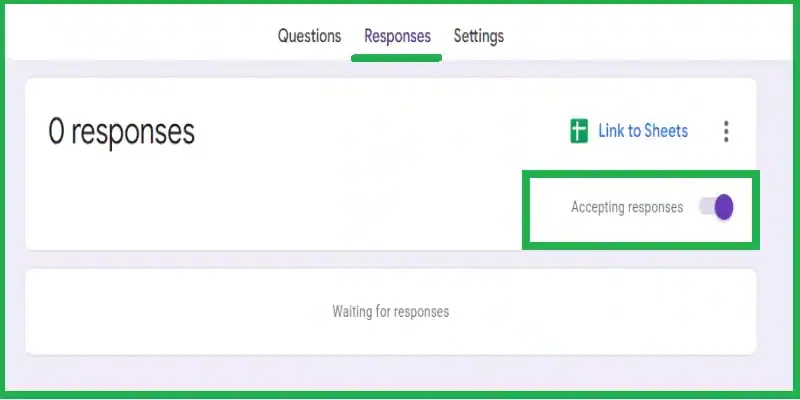
Turn off “Accepting responses”
Step 2: Turn off “Accepting responses”
To stop receiving responses, turn “Accepting responses” off, and your form will no longer be available for responses. You may even enter a custom message to display when someone tries to respond after you’ve stopped accepting responses.
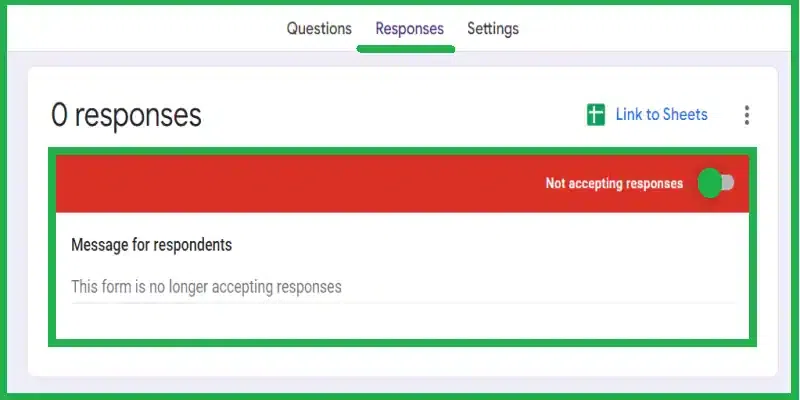
Put up a custom message to display when someone tries to respond after you’ve stopped accepting responses.
Read more
Conclusion
Google Forms offers a user-friendly and efficient solution for creating, customizing, and sharing digital questionnaires. The step-by-step guide outlined here simplifies the process of making a Google Form public to everyone, allowing for easy data collection without requiring respondents to sign in. With options to customize response settings, share through various channels, and control accessibility, Google Forms provides a versatile tool for conducting surveys or quizzes. The ability to easily test from accessibility and halt responses at any time adds practicality to the platform, making it a valuable resource for a wide range of applications.
FAQs
Why won’t my Google Form be public?
This may be because you might have not set the right settings .Make sure that “Limit to 1 response” and “Collect email addresses” is off ,under the Settings tab , “Responses” section. Check the collaborator access settings to make sure that editing rights are restricted. To verify if the form is public to everyone or not , follow the steps mentioned in the article under “How to test if your Google form is public”.
Are Google Forms visible to everyone?
By default , Google forms are not visible to everyone. When you create a Google Form, it is initially private, and access is restricted to those with the link or collaborators you specifically invite. However you may make the forms visible to everyone by following the steps mentioned in the article under “How to make a Google Form public.
How do I give access to a Google Form?
To give access to a Google Form, open the form you want to share. Click on Settings tab present at the top of the form and ensure that the “Limit to 1 response” and “Collect email addresses” is turned off in the “Responses” section .After this click on the “Send” button and share the form via link, email or any social media platform.
Share your thoughts in the comments
Please Login to comment...