How To Make A Stage Channel On Discord – Quick Steps
- Enable Community Server Options
- Select a Server > Create New Channel
- Select Channel as Stage > Type a Name
- Invite a Speaker or Add a Stage Moderator
- Go to Stage Channel
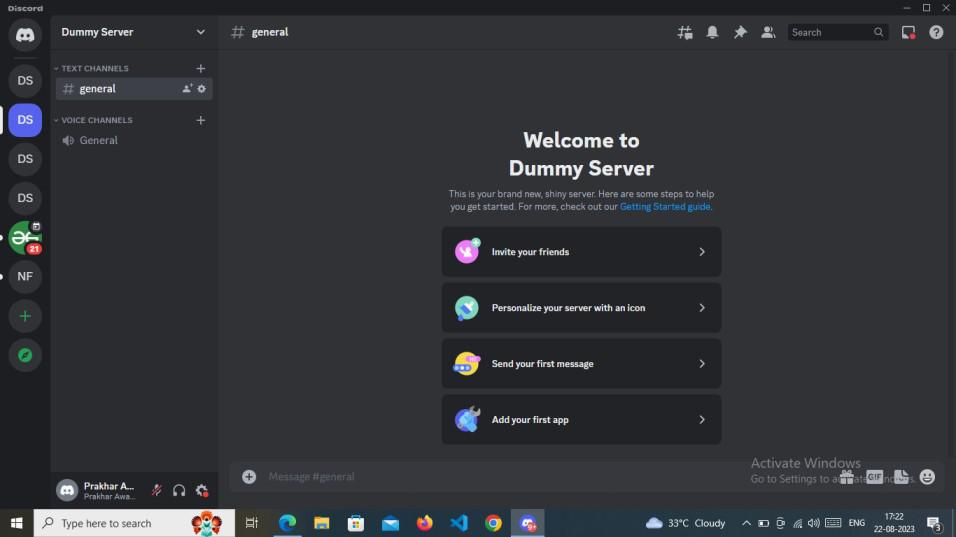
In today’s world of technology where there are so many platforms for individual as well as group communication, Discord has ascended to prominence as a dynamic platform that nurtures communities, companionship, and the exchange of ideas. In Discord the “Stage” feature – a virtual podium that empowers users to captivate audiences, share insights, and engage in discussions on a grand scale. Whether you’re an event organizer, a thought leader, or simply an individual aiming to amplify your voice, comprehending the process of creating a Stage in Discord can be transformative. Within this guide, we will lead you through a step-by-step journey to establish your very own Stage, granting you the ability to shine in the virtual spotlight and allow your message to reverberate across the digital landscape. Join us as we unravel the mechanics, provide tips, and explore the creative possibilities of crafting an immersive Stage experience that will undoubtedly leave your audience applauding for more.
What is a Stage Channel in Discord?
A Stage Channel within Discord serves as a communication platform designed to target a collective audience of users, allowing the broadcasting of various updates, occasions, and more within a Discord server. This channel type enables the capability for a single user to engage in speech while other participants connected to the stage channel assume the role of listeners on the Discord platform.
Note: In order to create a Stage Channel in Discord, it is mandatory to enable the Community Server Options
How to Set Up a Community Server on Discord for Stage Channel
Step 1: Launch the Discord App or Web App
To launch the Discord application on your desktop, locate the Discord icon and give it a click.
If you do not have the Discord app installed, you can simply access Discord directly through any web browser on your desktop.

Click on the Discord icon to open Discord App
Step 2: Select a Server
To create a stage in Discord you need a server in which you can create as stage, so just go to your server and right click on the server’s Icon to open the drop-down menu.
Open your Server >> Right-click on the Server Icon
Step 3: Select “Server Settings”
From the drop-down menu appears of the server select “Server Settings” among all the options to open the server settings of the server.
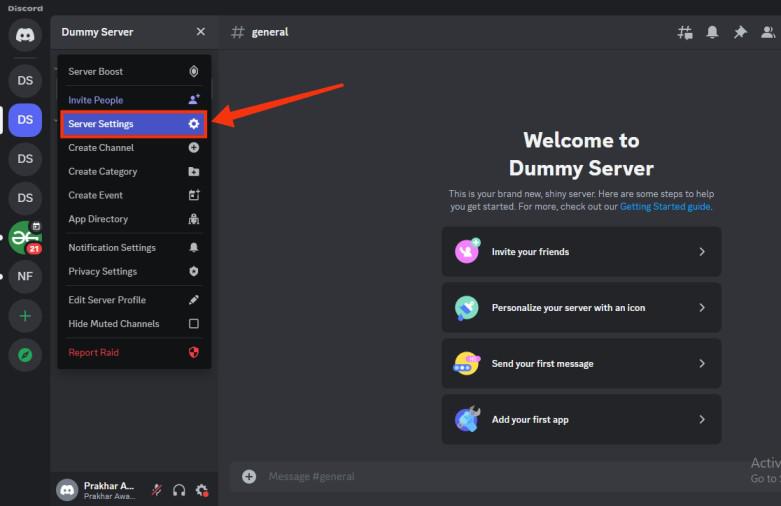
Select Server Settings
Step 4: Click on “Enable Community” and Select “Get Started”
In order to create a stage in Discord your server should be community server to so select the “Enable Community” tab from the server settings and then click on “Get Started” to make your server a community server.
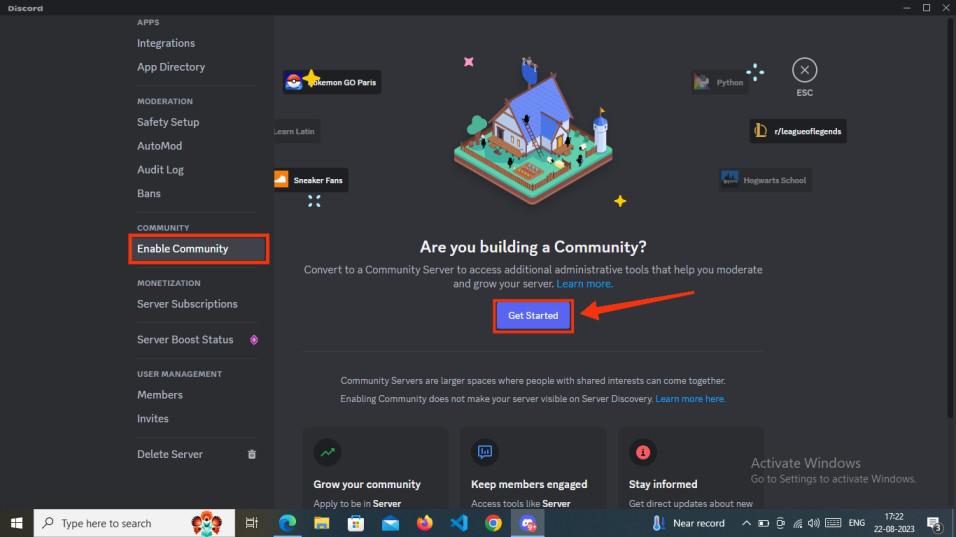
Select “Enable Community” Tab >> Click on “Get Started”
Step 5: Set Up Your Community Server
To make community server you need to complete three steps which will make your server a community server.
- Safety Checks: Check all the safety checks of Verify email Required, Scan Media and click on “Next”.

Confirm all Safety checks >> Click “Next”
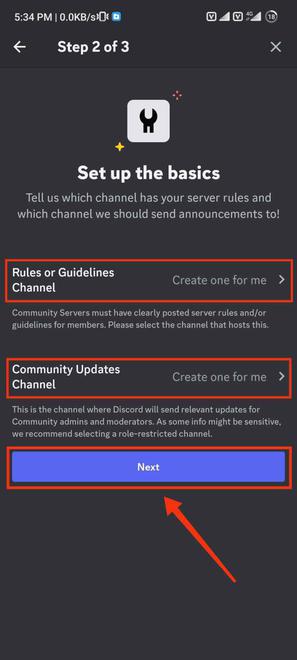
- Set Up the Basics: Select the channel which you want to make a community.
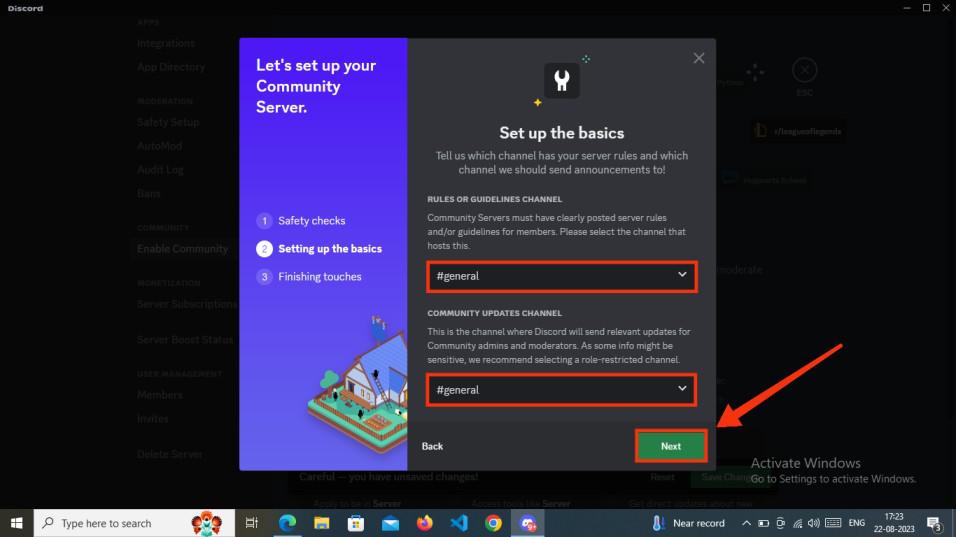
Set Up the Basics
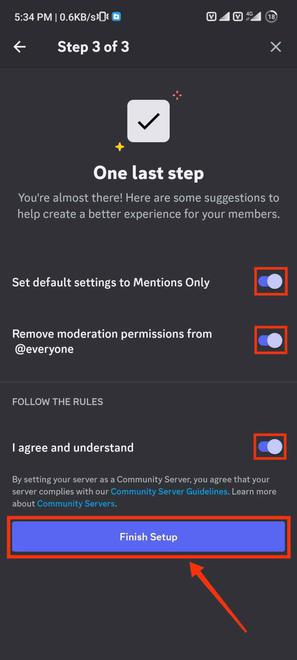
- Finishing Touches: Check the Agree check box and click on “Finish Setup”.
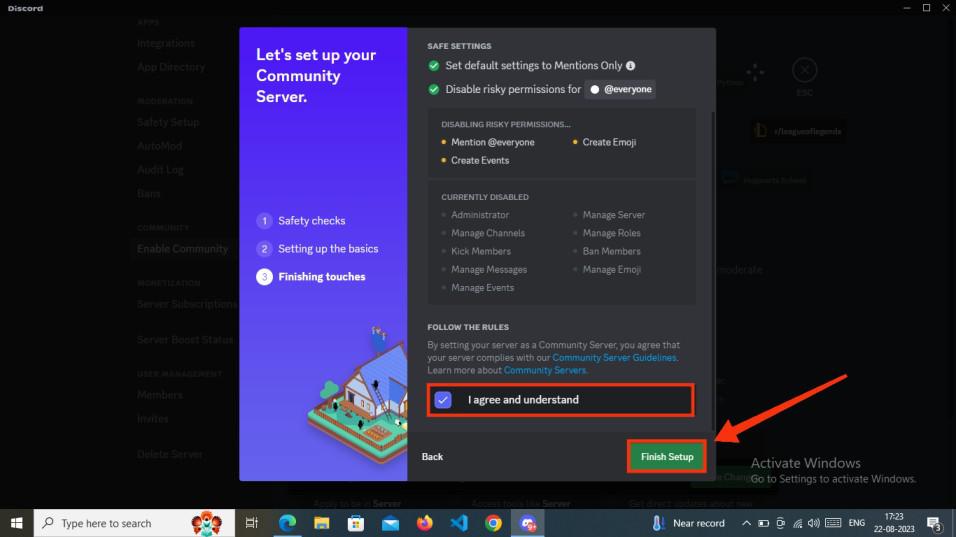
Finishing Touches
- Click Save Changes to save all the changes you made.
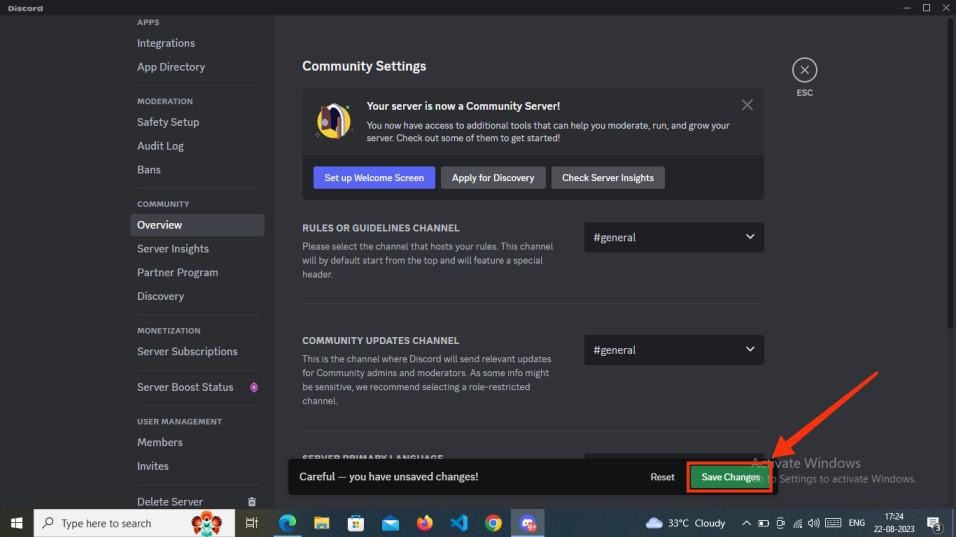
Click ” Save Changes”
How to Create a Stage Channel in Discord
Step 1: Select a Servver and Create a Channel
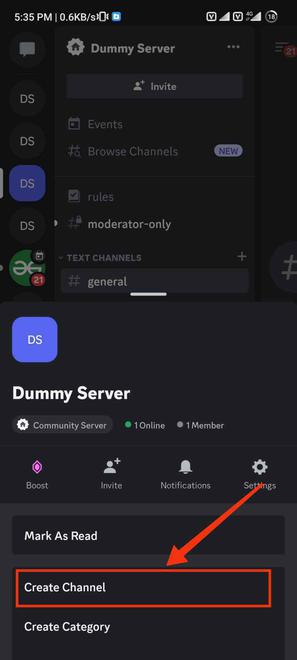
After enabling the community for your server go to your server and right-click on server’s icon to open the drop-down menu, among the menu select the “Create Channel” option to create a channel.
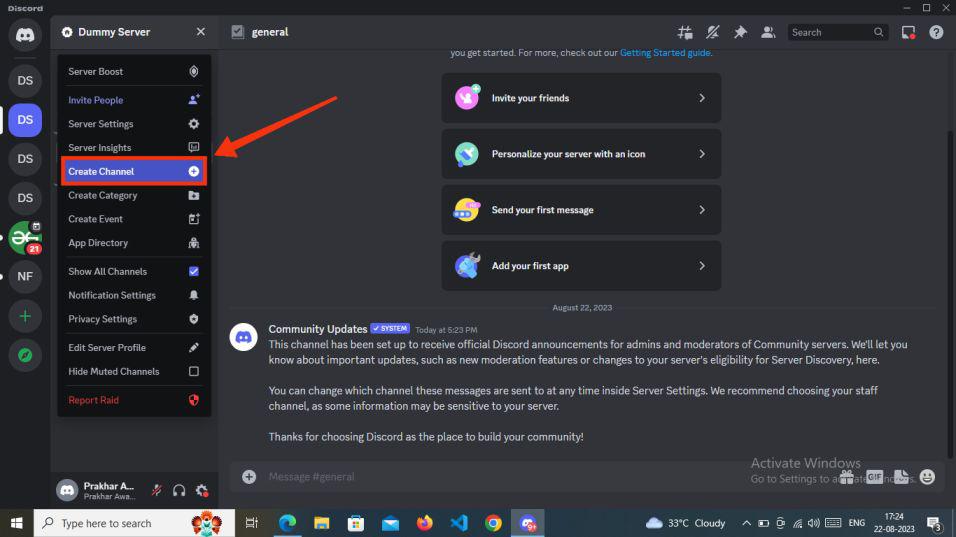
Right click on your Server >> Select “Create Channel”
Step 2: Select Channel Type as Stage and Click Next
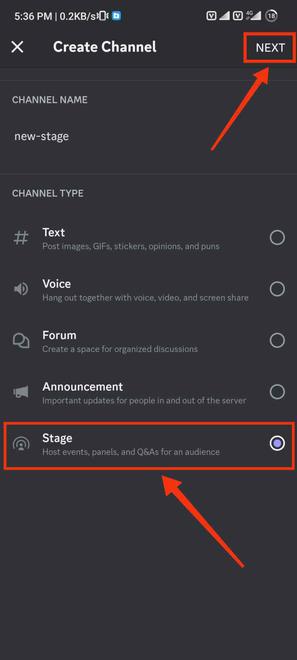
In the Create channel section select “Stage” form the channel type and give a name to your stage. After that click on the “Next” button to go to the next step.
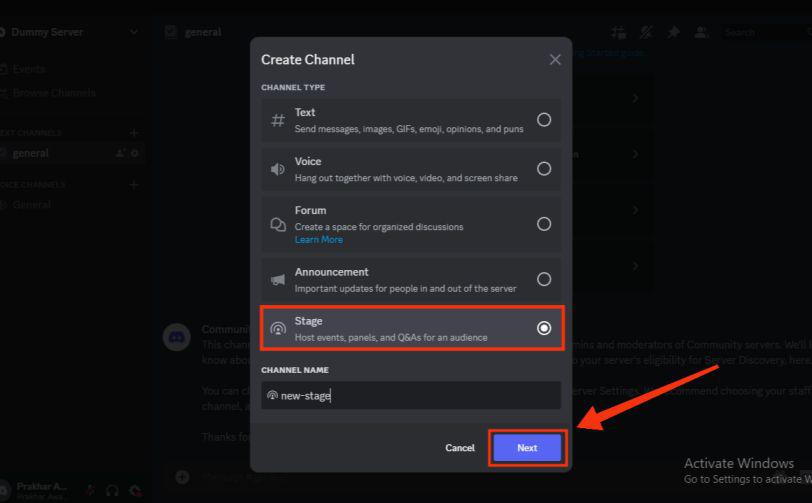
Select “Stage” >> Enter Stage Name >> Click “Next”
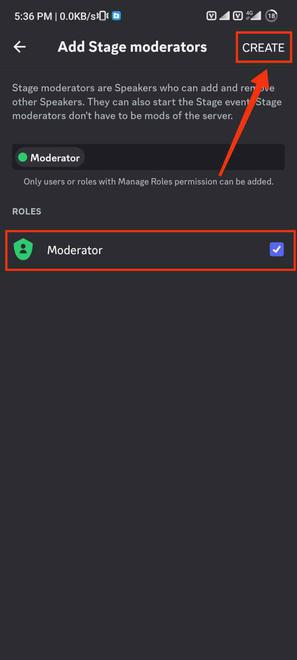
Step 3: Invite Speaker or Add Stage Moderator
Now you have to add the member to the Stage Moderator Role which will be the moderator of the stage, you can directly select the role of your server or you can type the name.
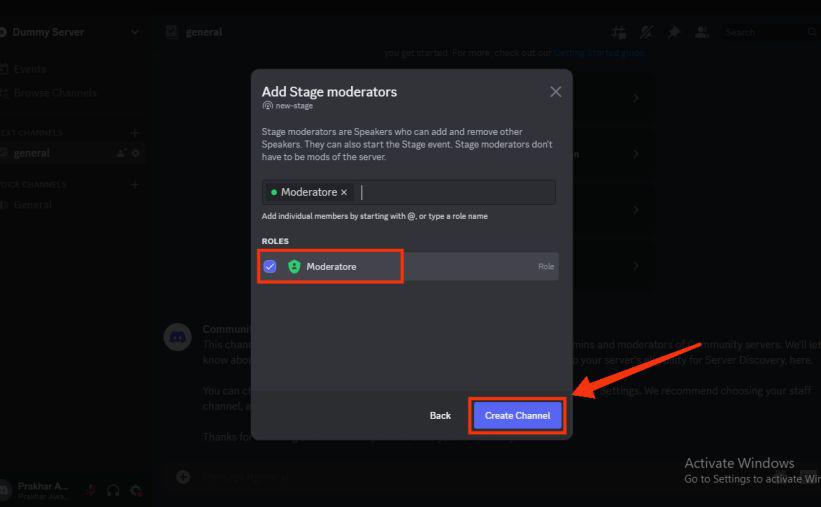
Invite Speaker
Step 4: Read all the Rules and Click Go it!
After creating your stage go to your stage by clicking on it, after clicking on the stage created some rules will be appeared of the stage read all the rules carefully and click on “Go It“.
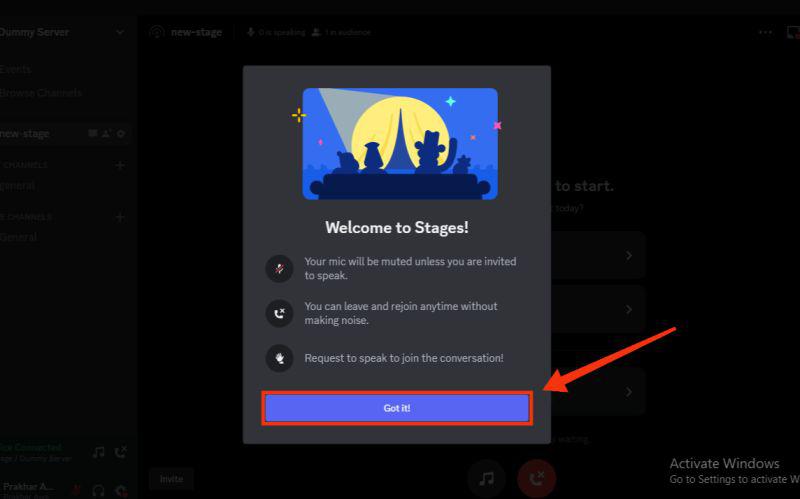
Read all the Rules >> Click Got it
Step 5: Click on “Start the Stage”
In the new stage created click on the “Start the Stage” button to start the stage.
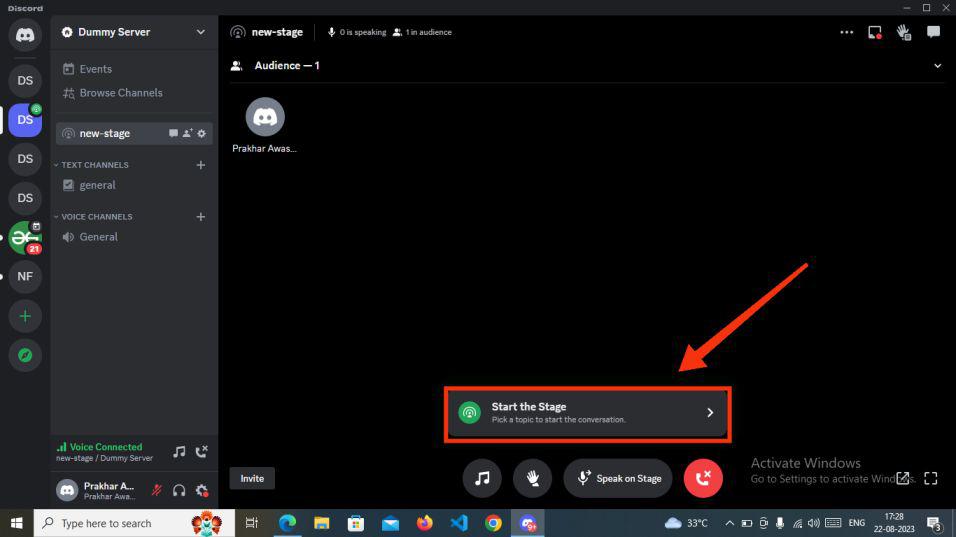
Click on “Start the Stage”
How to Start a Community Discord Server in Mobile
Step 1: Open Discord Mobile App
To launch the Discord app on your mobile, locate the Discord icon and give it a click.
Click on Discord icon to open App
Step 2: Open your Server and Click Three Dots
You need to open your server in which you want to make a stage and click on three-dots present next to the server’s name.

Click on Three Dots
Step 3: Go to the Server Settings
Click on the Settings icon to open the server settings.
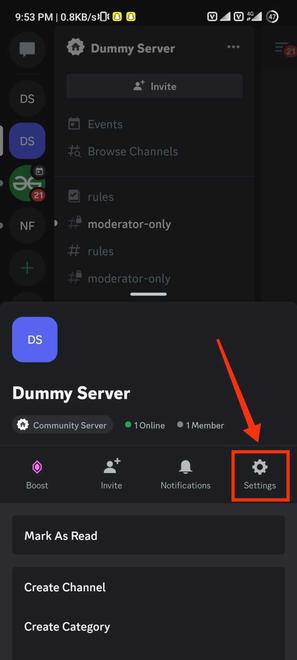
Go to the Server Settings
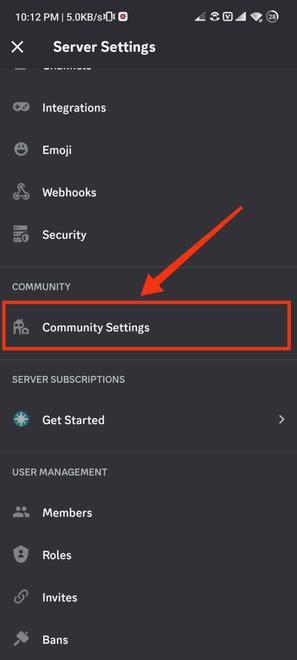
Step 4: Select “Community Server”
After coming to the server settings find the “Community Sever” option and give it a click.
Select Community settings
Step 5: Click on “Get Started”
In the Enable Community tab you can build your community and can make your server a community server, to do so click on “Get started”.
-660.jpg)
Click on “Get Started”
Step 6: Set Up your Community
To make your server a community server you have to complete three steps.
- Confirm all the safety checks to make your community safe.
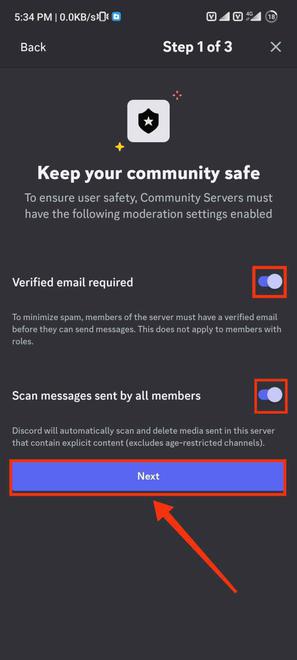
Confirm safety checks >> Click Next
- Set Up the Basics such rules and guidelines of the channel.
Set up the Basics
- Turn on the Permissions you needed and click on the “finish Setup” button to finish all the process.
Turn on the Permissions >> Click “Finish Setup”
Step 7: Review Changes and Click Save
Now review all the changes, edit according to your needs and click on “Save” button.

Click on “Save”
How to Create and Set Up a Stage Channel in Discord Mobile
Step 1: Select a Server amd Create Channel
After setting up your community server return to your server and click on Three-dots, after that select “Create Channel” to create a stage channel.
Select “Create Channel”
Step 2: Select “Stage”, Type a Name and Click Next
In the Create Channel section select the stage from the channel type as you are creating stage and click on the “Next” button to proceed to the next step.
Select “Stage” >> Give Name
Step 3: Add Stage Moderator
Now add your stage moderator who will manage the stage organized, you can select the moderator from the pre-roles of your server, or you can type the name of anyone to assign the stage moderator role.
Add Moderator
Step 4: Go to the newly Created Stage Channel
Now go to the stage created by you as you want to organize the stage.
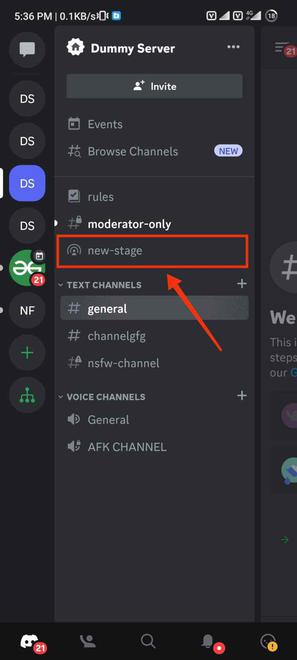
Click on the Stage
Step 5: Read all Rules & Regulations and Click “Got it”
After you click on the stage created a message containing all the rules and regulations will appear, read all the rules and click on “Got it”.
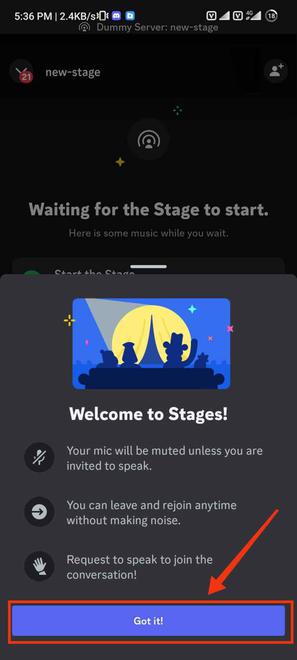
Click on “Got it”
Step 6: Click on “Start the Stage”
After reading all the rules and regulations click on “Start the Stage” button to organize the stage.
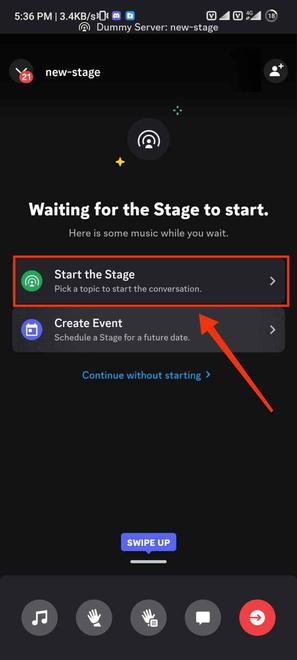
Click on “start the Stage”
Conclusion
Making a stage in discord can be done in some easy steps, stage is an audio-based meeting or event in which all the members communicate each other using the audio only. To create a stage, you need make your server a community server after that you can create stage in discord. Go to the server settings of the server and click on the “Get Started” button in the Enable Community tab and complete all the steps needed to make a community server. Then click on the Create Channel button from the server options and go for creating a stage, select the stage from the channel type in the create channel section and click “Next”. Your stage channel will be created.
FAQs
How Stage Channel Work?
Stage channels in Discord allow members to take on roles as Stage moderators, speakers, or audience listeners. Speakers appear at the top, making it clear who can talk, and Stage channels can be pinned for easy access. There are no enter or leave sounds for a seamless experience.
Who Can Speak In A Stage Channel?
In a Stage channel, speakers have the ability to talk. They can transition back to the audience by clicking “Move to Audience.” Stage moderators, a special category of speakers, possess additional powers like setting topics, opening the channel, and managing other speakers. These moderators can be assigned to entire roles or individual members. However, all server members, who have permission to view the channel, initially join Stage channels as part of the audience and are muted.
How many can join Audio Only Stage Channels?
In Audio Only Stage Channels, there’s no limit to the number of people who can be on stage and talking, while the audience viewing size can go up to 10,000.
For Video/Screen Share in Stage Channels, Stage moderators/server admins and Stage speakers with the proper permission can have 1 stream live at a time, and up to 5 people on stage can enable their cameras. The audience participants can vary in size:
- Free: 50 viewers
- Boosting Tier 2: 150 viewers
- Boosting Tier 3: 300 viewers
Share your thoughts in the comments
Please Login to comment...