How To Check Your Computer Uptime on Windows 11?
Last Updated :
15 Dec, 2023
Uptime is a major measure of system stability and performance as it measures how long your computer has been running since the last reboot. Understanding how to verify a computer’s uptime in Windows 11 may help you with debugging, maintaining, and supervising. This guide will explore various methods to find your system’s uptime easily.
Methods to Check Your Computer Uptime on Windows 11
Below are the 5 best methods to check your computer’s uptime on Windows 11. Let’s find out:
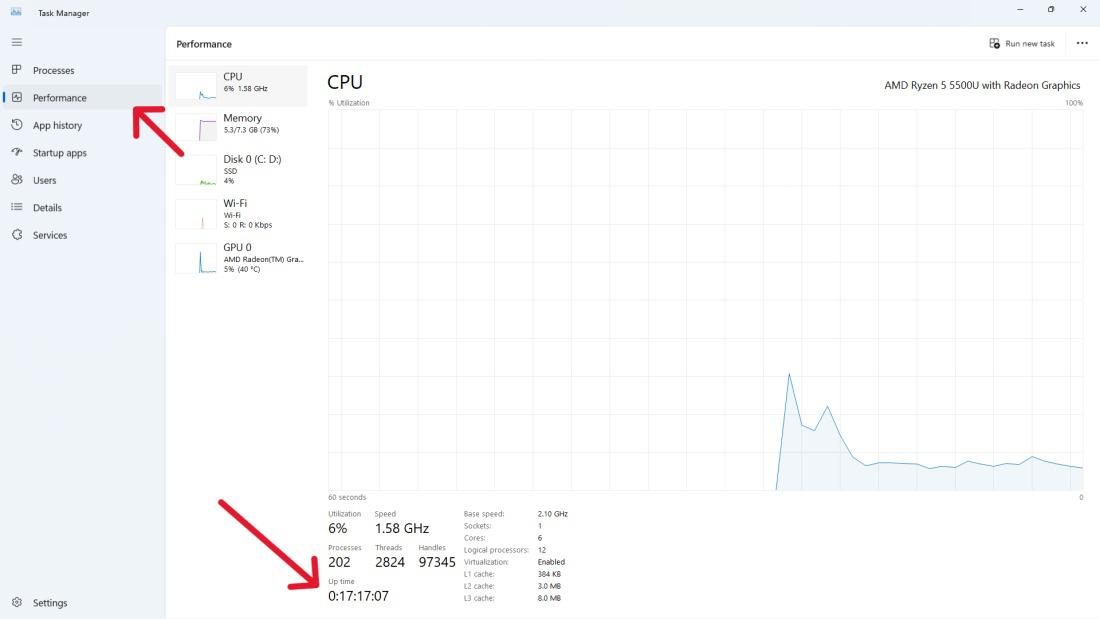
1. Find System Uptime Using Task Manager
Task Manager gives detailed information about your computer’s activity.
Step 1: Right-click on the taskbar and select “Task Manager” from the menu.

Step 2: Go to the “Performance” tab in the Task Manager window.
Step 3: Click on the “CPU” section to reveal additional details.
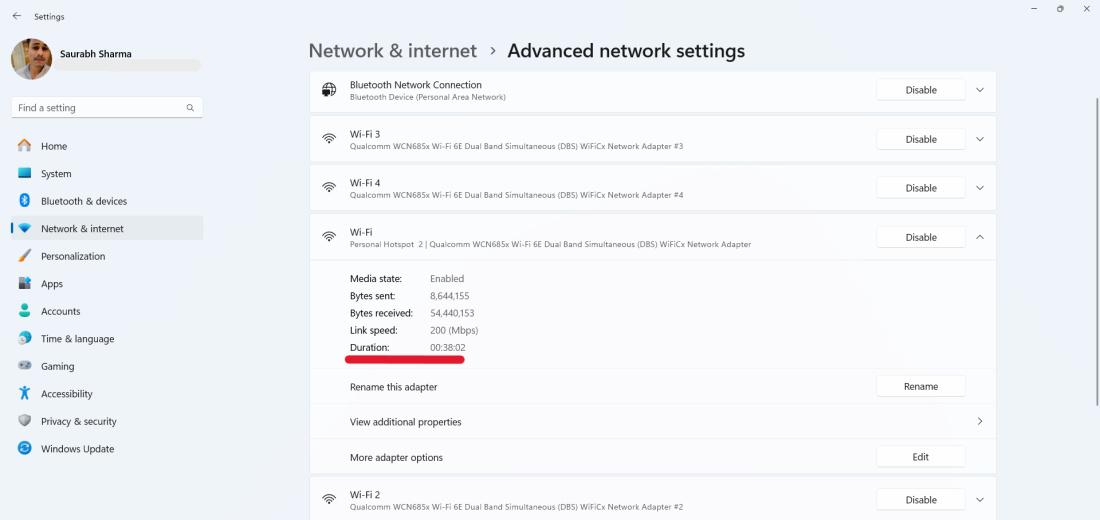
2. Find System Uptime via the Settings App
The settings app in Windows 11 helps a user easily navigate the system’s data.
Step 1: Open settings by pressing Win + I
Step 2: Navigate to the Network & Internet tab on the left sidebar.
Step 3: Click Advanced network settings
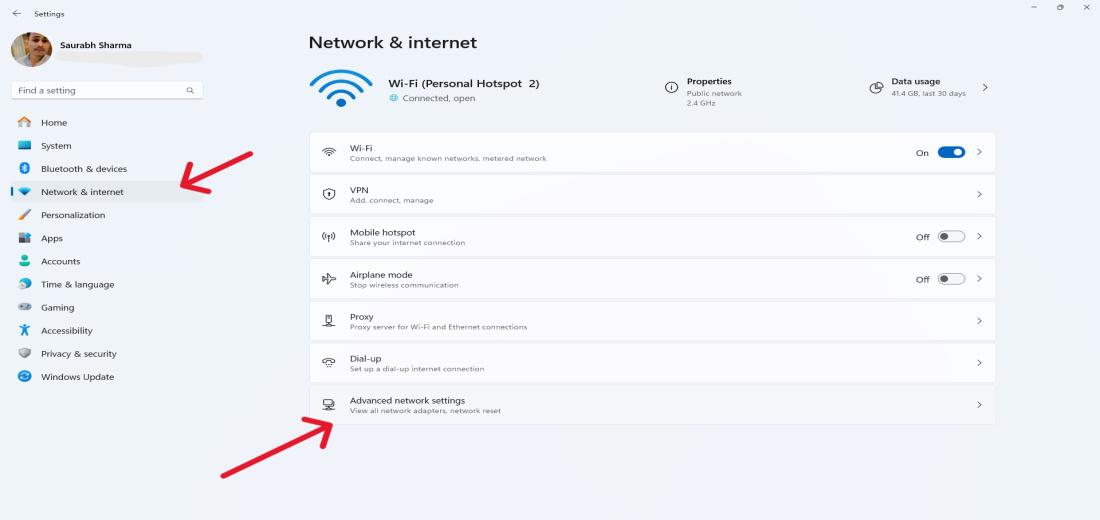
Step 4: Within the Network Adapters section, click on the active network adapter.
Check the uptime next to the Duration to monitor the connection’s active duration.
3. Find System Uptime Using Control Panel
Step 1: To open the control panel use Win + R then type “Control Panel”
Step 2: Click on “Network & Internet“
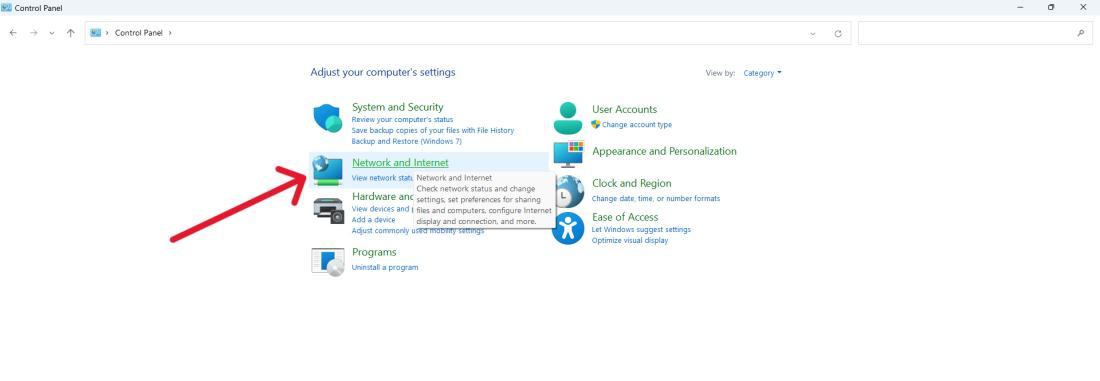
Step 3: After that, Click on Network and Sharing Center.
Step 4: Under the “View your active network” then click “Connections” network adapter
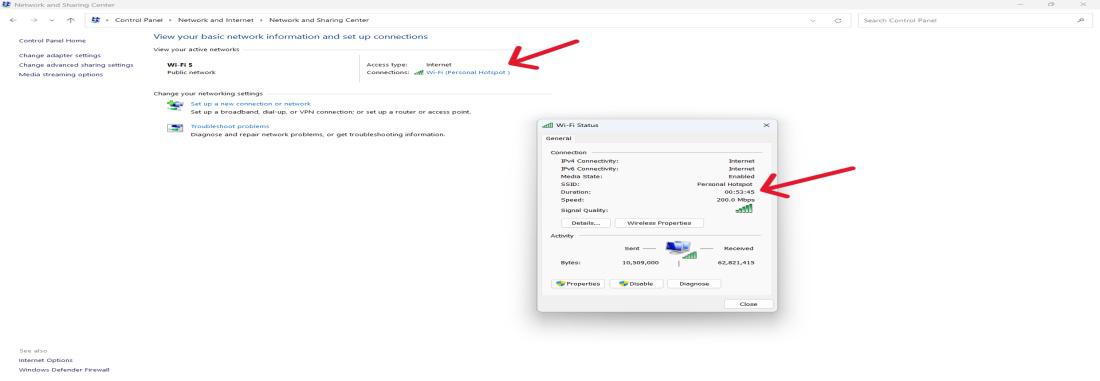
Step 5: In the General tab, locate the uptime displayed beside Duration.
4. Check System Uptime With Command Prompt
Step 1: To open the command prompt use the shortcut Win + R then type “cmd“
Step 2: Then, type the following command
systeminfo | find "System Boot Time"
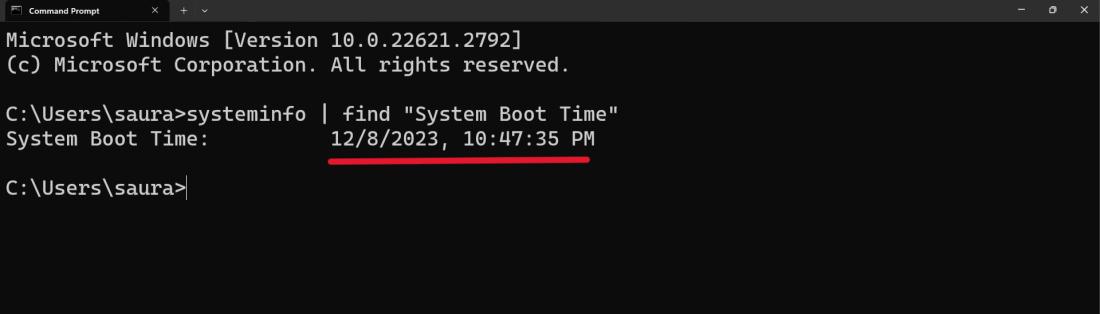
Run the command, and the Command Prompt will show your computer’s start time. Calculate system uptime by subtracting this from the current time.
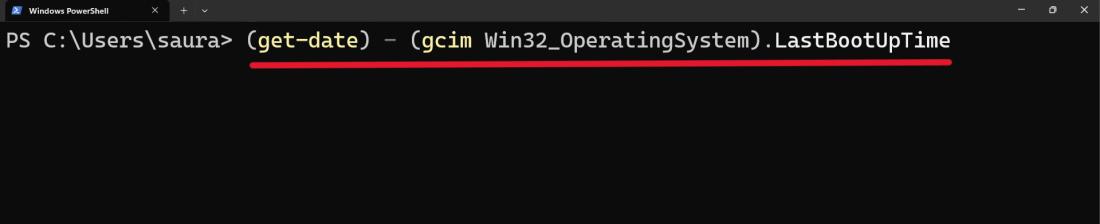
5. Check System Uptime With PowerShell
Step 1: Press Win + X and select “Terminal” or “Terminal (Admin)” for elevated access.
Step 2: Then, type the following command
(get-date) - (gcim Win32_OperatingSystem).LastBootUpTime
Conclusion
In conclusion, Tracking the uptime of your computer on Windows 11 ensures optimal performance of your system. The users will have varied paths that include as simple as Task Manager to as precise as PowerShell for tracking their machine’s dependability and in time resolving problems.
FAQ’s: Check Your Computer Uptime on Windows 11
1: Why is checking computer uptime important?
Windows 11 monitoring system uptime is vital for evaluating the system’s stability and reliability. It is used for identifying possible problems, tracking system dependability, and troubleshooting problems.
2: Can I check uptime using third-party tools?
Yes, a couple of third party apps such as ‘UptimeRobot’ and ‘System Uptime Full Plus’ that offer smooth uptime monitoring of your PC.
3: Do these methods work for all versions of Windows 11?
Yes, these methods can be applied to Windows 11 including its previous versions. Yet, slight changes of the interface may emerge due to updates.
Share your thoughts in the comments
Please Login to comment...