How to Add and Use Stickers on Discord
Last Updated :
25 Sep, 2023
How to Send Discord Stickers- Easy Steps
- Open Discord App or Web App
- Select a Sever > Select a Text Channel
- Click on the Stickers Icon
- Select Sticker > Click Send
Discord has risen as a formidable gaming platform, serving as the communication hub for gamers and babblers worldwide. However, its influence extends far beyond the gaming community, as Discord also caters to a diverse user base that relies on text and voice channels for communication. While text and emojis have become pins of online conversations, Discord elevates the experience by offering an array of expressive stickers. These stickers, easily accessible from the dedicated section next to the message box, add a delightful touch to your messages. Moreover, Discord allows users to go a step further by enabling them to upload custom stickers to their servers. In this article, we will delve into the world of Discord stickers, both built-in and customized, and uncover how they can enhance your communication experience on the platform.
How to Use and Send Discord Stickers
Step 1: Open the Discord App or Web App
To launch the Discord App on your Desktop, locate the Discord icon and give it a click.

Click on the Discord icon to open the Discord App
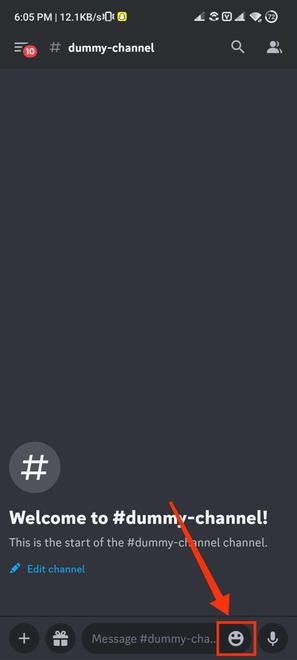
Step 2: Open a Text Channel and Click on the “Stickers” icon
Select a server open your text channel in which you want to send stickers in messages and click on the “Sticker” icon, it will open you a collection of all default stickers of Discord.

Open Text Channel >> Click the “Sticker” icon
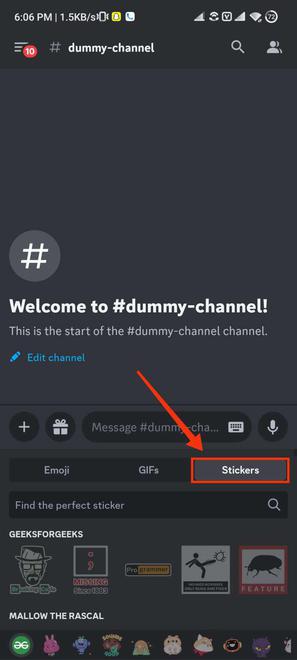
Step 3: Select a Sticker
Once you click on the sticker icon, you’ll see a range of built-in Discord stickers. Among these, simply choose the sticker you’d like to send in the chat, and it will be sent immediately when you click on it.
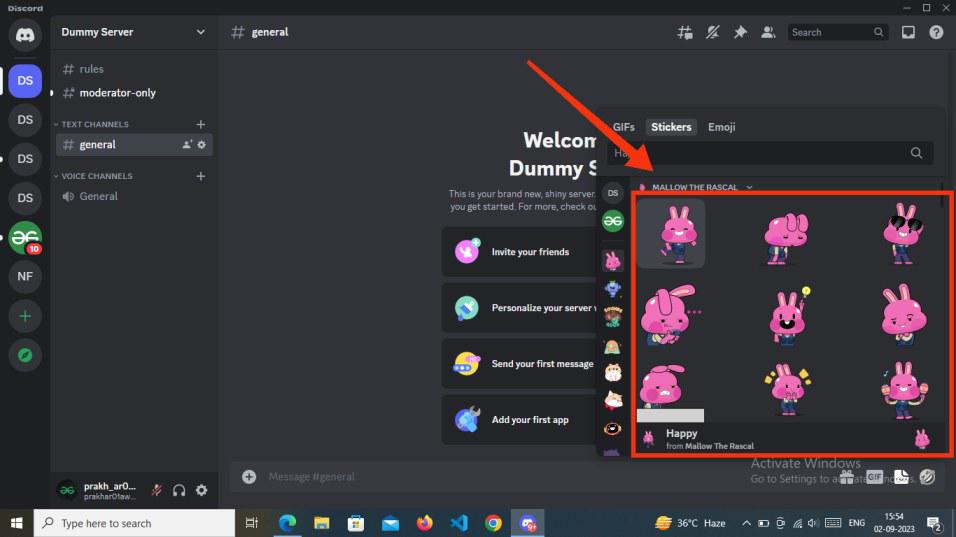
Select the Sticker
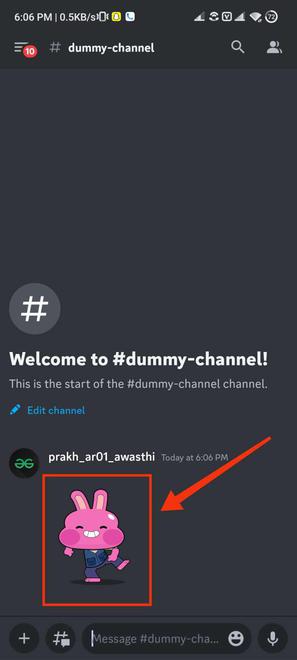
Step 4: Preview Sticker Sent in a Text Channel
After clicking on the sticker, it will be sent directly to the channel you’ve chosen.
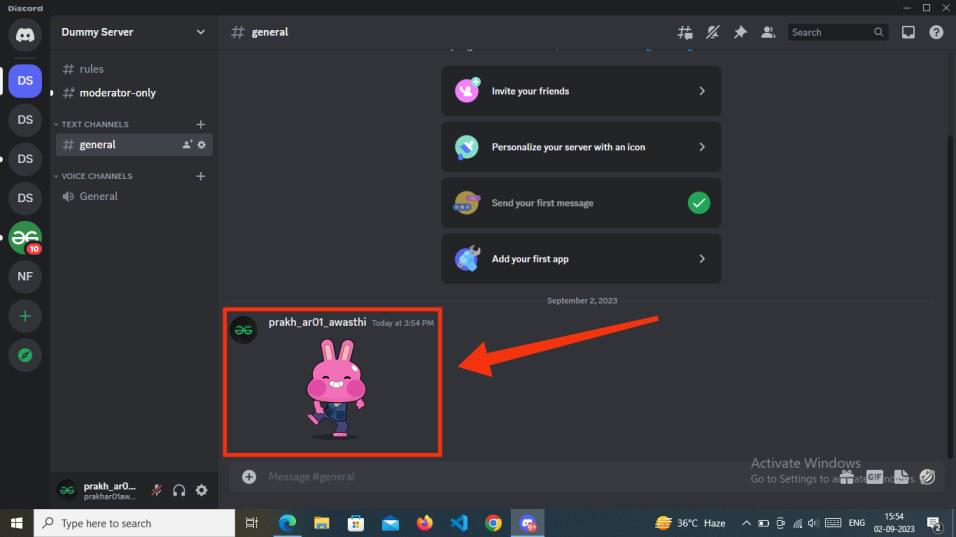
Sticker Sent
How to Add Discord Stickers
Step 1: Open the Discord App or Web App
To launch the Discord App on your Desktop, locate the Discord icon and give it a click.
Click on the Discord icon to open the Discord App
Step 2: Select a Server and open “Server Settings”
Open the Server in which you want to upload the stickers and go to the server settings of the server by selecting “Server Settings” from the server menu.
.jpg)
Select Server Settings
Step 3: Select “Stickers” and Click “Upload Stickers”
After coming to the server settings select the “Stickers” tab and click on the Upload Stickers button in order to upload your customized stickers.
Note: If you have no Server boost, then you can only add 5 Custom stickers in Discord.
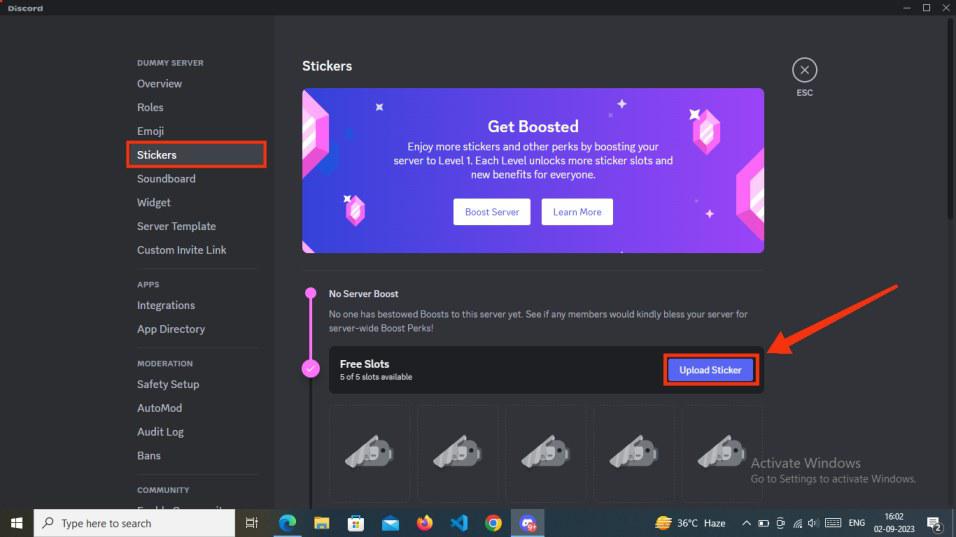
Select the “Sticker” tab >> Click on “
Step 4: Type “Sticker Name” and Click “Upload”
When you click on the “Upload Sticker” button, a File Uploading section will appear on the screen, prompting you to upload your own sticker. When uploading the sticker file, it’s essential to ensure that it’s in APNG or PNG format and does not exceed 512KB in size, otherwise, it won’t be accepted for upload to the server. After successfully uploading the sticker file, don’t forget to assign a name to your sticker and then click on the “Upload” button to complete the process and upload it to the server.
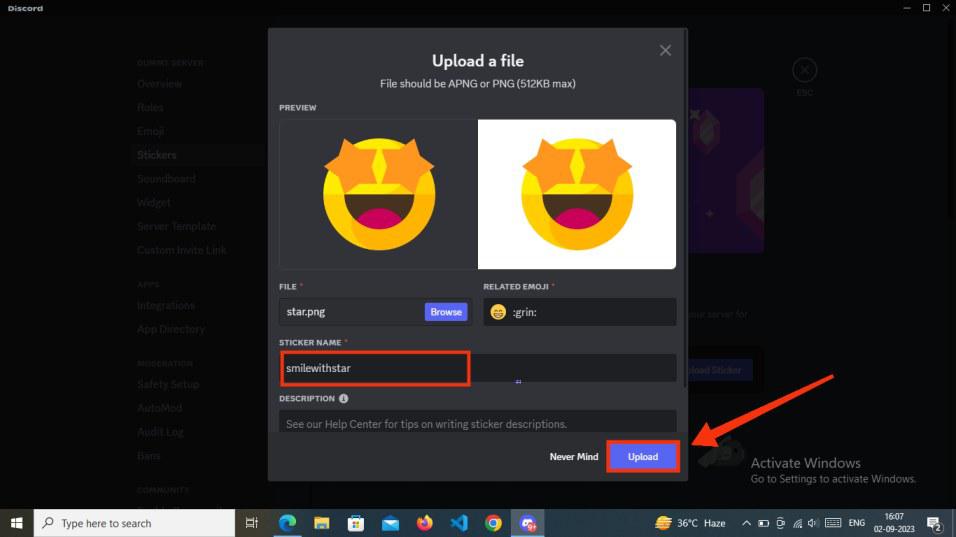
Give Sticker name >> Click “Upload”
Step 5: Review Changes
After successfully uploading your sticker to the server you can confirm it by visiting the sticker section.
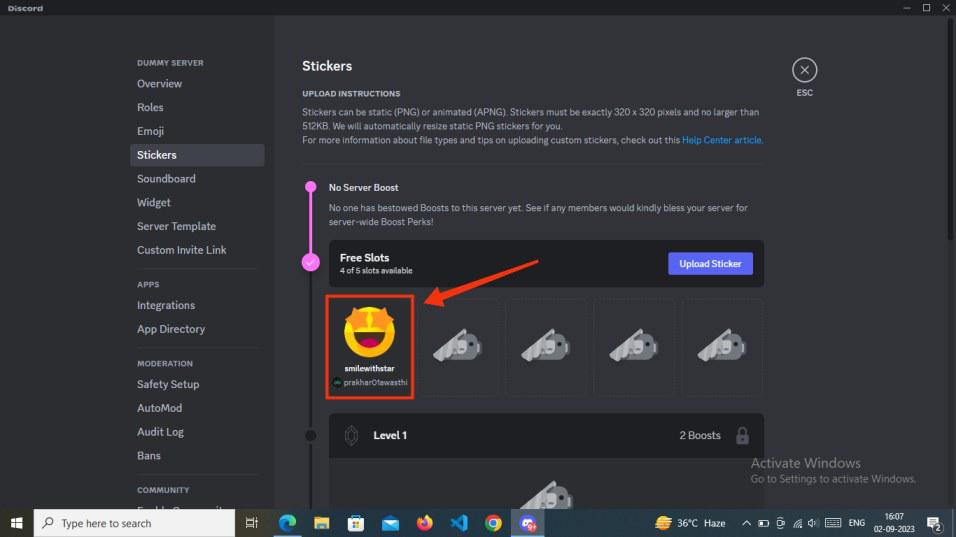
Sticker Uploaded
Step 6: Use the Sticker in the Text Channel
After your sticker has been successfully uploaded to the server, you can send it to anyone in a chat. To do this, click on the sticker icon and choose your sticker from your server’s sticker collection. Simply click on the sticker, and it will be sent in the chat.
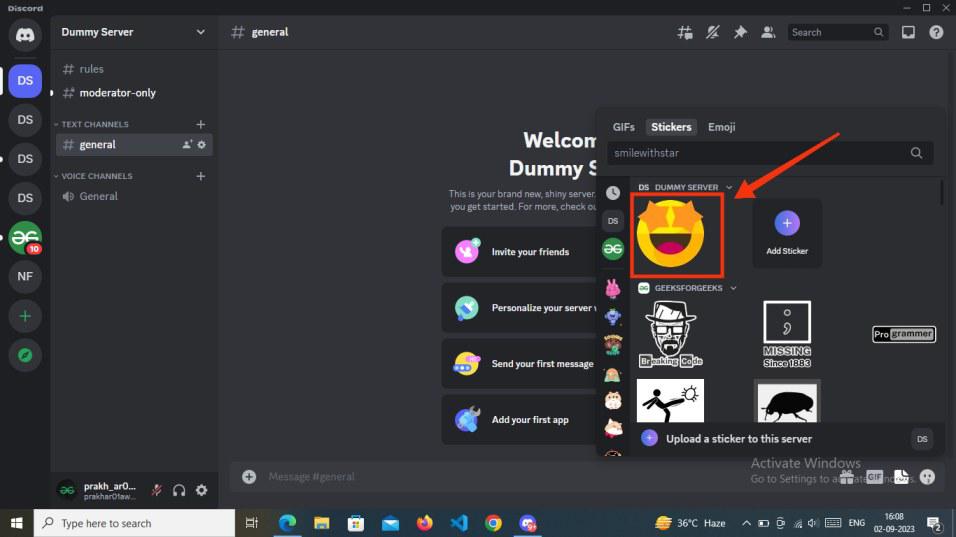
Click the Stickers icon >> Select your Sticker
How to Remove Stickers from a Discord Server
Step 1: Open the Discord App or Web App
To launch the Discord App on your Desktop, locate the Discord icon and give it a click.
Click on the Discord icon to open the Discord App
Step 2: Select a Server and Open Server Settings
First, you have to open the server in which you want to remove the uploaded stickers and go to the server settings of the server by selecting “Server Settings” from the Server menu.
Open your Server >> Go to the Server Settings
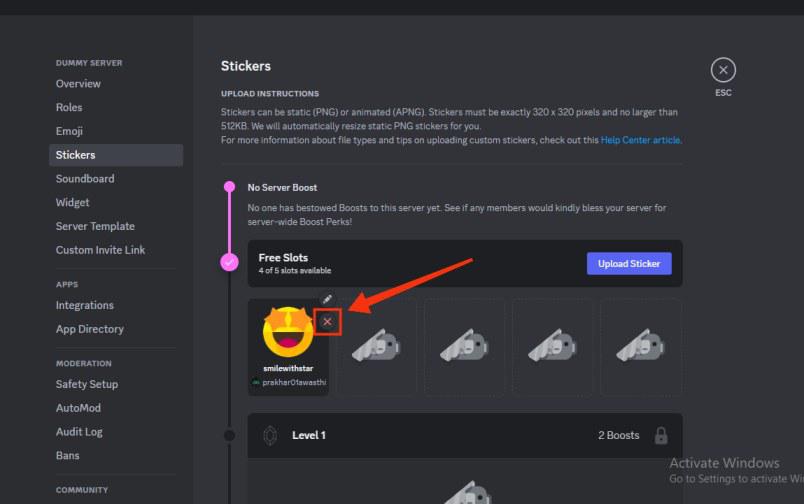
Step 3: Select the Stickers tab and Place the Cursor on the Sticker
After entering the server setting select the “Stickers” tab from the among tabs and place the cursor on the sticker which you want to remove from the server.
.jpg)
Select Stickers tab >> Place your cursor on Sticker
Step 4: Click on the Cross icon
To remove a sticker from your server, hover your cursor over the sticker you want to delete, and you will notice a ‘✘’ cross icon. Simply click on the ‘✘’ icon, and the sticker will be removed from your server.
Click on the Cross icon
How to Make Stickers in Discord on Mobile
Step 1: Open Discord Mobile App
To launch the Discord mobile app, locate the Discord icon and give it a click.
-660.jpg)
Click on the Discord icon to open the Discord App
Step 2: Open your Text Channel and Click the Emoji Icon
Open your Text Channel in which you want you want to make stickers and click on the “Emoji” icon to open the emoji section of the text channel.
Click on the Emoji icon
Step 3: Click on “Stickers” tab
When you click on the Emoji icon you will observe three tabs Emoji, GIF, and Stickers among all the tabs select Sticker’s tab as you want to make stickers. It will open the stickers.
Click on the “Stickers” tab
Step 4: Select Sticker to Send
After the stickers tab is opened you will observe a collection of stickers you can select any one of them, to send a sticker into the chat just tap on it and it will automatically send it to the chat.
-660.jpg)
Select the stickers
Step 5: Preview Sticker Sent
Now that your sticker has been sent to the chat.
Sticker Sent
Conclusion
Making Stickers in Discord is not a hard task it can be done very easily just follow the steps given above and you will be able to make stickers. Except for the in-built stickers of Discord, you can also use your customized stickers by uploading them to your Discord Server. All you need to do is open the text channel in which you want to make stickers and click on the Stickers icon to open all the stickers of Discord and just give a simple click to send them in the text channel. On the other hand, if you want to upload your customized sticker to your server you need to go to the server settings of the server and select the Stickers tab among all tabs, then click on the “Upload Sticker” button to upload your sticker. When uploading your sticker, you have to give a name to your sticker and just click on the upload button to upload it to the server. To use the uploaded sticker, you can go through the sticker’s icon present next to the chat box and select your sticker from it.
Share your thoughts in the comments
Please Login to comment...