What is a View Engine ?
Last Updated :
19 Apr, 2024
A view engine is a software component that allows the rendering of dynamic content onto a web page. It acts as a bridge between the server side and the client side. When the user accesses any webpage then the server responds to them with dynamic pages which is possible only because of the view engine. In this article, we will be covering full details about the view engine and how it works.
Prerequisites
Why it is used?
- View engines are used in web development to generate dynamic HTML content.
- When a server receives a request, it uses the view engine to fill in these placeholders with actual data.
- View engines make it easier to manage and update web pages, especially when dealing with dynamic content.
Features
- Dynamic Content Rendering: The view engine enables the server-side rendering of dynamic pages.
- Template Reusability: It also supports template reusability, allowing you to reuse the components on multiple pages across your application
- Data Injection: View engines provide mechanisms for injecting data into templates. This enables you to pass dynamic data from your server-side code to your client-side views, making it easy to display dynamic content.
- Conditional Rendering: Most view engine also provide this feature where you can only render your dynamic pages when certain conditions are met, allowing you to efficiently use your server.
Steps to create app having EJS as a view engine
Step 1: Install Dependencies
First of all make sure node.js is installed on your system. Then, open your terminal and run the following command to install the necessary dependencies:
npm install express ejs
Json file structure:
{
  "name": "add_css_to_ejs",
  "version": "1.0.0",
  "description": "",
  "main": "index.js",
  "scripts": {
    "test": "echo \"Error: no test specified\" && exit 1"
  },
  "author": "\"GFG\"",
  "license": "ISC",
  "dependencies": {
    "ejs": "^3.1.9",
    "express": "^4.19.2"
  }
}
Step 2: Create the app
Then, create file name app.js where you will write your server code.
// app.js

const express = require('express');
const app = express();
Step 3: Set EJS as a view engine
Set EJS as the View Engine. In Express, you can set the default view engine by using the app.set() method. We’ll set EJS as our view engine.
// Set EJS as the view engine
app.set('view engine', 'ejs');
Step 4: Define routes
Next step is to define a route that renders a dynamic HTML page using an EJS template.
// Define a route to render dynamic content
app.get('/', (req, res) => {
    // Sample data
    const user = { name: 'John', age: 30 };

    // Render the 'index.ejs' template and pass data to it
    res.render('index', { user });
});
Step 5: Create a Template File (index.ejs)
<!-- index.ejs -->

<!DOCTYPE html>
<html lang="en">
<head>
    <meta charset="UTF-8">
    <meta name="viewport" content="width=device-width, initial-scale=1.0">
    <title>EJS Example</title>
</head>
<body>
    <h1>Welcome <%= user.name %>!</h1>
    <p>You are <%= user.age %> years old.</p>
</body>
</html>
Step 6: Start the server
These code will help you to start the server at 3000 port locally in your system.
// Start the server
const PORT = process.env.PORT || 3000;
app.listen(PORT, () => {
    console.log(`Server is running on port ${PORT}`);
});
Step 7: Run the Application
You can do it by executing `node app.js` in your terminal. it will allow you to access that HTML file that you have created above on your local server.
node app.js
Step 8: Watch the app running
Now, open your web browser and navigate to http://localhost:3000.
Project structure:

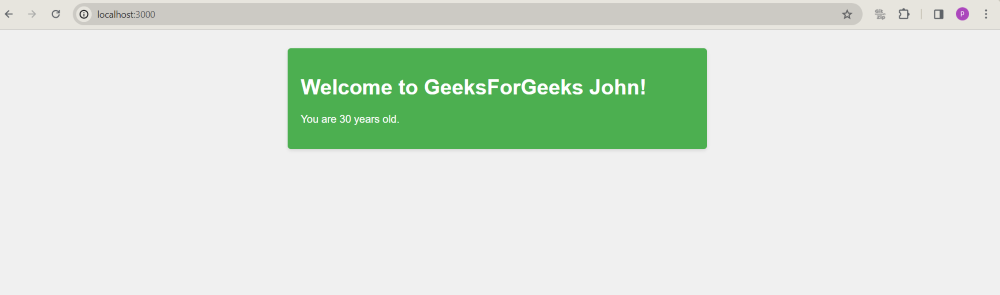
Example: This example shows the use of EJS view engine.
HTML
<!-- index.ejs -->

<!DOCTYPE html>
<html lang="en">
<head>
    <meta charset="UTF-8">
    <meta name="viewport"
          content="width=device-width, initial-scale=1.0">
    <title>GeeksForGeeks EJS Example</title>
    <style>
        body {
            font-family: Arial, sans-serif;
            background-color: #f0f0f0;
            padding: 20px;
        }
        .container {
            max-width: 600px;
            margin: 0 auto;
            background-color: #4caf50; /* Green background color */
            padding: 20px;
            border-radius: 5px;
            box-shadow: 0 2px 5px rgba(0, 0, 0, 0.1);
        }
        h1, p {
            color: #fff; /* White text color */
        }
    </style>
</head>
<body>
    <div class="container">
        <h1>Welcome to GeeksForGeeks <%= user.name %>!</h1>
        <p>You are <%= user.age %> years old.</p>
    </div>
</body>
</html>
// app.js

// Import required modules
const express = require('express');
const app = express();

// Set EJS as the view engine
app.set('view engine', 'ejs');

// Define a route to render dynamic content
app.get('/', (req, res) => {
    // Sample data
    const user = { name: 'John', age: 30 };

    // Render the 'index.ejs' template
    // and pass data to it
    res.render('index', { user });
});

// Start the server
const PORT = process.env.PORT || 3000;
app.listen(PORT, () => {
    console.log(`Server is running on port ${PORT}`);
});
Output:
Share your thoughts in the comments
Please Login to comment...