How to create Lists in Pug View Engine ?
Last Updated :
05 Mar, 2024
Pug is a template engine for NodeJS and browsers to render dynamic reusable content. At compile time, the template engine compiles our Pug template code to HTML. Pug has many powerful features like conditions, loops, includes, and mixins using which we can render HTML code based on user input or reference data.
Pug also supports JavaScript natively, hence using JavaScript expressions, we can format HTML code. This approach allows us to reuse static web pages which have dynamic data. Angular brackets are not used while specifying the tags.
Lists in Pug:
A list is a record of short pieces of related information used to display the data or any information on web pages in the ordered or unordered form. In ordered form, list elements are represented using some order; in unordered form, they are represented using a disk, square, or circle. While using the nested list in Pug, we need to consider the indentation to properly display list items.
Syntax for unordered list:
ul
    li  element
    li element
Syntax for an ordered list:
ol
li element
li element
Syntax for the description list:
dl
   dt  Title of description
      dd   Description about the Title.
Approach to Create Pug Lists:
- Setting Up ExpressJS: The code initializes an Express.js server.
- Setting View Engine: It sets Pug as the view engine for rendering templates.
- Routing: There’s a single route defined for the root URL (
/). When a user accesses this URL, it renders the list Pug template.
- Pug Template: The Pug template defines the structure and styling of the HTML page. It consists of ordered and unordered lists with different list item styles (disc, circle, square) and types (numeric, alphabetical, roman numerals).
- Styling: The styling is done using CSS embedded within the Pug template (
style.). It sets styles for the body, headings, containers, and list items.
Steps to Create Pug List Applicaiton:
Step 1: Create a NodeJS Application using the following command:
npm init -y
Step 2: Install required dependencies using the following command:
npm i pug express
Step 3: Create a views folder that contains the list.pug file.
Folder Structure:
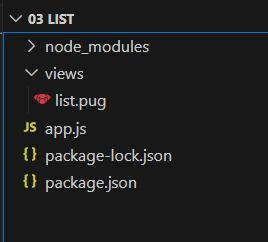
Project structure
The updated dependencies in package.json file will look like:
"dependencies": {
    "express": "^4.18.2",
    "pug": "^3.0.2"
}
Example: Below is an example of Pug list.
HTML
doctype html
html
head
title GeeksforGeeks Pug
style.
body {
text-align: center;
}
h1 {
color: green;
}
.container {
margin :2rem;
padding :1rem;
display: flex;
justify-content: space-between;
background-color: #44ff88;
text-align: center;
border-radius: 10%;
}
.ordered-list,
.unordered-list {
flex: 1;
}
ol, ul {
display: flex;
flex-direction: column;
align-items: center;
justify-content: center;
}
li.disc {
color: rgb(235, 152, 52);
list-style-type: disc;
}
li.circle {
color: rgb(69, 39, 145);
list-style-type: circle;
}
li.square {
color: #befall;
list-style-type: square;
}
body
h1 Welcome to GeeksforGeeks
div.container
div.ordered-list
h4 Ordered List in Pug
ol(type='1')
li HTML : 5
li Javascript
ol(type='A')
li HTML : 5
li Javascript
ol(type='a')
li HTML : 5
li Javascript
ol(type='I')
li HTML : 5
li Javascript
ol(type='i')
li HTML : 5
li Javascript
div.unordered-list
h4 Unordered List in Pug
ul
li(class="disc") HTML : 5
li(class="disc") Javascript
ul
li(class="circle") HTML : 5
li(class="circle") Javascript
ul
li(class="square") HTML : 5
li(class="square") Javascript
|
Javascript
const express=require('express');
const app=express();
const port=3000;
app.set('view engine','pug');
app.get('/',(req,res)=>{
res.render('list');
});
app.listen(port,()=>{
console.log(`server is running at http:
});
|
Output:
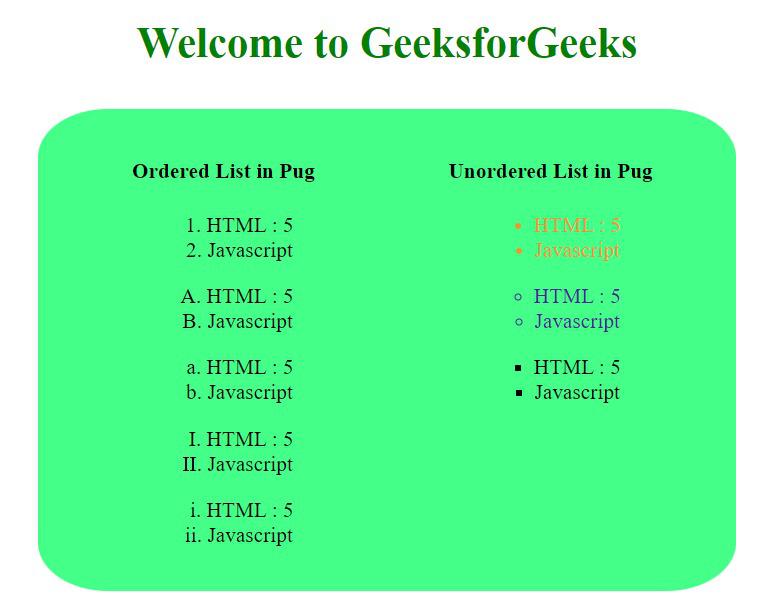
Example 2: Illustration of the Lists in PugJS.
HTML
doctype html
html
head
title GeeksforGeeks Pug
style.
body {
text-align: center;
}
h1 {
color: green;
}
.container {
margin :2rem;
padding :1rem;
display: flex;
justify-content: space-between;
background-color: #44ff88;
text-align: center;
border-radius: 10%;
}
.ordered-list,
.unordered-list {
flex: 1;
}
ol, ul {
display: flex;
flex-direction: column;
align-items: center;
justify-content: center;
}
li.disc {
color: rgb(235, 152, 52);
list-style-type: disc;
}
li.circle {
color: rgb(69, 39, 145);
list-style-type: circle;
}
li.square {
color: #befall;
list-style-type: square;
}
body
h1 Welcome to GeeksforGeeks
div.container
div.ordered-list
h4 Ordered List in Pug
ol(type='1')
li HTML : 5
li Javascript
ol(type='A')
li HTML : 5
li Javascript
ol(type='a')
li HTML : 5
li Javascript
ol(type='I')
li HTML : 5
li Javascript
ol(type='i')
li HTML : 5
li Javascript
div.unordered-list
h4 Unordered List in Pug
ul
li(class="disc") HTML : 5
li(class="disc") Javascript
ul
li(class="circle") HTML : 5
li(class="circle") Javascript
ul
li(class="square") HTML : 5
li(class="square") Javascript
|
Javascript
const express=require('express');
const app=express();
const port=3000;
app.set('view engine','pug');
app.get('/',(req,res)=>{
res.render('list');
});
app.listen(port,()=>{
console.log(`server is running at http:
});
|
Output:
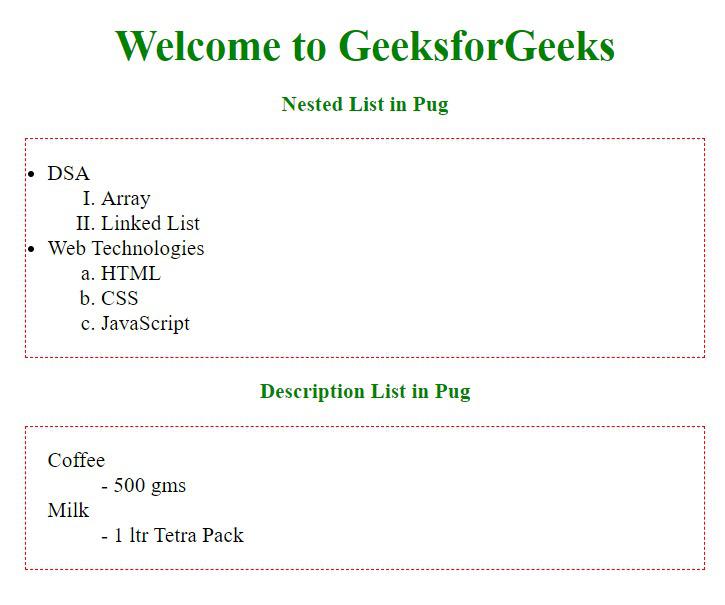
Nested List in Pug
Share your thoughts in the comments
Please Login to comment...