How to Turn Windows Defender On or Off?
Last Updated :
24 Nov, 2023
In 2019, Microsoft Inc. declared the Windows Defender Antivirus, or Windows Defender application will be now prominently available on Windows 10 and later versions. Earlier, the Windows Defender Antivirus was present as a free application that can be installed on any Windows OS for security purposes. But later, it expands more to provide security to other OS like Mac.

Windows Defender works on the system where it continuously searches for malware and if there is anything, it will be directly isolated and then removed. So, if any users want to install any third-party application that is targeted by the Windows Defender, they need to Off Windows Defender while using the application. After using that application, Enabling Windows Defender should be done by the users.
In this article, we will discuss the methods required for the On or Off process of Windows Defender Antivirus Software.
Why Should You Disable Windows Defender Antivirus on Windows 10?
Windows Defender Antivirus is installed on Windows devices for the safety and security of various malware that can affect the performance and privacy of the device. That is the reason, many users never want to disable the service. But, there might be some scenarios where disabling Windows Defender Antivirus becomes a necessity.
- Installation of Another Antivirus: When a user wants to install another antivirus on the device, the Windows Defender needs to be disabled permanently. Otherwise, it will mark another antivirus as a threat & stop its execution.
- Successful Windows Update: Sometimes, you will find the Windows Update is unsuccessful. This is because there might be some elements that are marked as threats by the Windows Defender. Disabling the best option to successfully update.
- Application Interference: In most cases, the Windows Defender marks some applications especially some Games as malware to the device. And it restricts those applications to open the device. Turn off the Windows Defender to execute the app.
Different Methods Make Windows Defender On or Off?
For turning On or Off Windows Defender Antivirus, there are mainly three methods present. We will discuss each methods one by one. Let’s start with the simple method which uses the Settings of the Device.
Method 1: Turn Windows Defender On or Off using Settings
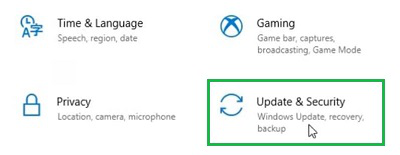
Step 1: Open Settings & go to the Update & Security.
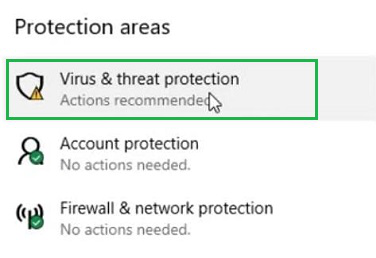
Step 2: On the left-hand side, find out the Virus & Threat Protection. Click on that.
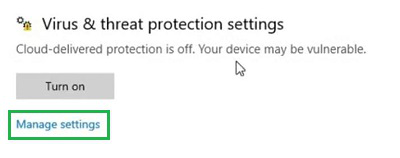
Step 3: Scroll down a bit to find Virus & Threat Protection Settings. Click on the Manage Settings option.
Step 4: Under the Real-Time protection, button will be present. If the button is Enabled, then the Windows Defender is On. Disabling the button will Off the Windows Defender Antivirus.
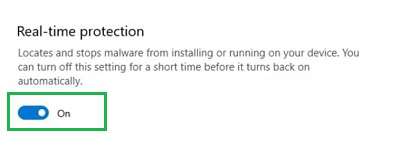
Hence, we have successfully turned Windows Defender On and Off using the Settings of the Device.
Method 2: Turn Windows Defender On or Off using Registry Editor
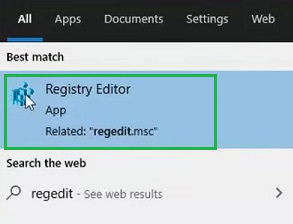
Step 1: In the Search Bar, Search for the “regedit”. And go with the best available option to open the Registry Editor.
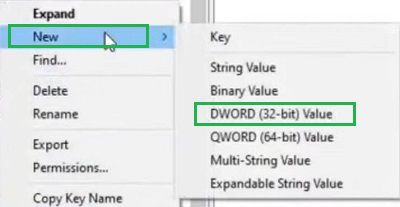
Step 2: Follow the path HKEY_LOCAL_MACHINE > SOFTWARE > Policies > Microsoft > Windows Defender. Right-click on the option. Click the Next option, and later go for the DWORD (32-bit) Value.
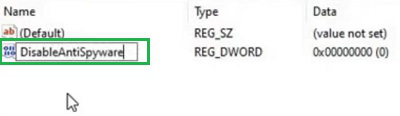
Step 3: Provide the name DisableAntiSpyware for to turn off the Windows Defender. And to turn on the Windows Defender again, the name will be changed to EnableAntiSpyware.
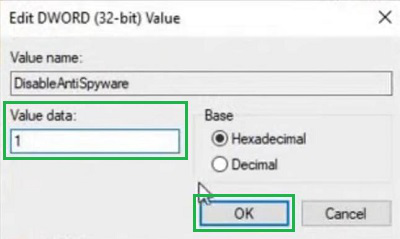
Step 4: Double-click over it to open a new small window. Provide the Value Data as 1 to make the key functional.
Hence, we have successfully turned Windows Defender On and Off using the Registry Editor.
Method 3: Turn Windows Defender On or Off using Group Policy
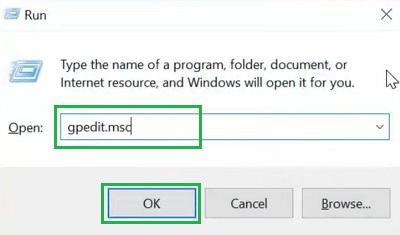
Step 1: Open the Run Window by pressing the Windows + R keys. Now, write the command ‘gpedit.msc’ there and click OK.
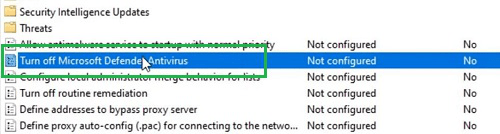
Step 2: Follow the path Computer Configuration > Administrative Templates > Windows Components > Microsoft Defender Antivirus. On the right-hand side, click on the Turn Off Microsoft Defender Antivirus option.
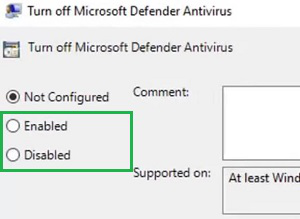
Step 3: Now, you will get two options, Enabled or Disabled. Choose what you want. If you choose Enable, the Windows Defender Application will be On. if you choose Disable, it will be Off.
Hence, we have successfully turned Windows Defender On and Off using the Group Policy.
So, these are the two simple methods present to turn Windows Defender On or Off on your device. Most users prefer the Settings method to turn off the Windows Defender. However, you have to turn it on after your job is done. Otherwise, your device will be vulnerable to malware.
Also Read
FAQs to Turn Windows Defender On or Off
1. How to turn off Windows Defender on my Windows 10 laptop?
To turn off the Windows Defender on your Windows 10 laptop, the following steps can be executed.
- Open the Settings and go to Update & Security.
- Click on Virus & Threat Protection.
- Select Manage Settings.
- Disable the button under the Real-Time Protection
2. What are the steps to make Windows Defender On using the Registry Settings?
The steps involved to make Windows Defender On using the Registry Settings are the following:
- Search for Registry Settings & open it.
- Follow the path Computer Configuration > Administrative Templates > Windows Components > Microsoft Defender Antivirus.
- Click on Turn Off Windows Defender Antivirus on the right-hand side.
- Select the Enable button & click OK.
3. How to turn on Windows Defender using the Group Policy?
To Turn Off the Windows Defender on the Registry Settings, the below-mentioned steps can be utilized.
- Open the Registry Editor using the term ‘gpedit.msc’.
- Expand the Computer Configuration, later Administrative Templates.
- Under the Administrative Template, expand Windows Components and click on Microsoft Defender Antivirus.
- Select the Disable option and click OK.
Share your thoughts in the comments
Please Login to comment...