How to create module with Routing in Angular 9 ?
Last Updated :
06 Aug, 2021
Angular applications are modular, and NgModules is Angular’s own modular architecture. NgModules are containers for closely integrated application domains, workflows, or feature sets that comprise cohesive code blocks. Their scope is governed by the NgModule they include, and they can contain components, service providers, and other code files. You can import functions from other NgModules or export a subset of them for use by other NgModules.
Routing in Angular allows the users to create a single-page application with multiple views and allows navigation between them. Users can switch between these views without losing the application state and properties. In this article, we will discuss how to create a module with routing in Angular 9. We will discuss with step-by-step instructions how to create a routing module in an Angular 9 application with a very simple example so that you can easily understand how it works.
We will apply the above approach to build the routing module in a stepwise manner.
-
Create a new Angular Application: Using the following command, we can quickly create an angular app:
ng new geeksforgeeks-solution
-
Create the main module: Go inside our project folder. We want to use the Angular CLI command to create a module after we’ve correctly created the app. In an angular application, angular gives a command to construct a module with routing. So, to create the main module, run the command below:
ng g module main --routing
After running the successful above command, it will create two files in the new folder name as main inside the app folder.

-
Import-module to module.ts file: We simply import our module into the app.module.ts file, so update this file as shown below:
Approach:
- Create an Angular app that to be used.
- Create the navigation links inside the app component and then provide the “routerLink” directive to each route and pass the route value to the “routerLink” directive.
- Then add the routes to the routing.module.ts file and then import the routing.module.ts into the app.module.ts file.
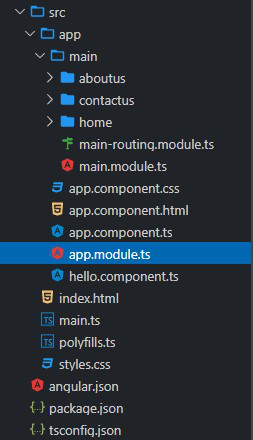
Project Structure: It will look like the following image:
Example:
app.module.ts
import { NgModule } from "@angular/core";
import { BrowserModule } from "@angular/platform-browser";
import { AppRoutingModule } from "./app-routing.module";
import { AppComponent } from "./app.component";
import { MainModule } from "./main/main.module";
@NgModule({
declarations: [AppComponent],
imports: [BrowserModule, AppRoutingModule, MainModule],
providers: [],
bootstrap: [AppComponent],
})
export class AppModule {}
|
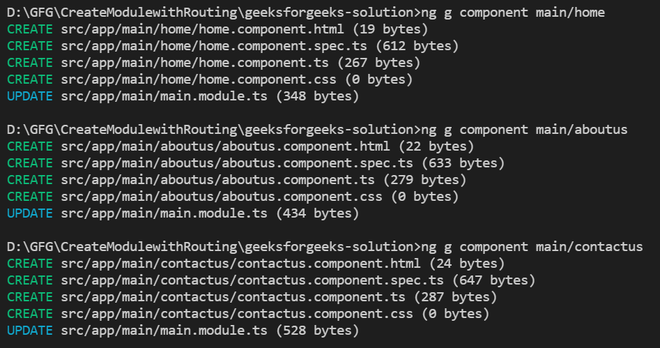
Create components for the main module: We now use the following command to add a new component to our main module, so let’s create the home, about us, and contact us components for the main module:
ng g component main/home
ng g component main/aboutus
ng g component main/contactus
After running the above command successfully:
Add routing for components: In this step we are simply adding the route with the component we created so we need to update our main module routing module file as shown below:
main-routing.module.ts
import { NgModule } from "@angular/core";
import { RouterModule, Routes } from "@angular/router";
import { AboutUsComponent } from "./about-us/about-us.component";
import { ContactUsComponent } from "./contact-us/contact-us.component";
import { HomeComponent } from "./home/home.component";
const routes: Routes = [
{ path: "", component: HomeComponent },
{ path: "aboutus", component: AboutUsComponent },
{ path: "contactus", component: ContactUsComponent },
];
@NgModule({
imports: [RouterModule.forChild(routes)],
exports: [RouterModule],
})
export class MainRoutingModule {}
|
Update component HTML file: Finally, we need to update the HTML file of our application component, we need to add bindings of all routes with router outlet, so we update them as shown below:
app.component.html
<!DOCTYPE html>
<html>
<head>
<style>
ul {
list-style-type: none;
margin: 0;
padding: 0;
overflow: hidden;
background-color: #333;
}
li {
float: left;
}
li a {
display: block;
color: white;
text-align: center;
padding: 14px 16px;
text-decoration: none;
}
li a:hover {
background-color: #04aa6d;
}
.active {
background-color: #333;
}
</style>
</head>
<body>
<ul>
<li><a class="active" href="#home" routerLink="/">Home</a></li>
<li><a href="#contact" routerLink="/contactus">Contact</a></li>
<li><a href="#about" routerLink="/aboutus">About</a></li>
</ul>
<div style="text-align: center; font-weight: bolder; font-size: 50px">
<router-outlet></router-outlet>
</div>
</body>
</html>
|
Now, we can run our example application using the below command:
ng serve
Output:
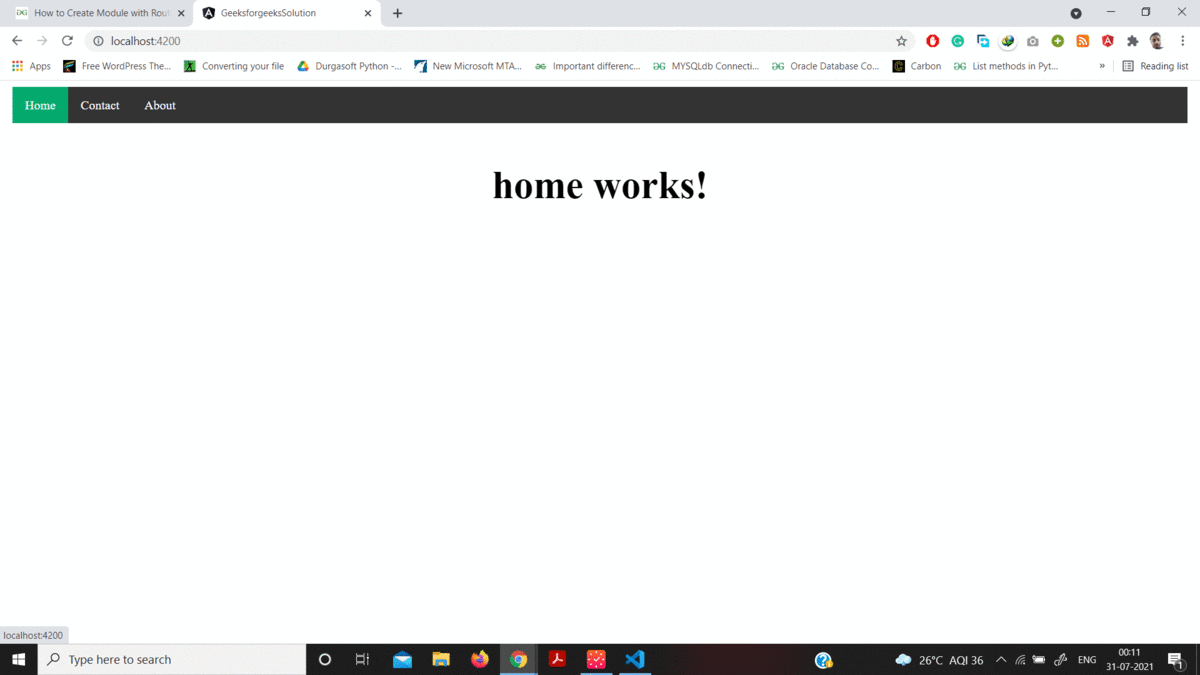
Final Application output
Share your thoughts in the comments
Please Login to comment...