How to Create an Angular Project from Scratch ?
Last Updated :
28 Mar, 2024
To create an Angular project from scratch, we’ll need Node.js and npm installed on our computer. Once installed, we can use Angular CLI, a command-line tool, to quickly set up a new Angular project with a basic structure. After creating the project, we can start coding our application using TypeScript, HTML, and CSS files located in the project directory. Angular CLI simplifies tasks like serving the application locally for development, generating components, and managing dependencies, making it easy to get started with Angular development even for beginners.
Steps to create Angular Project from Scratch:
Step 1: Install Angular CLI:
Angular CLI (Command Line Interface) is a powerful tool for creating and managing Angular projects. You can install it globally using npm by running the following command in your terminal or command prompt:
npm install -g @angular/cli
Step 2: Create a New Angular Project:
Once Angular CLI is installed, you can use it to create a new Angular project. Navigate to the directory where you want to create your project and run the following command:
ng new my-angular-app
Step 3: Serve Your Angular Application:
After the project is created, navigate into the project directory then use an Angular CLI to serve your application locally by running:
ng serve
Step 4: Create a Component:
Use Angular CLI to generate a new component. Open your terminal or command prompt, navigate to your project directory, and run the following command:
ng generate component my-component
Step 5: Configure Routes:
Define the routes for your application in the app-routing.module.ts file. You can use Angular’s RouterModule to configure routes and associate components with specific URLs.
import { NgModule } from '@angular/core';
import { Routes, RouterModule } from '@angular/router';
import { HomeComponent } from './home/home.component';
import { AboutComponent } from './about/about.component';

const routes: Routes = [
    { path: '', component: HomeComponent },
    { path: 'about', component: AboutComponent },
];

@NgModule({
    imports: [RouterModule.forRoot(routes)],
    exports: [RouterModule]
})
export class AppRoutingModule { }
Step 6: Add Content to Components:
Open the HTML file of your component (component-name.component.ts, component-name.component.html, and component-name.component.css) and add the desired content.
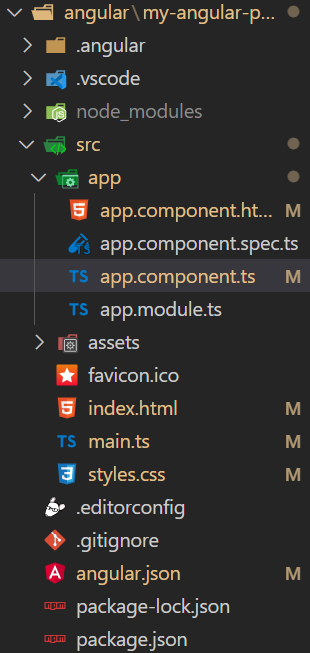
Folder Structure:
The updated dependencies in package.json file will look like:
"dependencies": {
    "@angular/animations": "^16.0.0",
    "@angular/common": "^16.0.0",
    "@angular/compiler": "^16.0.0",
    "@angular/core": "^16.0.0",
    "@angular/forms": "^16.0.0",
    "@angular/platform-browser": "^16.0.0",
    "@angular/platform-browser-dynamic": "^16.0.0",
    "@angular/router": "^16.0.0",
    "rxjs": "~7.8.0",
    "tslib": "^2.3.0",
    "zone.js": "~0.13.0"
}
Example: In this example we’ll create a simple GFG AboutUs page using Angular
HTML
<!-- app.component.html -->

<div>
    <h1 style="text-align: center; color: green">GeeksforGeeks</h1>
    <div style="margin-left: 20px">
        <h2>About Us</h2>
        <p>
            <strong>1. Company Profile and Brand:</strong><br />
            GeeksforGeeks is a leading platform that provides
            computer science resources and coding challenges for
            programmers and technology enthusiasts, along with
            interview and exam preparations for upcoming aspirants.
            With a strong emphasis on enhancing coding skills and
            knowledge, it has become a trusted destination for over
            12 million plus registered users worldwide. The platform
            offers a vast collection of tutorials, practice problems,
            interview tutorials, articles, and courses,
            covering various domains of computer science.
            <br /><br />
            Our exceptional mentors hailing from top colleges &
            organizations have the ability to guide you on a
            journey from the humble beginnings of coding to
               the pinnacle of expertise. Under their guidance watch
            your skills flourish as we lay the foundation and
            help you conquer the world of coding.
        </p>
        <p>
            <strong>2. Company Founders/Directors:</strong><br />
            Our founder Sandeep Jain is a visionary entrepreneur
            and esteemed computer science expert. Fueled by his
            unwavering passion for coding and education, laid the
            very bedrock upon which GeeksforGeeks stands today, and his
            indomitable spirit has been instrumental in its remarkable
            growth and resounding success. As the steadfast driving
            force behind the company, Sandeep remains a beacon of
            guidance and inspiration, propelling the team
            to constantly challenging limits and craft transformative
            learning experiences.
        </p>
    </div>
</div>
//app.component.ts

import { Component } from '@angular/core';

@Component({
    selector: 'app-root',
    templateUrl: './app.component.html',
    styleUrls: ['./app.component.css']
})
export class AppComponent {
}
//app.module.ts

import { NgModule } from '@angular/core';
import { BrowserModule } from '@angular/platform-browser';

import { AppComponent } from './app.component';

@NgModule({
    declarations: [
        AppComponent
    ],
    imports: [
        BrowserModule
    ],
    providers: [],
    bootstrap: [AppComponent]
})
export class AppModule { }
To start the application run the following command.
ng serve
Output:

Share your thoughts in the comments
Please Login to comment...