Django CRUD (Create, Retrieve, Update, Delete) Function Based Views
Last Updated :
27 Aug, 2021
Django is a Python-based web framework which allows you to quickly create web application without all of the installation or dependency problems that you normally will find with other frameworks. Django is based on MVT (Model View Template) architecture and revolves around CRUD (Create, Retrieve, Update, Delete) operations. CRUD can be best explained as an approach to building a Django web application. In general CRUD means performing Create, Retrieve, Update and Delete operations on a table in a database. Let’s discuss what actually CRUD means,
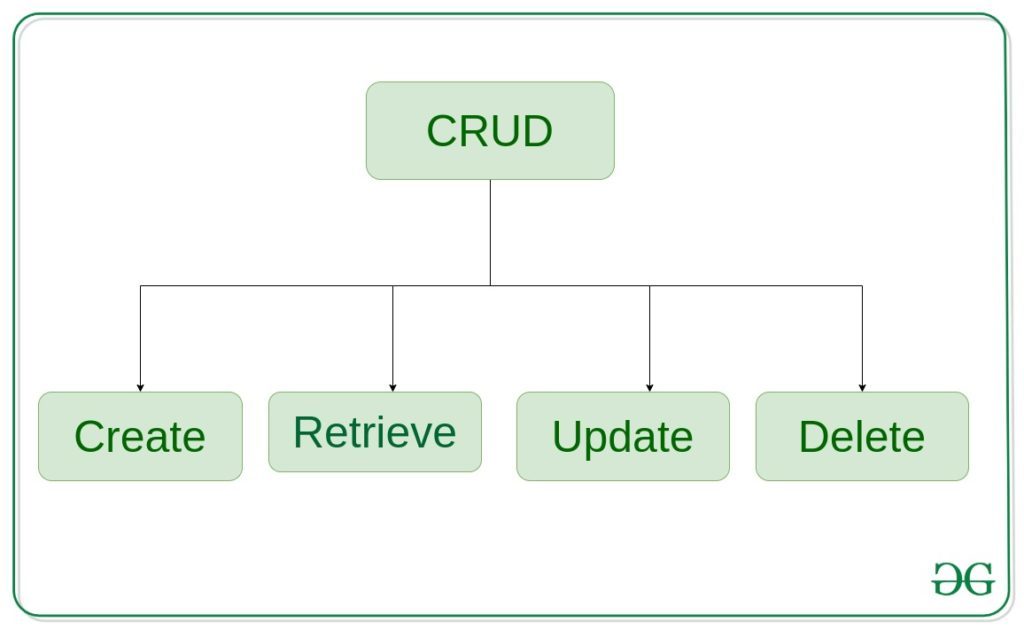
Create – create or add new entries in a table in the database.
Retrieve – read, retrieve, search, or view existing entries as a list(List View) or retrieve a particular entry in detail (Detail View)
Update – update or edit existing entries in a table in the database
Delete – delete, deactivate, or remove existing entries in a table in the database
Django CRUD (Create, Retrieve, Update, Delete) Function Based Views
Illustration of How to create and use CRUD view using an Example. Consider a project named geeksforgeeks having an app named geeks.
Refer to the following articles to check how to create a project and an app in Django.
After you have a project and an app, let’s create a model of which we will be creating instances through our view. In geeks/models.py,
Python3
from django.db import models
class GeeksModel(models.Model):
title = models.CharField(max_length = 200)
description = models.TextField()
def __str__(self):
return self.title
|
After creating this model, we need to run two commands in order to create Database for the same.
Python manage.py makemigrations
Python manage.py migrate
Now we will create a Django ModelForm for this model. Refer this article for more on modelform – Django ModelForm – Create form from Models. create a file forms.py in geeks folder,
Python3
from django import forms
from .models import GeeksModel
class GeeksForm(forms.ModelForm):
class Meta:
model = GeeksModel
fields = [
"title",
"description",
]
|
Create View
Create View refers to a view (logic) to create an instance of a table in the database. It is just like taking an input from a user and storing it in a specified table.
In geeks/views.py,
Python3
from django.shortcuts import render
from .models import GeeksModel
from .forms import GeeksForm
def create_view(request):
context ={}
form = GeeksForm(request.POST or None)
if form.is_valid():
form.save()
context['form']= form
return render(request, "create_view.html", context)
|
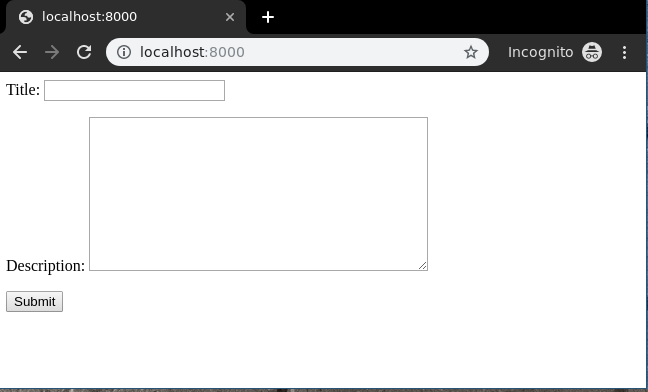
Create a template in templates/create_view.html,
html
<form method="POST" enctype="multipart/form-data">
{% csrf_token %}
{{ form.as_p }}
<input type="submit" value="Submit">
</form>
|
Now visit http://localhost:8000/
To check complete implementation of Function based Create View, visit Create View – Function based Views Django.
Retrieve View
Retrieve view is basically divided into two types of views Detail View and List View.
List View
List View refers to a view (logic) to list all or particular instances of a table from the database in a particular order. It is used to display multiple types of data on a single page or view, for example, products on an eCommerce page.
In geeks/views.py,
Python3
from django.shortcuts import render
from .models import GeeksModel
def list_view(request):
context ={}
context["dataset"] = GeeksModel.objects.all()
return render(request, "list_view.html", context)
|
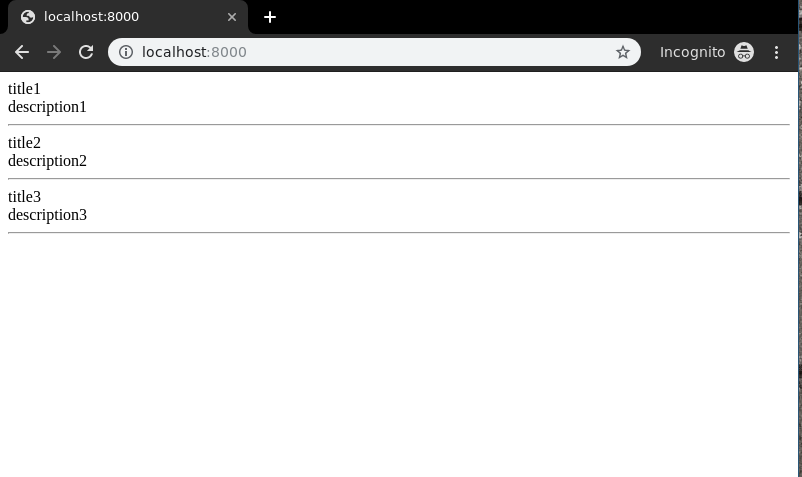
Create a template in templates/list_view.html,
html
<div class="main">
{% for data in dataset %}.
{{ data.title }}<br/>
{{ data.description }}<br/>
<hr/>
{% endfor %}
</div>
|
Now visit http://localhost:8000/
To check complete implementation of Function based List View, visit List View – Function based Views Django
Detail View
Detail View refers to a view (logic) to display a particular instance of a table from the database with all the necessary details. It is used to display multiple types of data on a single page or view, for example, profile of a user.
In geeks/views.py,
Python3
from django.urls import path
from .views import detail_view
urlpatterns = [
path('<id>', detail_view ),
]
|
Let’s create a view and template for the same. In geeks/views.py,
Python3
from django.shortcuts import render
from .models import GeeksModel
def detail_view(request, id):
context ={}
context["data"] = GeeksModel.objects.get(id = id)
return render(request, "detail_view.html", context)
|
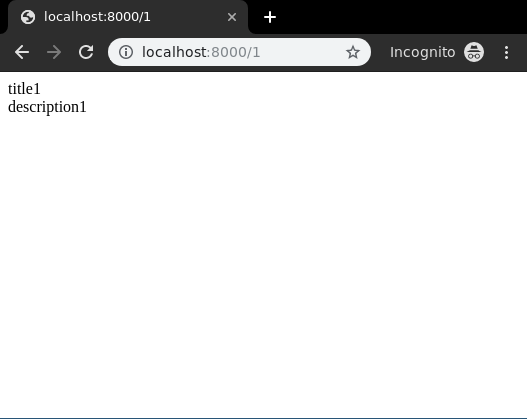
Create a template in templates/Detail_view.html,
html
<div class="main">
{{ data.title }}<br/>
{{ data.description }}<br/>
</div>
|
Let’s check what is there on http://localhost:8000/1
To check complete implementation of Function based Detail View, visit Detail View – Function based Views Django
Update View
Update View refers to a view (logic) to update a particular instance of a table from the database with some extra details. It is used to update entries in the database for example, updating an article at geeksforgeeks.
In geeks/views.py,
Python3
from django.shortcuts import (get_object_or_404,
render,
HttpResponseRedirect)
from .models import GeeksModel
from .forms import GeeksForm
def detail_view(request, id):
context ={}
context["data"] = GeeksModel.objects.get(id = id)
return render(request, "detail_view.html", context)
def update_view(request, id):
context ={}
obj = get_object_or_404(GeeksModel, id = id)
form = GeeksForm(request.POST or None, instance = obj)
if form.is_valid():
form.save()
return HttpResponseRedirect("/"+id)
context["form"] = form
return render(request, "update_view.html", context)
|
Now create following templates in templates folder,
In geeks/templates/update_view.html,
html
<div class="main">
<form method="POST">
{% csrf_token %}
{{ form.as_p }}
<input type="submit" value="Update">
</form>
</div>
|
In geeks/templates/detail_view.html,
html
<div class="main">
{{ data.title }} <br/>
{{ data.description }}
</div>
|
Let’s check if everything is working, visithttp://localhost:8000/1/update.
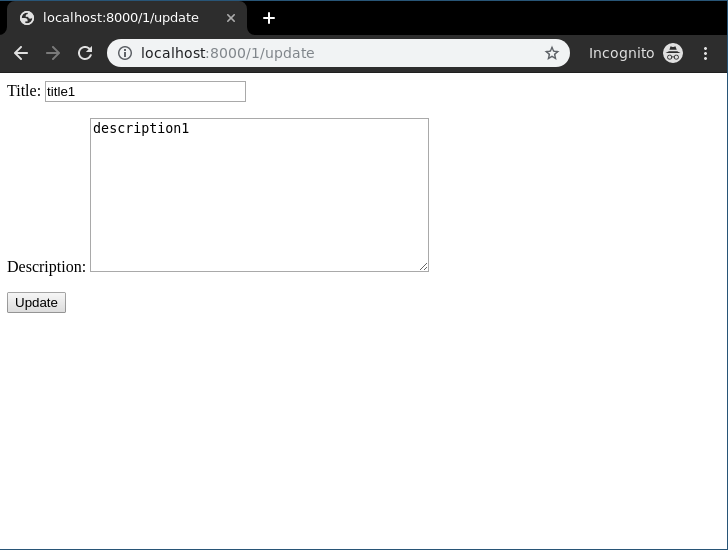
To check complete implementation of Function based update View, visit Update View – Function based Views Django
Delete View
Delete View refers to a view (logic) to delete a particular instance of a table from the database. It is used to delete entries in the database for example, deleting an article at geeksforgeeks.
In geeks/views.py
Python3
from django.shortcuts import (get_object_or_404,
render,
HttpResponseRedirect)
from .models import GeeksModel
def delete_view(request, id):
context ={}
obj = get_object_or_404(GeeksModel, id = id)
if request.method =="POST":
obj.delete()
return HttpResponseRedirect("/")
return render(request, "delete_view.html", context)
|
Now a url mapping to this view with a regular expression of id,
In geeks/urls.py
Python3
from django.urls import path
from .views import delete_view
urlpatterns = [
path('<id>/delete', delete_view ),
]
|
Template for delete view includes a simple form confirming whether user wants to delete the instance or not. In geeks/templates/delete_view.html,
html
<div class="main">
<form method="POST">
{% csrf_token %}
Are you want to delete this item ?
<input type="submit" value="Yes" />
<a href="/">Cancel </a>
</form>
</div>
|
Everything ready, now let’s check if it is working or not, visit http://localhost:8000/2/delete
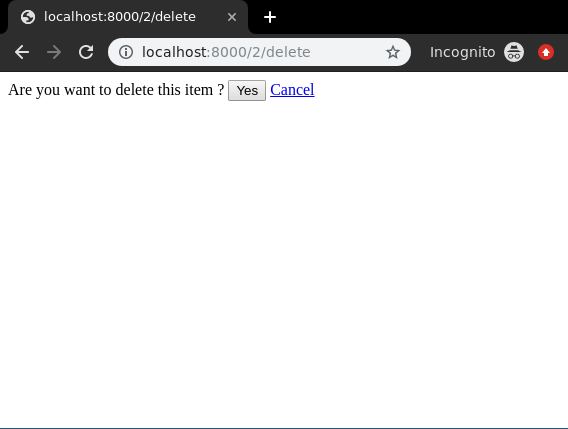
To check complete implementation of Function based Delete View, visit Delete View – Function based Views Django
Like Article
Suggest improvement
Share your thoughts in the comments
Please Login to comment...