Deploy a Node.js Application with Azure
Last Updated :
19 Oct, 2023
Deploying a Node.js application on Azure, a prominent cloud computing platform, has become a seamless process, thanks to its user-friendly interface and integration capabilities. This guide aims to walk you through deploying a Node.js application on Azure using the Azure portal. We will cover essential terminologies, provide a step-by-step guide, and incorporate diagrams, screenshots, and examples to ensure a comprehensive understanding.
Key Terminologies
Before we embark on the deployment journey, let’s familiarize ourselves with key terminologies related to Azure and deploying Node.js applications:
- Azure: Microsoft’s cloud computing platform offering various cloud services and solutions.
- Node.js: An open-source, cross-platform JavaScript runtime environment used for server-side programming.
- App Service Plan: The infrastructure hosting applications in Azure, defining computing resources and features available to hosted applications.
- Resource Group: A logical container in Azure holding related resources, such as Azure virtual machines, databases, or web apps.
Step-by-Step Deployment Process
Step 1: Create a Node.js Application
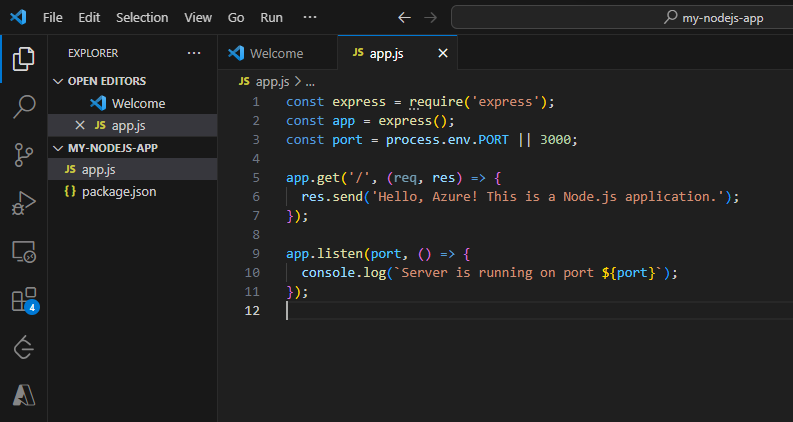
1. Creating app.js
Start by creating a Node.js application. For simplicity, we’ll create a basic app.js file that responds with “Hello, Azure!”.Remember to initialise a new Node.js project using: npm init -y
Javascript
const express = require('express');
const app = express();
const port = process.env.PORT || 3000;
app.get('/', (req, res) => {
res.send('Hello, Azure! This is a Node.js application.');
});
app.listen(port, () => {
console.log(`Server is running on port ${port}`);
});
|
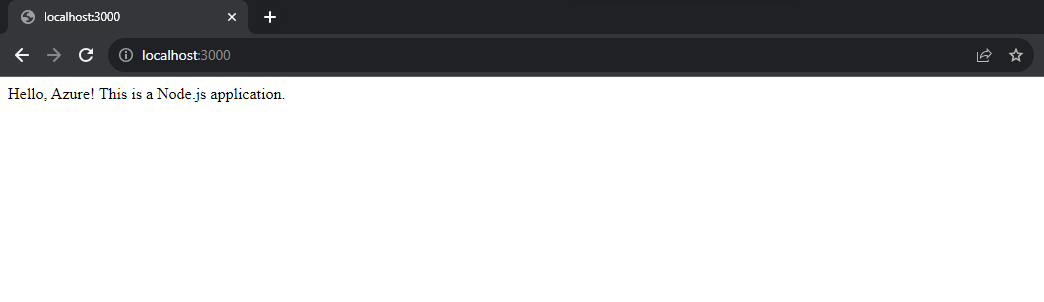
2. Check application locally
Ensure your Node.js application runs correctly on your local machine by testing it locally. Run your application on port 3000 using the command “node app.js”
Open a web browser and go to http://localhost:3000 to see if the application is running.

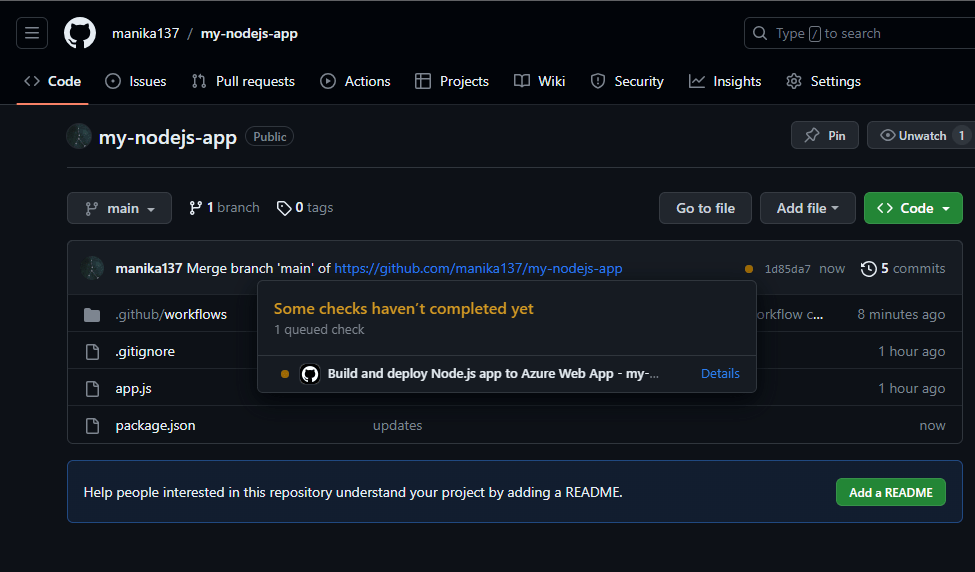
3. Set up a Github repository
Create a GitHub repository (e.g., my-nodejs-app) and push the Node.js application code to the repo.
Step 2: Set Up Azure Resources
1. Sign in to Azure portal
Open your web browser and navigate to the Azure portal. Sign in with your Azure account or create a new account.
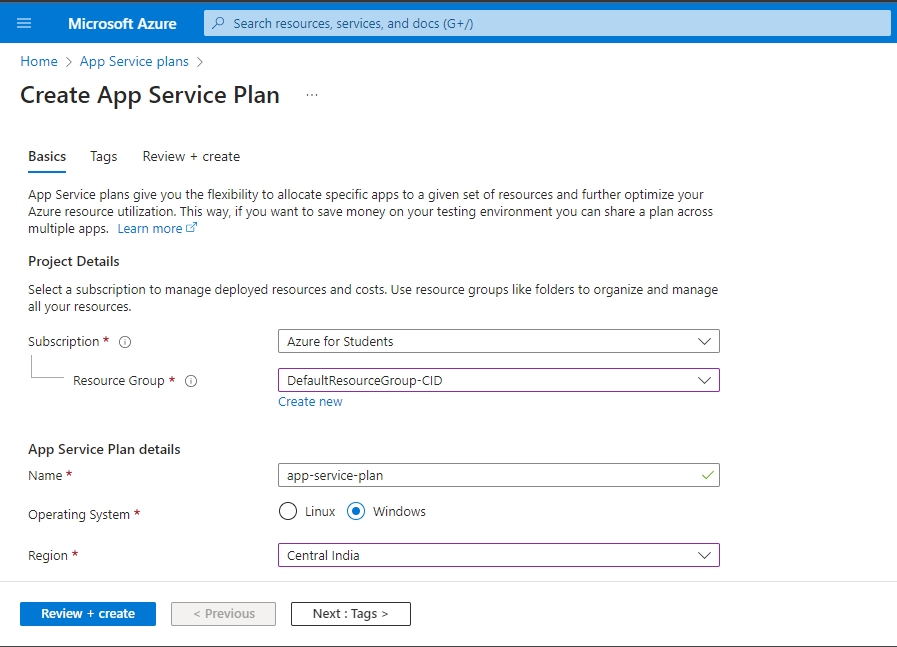
2. Configure app service plan
If you don’t have an active app service plan, go to the App Service plan section from the Azure resources marketplace to generate a new plan. Fill in the following details:
- Subscription: Choose your Azure subscription.
- Resource Group: Create a new or use an existing resource group.
- Name: Enter a unique name for your App Service. (my-nodejs-app-azure name was used here)
- Operating System: Choose your system’s operating system (Linux or Windows)
- Region: Choose the appropriate region
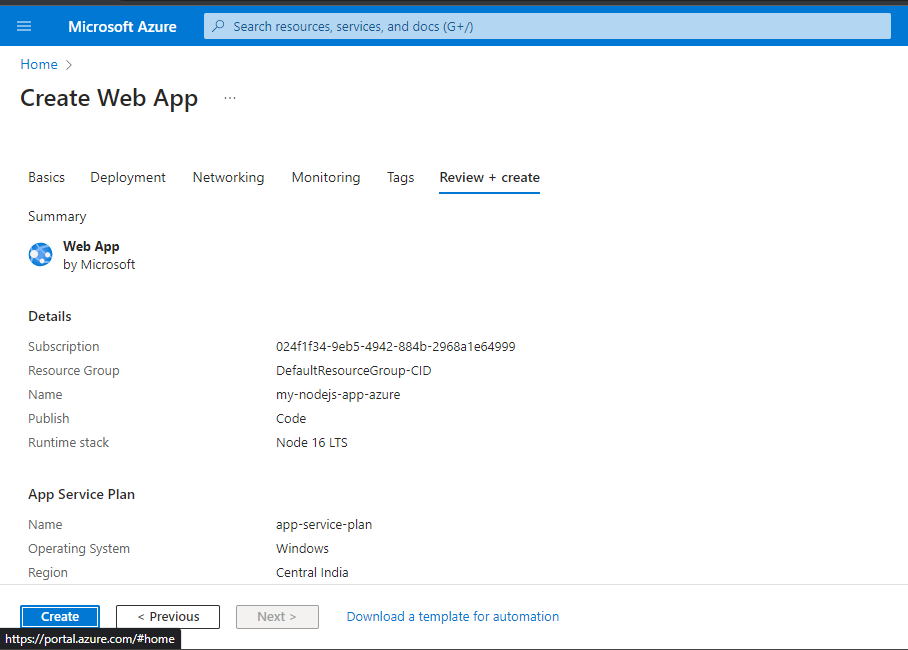
Click on ‘Review+Create’
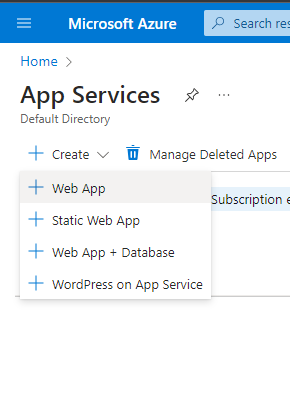
3. Create a web app
Click on the “+ Create” button on the top left from the App Service section you created above and select “Web App”. Fill in the following details:
- Subscription: Choose your Azure subscription.
- Resource Group: Create a new or use an existing resource group.
- Name: Enter a unique name for your App Service. (my-nodejs-app-azure name was used here)
- Publish: Choose “Code”.
- Runtime Stack: Choose “Node.js 16LTS”.
Step 3: Deploy
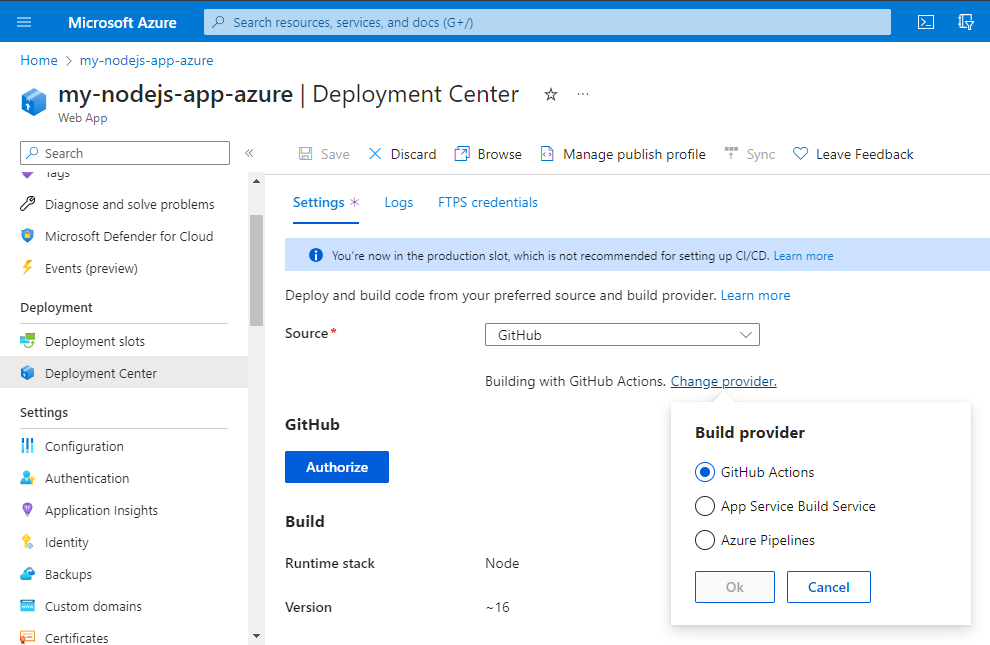
1. Connect Github to Azure
Connect your GitHub repository to your Azure Web App for seamless deployments.In the Azure portal, navigate to your Web App and select “Deployment Center.” Choose GitHub as the source and connect to the GitHub repository (my-nodejs-app). Configure the deployment settings and select the branch to deploy.
2. View deployed website
Check your deployed Node.js application on Azure by browsing the Web App.Navigate to your Web App’s overview section in the Azure portal and click on “Browse” to view your deployed website. This should be same as the site we saw on localhost:3000.
.png)
FAQs On Node.js Application With Azure
1. What Is An App Service Plan in Azure?
An App Service Plan is a set of compute resources configured for a web app to run. It defines the computing resources and capabilities available to the web app.
2. How Does Azure Ensure Application Scalability?
Azure App Service automatically scales based on demand, ensuring that your application can handle increased traffic and load without manual intervention.
3. Can I Deploy Multiple Node.js Applications Within A Single App Service plan?
Yes, you can deploy multiple Node.js applications within a single App Service plan, allowing for cost-effective hosting of multiple applications.
4. How Does Azure Web App Handle Application Updates?
Azure Web App integrates with source control systems like GitHub to enable continuous deployment. Whenever there’s a new commit, Azure Web App automatically updates the application to the latest version.
5. Is It Possible To Set Up Custom Domain Names For Azure Web Apps?
Yes, Azure Web Apps allow you to configure custom domain names to provide a branded and personaliZed experience to your users.
Share your thoughts in the comments
Please Login to comment...