In this tutorial, we’ll deploy the Python (Django) Web app to Azure. Microsoft Azure provides an environment for websites to be deployed, managed, and scaled very easily. We’ll see two options to deploy our Django website – one using Azure CLI and the other using Azure Portal’s Interface. The deployed website will be deployed on Azure subdomain but if you have your own registered domain name then you can also use that. Let’s dive into the tutorial.
What is Azure?
Azure is a cloud computing platform that is provided by Microsoft and is commonly referred to as Microsoft Azure. This platform provides a wide variety of services like storage, Virtual Machines, databases, AI, Machine Learning, Virtual Networks, functions, and the list goes on and on. If you want to learn more about it, Microsoft itself provides its Learning platform, or visit the GFG page to learn more.
What is Django?
Django is a web framework written in Python, which is used to build web applications quickly. It is based on MVC architecture and follows the DRY (Don’t Repeat Yourself) principle. It is famously known for its built-in features for admin interface, database, ORM, forms handling, testing framework, etc. which makes it a popular choice among developers, mostly Python developers to use it for designing Web Applications. You can learn more by visiting the GFG Django tutorial.
Prerequisite:
- A Django project ready for deployment.
- Azure Account.
Implementation:
Deploy using Azure CLI (Best Option) :
Step 1: First download and Install Azure CLI on your local system. Visit here to download Azure CLI according to your OS and present tools.
Step 2: Check your Azure version by typing:
az version

Step 3: Now login to Azure using CLI :
az login
Typing above command will open login page on Browser, then login using your credentials and that will display successful window on Browser:

Successful Login window in Browser
And CLI will display result like this on successful Login:
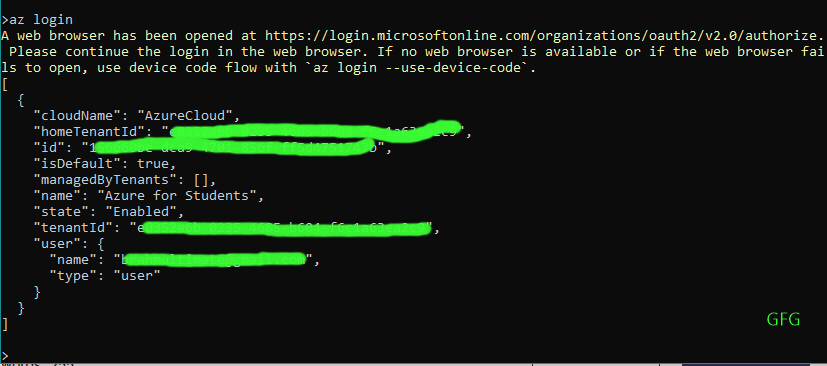
Output Result after Successful Login in CLI
Step 4: Now we’ll create the app and other required resources in one command. Remember to be in your Web Application directory because below command automatically takes the files from the current directory with automatically production building.
az webapp up --runtime PYTHON:3.9 --sku B1 --logs
- here –runtime refers to the python version the app is using.
- –sku tells to use the B1 (Baisc) service plan, you can choose appropriate plan for your website.
- here the website name will be generated automatically, but you can specify the app name by using –name mywebsitename
- –logs print the logs in the console.
What Above command does?
- creates resource group
- creates App Service Plan
- create app with specified name or if not given the generates name automatically
- zip deployment
The above command automatically creates and configures everything required for a website from creating resource group to zip deployment. Everything that goes in cloud is printed step by step in the CLI, see the below image to know how it looks
.png)
Console Output of deployed Website
Step 5: Now your website is deployed on Azure App Service. You can access your website at http://<app-name>.azurewebsites.net
Like my app name is ‘kind-bush-1d842db2ea724133a92a92d5696d8466′ so i can access my website at ‘https://kind-bush-1d842db2ea724133a92a92d5696d8466.azurewebsites.net/
You can check your website configuration in App Services in Azure Portal.
Deploy using Azure Portal:
Step 1: Search for App Services in Search Bar and Select that.
Step 2: Click on the ‘+ Create‘ option and then select ‘web app’.
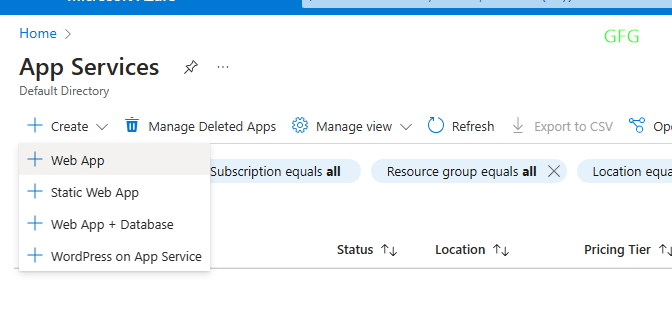
App Services dashboard
Step 3: Now fill the details in Create Web App.
- Select/create resource group.
- write a unique name of your website which will also act as domain for your website
- Select Runtime Stack as your Python version, mine is python 3.9
- Select the region which is close to you or your client.
- Select the pricing plan for your website, I’ll select this time F1.
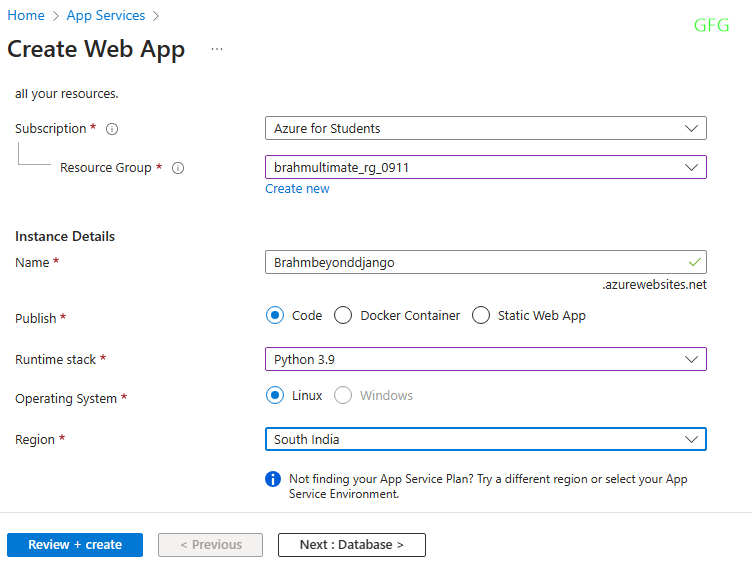
Filling App details
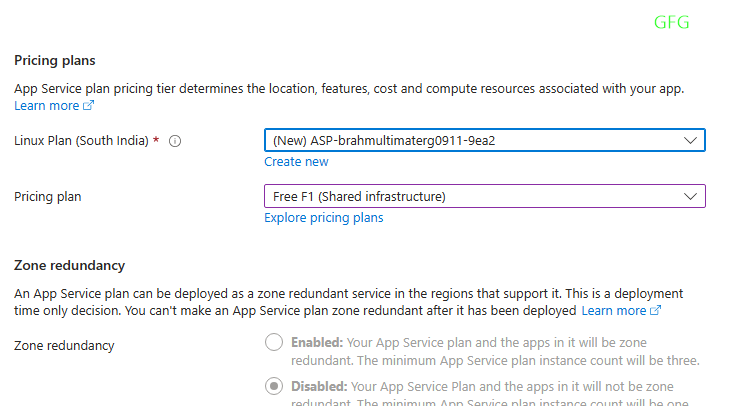
Selecting the Pricing Plans for Website
Step 4: Now click on ‘Review+Create’ or you can explore more configuration according to your Website like Database and Networking etc. And then Click on ‘Create‘

Click on Create.
Step 5: Now we have to upload the app code on Azure. For that create a ZIP of your website files. In first few steps we’ll do the configuration required to upload the Zip file and after that we’ll see on how to do zip deployment either by using curl or Azure CLI
Click on Configuration under Setting tab on left and then select New Application Setting.
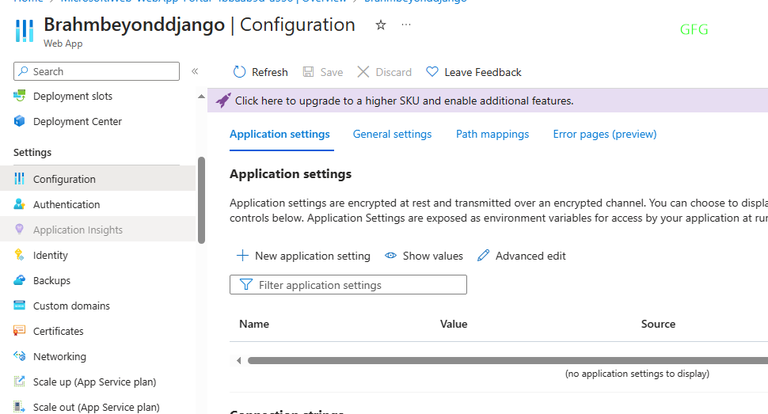
Configuration
Step 6: Now in name write SCM_DO_BUILD_DURING_DEPLOYMENT and in value fill true and then click on OK and then click on Save in the Configuration window (beside the Refresh and Discard options).
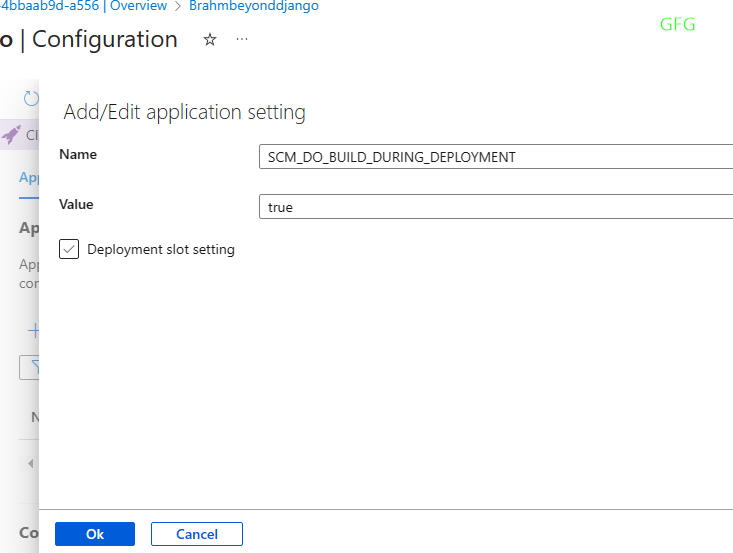
Add/Edit Application Setting
Step 7: Now click on Continue to save the Configuration and automatically restart to apply the changed settings.
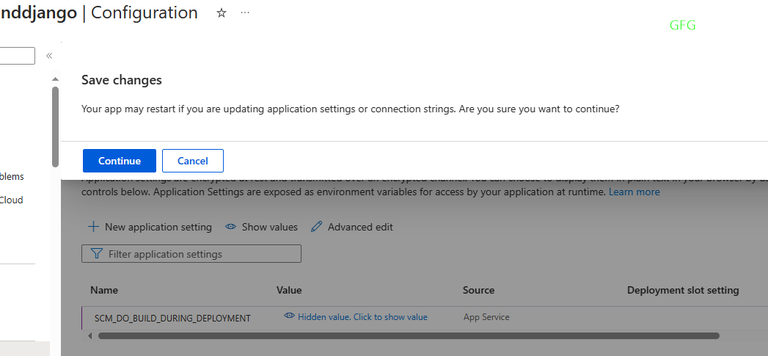
Save Configuration
Step 8: Now click on Deployment Center in Deployment tab in left sidebar and select the FTPS credentials bar. In the FTPS Username select only part after ‘\’ that starts with $ like here $Brahmbeyonddjango.
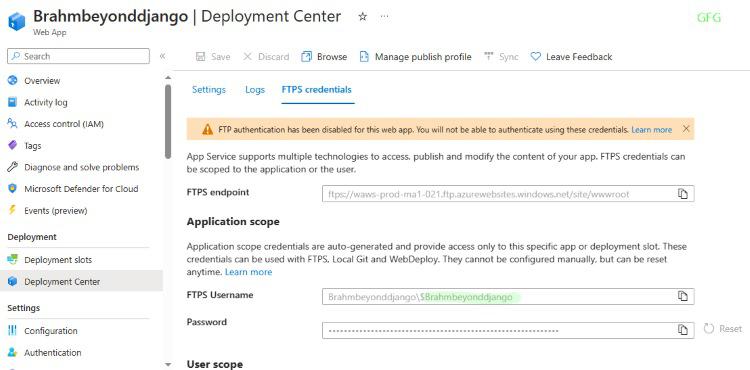
FTPS credentials
Step 9: Here as you can see that by default there is a warning that FPT has been disabled and if this isn’t your case then skip this step. Head to Configuration under Setting tab on left sidebar and click on General settings.

General settings
Now click on ‘ON’ radio button in FTP Basic Auth section
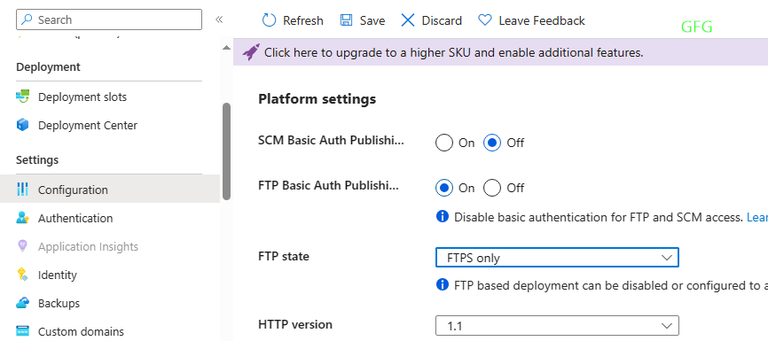
Enabling the FTP Auth
Now head back to Deployment Center and you’ll see that warning is gone.
Step 10: Option a: Use this curl command to upload the zip file of your Django website and deploy it.
curl -X POST \
    -H 'Content-Type: application/zip' \
    -u '<deployment-user>' \
    -T <zip-file-name> \
    https://<app-name>.scm.azurewebsites.net/api/zipdeploy
curl -X POST -H 'Content-Type: application/zip' -u '<deployment-user>' -T <zip-file-name> https://<app-name>.scm.azurewebsites.net/api/zipdeploy
Replace the ‘<deployment-user> with the username you got in previous step, and <zip-file-name> with your zip file name and the <app-name> with your app name.
This will upload the zip files and deploy your website on azure.
Option b: If you will face problem with the curl, you can use Azure CLI (first you need to install if you haven’t yet as Azure CLI will be very helpful if you plan to use Azure)
- If you have bash: (Commands taken directly from Microsoft Azure tutorial)
# Change these values to the ones used to create the App Service.
RESOURCE_GROUP_NAME='msdocs-python-webapp-quickstart'
APP_SERVICE_NAME='msdocs-python-webapp-quickstart-123'

az webapp deploy --name $APP_SERVICE_NAME --resource-group $RESOURCE_GROUP_NAME --src-path <zip-file-path>
- If you have PowerShell: (Command taken directly from Microsoft Azure tutorial)
# Change these values to the ones used to create the App Service.
$resourceGroupName='msdocs-python-webapp-quickstart'
$appServiceName='msdocs-python-webapp-quickstart-123'

az webapp deploy --name $appServiceName --resource-group $resourceGroupName --src-path <zip-file-path>
Now your website is deployed on Azure App Service. You can access your website at http://<app-name>.azurewebsites.net
Like my app name is ‘Brahmbeyonddjango‘ so i can access my website at ‘https://Brahmbeyonddjango.azurewebsites.net/’
Conclusion
Whether you want use CLI interface or azure’s user-friendly GUI, now you know how to deploy your Django website easily. You can explore other configuration options as it’s a cloud platform with very large features and everyone’s Applications configurations depends on their needs.
Django in azure – FAQ’s
Are there only 2 methods to deploy the Django app on Azure?
Ans. No, you can also use VS Code extension which most of VS code users prefer but then also Azure CLI is best option if you want fast and hassle free deployment. You can the documentation for using extension on VS code.
Is Azure the best Option for deploying Django Website?
Ans. this answer really depends on your website needs and the account type you are using like if you are a student then you will free credits and more free options but as a regular user you can choose Azure if you have to use more integration that Azure provides otherwise Hosting Managers are best option if you want to host your website.
Does Azure App Service only provide deployment option for Django App?
Ans. No, absolutely not. The Azure can be used to deploy any application written in any framework and language.
Is deploying Website on Azure a difficult task?
No, you only need basic computer knowledge, and you can follow this tutorial very easily.
What if I want to know more options and configuration regarding the deployment and managing the app on Azure?
Ans. If you need more information then Visit to their website or Contact the Azure team and they will presonally help you with your website configuration
Share your thoughts in the comments
Please Login to comment...