Deploy a Node.js Application with Azure
Last Updated :
25 Oct, 2023
Azure is a Cloud computing platform and service provided by Microsoft. It provides a wide range of services including Azure Virtual Machine, Azure Functions, Azure Machine Learning, Azure App Services, Azure DevOps, etc.
Node.js is an open-source, server-side runtime environment that allows developers to run Javascript applications. It is built on Chrome’s V8 JavaScript engine
Steps To Create A Simple Node.js Application And Deploy It With Azure
Step 1: Creation of a Node.js application
- Choose your favorite IDE. In my case, I am using Visual Studio Code Editor.
- Initialize a new Node.js application using npm(Node Package Manager) in your project directory using the following command.
npm init -y
- Now, create a JavaScript file in your project directory. Let’s say app.js
Javascript
const http = require('http');
const host = '127.0.0.1';
const port = 3000;
const server = http.createServer((req, res) => {
res.statusCode = 200;
res.setHeader('Content-Type', 'text/plain');
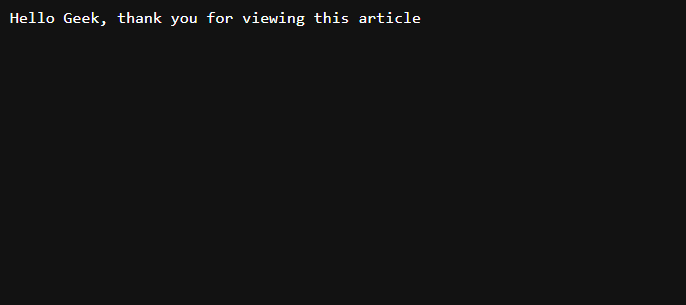
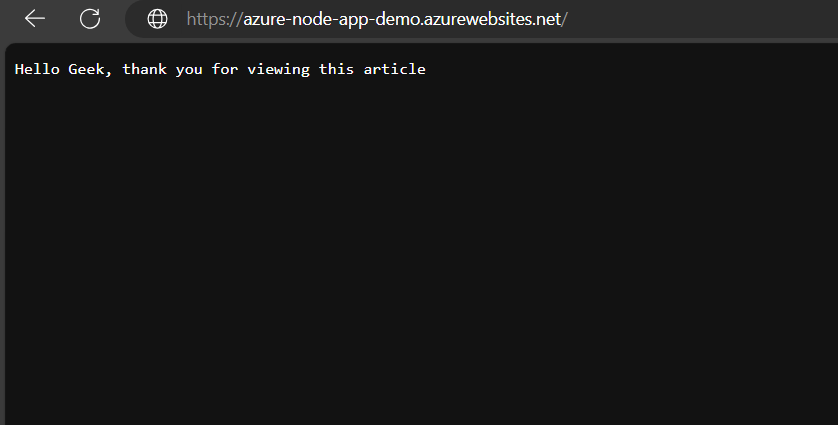
res.end('Hello Geek, thank you for viewing this article\n');
});
server.listen(port, host, () => {
console.log(`Server running at http:
});
|
Explanation: The above code creates an HTTP server using the ‘http’ module that listens on localhost (127.0.0.1) at port 3000. When successfully accessed it responds with the message “Hello Geek, thank you for viewing this article” with status code 200.
Output:
Step 2: Microsoft Azure setup in Visual Studio Code.
- Open your Visual Studio Code and make sure you have installed and enabled the following extensions
- Go to Visual Studio code editor
- Open the Extensions Menu in the Sidebar and the search box, type “Azure App Services“.
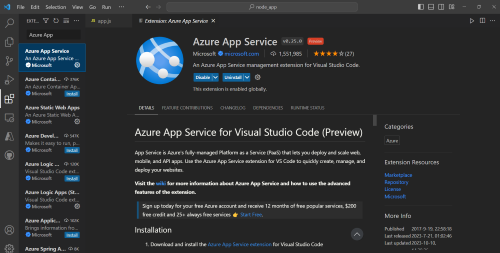
- Now, download this official Azure App Services extension provided by Microsoft.
Step 3: Creating Azure Web App for Node.js Application
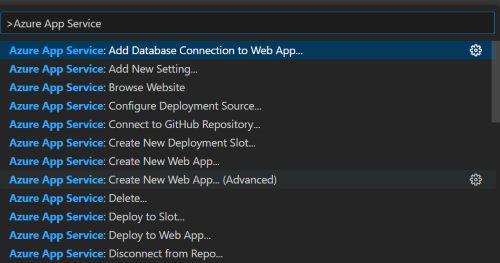
- After Setting up the IDE, Go back to the project explorer and Click on the search box at the top of the IDE.
- Click “>Azure App Services”, you will start to find the list of services available. In that click on Azure App Services: Create a new Web App… (Advanced) option.
- If you didn’t signin to your Azure account into Visual Studio code, It asks to signing.

- To do that, you need to have this extension named “Azure Account“
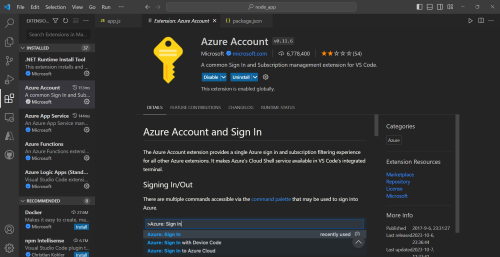
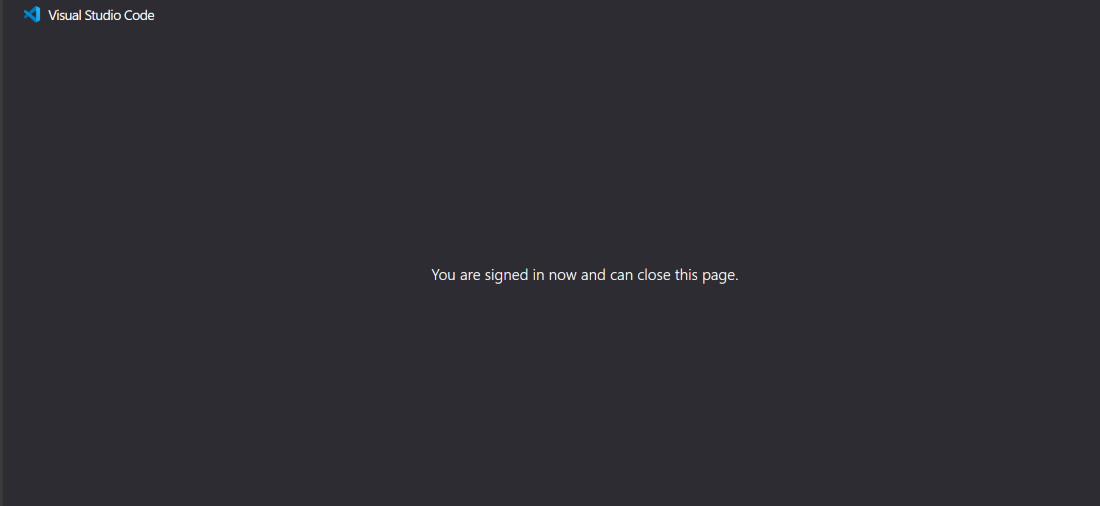
- We you signing, it will take you to a signing page, you can choose your subscription account and once you successfully signed in, you can close the page.
- Now, repeat the same process, until it asks to choose the subscription.


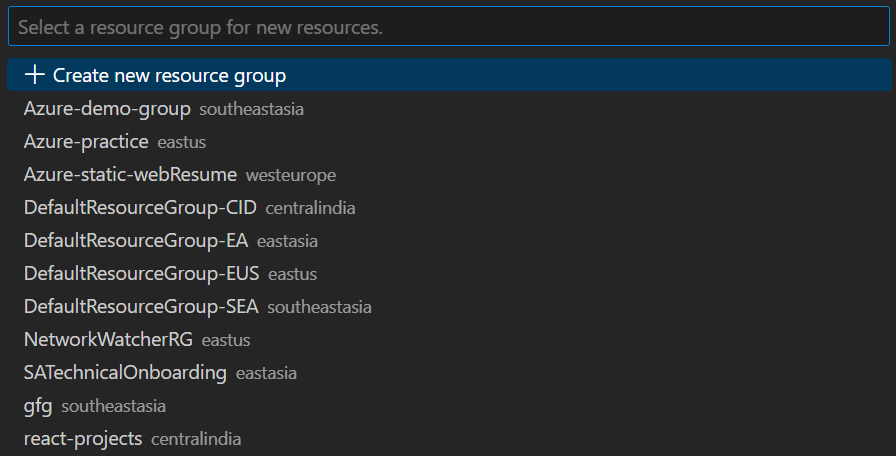
- Choose a resource group from the available resource groups in your Azure account or create a new Resource group that helps to manage your Web App.
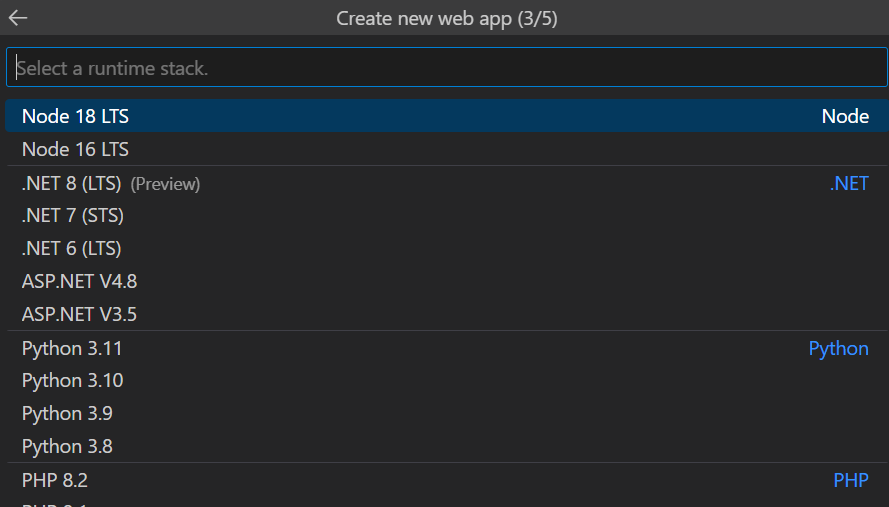
- Select the run-time stack. Since we are creating a Web App for Node.js application, choose Node <version> LTS
- Choose the Operating System to run your Web App.

- For Windows users, Select the available Windows App Service Plan or Create a new plan with the required tier.

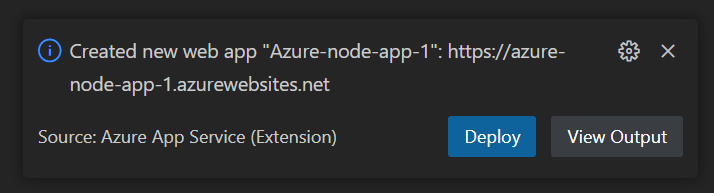
- Now, you can see the Azure: Activity Log tab in the console for insights. After successfully completing creating your Web App it will show this message
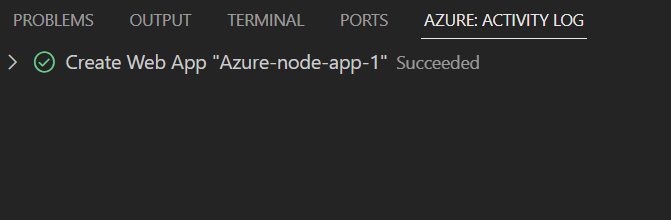
- Along with that, It will suggest you to Deploy your Web App.
Step 4: Deploy your Web App
- After clicking “Deploy”, you will be asked the Node.js file which you want to deploy.
- Select the file or folder of your application.

- Now, you can see that your Node.js application is deploying.

- To View the logs, you can see the Output tab.

- You have deployed your Node.js Application successfully using Azure App Services.
- Go to your Azure portal to find the Default domain and you can see the required output.
FAQs on Node.js Application with Azure
1. What are the prerequisites for deploying a Node.js application on Azure?
The prerequisites required for deploying a Node.js application on Azure are:
- Microsoft Azure account
- Node.js application (Practical knowledge of Node.js)
- Practical knowledge on using Azure CLI and App Services.
2. What are the steps to deploy a Node.js application on Azure?
Here is the Overview of steps to deploy a Node.js application on Azure.
- Create an Azure App Service
- Prepare the Node.js Application
- Package the Application
- Deploy to Azure App Service
- Configure App Settings
- Start the Application
3. What are the benefits of deploying Node.js applications on Azure?
Deploying Node.js applications on Azure platform provides various benefits including
- Scalability: We can scale our applications horizontally or vertically based on demand.
- Cost-effective: Azure offers a pay-as-you-go pricing model, allowing you to pay only for the resources you consume.
- DevOps and CI/CD Integration: Azure DevOps provides powerful tools for continuous integration, continuous deployment (CI/CD), and automated testing of Node.js applications.
4. How Do I Deploy A Node.Js Application On Azure?
There are various ways to deploying a Node.js Application on Azure like through Azure functions, Azure Virtual Machines, Azure Web Apps. For simplicity, you can start with Azure App Services.
5. Can I Configure Environment Variables In My Node.Js Application On Azure?
Yes, you can configure your environment variables which are accessed using process.env in the node application in the Configure section of your web app.
6. How Do I Debug My Node.Js Application On Azure?
You can enable remote debugging for your Node.js application on Azure App Service. This allows you to attach a debugger and troubleshoot issues in your code.
7. How Do I View Logs For My Node.Js Application On Azure?
You can access logs and diagnostics in the Azure portal under the Monitoring section of your App Service. You can view the logs in the Visual Studio code IDE in the Output tab in the console.
Share your thoughts in the comments
Please Login to comment...