How to Change Administrator Account in Windows 11?
Last Updated :
09 Apr, 2024
Windows has two account types: Standard and Administrator. The standard user group provides minimal access to features in comparison to the Administrator group, where app installation and command execution tasks are allowed. To change an administrator account, grant administrator privileges to a regular user account and change the current administrator account.
In this article, we’ll show you how to change administrator accounts in Windows 11.
1. Method 1: Change Administrator Account In windows 11 From Settings App
Step 1: To open the Settings app, Press the Windows key + I.
Step 2: Navigate to “Accounts” and select “other users.”
Step 3: Click on the user you want to change, then click “Change account type” and set it to Administrator.
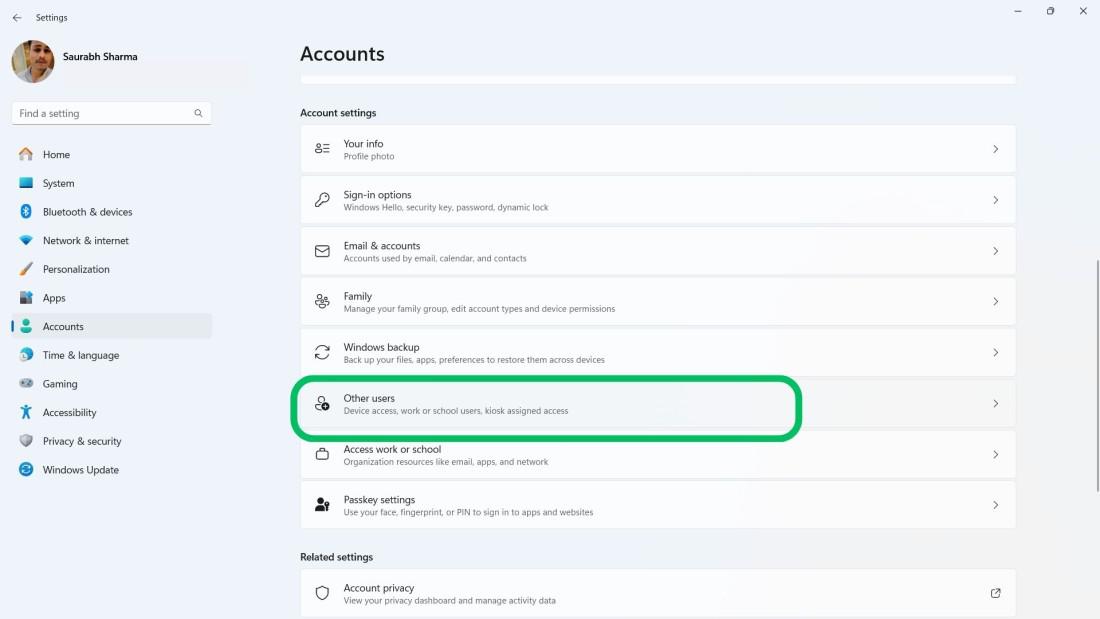
Step 4: Select “Administrator” from the drop-down menu

2. Method 2: Change Administrator Account In windows 11 From The Control Panel
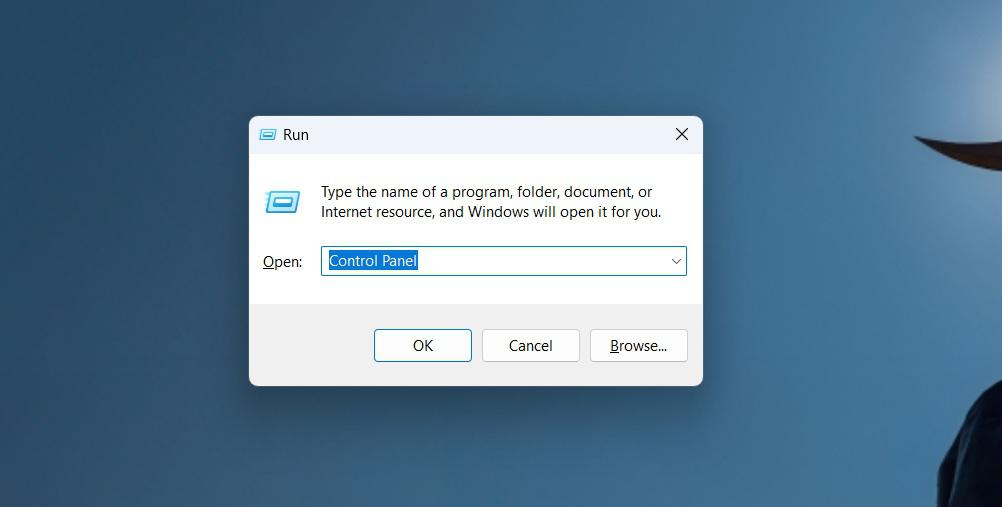
Step 1: Press Win + R then on the run dialog type “Control Panel”
Step 2: Step 2: Go to “User Accounts” and then “User Accounts” again.
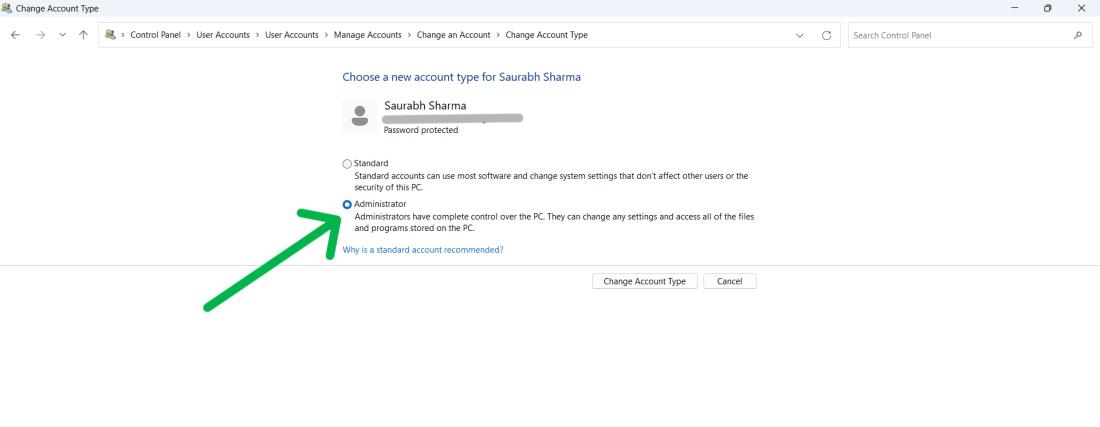
Step 3: Select “Manage another account,” choose the account, and then click “Change the account type.”
Step 4: Select the administrator from the list and then click on the “Change Account Type” button
3. Method 3: Change Administrator Account In windows 11 with Netplwiz
Step 1: To open the Run dialog, press the Windows key + R.
Step 2: Type “netplwiz” and press Enter.
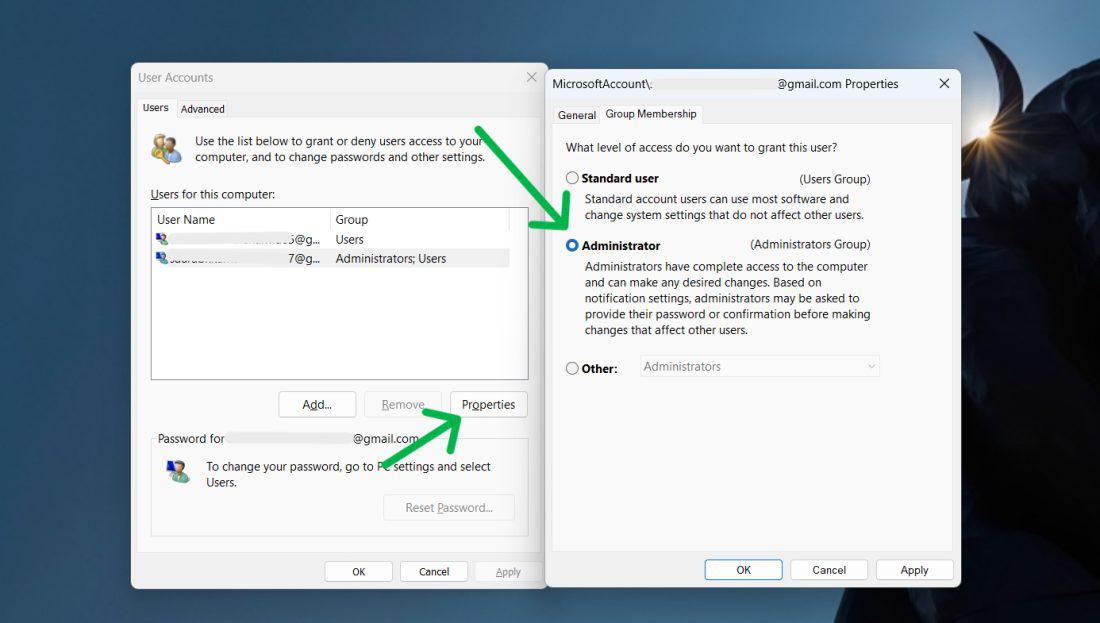
Step 3: Select the user, click on “Properties,” Navigate to the “Group Membership” tab, and choose “Administrator.”
4. Method 4: Change Administrator Account In windows 11 using the Command Prompt
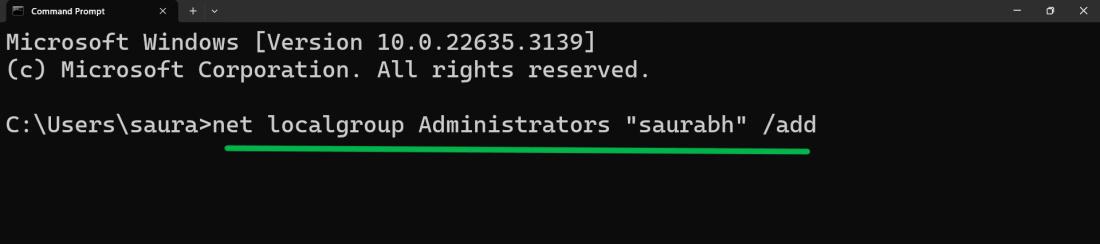
Step 1: Press Win + S then on the search bar type “CMD” then open it
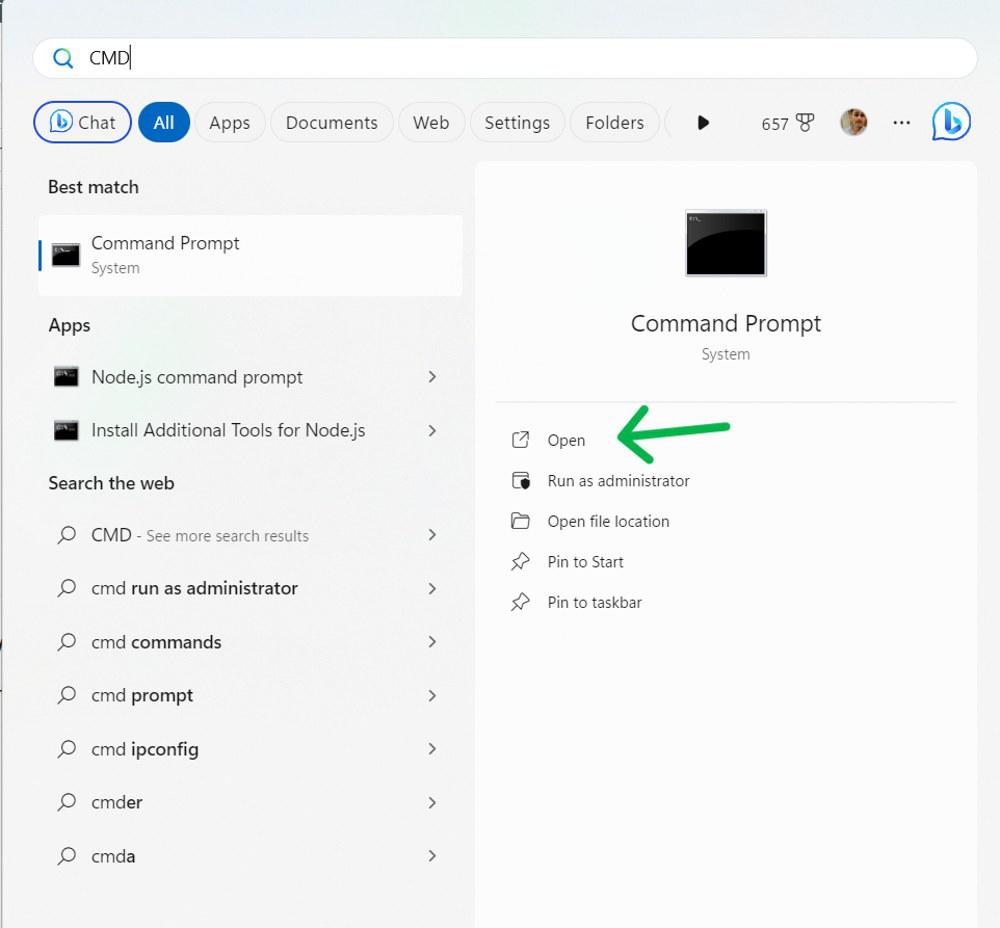
Step 2: Type the following command
net localgroup Administrators “NAME” /add
Replace the name with the user name of your account
How to Disable the Default Administrator Account in Windows 11
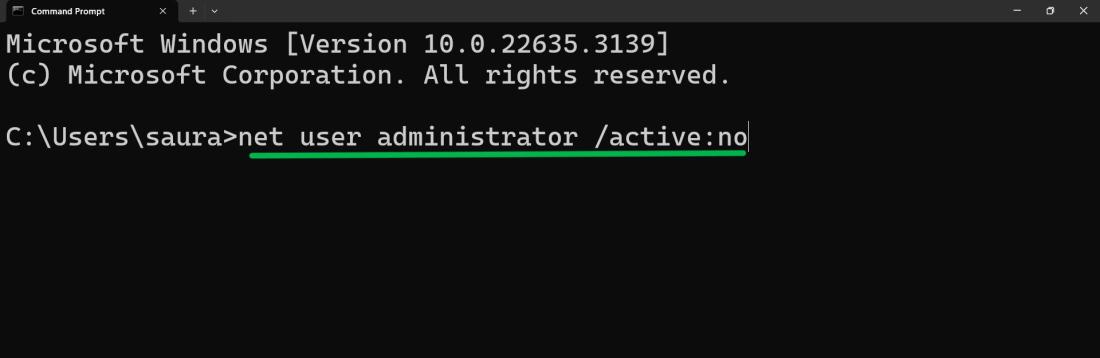
Step 1: Open Command Prompt as Administrator.
Step 2: Execute the command “net user administrator /active: Windowsno.”
Conclusion
In Conclusion, We have shown five ways of changing a user account to an administrator on Windows 11, and how to disable the default administrator account. You can choose any method to change a standard account to administrator.
How To Change Administrator Name on Windows 11- FAQs
How to Change a User Account to Administrator on Windows 11?
Follow the steps below to change a user account to administrator in WIndows 11:
- Open Settings with Win + I,
- Go to “Accounts,” choose “Other users,”
- Click on the target user,
- Select “Change account type,” and set it to “Administrator.”
How To Change Administrator Name on windows 11 Without A Microsoft Account?
Follow the steps below to change the admin name in Windows 11:
- Open Computer Management via right-clicking Start,
- Navigate to System Tools > Local Users and Groups > Users.
- Right-click Administrator, select Rename, type a new name, and press Enter.
How To Enable An Administrator Account In Windows 11 Without Login?
Open command prompt then type the following command:
net user administrator /active:yes .
Share your thoughts in the comments
Please Login to comment...